以往,在 ASP.NET Fx / ASP.NET Core 我會先寫好 Controller(Server Code) 再搭配 NSwag、Swashbuckle.AspCore 產生 Swagger / OpenAPI Specification Doc,一旦要修改它(Spec.)就必須要重新編譯專案,只是要改文件的錯字,也沒有動到 Server Code 的邏輯,卻要重新 Build Server,幾次下來發現這樣似乎不是很聰明。也常常發生過於關注 Server Code 忽略 Specification ,導致兩邊跟不一致。
現在,我先寫 Specification,然後再透過它產生 Controller (Server Code) 讓 Specification 不再強制依賴 Server Code,解除強依賴關係,編寫規範時再也不需要重新建置專案,目前運作起來挺順暢的,接下來,我分享我是怎麼做的
開發環境
- Windows 11
- Rider 2022.1.2
- .NET 6
甚麼是 Swagger / OpenAPI Specification
譯自英文-
OpenAPI規範(以前稱為Swagger規範)是一種機器可讀接口文件的規範,用於描述,生成,使用和可視化RESTful Web服務。它以前是Swagger框架的一部分,在2016年成為一個獨立的項目,受到Linux基金會的一個開源協作項目OpenAPI Initiative的監督。 维基百科(英文)
Swagger 的生態系
Swagger 發展至今,整個生態系算是非常的完整,除了自身發展的工具之外,第三方的支援度也算是非常的高,就我常用的開發工具 VS IDE、VS Code、Jetbrains 系列的 IDE,都有支援
下圖出自
5分钟了解swagger_菜刚的博客-CSDN博客_swagger是什么

swagger-ui-watcher
https://www.npmjs.com/package/swagger-ui-watcher
swagger editor
swagger ui
https://swagger.io/tools/swagger-ui/
參考
https://swagger.io/docs/open-source-tools/swagger-ui/usage/installation/
swagger hub
參考
https://swagger.io/tools/swaggerhub/
https://medium.com/pizzas/swagger%E5%85%A5%E9%96%80-1-swaggerhub-a23163156635
編寫 Swagger / OpenAPI Specification 的 IDE
推薦使用 OpenAPI (Swagger) Editor 擴充工具,Rider、VS Code 都有支援,安裝連結如下
OpenAPI (Swagger) Editor - Visual Studio Marketplace
OpenAPI (Swagger) Editor - IntelliJ IDEs Plugin | Marketplace (jetbrains.com)
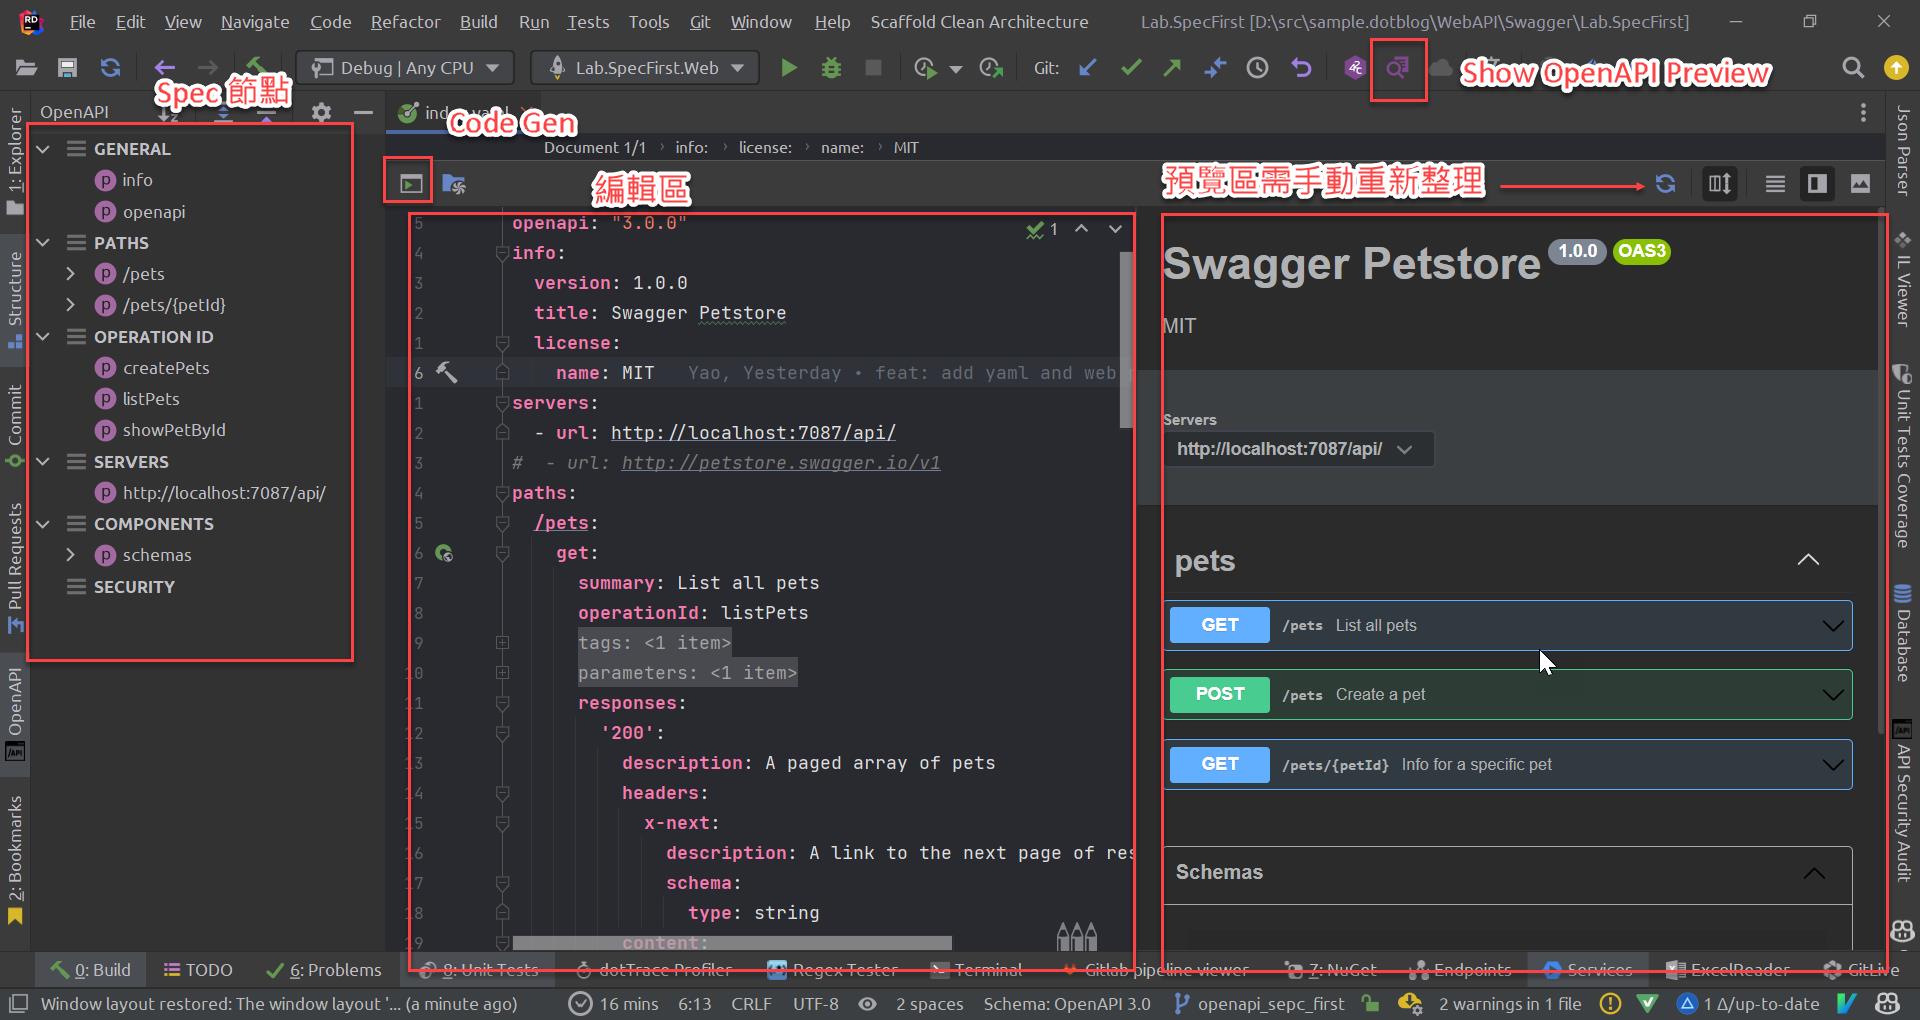
在 Rider 的編輯畫面
OpenAPI (Swagger) Editor 擴充工具,簡單介紹下
- OpenAPI Window 呈現整份 Spec. 的節點
- Show OpenAPI Preview 幫我們啟動一個 local server 來實現所見及所得,編輯 Spec. 效果馬上就 效果馬上就 Render 成 HTML 並更新頁面
內建功能
- 預覽需要手動整理
- Code Gen to Client and Server
OpenAPI Preview 效果如下
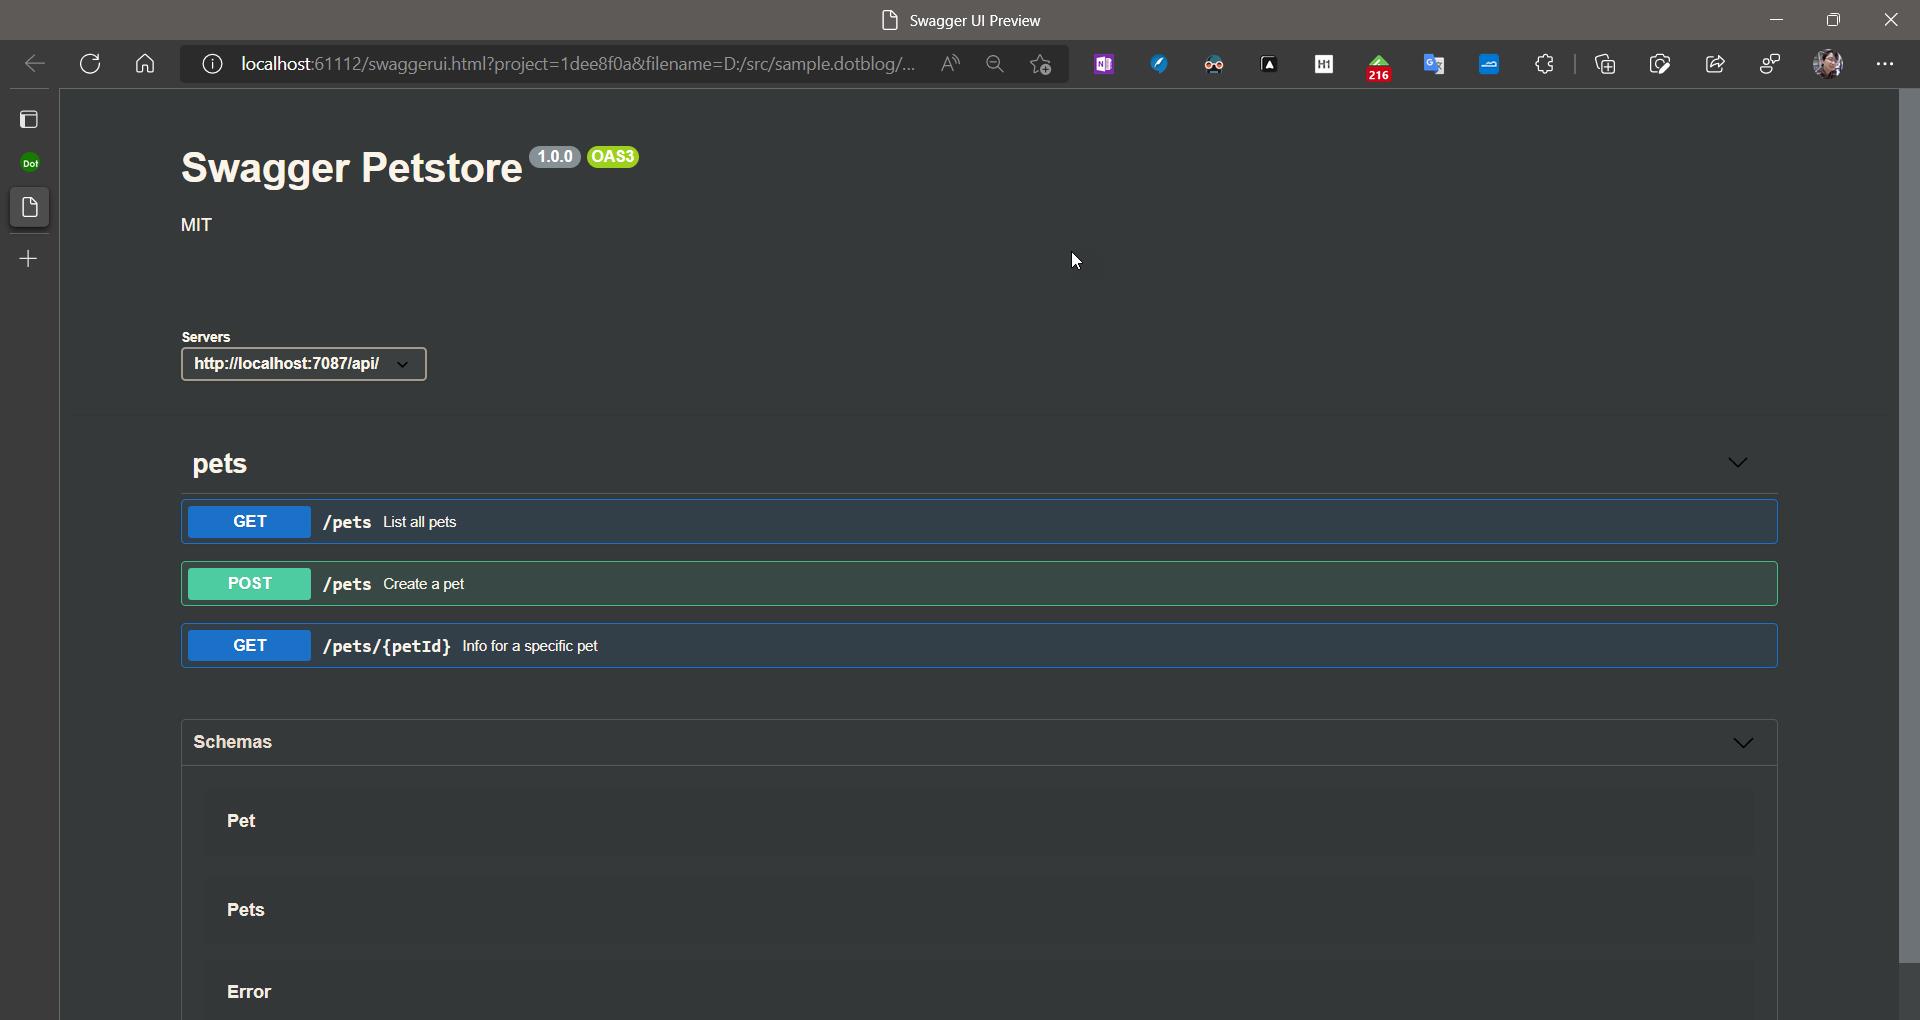
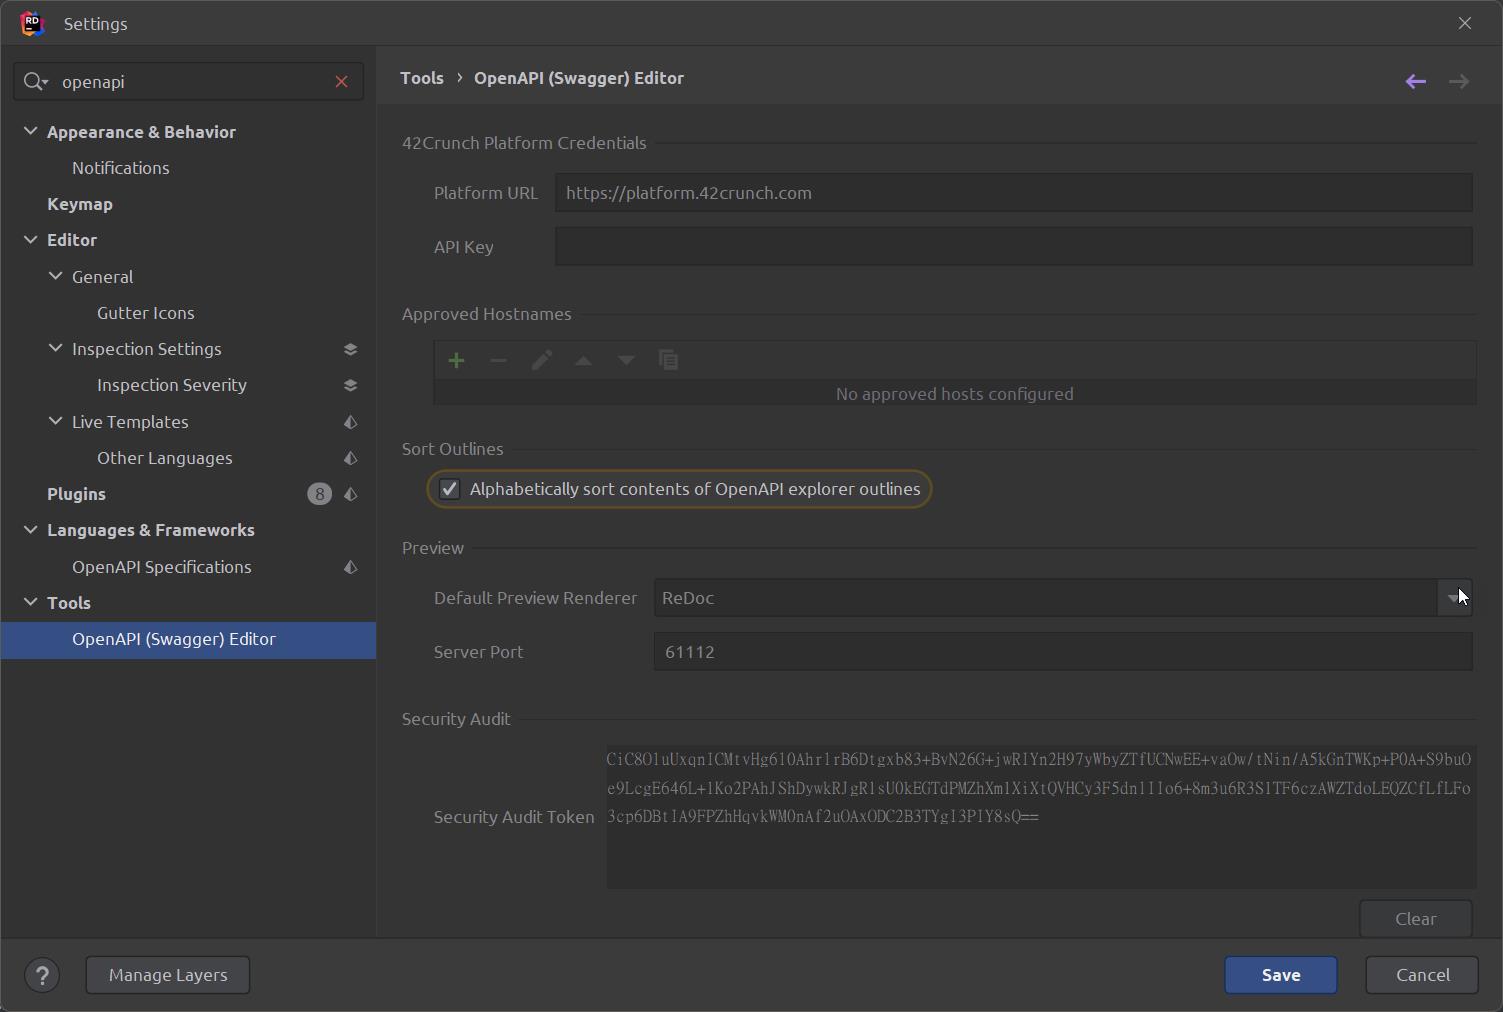
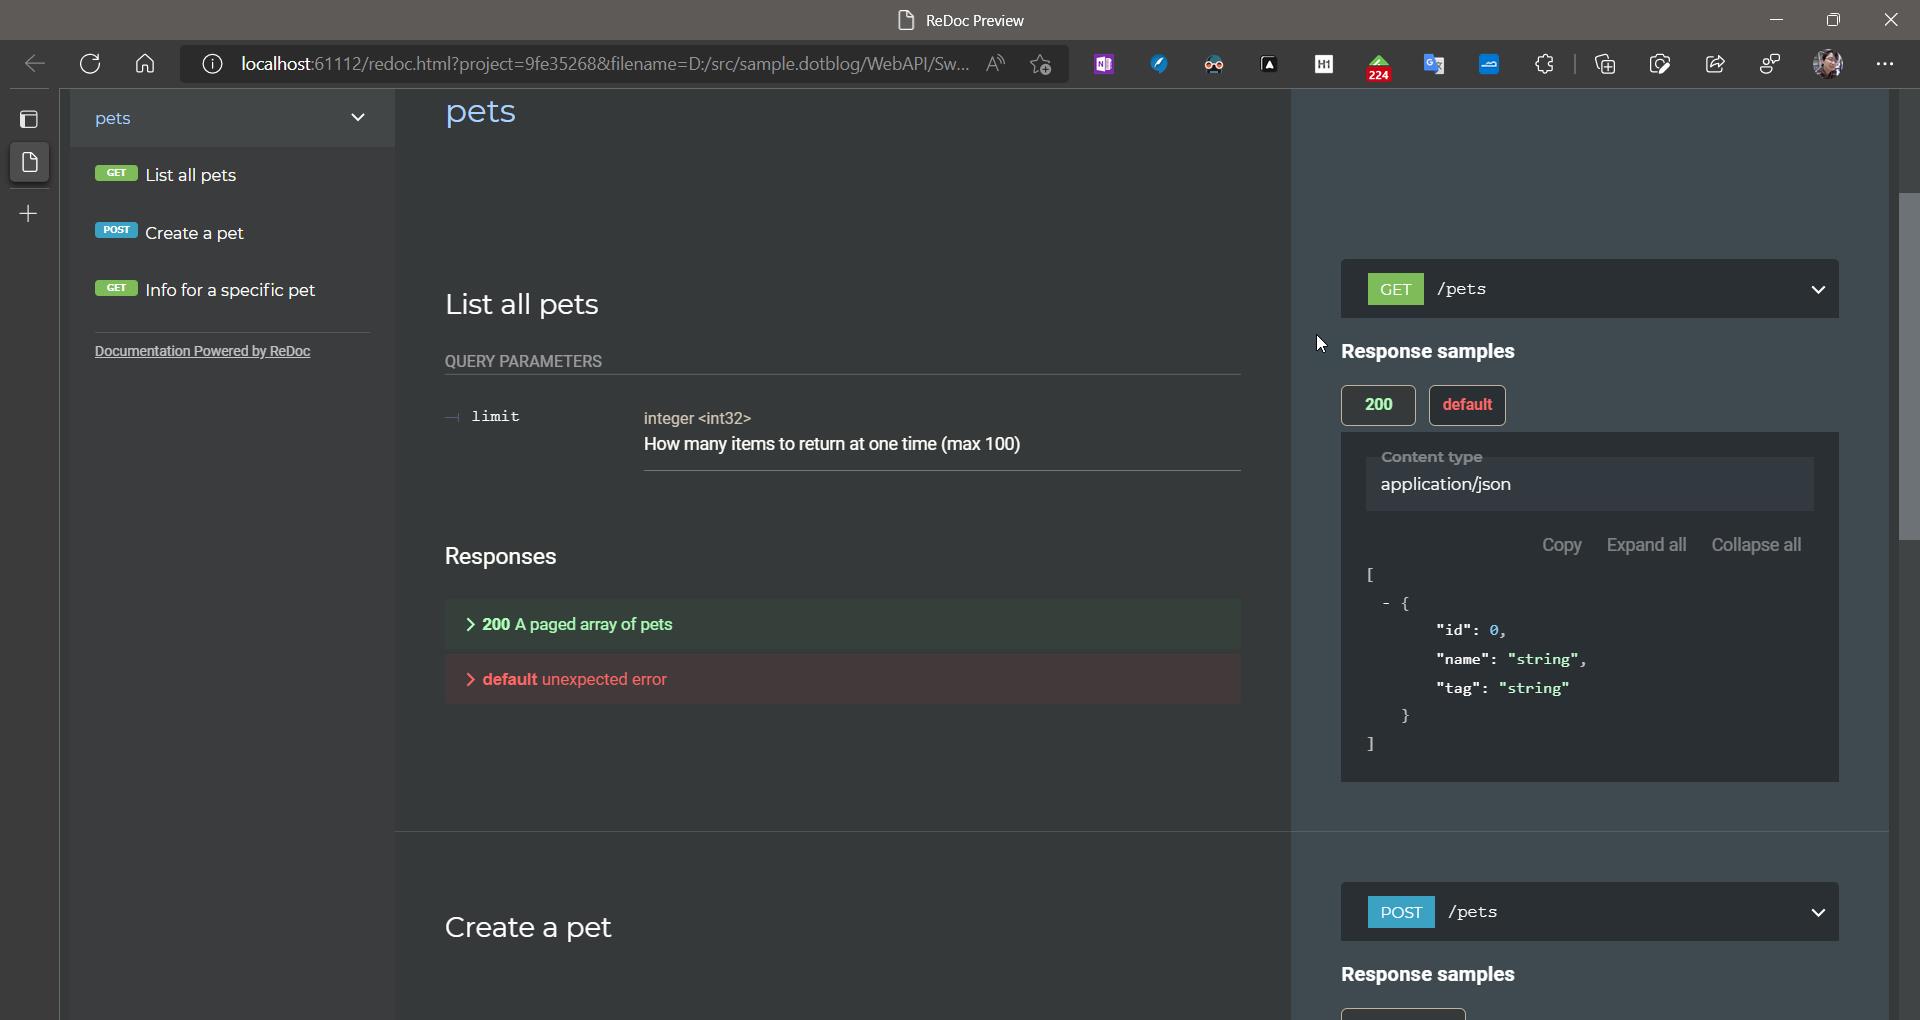
OpenAPI Preview 預設是使用 Swagger UI,很棒的是它也有支援 ReDoc
ReDoc 的預覽效果如下:
apicur
這是一款線上編輯工具,適用於多人協作 https://studio-auth.apicur.io/

寫完之後 Preview
便可分享成果,只要給對方連結即可
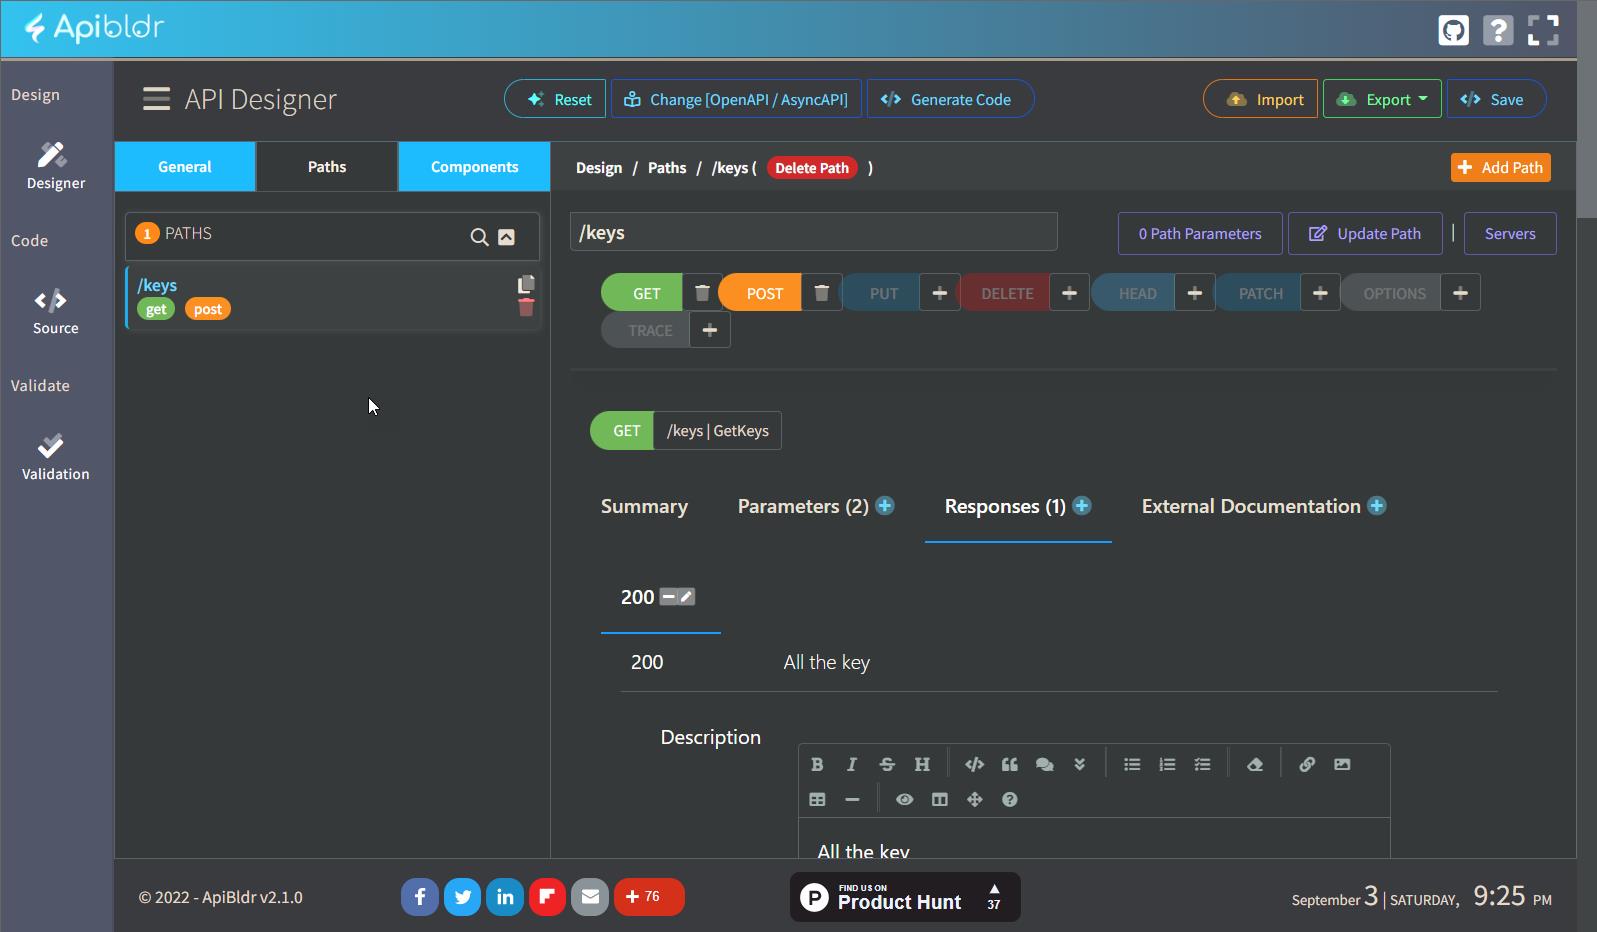
apibldr
這也是一款線上編輯工具,Free Online Visual API Designer for OpenAPI and AsyncAPI Specifications - ApiBldr,這套 Editor 就沒有那麼適合協作了,但是他能 Generate Code
stoplight
https://stoplight.io/ 擁有相當完整的協作、編寫體驗
以上幾套線上編寫工具,若以編寫功能為主的話我最推薦 stoplight
以 Server Render 為主的開發流程
ASP.NET Framework Web API 開始就已經支援從 Controller 產生 Swagger.json,並且自動渲染 Swagger UI,以往的開發模式也都是以這樣的流程為主,從 Swashbuckle 到 Swagger.NET,ASP.NET Core Web API 開始,則是以 NSwag、Swashbuckle.AspCore 為主,我的開發流程是這樣
- 根據需求寫測試案例,規劃 HttpMethod、Path
- 寫 Server Code:Controller/Action/Route
- 執行 Server Code 渲染出 Swagger UI,文件靠 Server Code 來渲染,當要修改文件時,要重新編譯專案
- 用 NSwag Studio 產生出 Client 的扣,墊一層 SDK,可以在這裡做一處理,比如:快取
- 在測試專案用 Microsoft.AspNet.WebApi.OwinSelfHost 把 Web API 架起來,這時候的 Web API 已經跟 IIS 脫鉤了,不需要 IIS 也能運作。
- 在測試步驟裡用產出來的 Cient 扣去打測試專案的 Server
我覺得這樣可以很完整的從需求出發,貫穿整個服務。
優點:
- 熟悉 C# 就能產出文件
缺點:
- 修改文件都要重新編譯專案
- 專注在實作 API,容易忽略規範 (Spec)
- 當 Swagger 套件沒有辦法滿足文件需求時,需要了解套件的使用方式,比如自訂 header
[Swagger] 在 Swagger UI 新增自訂 Header | 余小章 @ 大內殿堂 - 點部落 (dotblogs.com.tw) - 需要先寫 Server Code 才會有 Swagger 文件(Swagger.json)
以 Swagger / OpenAPI Specification 為主的開發流程
偶然一次,我在目前的公司提起以文件為主的開發流程,沒想到我的老闆安德魯已經有這樣的想法並著手在進行了,我們公司現在有一套完整的文件上版流程,只要提交 swagger.yaml 就能套用這流程,略過我們公司的文件上版流程;現在我的開發流程會是這樣
- 根據需求寫測試案例,規劃 HttpMethod、Path
- 寫 swagger.yaml/json,我選擇用 yaml
- 執行 Code gen 渲染出 Server Code、Client Code(SDK),墊一層 SDK,可以在這裡做一處理,比如:快取
- 在測試專案用 TestServer、WebApplicationFactory 把 Web API 架起來
- 在測試步驟裡用產出來的 Cient 扣去打測試專案的 Server
優點:
- 文件修改不用重新編譯專案
- Server、Client 扣都是依賴相同的 Swagger.yaml
- 不須需要先寫 Server Code 才會有 Swagger.json,更快速的產生 Swagger.json,有利於提升前後端並行開發的速度
缺點:
嚴格來說也不算是缺點,對於不熟悉的人要花一點時間去克服
- 要熟悉 OpenAPI 的規範
- 要熟悉 yaml 結構
如何編寫 Swagger.yaml/json
編寫 OpenAPI Specification 其實很簡單,基本上就是圍繞在需要一個 Http 服務端點所需要的內容,接下來我們來看看 Swagger / OpenAPI Specification 有那些標籤,開始之前要先知道 *.yaml / *.json 的規則,在此就不多敘述了。
除了標準,還有一些特殊的標籤
- type:支援許多的 type 描述
- operationId:服務端點的唯一 Id、Code Gen 時,Server、Client,都會依照這個 Id 產生對應的方法名稱
- examples:依照案例編寫,讓調用端知道在甚麼場景,可以輸入甚麼參數
- $ref:顧名思義為參考,參考內部/外部檔案的節點,當不同的端點,有相同的結構,利用 $ref 可以減少重複定義的成本
- api info:描述服務的基礎訊息,比如版號、聯繫資訊
透過官方範例可以降低學習成本,這裡有各個版本的範例,我選用 OpenAPI Specification 3.0 的範例 OpenAPI-Specification/petstore.yaml,
openapi: "3.0.0"
info:
  version: 1.0.0
  title: Swagger Petstore
  license:
    name: MIT
servers:
  - url: http://petstore.swagger.io/v1
paths:
  /pets:
    get:
      summary: List all pets
      operationId: listPets
      tags:
        - pets
      parameters:
        - name: limit
          in: query
          description: How many items to return at one time (max 100)
          required: false
          schema:
            type: integer
            format: int32
      responses:
        '200':
          description: A paged array of pets
          headers:
            x-next:
              description: A link to the next page of responses
              schema:
                type: string
          content:
            application/json:
              schema:
                $ref: "#/components/schemas/Pets"
        default:
          description: unexpected error
          content:
            application/json:
              schema:
                $ref: "#/components/schemas/Error"
    post:
      summary: Create a pet
      operationId: createPets
      tags:
        - pets
      responses:
        '201':
          description: Null response
        default:
          description: unexpected error
          content:
            application/json:
              schema:
                $ref: "#/components/schemas/Error"
  /pets/{petId}:
    get:
      summary: Info for a specific pet
      operationId: showPetById
      tags:
        - pets
      parameters:
        - name: petId
          in: path
          required: true
          description: The id of the pet to retrieve
          schema:
            type: string
      responses:
        '200':
          description: Expected response to a valid request
          content:
            application/json:
              schema:
                $ref: "#/components/schemas/Pet"
        default:
          description: unexpected error
          content:
            application/json:
              schema:
                $ref: "#/components/schemas/Error"
components:
  schemas:
    Pet:
      type: object
      required:
        - id
        - name
      properties:
        id:
          type: integer
          format: int64
        name:
          type: string
        tag:
          type: string
    Pets:
      type: array
      items:
        $ref: "#/components/schemas/Pet"
    Error:
      type: object
      required:
        - code
        - message
      properties:
        code:
          type: integer
          format: int32
        message:
          type: string
從這份範例裡面去修改可以大大的降低學習的成本,遇到不會寫的再查找文件,我們先順過整個流程,先把範例另存在本機 index.yaml 吧。
Swagger / OpenAPI Specification 產生 Server / Client 程式碼
市面上程式碼產生器很多,我知道的有 Swagger Codegen、AutoRest、NSwag、OpenAPITools
上一篇有介紹過 Client Code Gen 的 command line
[Swagger] 一些 Swagger 編寫文件的技巧和 Client Code Gen | 余小章 @ 大內殿堂 - 點部落 (dotblogs.com.tw)
最後我選擇 NSwag,因為他除了有 CLI 之外還有 GUI,產出來的程式碼是一個檔案,使用上也不會太複雜,要注意的是不要去動到 Code Gen 的檔案
這裡需要
- 新增一個 Web API 專案名為:Lab.SpecFirst.Web,以及 Library 專案名為: Lab.SpecFirst.Adapter
- 讓 index.yaml 的 servers url 和 Lab.SpecFirst.Web 的 url 一樣,如下圖

NSwag CLI
安裝
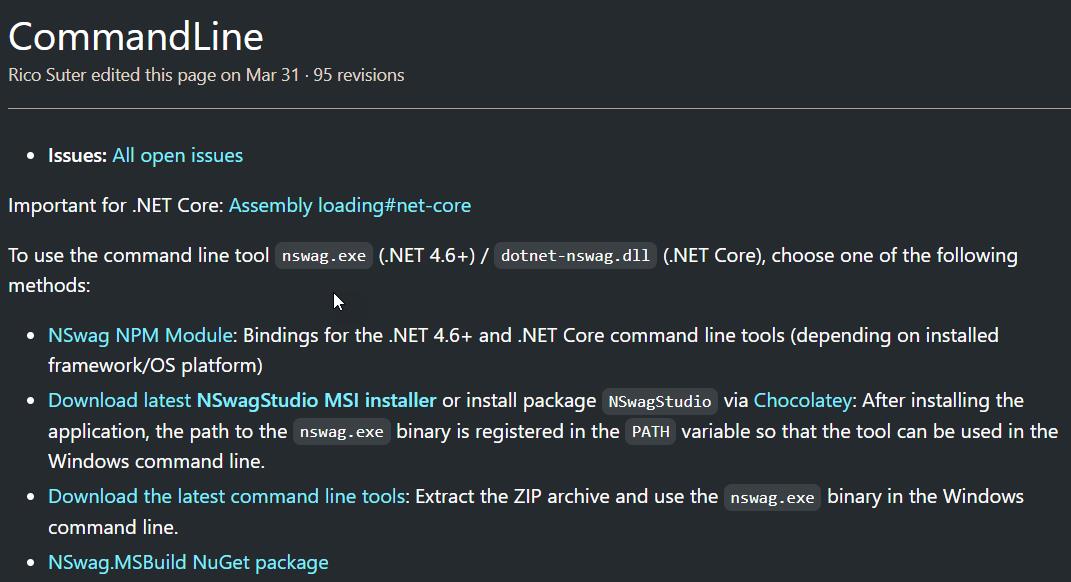
有幾種方式可以取得 CLI,請參考下圖 CommandLine · RicoSuter/NSwag Wiki (github.com)
CSharpControllerGenerator · RicoSuter/NSwag Wiki (github.com)
example
dotnet "/.../dotnet-nswag.dll" openapi2cscontroller /input:https://somewhere.com/swagger.yaml /classname:MyResource /namespace:Com.Example.MyResource /output:Controllers/ResourceController.cs /UseLiquidTemplates:true /AspNetNamespace:"Microsoft.AspNetCore.Mvc" /ControllerBaseClass:"Microsoft.AspNetCore.Mvc.Controller"
CommandLine · RicoSuter/NSwag Wiki (github.com)
example
nswag openapi2csclient /input:MyWebService.json
                       /classname:MyServiceClient
                       /namespace:MyNamespace
                       /output:MyServiceClient.cs
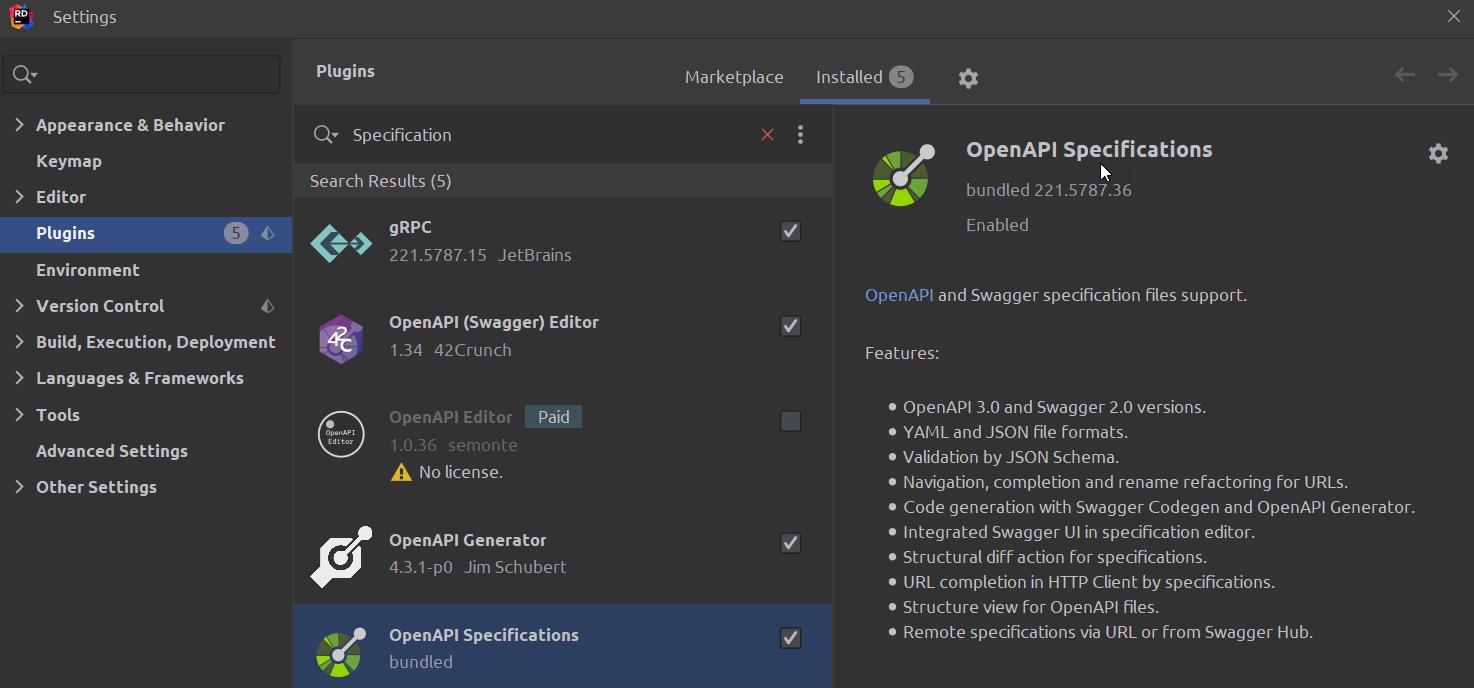
另外,Rider 內建的 Open Specification 套件也支援 Code Gen,一鍵產生 Server/Client 的 Code,這個功能所依賴的套件是 OpenAPITools
將指令整合到 taskfile 裡面
version: "3"

dotenv: [ "secrets/secrets.env" ]

tasks:
  rest-codegen-code:
    desc: 產生 Client / Server Code
    cmds:
      - task: rest-codegen-client
      - task: rest-codegen-server

  rest-codegen-client:
    desc: 產生 Client Code
    cmds:
      - nswag openapi2csclient /input:doc/index.yaml /classname:LabSpecClient /namespace:Lab.SpecFirst.Adapter /output:src/Lab.SpecFirst.Adapter/AutoGenerated/LabSpecClient.cs /jsonLibrary:SystemTextJson /generateClientInterfaces:true /exposeJsonSerializerSettings:false /useBaseUrl:false

  rest-codegen-server:
    desc: 產生 Server Code
    cmds:
      - nswag openapi2cscontroller /input:doc/index.yaml /classname:SpecFirstContract /namespace:Lab.SpecFirst.Web.Controllers /output:src/Lab.SpecFirst.Web/AutoGenerated/Controller.cs /jsonLibrary:SystemTextJson
執行結果如下

或者跟 Rider 整合

這時候 Server / Client 的 Code 都已經產生好在專案內了
Server Code
NSwag 產出一份合約跟範本,範本已經設定好相關的基礎建設,比如:Route,我們只需要專心的實作這份合約並注入到範本
public interface ISpecFirstContractController
{
    System.Threading.Tasks.Task<System.Collections.Generic.ICollection<Pet>> ListPetsAsync(int? limit);

    System.Threading.Tasks.Task CreatePetsAsync();

    System.Threading.Tasks.Task<Pet> ShowPetByIdAsync(string petId);
}
範本如下:
[System.CodeDom.Compiler.GeneratedCode("NSwag", "13.13.2.0 (NJsonSchema v10.5.2.0 (Newtonsoft.Json v11.0.0.0))")]
[Microsoft.AspNetCore.Mvc.Route("api/")]
public partial class SpecFirstContractController : Microsoft.AspNetCore.Mvc.ControllerBase
{
    private ISpecFirstContractController _implementation;

    public SpecFirstConteollerController(ISpecFirstContractController implementation)
    {
        _implementation = implementation;
    }

    [Microsoft.AspNetCore.Mvc.HttpGet, Microsoft.AspNetCore.Mvc.Route("pets")]
    public System.Threading.Tasks.Task<System.Collections.Generic.ICollection<Pet>> ListPets([Microsoft.AspNetCore.Mvc.FromQuery] int? limit)
    {
        return _implementation.ListPetsAsync(limit);
    }

    [Microsoft.AspNetCore.Mvc.HttpPost, Microsoft.AspNetCore.Mvc.Route("pets")]
    public System.Threading.Tasks.Task CreatePets()
    {
        return _implementation.CreatePetsAsync();
    }

    [Microsoft.AspNetCore.Mvc.HttpGet, Microsoft.AspNetCore.Mvc.Route("pets/{petId}")]
    public System.Threading.Tasks.Task<Pet> ShowPetById(string petId)
    {
        return _implementation.ShowPetByIdAsync(petId);
    }

}
詳細內容:sample.dotblog/Controller.cs at master · yaochangyu/sample.dotblog (github.com)
Client Code
他會幫我們準備好相關的參數,讓我們用起來就像是在操作一般的物件
詳細內容:sample.dotblog/LabSpecClient.cs at master · yaochangyu/sample.dotblog (github.com)
Swagger / OpenAPI Specification 產生 html
當 API Spec. 寫好之後,也可以轉變成 html,讓非開發團隊檢視
redoc-cli
安裝
npm install -g redoc-cli產生 html
redoc-cli build -o index.html swagger.yml
Web API 整合測試參考
[ASP.NET Core 5] 利用 WebApplicationFactory 進行 Web API 整合測試 | 余小章 @ 大內殿堂 - 點部落 (dotblogs.com.tw)
[ASP.NET Core 3] 利用 TestServer 進行 Web API 整合測試 | 余小章 @ 大內殿堂 - 點部落 (dotblogs.com.tw)
[ASP.NET Web API 2] 使用 OWIN 進行整合測試 | 余小章 @ 大內殿堂 - 點部落 (dotblogs.com.tw)
專案位置
sample.dotblog/WebAPI/Swagger/Lab.SpecFirst at master · yaochangyu/sample.dotblog (github.com)
結論
回顧一下 Spec. First 的流程(不包含測試)
- 盤點需求
- 編寫 Swagger / OpenAPI 規範 (Spec.)
- Code Gen 產生 Server / Client Code
- 實作 Server Code
Specification First 的工作流程更精準、專注與外部之間的整合,目前我非常喜歡這樣的流程,有興趣的也可以跟著動手試試看
若有謬誤,煩請告知,新手發帖請多包涵

Microsoft MVP Award 2010~2017 C# 第四季
Microsoft MVP Award 2018~2022 .NET
