呈上篇,我們寫了一個 powershell 監控資料的功能,一旦 powershell 被關閉了,或是電腦重開了,這項功能就被關閉了,如果能包成 windows service 的話,就可以很有效的解決這樣的問題
以往都是透過 c# 編譯出來的 exe 檔去掛載 windows service,較為常見的是開啟新專案 windows service, 透過 C# 將寫好的 service (需自行寫OnStart, OnStop 的行為事件),再透過 dos command 的 sc.exe 包裝至 windows service 去
但如果今天要掛載至 windows service 的對象是 powershell 的話,有兩種方式
透過 c# 程式建立 windows service
第一種就是透過 c# 程式碼去呼叫 powershell 再執行,或是直接改成 c# 的執行方式,除非你的 powershell 真的又臭又長,或是有一堆坑,才會建議選擇用這種方式
以上回監控檔案路徑為例,改用 c# 來做的話(這裡就不介紹怎麼透過 c# 呼叫 powershell,而是透過 c# 改寫)
你需要把你啟動的動作寫在 OnStart 事件裡面,其實這也對應著 windows service 一掛載上去後你手動啟動你的服務時的進入點
       static void Main()
       {
           ServiceBase[] ServicesToRun;
           ServicesToRun = new ServiceBase[]
           {
               new Service1()
           };
           ServiceBase.Run(ServicesToRun);
       }
       protected override void OnStart(string[] args)
       {
           var watcher = new FileSystemWatcher();
           watcher.Path = "your path";
           watcher.Filter = "*.*";
           watcher.IncludeSubdirectories = true;
           watcher.EnableRaisingEvents = true;
           watcher.Changed += FileChangedEvent;
           watcher.Created += FileChangedEvent;
           watcher.Renamed += FileChangedEvent;
           watcher.Deleted += FileChangedEvent;
       }
       protected override void OnStop()
       {
       }
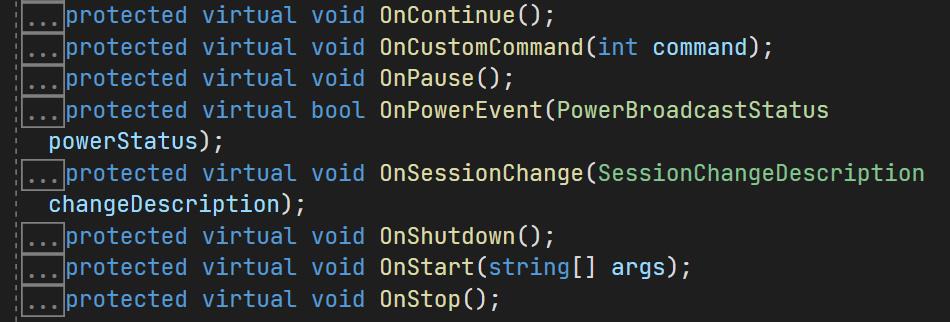
而相關的動作,也能在 ServiceBase 裡找到 virtual 的方法宣告,你可以決定要不要覆寫掉
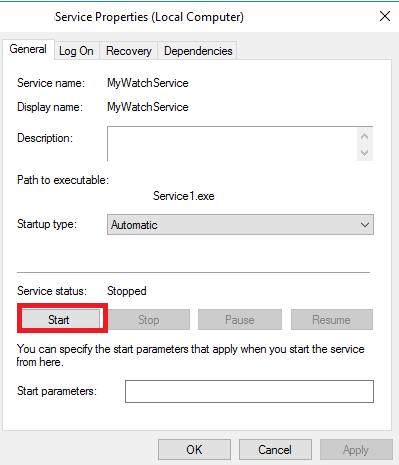
接著寫好後編譯成 exe 的檔案後,到目標電腦上進行安裝,並設定開機時自動啟動,但初始狀態是 Stopped
建立 MyWatchService,可參考 ms document
sc create MyWatchService binPath="[YourBinPath]\xxx.exe" start=auto移除 MyWatchService,可參考 ms document
sc delete MyWatchService
NSSM (Non-Sucking Service Manager)
第二種是透過第三方的工具 NSSM 來進行包裝
安裝方式
1. 你可以透過 choco install nssm 取得
2. 或是到 nssm 的網站下載最新版的免安裝下來使用,是一套用 c++ 寫的程式,檔案非常的小,只有 1.2 MB,有 source code 的 UI 程式,真的是非常驚人
先準備 powershell 所要執行的指令,可以參考上一篇
### SET FOLDER TO WATCH + FILES TO WATCH + SUBFOLDERS YES/NO
  $filewatcher = New-Object System.IO.FileSystemWatcher
  #Montion the folder to monitor
  $filewatcher.Path = "E:\Site\"
  $filewatcher.Filter = "*.*"
  #include subdirectories $true/$false
  $filewatcher.IncludeSubdirectories = $true
  $filewatcher.EnableRaisingEvents = $false
### DEFINE ACTIONS AFTER AN EVENT IS DETECTED
  $writeaction = { $path = $Event.SourceEventArgs.FullPath
              $changeType = $Event.SourceEventArgs.ChangeType
              $logline = "$(Get-Date), $changeType, $path"
              Add-content "E:\Log\FileWatcher_log.txt" -value $logline
              Add-content "E:\Log\FileWatcher_log.txt"" -value ($Event | ConvertTo-Json -Compress)
            }
### DECIDE WHICH EVENTS SHOULD BE WATCHED
#The Register-ObjectEvent cmdlet subscribes to events that are generated by .NET objects on the local computer or on a remote computer.
#When the subscribed event is raised, it is added to the event queue in your session. To get events in the event queue, use the Get-Event cmdlet.
  Register-ObjectEvent $filewatcher "Created" -Action $writeaction
  Register-ObjectEvent $filewatcher "Changed" -Action $writeaction
  Register-ObjectEvent $filewatcher "Deleted" -Action $writeaction
  Register-ObjectEvent $filewatcher "Renamed" -Action $writeaction

while ($True) {Start-Sleep -Seconds 1}
利用powershell 執行 nssm 掛載 ps1file
接著我們就可以展示怎麼使用 nssm 來掛載 powershell 的檔案了,並建立 NSSMpsService(可自行改名)
cd [your nssm folder path]
$Binary = (Get-Command Powershell).Source
$Arguments = '-ExecutionPolicy Bypass -NoProfile -File "[Your powershell folder]\xxx.ps1"'
.\nssm.exe install NSSMpsService $Binary $Arguments
移除 nssm 所建立的 service
.\nssm.exe remove NSSMpsService更多的 nssm command 可以參考 https://nssm.cc/commands
參考資料
https://dotblogs.com.tw/AceLee/2021/09/13/113303
https://nssm.cc
https://docs.microsoft.com/zh-tw/windows-server/administration/windows-commands/sc-create
https://docs.microsoft.com/zh-tw/windows-server/administration/windows-commands/sc-delete
https://xkln.net/blog/running-a-powershell-script-as-a-service/
https://wreadit.com/@mshwinfomshw/post/63870