如何把Windows Server做成BYOI並且上傳到OCI使用
OCI中Windows Server的image授權費用是跟著OCPU去計算,
一顆OCPU所花下來的Sindows Server授權費用約為新台幣 2,136/月,
如果是一顆以上的話費用更是疊加上去的。
(參考網址 : OCI成本估算 )
而微軟官方定價,Windows Server 2022 Standard - 16Core的牌價為美金 1069元,換算台幣為34,208元(以1美元=32塊台幣計算)。
(參考網址 : Windows Server 2022 的定價和授權 )
請注意,這是16Core的價格,如果換算成2Core的(1顆OCPU=2顆vCPU,所以用2Core來算),大概會落在新台幣4,276元左右。
也就是說呢,我在OCI上使用OCI提供的Windows image,大概3個月的費用就會超過買斷授權的費用了,老實說非常的不划算。
如果要省錢的話,最好的辦法就是買斷Windows Server授權並且上傳到OCI做使用。
Windows Server image 的先決條件
注意條件 :
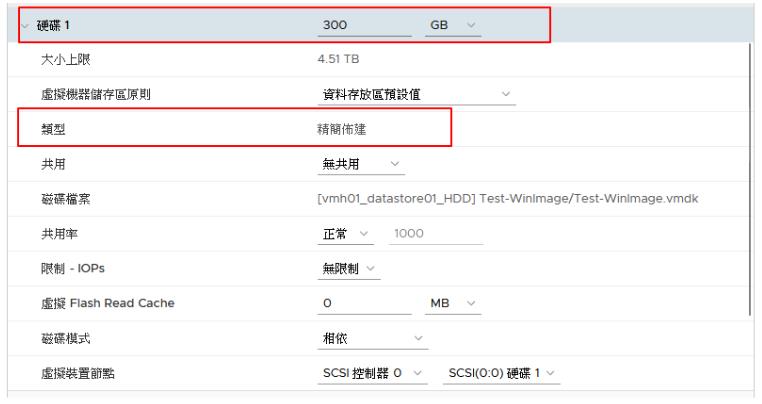
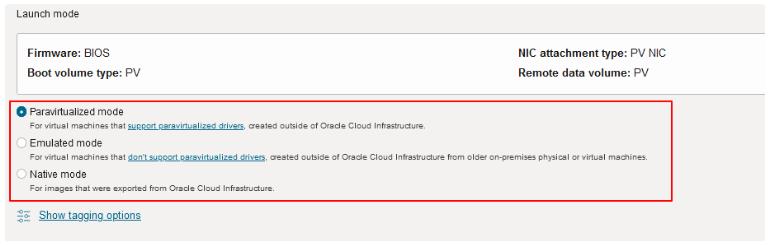
- 僅支援VMDK與QCOW2格式,如果是VMDK的話,硬碟的類型要選擇"single growable" (monolithicSparse)或著"stream optimized" (streamOptimized);此外不能有快照。開機硬碟空間要大於256G,小於400G
- 開機類型要是BIOS,不能UEFI
- 硬碟不能加密
- 僅支援一個磁碟,且必須要有MBR或開機載入程式的開機碟
- 網路介面必須使用DHCP
- 網路介面不能修改MAC
- 需要開啟遠端桌面功能
- Windows內建防火牆中,專用跟公用網路位置的入站規則需要加入RDP存取(其實可以直接把Windows防火牆關了就好)

Windows Server image 元件安裝與設定
VMDK設定完成,安裝完Windows Server,都準備好之後,接下來要進行元件安裝與設定 :
- Oracle VirtlO Drivers for Microsoft Windows
- Oracle-cloud Windows-server generalize 相關設定 (如果你要做通用型的image,必須要安裝這個)
Oracle VirtlO Drivers 安裝
從Oracle VirtlO Drivers for Microsoft Windows 下載完檔案之後,它會再透過這個下載下來的檔案下載真正需樣的驅動裝置,所以最後會是一個壓縮檔,解壓縮後才會看到”Setup.exe”,那才是我們要安裝的主體。

用系統管理員去執行”Setup.exe”,安裝過程還蠻簡單的,就是"Next"→"Install"→"Finish"。
安裝完後需要進行重啟。
Oracle-cloud Windows-server generalize 相關設定
安裝完Oracle VirtlO Drivers後,進行Windows-server generalize設定。
從Creating Windows Custom Images下載相關EXE檔案

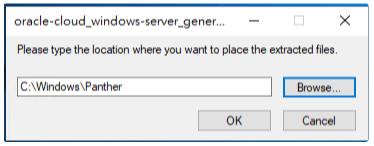
下載好後以系統管理員執行,出現要解壓縮檔哪個資料夾時,請解壓縮到C:\Windows\Panther
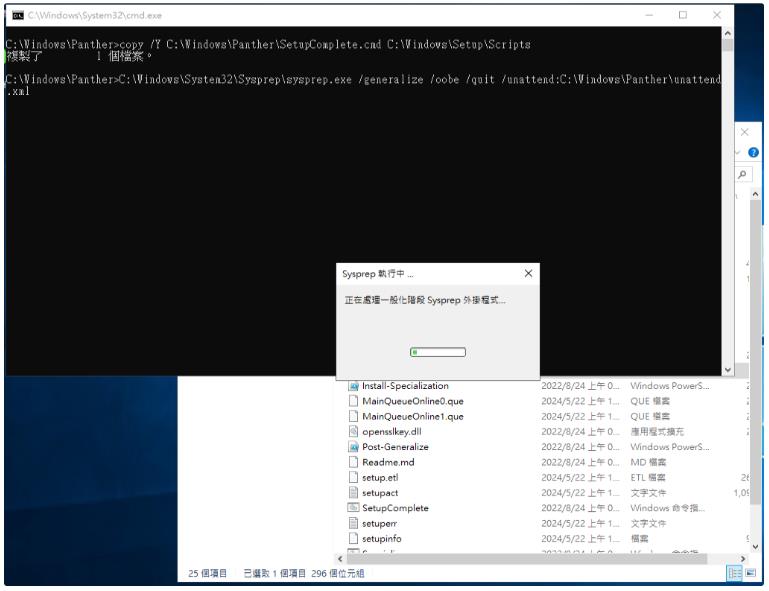
之後在C:\Windows\Panther中,執行Generalize.cmd(以系統管理員執行)
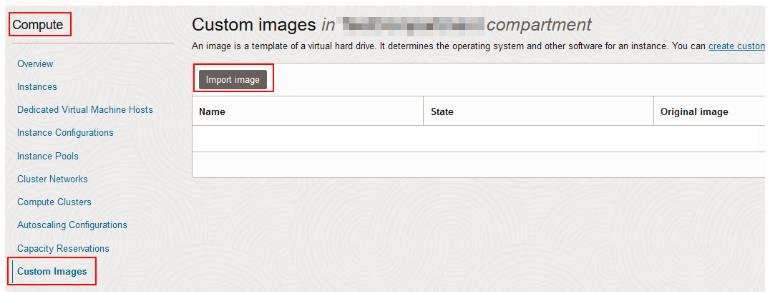
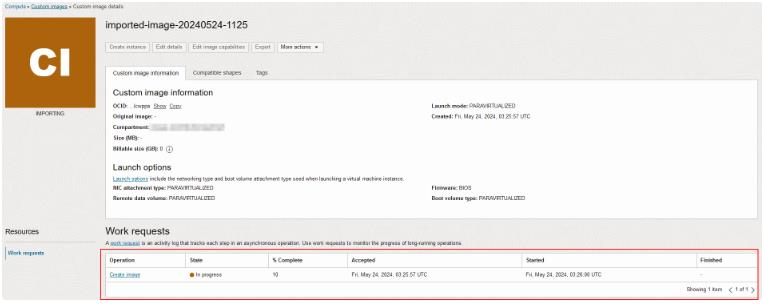
上傳OCI Object Storage並Custom image import
VM關機後,將VMDK上傳到OCI的Object Storage中,可參考此篇文章進行分段上傳。
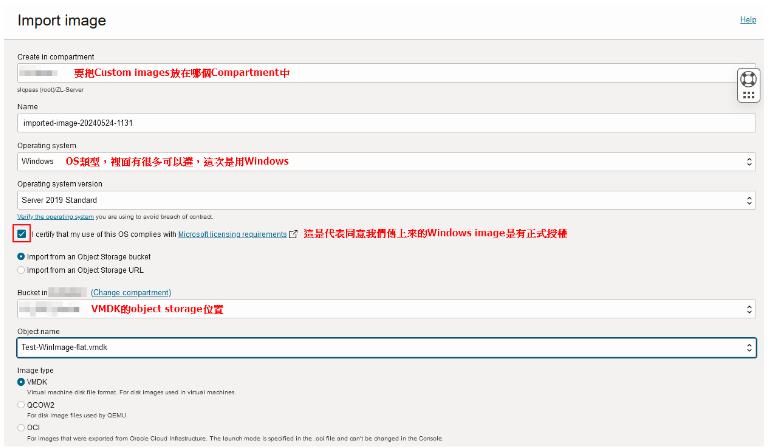
上傳完成後,登入到OCI 控制台中,Compute → Custom Images進行Import image


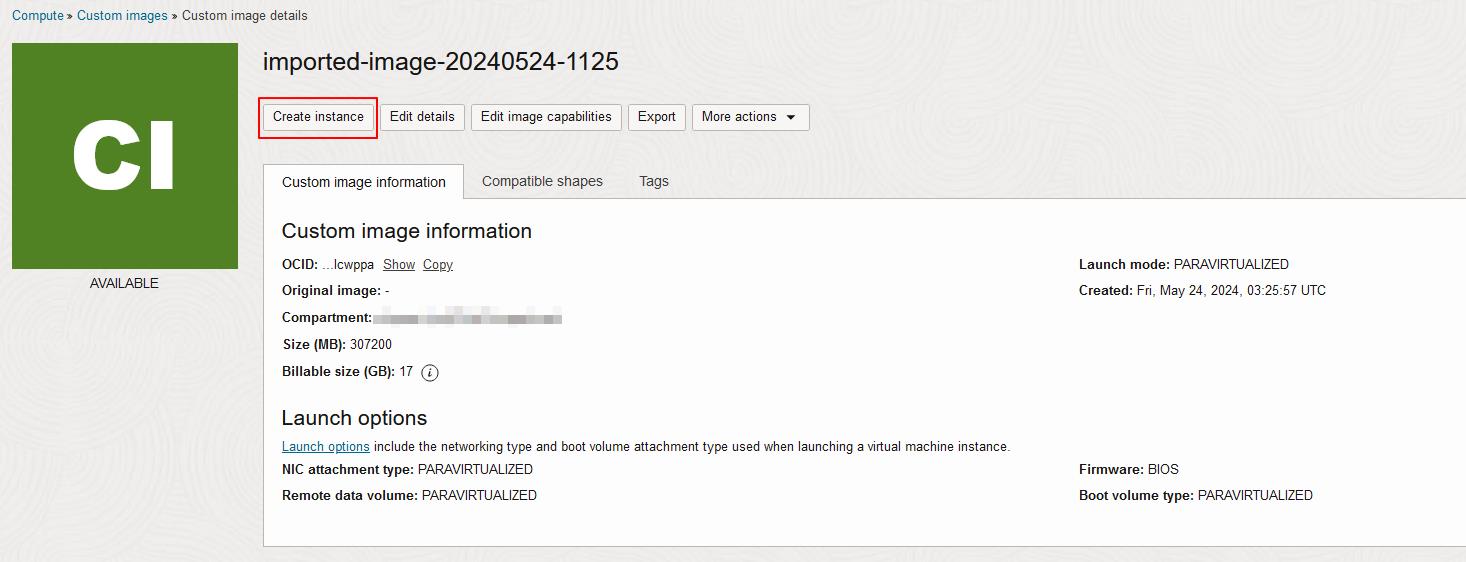
使用Custom images create instance並連線測試
使用Custom image create instance的方法很多,這邊只會使用其中一種方法。
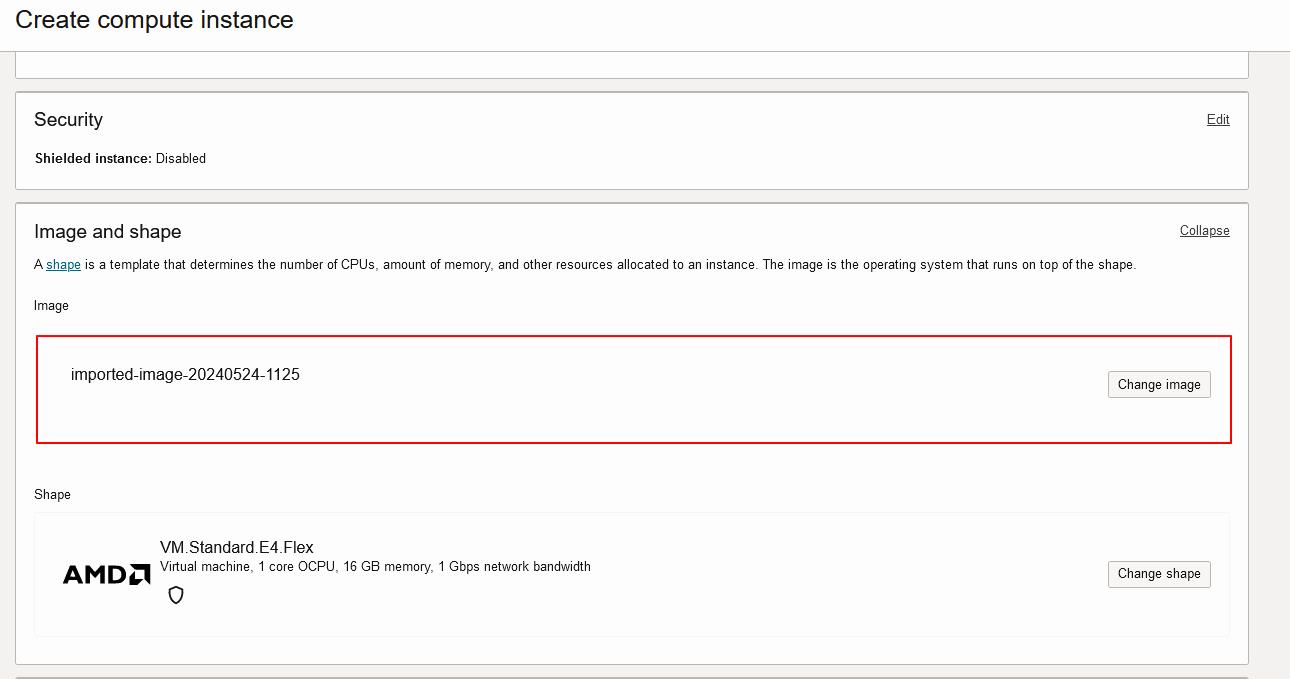
點進去剛剛的Custom image,上面有個”Create instance”就可以建立了。