本文章內容:
Docker安裝。
1. 安裝Docker
1.1 環境
- 64 bits CPU
- Linux Kernel 3.10+
[root@localhost ~]# cat /etc/redhat-release
CentOS Linux release 7.8.2003 (Core)  #這裡以CentOS 7為例
[root@localhost ~]# uname -r
3.10.0-1127.el7.x86_64
1.2 安裝
1.2.1 使用發行版extras倉庫的rpm包安裝
1. 執行yum repolist,可以看到extras倉庫
[root@localhost ~]# yum repolist
Loaded plugins: fastestmirror
Loading mirror speeds from cached hostfile
 * base: ftp.tc.edu.tw
 * extras: ftp.tc.edu.tw
 * updates: ftp.tc.edu.tw
repo id                                                                     repo name                                                                   status
base/7/x86_64                                                               CentOS-7 - Base                                                             10,072
docker-ce-stable/7/x86_64                                                   Docker CE Stable - x86_64                                                      100
extras/7/x86_64                                                             CentOS-7 - Extras                                                              451
updates/7/x86_64                                                            CentOS-7 - Updates                                                           1,640
repolist: 12,263
2. 執行yum install docker -y
[root@localhost ~]# yum install docker -y3. 執行systemctl start docker.service && systemctl enable docker.service
[root@localhost ~]# systemctl start docker.service && systemctl enable docker.service
Created symlink from /etc/systemd/system/multi-user.target.wants/docker.service to /usr/lib/systemd/system/docker.service.
4. 執行docker run hello-world確定Docker Engine安裝正確
[root@localhost ~]# docker run hello-world
Unable to find image 'hello-world:latest' locally
Trying to pull repository docker.io/library/hello-world ...
latest: Pulling from docker.io/library/hello-world
0e03bdcc26d7: Pull complete
Digest: sha256:95ddb6c31407e84e91a986b004aee40975cb0bda14b5949f6faac5d2deadb4b9
Status: Downloaded newer image for docker.io/hello-world:latest

Hello from Docker!
This message shows that your installation appears to be working correctly.

To generate this message, Docker took the following steps:
 1. The Docker client contacted the Docker daemon.
 2. The Docker daemon pulled the "hello-world" image from the Docker Hub.
    (amd64)
 3. The Docker daemon created a new container from that image which runs the
    executable that produces the output you are currently reading.
 4. The Docker daemon streamed that output to the Docker client, which sent it
    to your terminal.

To try something more ambitious, you can run an Ubuntu container with:
 $ docker run -it ubuntu bash

Share images, automate workflows, and more with a free Docker ID:
 https://hub.docker.com/

For more examples and ideas, visit:
 https://docs.docker.com/get-started/
1.2.2 使用官方倉庫的rpm包安裝
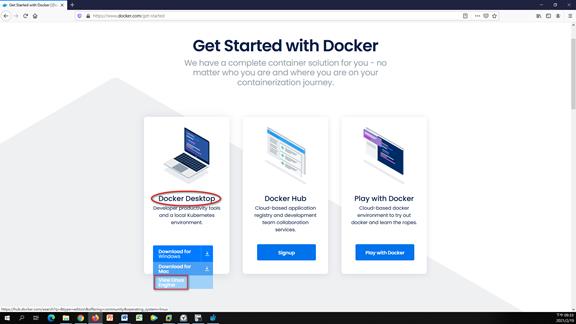
1. 訪問Docker官網"https://www.docker.com/" → 點"Get Started"

2. 在Docker Desktop點"View Linux Engine"
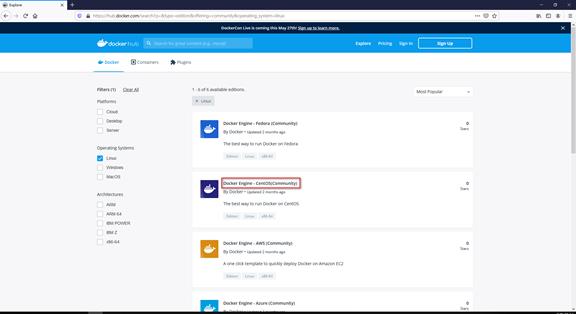
3. 點"Docker Engine - CentOS(Community)"
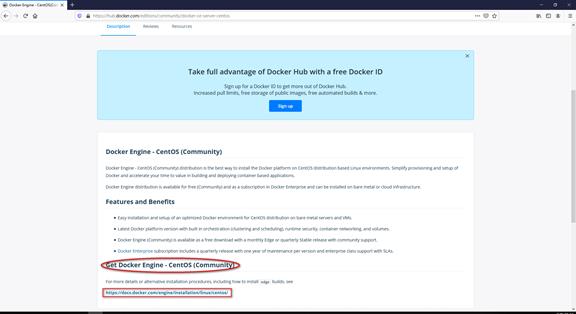
4. 在Get Docker Engine - CentOS (Community)點"https://docs.docker.com/engine/installation/linux/centos/"連結
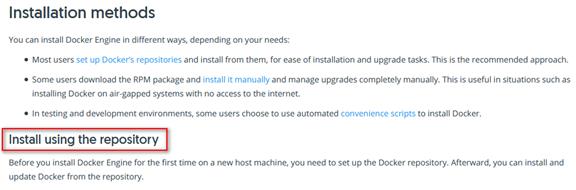
5. 依Install using the repository方法進行安裝
5.1 執行yum install yum-utils -y
[root@localhost ~]# yum install yum-utils -y5.2 執行yum-config-manager --add-repo https://download.docker.com/linux/centos/docker-ce.repo
[root@localhost ~]# yum-config-manager --add-repo https://download.docker.com/linux/centos/docker-ce.repo
Loaded plugins: fastestmirror
adding repo from: https://download.docker.com/linux/centos/docker-ce.repo
grabbing file https://download.docker.com/linux/centos/docker-ce.repo to /etc/yum.repos.d/docker-ce.repo
repo saved to /etc/yum.repos.d/docker-ce.repo
5.3 執行yum install docker-ce docker-ce-cli containerd.io -y
[root@localhost ~]# yum install docker-ce docker-ce-cli containerd.io -y5.4 執行systemctl start docker.service && systemctl enable docker.service
[root@localhost ~]# systemctl start docker.service && systemctl enable docker.service
Created symlink from /etc/systemd/system/multi-user.target.wants/docker.service to /usr/lib/systemd/system/docker.service.
5.5 執行docker run hello-world確定Docker Engine安裝正確
[root@localhost ~]# docker run hello-world
Unable to find image 'hello-world:latest' locally
latest: Pulling from library/hello-world
0e03bdcc26d7: Pull complete
Digest: sha256:95ddb6c31407e84e91a986b004aee40975cb0bda14b5949f6faac5d2deadb4b9
Status: Downloaded newer image for hello-world:latest

Hello from Docker!
This message shows that your installation appears to be working correctly.

To generate this message, Docker took the following steps:
 1. The Docker client contacted the Docker daemon.
 2. The Docker daemon pulled the "hello-world" image from the Docker Hub.
    (amd64)
 3. The Docker daemon created a new container from that image which runs the
    executable that produces the output you are currently reading.
 4. The Docker daemon streamed that output to the Docker client, which sent it
    to your terminal.

To try something more ambitious, you can run an Ubuntu container with:
 $ docker run -it ubuntu bash

Share images, automate workflows, and more with a free Docker ID:
 https://hub.docker.com/

For more examples and ideas, visit:
 https://docs.docker.com/get-started/
1.3 設定下載Docker鏡像加速器(如果有需要的話)
1. Docker的主配置文件名為daemon.json,這個文件本身不存在,啟動docker.service服務後系統會自動創建/etc/docker目錄,在此目錄裡面創建名為daemon.json的文件
[root@localhost ~]# touch /etc/docker/daemon.json2. 設定下載Docker鏡像加速器
[root@localhost ~]# vim /etc/docker/daemon.json
{
  "registry-mirrors":["https://mirror.baidubce.com"]  #百度雲的加速器。這是個數組格式,如果有多個地址的話可以使用逗號隔開
}
3. 重啟docker.service服務
[root@localhost ~]# systemctl restart docker.service4. 執行docker info,有看到如下訊息表示設定成功
[root@localhost ~]# docker info
...
Registry Mirrors:
  https://mirror.baidubce.com/
ps:如果有出現以下兩行
WARNING: bridge-nf-call-iptables is disabled
WARNING: bridge-nf-call-ip6tables is disabled
則執行如下步驟,
# vim /etc/sysctl.conf
net.bridge.bridge-nf-call-ip6tables = 1
net.bridge.bridge-nf-call-iptables = 1
# sysctl -p