看 Intellij 的官方文件有稍微撞牆了一下 (文字敘述跟實際操作的圖像有時候很難在腦中連結...
所以記了下怎麼在 Intellij 中設定 JUnit 的 Library...
參照了 Intellij 的文件:
https://www.jetbrains.com/help/idea/configuring-testing-libraries.html#create_test
Adding test libraries
To add a test library to the classpath when creating a test for a class
( 當替一個類別建立一個 test 時, 增加 test 函式庫到 classpath )
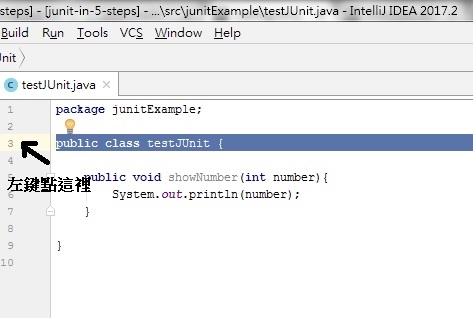
1.In the editor, place the cursor within the line containing the class declaration.
->點擊圖片箭頭指的地方那一行底色會變粉紅 (如圖), 注意不要點到其他地方
2.Press Alt+Enter to view the available intention actions.
->1步驟剛結束時 Alt + Enter, 會跑出下面可以選的指令
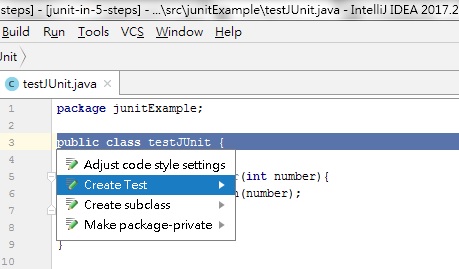
3.Select Create Test
->2那一張圖點下去 Create Test
4.In the Create Test dialog, to the right of the text informing you that the corresponding library is not found, click Fix.
-> 在 Create Test 視窗內會顯示找不到 JUnit 的 library, 點 fix 下去
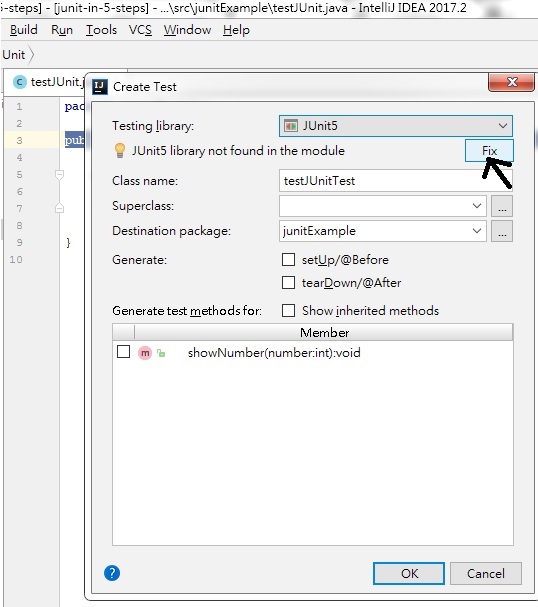
記得之後會跳出來一個視窗問你要直接加入 library 還是用甚麼 distribution 方式
我是直接選前者, 至於這兩個東西的內容就不深究了...哪天心血來潮再補上
To add a test library to the classpath when writing the code for a test
( 當要寫測試用的 code時, 增加 test 函式庫到 classpath )
1.In the source code of a test class, place the cursor within an unresolved reference to TestCaseor annotation.
-> 在 test class 的 code , 將游標指到一個還沒解決問題 (找不到資源) 的參照
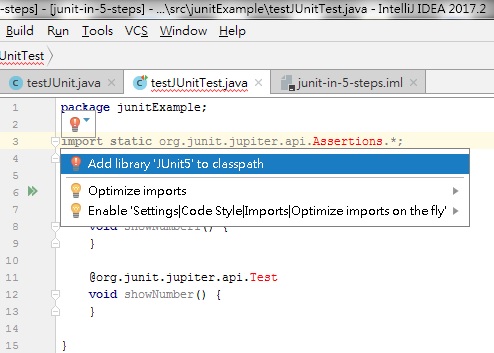
將游標指到 Assertions (紅字處) , 左邊就會跳出來紅色的燈泡
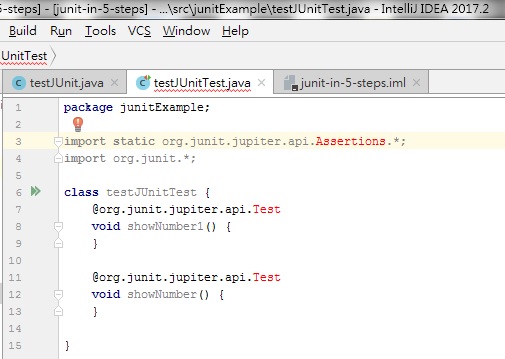
2.Press Alt+Enter to view the available intention actions.
3.Select Add <library> to classpath.
->兩個步驟跟之前一樣, 先 Alt+Enter, 跳出如圖的選項選第一個就是了
