初始化專案與設定 : 此次的專案名稱 設為 MvcIdentityTest2
-
再方案中加入MVC專案,不勾選驗證
-
使用 NuGet 套件管理員點選更新頁面,將組件更新至最新後重新建置且運行一次專案
-
為何要運行專案??因為在 WebConfig 中有版本的問題,若不先運行一次後續安裝 Identity && Owin 這些套件會產生非預期例外
修改程式碼 :
A. 修改 HomeController 中 Index 這個方法 :
public ActionResult Index()
{
    Dictionary<string, object> data
       = new Dictionary<string, object>();
    data.Add("Placeholder", "Placeholder");
    return View(data);
}
B. 增加程式碼於 _Layout.cshtml 的頁面 :
<meta http-equiv="Content-Type" content="text/html; charset=utf-8"/>
   @*....*@
    <style>
        .container {
            padding-top: 10px;
        }
        /*增加container的Padding*/
        .validation-summary-errors {
            color: #f00;
        }
        /*這是modelstate中錯誤訊息的字體*/
    </style>
</head>
C. 清掉 Index.cshtml 的 HTML 碼並修改 :
@{
    ViewBag.Title = "Index";
}

<div class="panel panel-primary">
    <div class="panel-heading">User Details</div>
    <table class="table table-striped">
        @foreach (string key in Model.Keys)
        {
            <tr>
                <th>@key</th>
                <td>@Model[key]</td>
            </tr>
        }
    </table>
</div>
在Index的方法中有回傳一個 Dictionary<> 的物件,在 MVC 的機制中可以直接透過 Model.Keys 取得相關的資訊!!
創建資料庫與使用 Identity 的機制 使用 EF 創建相關 TABLE 在這裡示範用 LocalDb 建立 :
A. 上網查詢 SQL 開啟 LocalDb 的方式,在 Visual Studio 中開啟 Sql物件總管 的視窗
B. 新增 LocalDb 的Server,新增資料庫於 LocalDb 中,資料庫名稱命名 "IdentityDbTest2"
C. 使用 NuGet 添加套件: NuGet 會自動新增相依性的套件
- Microsoft.AspNet.Identity.EntityFramework-zh-Hant -Version 2.2.1
這是 Identity 使用 EF 配置資料庫的組件。
- Microsoft.AspNet.Identity.Owin-zh-Hant -Version 2.0.1
這是 Identity 使用微軟的 Owin(中間件) 達成必要資訊的修改與建置。
- Microsoft.Owin.Host.SystemWeb-zh-Hant -Version 3.1.0
這是 Owin 與 Web Server 之間轉換的組件。
D. 更新主 WebConfig 中的內容 :
-
新增連線字串 : 此註解不能在 WebConfig 中使用,否則會異常
<connectionStrings> <add name="IdentityDb" <!--連線字串的名稱--> providerName="System.Data.SqlClient" <!--Server的供應類型--> connectionString="Data Source=(LocalDb)\MSSQLLocalDB; <!--Server的名稱與位置--> Initial Catalog=IdentityDbTest2; <!--資料庫的名稱--> Integrated Security=True; <!--使用何種機制來登入(此設定是Windows驗證)--> Connect Timeout=15; Encrypt=False; TrustServerCertificate=False; MultipleActiveResultSets=True"/> <!--多結果活動集 同時讀取的多個查詢來形成結果--> </connectionStrings> -
新增 appSettiong 裡面的 Key :
<appSettings>
    .....
    <!--設定Owin 初始化的Config檔-->
    <add key="owin:AppStartup" value="專案名稱.Identity的Config類別名稱" />
    <!--針對Owin套件自動找尋對應的Appstapt先關閉-->
    <!--<add key="owin:AutomaticAppStartup" value="false" />-->
</appSettings>
E. 新增 用戶類的 DataModel : 此模型會繼承自 Identity 的類別
在 Models 資料夾中新增一個類別 AppUser.cs :
using System;
using Microsoft.AspNet.Identity.EntityFramework;

namespace MvcIdentityTest2.Models
{
    public class AppUser : IdentityUser
    {
        //這裡將放置附加屬性
    }
}
F. 配置 Identity 中的 EF DbContext 類別 : 此類別的重點就是 Identity 第一次初始化的配置。與EF類似
-
專案中新增資料夾 名稱為Infrastructure
-
建立類別名稱為 AppIdentityDbContext.cs
using System.Data.Entity; using Microsoft.AspNet.Identity.EntityFramework; using MvcIdentityTest2.Models; namespace MvcIdentityTest2.Infrastructure { /// <summary> /// 此類別是設定 Identity 連線至資料庫伺服的基本設定檔。等同於使用Entity中的DbContex類別 /// </summary> public class AppIdentityDbContext : IdentityDbContext<AppUser> //該泛型中的類型就是剛剛建立的 AppUser 類別 條件約束是 where T : IdentityUser { public AppIdentityDbContext() : base("IdentityDb") { } static AppIdentityDbContext() { // 該泛型 必須是自己配置的 類別 才會產生效用 Database.SetInitializer<AppIdentityDbContext>(new IdentityDbInit()); } /// <summary> /// 主要是在 IdentityConfig 中,需要返回實例的方法 /// </summary> public static AppIdentityDbContext Create() { return new AppIdentityDbContext(); } } /// <summary> /// 資料庫初始化時的基本設定 /// 若 DataModel 結構異動時資料庫的規則為以下設定。 /// 且 EF 會洗掉資料庫資料,寫入新的資料庫 /// 繼承自 DropCreateDatabaseIfModelChanges<> 會影響 Identity 更新資料庫結構時的變化 /// </summary> public class IdentityDbInit : DropCreateDatabaseIfModelChanges<AppIdentityDbContext> { protected override void Seed(AppIdentityDbContext context) { PerformInitialSetup(context); base.Seed(context); } public void PerformInitialSetup(AppIdentityDbContext context) { // initial configuration will go here //初始化配置將放在這兒 } } } -
建立 Identity 的 UserManager<> 使用者管理器類
這個類別主要就是 Idetity 提供對於使用者 新刪修查 的方法,是很常被使用到的類別。using Microsoft.AspNet.Identity; using Microsoft.AspNet.Identity.EntityFramework; using Microsoft.AspNet.Identity.Owin; using Microsoft.Owin; using MvcIdentityTest2.Models; namespace MvcIdentityTest2.Infrastructure { /// <summary> /// 此為 Identity 所提供的 <see cref="UserManager{TUser}"/>。 /// 主要就是 SQLSERVER 取資料提供相對應的方法 /// </summary> public class AppUserManager : UserManager<AppUser> // UserManager類別的泛型 的條件約束 where T : class,Identity.IUser { public AppUserManager(IUserStore<AppUser> store) : base(store) { } /// <summary> /// 主要是在 IdentityConfig 中,需要返回實例的方法 /// </summary> public static AppUserManager Create( IdentityFactoryOptions<AppUserManager> options, IOwinContext context) { // 透過 Owin 取得對應的 DbContext 的實例 AppIdentityDbContext db = context.Get<AppIdentityDbContext>(); // 取得對應的 AppuserManger 類別 AppUserManager manager = new AppUserManager(new UserStore<AppUser>(db)); return manager; } } } -
有了以上的類別已達成了基本的配置,最後就是要新增 Identity 對應的 Config 類別以告知Identity 我們要使用自己的配置 :
再一開始我們在 WebConfig 中的 appSetting 有設定 Key 值,稍做解釋一下 Identity 在網站運行時需要配置一些初始設定,所以在 WebConfig 中設定主要就是讓 中間層 可以知道相關的配置,並執行各個套件與自定義的初始設定。
在 AppStart 的資料夾新增類別 : 名稱為 IdentityConfig.csusing Microsoft.AspNet.Identity; using Microsoft.Owin; using Microsoft.Owin.Security.Cookies; using Owin; using MvcIdentityTest2.Infrastructure; namespace MvcIdentityTest2 { public class IdentityConfig { /// <summary> /// 此類別是 <see cref="Owin"/> && <see cref="Identity"/> 中的 APP 設定檔。 /// 主要就是在此專案中 自定義建立的 Identity 類別 /// </summary> public void Configuration(IAppBuilder app) { // 設定 IdentityDbContext 並提供返回對應型別實例的方法 app.CreatePerOwinContext<AppIdentityDbContext>(AppIdentityDbContext.Create); // 設定 IdentityUserManager 並提供返回對應型別實例的方法 app.CreatePerOwinContext<AppUserManager>(AppUserManager.Create); // 設定 Owin 中間層的 Cookie 認證機制 app.UseCookieAuthentication(new CookieAuthenticationOptions { AuthenticationType = DefaultAuthenticationTypes.ApplicationCookie, LoginPath = new PathString("/Account/Login"), // 若未驗證 導向於指定頁面 }); } } }
G. 配置 Admin 控制器 : 這個控制器最主要是管理員可觀看與管理"會員"
以上的 Identity 相關的 EF 配置都完成後且也在 Config 中透過 Owin 達成初始設定,那之後就是使用這些 Identity 提供的物件,達成修改資料。
-
在配置控制器之前我們需要新增一個 父Controller目的是為了提供某些方法 : 在 Controllers 的資料夾中新增控制器 MyBaseController.cs
using System.Web; using System.Web.Mvc; using Microsoft.AspNet.Identity.Owin; namespace MvcIdentityTest2.Controllers { /// <summary> /// 此為所有Controller的共通類別 /// </summary> public abstract class MyBaseController : Controller { /// <summary> /// 取得當前 Identity 的 使用者管理器類 /// <see cref="Infrastructure.AppUserManager"/> /// </summary> protected virtual Infrastructure.AppUserManager BaseUserManager { get { //此方法是 Owin 對於 HttpContext 新增的擴充方法 return HttpContext.GetOwinContext().GetUserManager<Infrastructure.AppUserManager>(); } } } } -
配置 AdminController : 在 Controllers 的資料夾中新增控制器 AdminController.cs
using System.Web.Mvc; namespace MvcIdentityTest2.Controllers { //管理使用者的Controller public class AdminController : MyBaseController { public ActionResult Index() { //使用父類別中的方法取得使用者管理器的實例 後取得所有User的資料 return View(base.BaseUserManager.Users); } } } -
配置對應的 View : 再 Views\Admin 的資料夾中新增 Index.cshtml
model IEnumerable<MvcIdentityTest2.Models.AppUser>

@{
    ViewBag.Title = "User Index";
}

<h2>User Accounts</h2>

<table class="table">
    <tr>
        <th>
            @Html.DisplayNameFor(model => model.Id)
        </th>
        <th>
            @Html.DisplayNameFor(model => model.Email)
        </th>
        <th>
            @Html.DisplayNameFor(model => model.UserName)
        </th>
        <th></th>
    </tr>
    @if (Model.Count() == 0)
    {
        <tr><td colspan="3" class="text-center">No User Accounts</td></tr>
    }
    else
    {
        foreach (var item in Model)
        {
            <tr>
                <td>
                    @Html.DisplayFor(modelItme => item.Id)
                </td>
                <td>
                    @Html.DisplayFor(modelItem => item.Email)
                </td>
                <td>
                    @Html.DisplayFor(modelItem => item.UserName)
                </td>
                <td>
                    @*在VIEW中可以隨時地引入 @using (Html.BeginForm(){} 達到任意組合之需求*@
                    @*以下範例就是 Delete是用 POST,但是 Edit 就是使用 GET 該模式可以活用以達到精簡Controller中的程式碼 *@
                    @using (Html.BeginForm("Delete", "Admin", new { id = item.Id }))
                    {
                        @Html.ActionLink("Edit", "Edit", new { id = item.Id }, new { @class = "btn btn-primary btn-xs" })
                        <button class="btn btn-danger btn-xs" type="submit"> Delete </button>
                    }
                </td>

            </tr>
        }
    }
</table>

<p>
    @Html.ActionLink("Create New", "Create", null, new { @class = "btn btn-primary" })
</p>

@若以跟著指示操作到這時,可以試著運行該專案看看結果與資料庫中所產生的資料表!!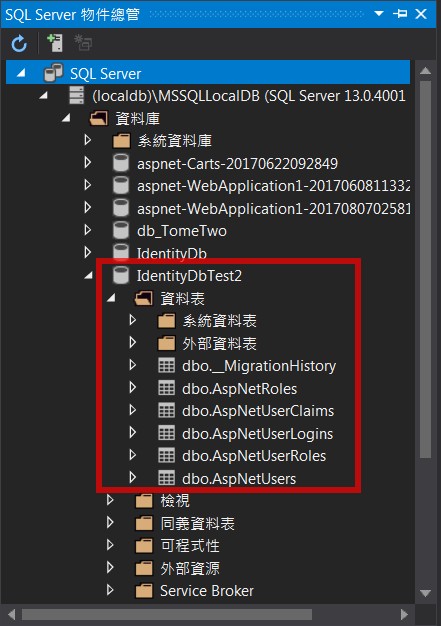
-
配置創建使用者的 ViewModel : 再 Modles 的資料夾新增 UserViewModels.cs 類別
using System.ComponentModel.DataAnnotations; namespace MvcIdentityTest2.Models { /// <summary> /// 該類別是使用者創立帳號時所用的ViewModel /// </summary> public class CreateModel { [Required] public string Name { get; set; } [Required] public string Email { get; set; } [Required] public string Password { get; set; } } } -
回到 MyBaseController 中修改程式碼 : 只顯示此次修改的程式碼片段 與 空間
using System.Web; using System.Web.Mvc; using Microsoft.AspNet.Identity.Owin; using Microsoft.AspNet.Identity; using System.Linq; namespace MvcIdentityTest2.Controllers { public abstract class MyBaseController : Controller { /// <summary> /// 此方法 是將 <see cref="IdentityResult"/> 中的 Errors 的資訊 /// 新增到 ModelState 供 VIEW 使用。 /// </summary> protected virtual void BaseAddErrorsFromResult(IdentityResult result) { result.Errors.ToList().ForEach(errMsg => ModelState.AddModelError("", errMsg)); } } } -
回到 AdminController 中修改程式碼 :
using System.Web.Mvc; using MvcIdentityTest2.Models; using Microsoft.AspNet.Identity; using System.Threading.Tasks; namespace MvcIdentityTest2.Controllers { //管理使用者的Controller public class AdminController : MyBaseController { public ActionResult Index() { //使用父類別中的方法取得使用者管理器的實例 後取得所有User的資料 return View(base.BaseUserManager.Users); } [HttpGet] public ActionResult Create() { return View(); } [HttpPost] public async Task<ActionResult> Create(CreateModel model) { // 若前端的驗證成功 if (ModelState.IsValid) { // 將 ViewModel 的資料帶入 DataModel 中 AppUser user = new AppUser { UserName = model.Name, Email = model.Email }; // 使用 Identity 的新增方法,新增一筆資料並加使用者密碼加密。 IdentityResult result = await base.BaseUserManager. CreateAsync(user, model.Password); // 若新增成功 if (result.Succeeded) { return RedirectToAction("Index"); } else { base.BaseAddErrorsFromResult(result); } } return View(model); } } } -
再來創建 Create 方法對應的 View,再 \Views\Admin\ 新增 Create.cshtml 頁面
@model MvcIdentityTest2.Models.CreateModel

@{
    ViewBag.Title = "Create User";
}

<h2>Create User</h2>

@using (Html.BeginForm())
{
    @Html.AntiForgeryToken()
    <div class="form-horizontal">
        <h4>CreateModel</h4>
        <hr />
        @Html.ValidationSummary(true, "", new { @class = "text-danger" })
        <div class="form-group">
            @Html.LabelFor(model => model.Name, htmlAttributes: new { @class = "control-label col-md-2" })
            <div class="col-md-10">
                @Html.EditorFor(model => model.Name, new { htmlAttributes = new { @class = "form-control" } })
                @Html.ValidationMessageFor(model => model.Name, "", new { @class = "text-danger" })
            </div>
        </div>

        <div class="form-group">
            @Html.LabelFor(model => model.Email, htmlAttributes: new { @class = "control-label col-md-2" })
            <div class="col-md-10">
                @Html.EditorFor(model => model.Email, new { htmlAttributes = new { @class = "form-control" } })
                @Html.ValidationMessageFor(model => model.Email, "", new { @class = "text-danger" })
            </div>
        </div>

        <div class="form-group">
            @Html.LabelFor(model => model.Password, htmlAttributes: new { @class = "control-label col-md-2" })
            <div class="col-md-10">
                @Html.EditorFor(model => model.Password, new { htmlAttributes = new { @class = "form-control" } })
                @Html.ValidationMessageFor(model => model.Password, "", new { @class = "text-danger" })
            </div>
        </div>

        <div class="form-group">
            <div class="col-md-offset-2 col-md-10">
                <input type="submit" value="Create" class="btn btn-default" />
            </div>
        </div>
    </div>
}

<div>
    @Html.ActionLink("Back to List", "Index")
</div>
若做到此步驟 不仿先試試運行專案看看!! 並試試新增使用者且到資料庫中查看資料的情況
H. 配置 密碼規範類別 : 創建一個 Identity 的 PasswordValidator 類別
-
回到 AppUserManeger 類別 :
using Microsoft.AspNet.Identity;
using Microsoft.AspNet.Identity.EntityFramework;
using Microsoft.AspNet.Identity.Owin;
using Microsoft.Owin;
using MvcIdentityTest2.Models;

namespace MvcIdentityTest2.Infrastructure
{
    /// <summary>
    /// 此為 Identity 所提供的 <see cref="UserManager{TUser}"/>。
    /// 主要就是 SQLSERVER 取資料提供相對應的方法
    /// </summary>
    public class AppUserManager : UserManager<AppUser>
    // UserManager類別的泛型 的條件約束 where T : class,Identity.IUser
    {
        public AppUserManager(IUserStore<AppUser> store) : base(store)
        {
        }

        /// <summary>
        /// 主要是在 IdentityConfig 中,需要返回實例的方法
        /// </summary>
        public static AppUserManager Create(
             IdentityFactoryOptions<AppUserManager> options,
             IOwinContext context)
        {
            // 透過 Owin 取得對應的 DbContext 的實例
            AppIdentityDbContext db = context.Get<AppIdentityDbContext>();
            // 取得對應的 AppuserManger 類別
            AppUserManager manager = new AppUserManager(new UserStore<AppUser>(db));


            //使用 Identity 的 UserManager 類別 來初始化 PasswordValidator 物件
            manager.PasswordValidator = new PasswordValidator() {
                RequiredLength = 6, //密碼長度需大於六
                RequireNonLetterOrDigit = false, //必須有特殊符號
                RequireDigit = false, //必須要有數字
                RequireLowercase = true, //必須要有小寫字母
                RequireUppercase = true //必須要有大寫字母
            };

            return manager;
        }
    }
}
以上可以以達到基本的密碼規範,但可能或許需要更多的規範時該怎麼辦? 參考下一點
-
再 \Infrastructure\ 新增 CustomPasswordValidator.cs 類別 :
using System.Linq; using System.Threading.Tasks; using Microsoft.AspNet.Identity; namespace MvcIdentityTest2.Infrastructure { /// <summary> /// 此類別繼承 PasswordValidator 類別,主要針對 ValidateAsync 原方法做複寫。 /// 該方法主要就是執行原方法的 使用者創建帳號時 密碼的相關驗證。後增加自定義的驗證 /// </summary> public class CustomPasswordValidator : PasswordValidator { /// <summary> /// 使用者創建帳號使 針對密碼所做的驗證 /// </summary> public override async Task<IdentityResult> ValidateAsync(string pwd) { // 等待 父類別的非同步方法跑完病回傳 IdentityResult // 這個Identity方法 是依據原本規則的設定值 去跑它既有的驗證 此時 // 跑完後 會再跑我們自行增加的驗證 IdentityResult result = await base.ValidateAsync(pwd); //抓取原本的錯誤資訊 不管有無資料 var errors = result.Errors.ToList(); if (pwd.Contains("12345")) { errors.Add("密碼不能包含如 12345 這種順向排列的數字"); // 當 Identity 的 IdentityResult 被覆寫掉的同時 那並不會繼續執行後續動作 result = new IdentityResult(errors); } if (string.IsNullOrEmpty(pwd)) { errors.Add("密碼不能為空值"); result = new IdentityResult(errors); } return result; } } } -
接著繼續修改 AppUserManeger 類別中的 Create 方法 => 只顯示修改程式碼 :
public class AppUserManager : UserManager<AppUser>
{
   .....
   //使用 Identity 的 UserManager 類別 來初始化 UserValidator 物件
   manager.PasswordValidator = new CustomPasswordValidator() {  <--修改部分
      ......
   };
   .....
}
I. 配置 使用者帳號規範類別 : 創建一個 Identity 的 UserValidator 類別
-
回到 AppUserManeger 類別中的 Create 方法修改 => 只顯示修改程式碼 :
public class AppUserManager : UserManager<AppUser>
{
   ......
   // 使用 Identity 的 UserManager 類別 來初始化 UserValidator 物件
   manager.UserValidator = new UserValidator<AppUser>(manager) {
      AllowOnlyAlphanumericUserNames = true, // 帳號需要有字母與數字組合
      RequireUniqueEmail = true // Email 需是未註冊過的
   };
   return manager;
}
同樣的若基本的帳號規範需求不夠時,可以自訂使用者帳號規範類別請參考下一點
-
再 \Infrastructure\ 新增 CustomUserValidator.cs 類別 :
using System.Linq; using System.Threading.Tasks; using Microsoft.AspNet.Identity; using MvcIdentityTest2.Models; using System.Web; namespace MvcIdentityTest2.Infrastructure { /// <summary> /// 此類別繼承 UserValidator<> 類別,主要針對 ValidateAsync 原方法做複寫。 /// 該方法主要就是執行原方法的 使用者創建帳號時 帳號與信箱或其相關驗證。後增加自定義的驗證 /// </summary> public class CustomUserValidator : UserValidator<AppUser> { public CustomUserValidator(UserManager<AppUser> manager) : base(manager) { } /// <summary> /// 使用者創立帳號時,針對除了密碼以外的欄位 如信箱、帳號等做相關的驗證 /// </summary> public override async Task<IdentityResult> ValidateAsync(AppUser item) { // 先跑父類的驗證 IdentityResult result = await base.ValidateAsync(item); // 若信箱的結尾不等於 example.com 這個模式的話則驗證不過 if (!item.Email.ToLower().EndsWith("@example.com")) { // 先把父類別的驗證錯誤資訊拷貝起來 var errors = result.Errors.ToList(); errors.Add("信箱的格式錯誤 請參照 : @example.com"); result = new IdentityResult(errors); } // 看是否已經認證過 if (!HttpContext.Current.User.Identity.IsAuthenticated) { var userName = item.UserName.ToLower().Trim(); // 若帳號名稱與 admin && administrator 相符時,驗證不過 if (userName == "admin" || userName == "administrator") { var errors = result.Errors.ToList(); errors.Add("不可使用包含 admin && administrator 等字串組合"); result = new IdentityResult(errors); } } return result; } } } -
接著繼續修改 AppUserManeger 類別中的 Create 方法 => 只顯示修改程式碼 :
public class AppUserManager : UserManager<AppUser>
{
    .....
    // 使用 Identity 的 UserManager 類別 來初始化 UserValidator 物件
    manager.UserValidator = new CustomUserValidator(manager) {
        AllowOnlyAlphanumericUserNames = true, // 帳號需要有字母與數字組合
        RequireUniqueEmail = true // Email 需是未註冊過的
    };
    .....
}
J. 修改 Admin 控制器 : 之前的 Admin 控制器可以查詢與新增使用者,現在要繼續增加 修改與刪除的方法 !!
-
實現刪除的方法 : 之前在 Index 的頁面中就已設定好,刪除的方法是用 POST的機制回傳
修改 AdminController 只顯示修改的程式碼與引入組件 =>using System.Web.Mvc; using MvcIdentityTest2.Models; using Microsoft.AspNet.Identity; using System.Threading.Tasks; public class AdminController : MyBaseController { .... [HttpPost] public async Task<ActionResult> Delete(string id) { // 使用 Identity 使用者管理器類 的方法,找尋到對應的使用者 // 並回傳一個含有資料的 DataModel AppUser user = await base.BaseUserManager.FindByIdAsync(id); if (user != null) { // 使用 Identity 使用者管理器類 的方法,刪除一筆相符的資料 並回傳狀況 IdentityResult IdentityResult result = await base.BaseUserManager.DeleteAsync(user); if (result.Succeeded) { return RedirectToAction("Index"); } else { return View("Error", result.Errors); } } else { return View("Error", new string[] { "User Not Found" }); } } } -
著再 \Views\Shared (修改)或新增一個 Error.cshtml 的頁面,讓發生錯誤或其它狀況時可眺轉:
@model IEnumerable<string> @{ Layout = null; ViewBag.Title = "Error"; } <!DOCTYPE html> <html> <head> <meta name="viewport" content="width=device-width" /> <title>_Error</title> </head> <body> <div class="alert alert-danger"> @switch (Model.Count()) { case 0: @: 發生了一些錯誤。請在試一次,或聯絡網站管理員。 break; case 1: @Model.First(); break; default: @: 發生了以下錯誤,請確認。 <ul> @foreach (var item in Model) { <li>@item</li> } </ul> break; } </div> @Html.ActionLink("OK", "Index", null, new { @class = "btn btn-default" }) </body> </html> -
實現修改的方法 : 之前在 Index 的頁面中就已設定好 修改的方法是用 GET的機制回傳
修改 AdminController 只顯示修改的程式碼 =>public class AdminController : MyBaseController { .... [HttpGet] public async Task<ActionResult> Edit(string id) { //使用 Identity 使用者管理器類 的方法,刪除一筆相符的資料 並回傳狀況 //IdentityResult AppUser user = await base.BaseUserManager.FindByIdAsync(id); if (user != null) { return View(user); } else { return RedirectToAction("Index"); } } [HttpPost] public async Task<ActionResult> Edit(string id, string email, string pwd) { // 先透過 ID 取得 對應 User 的 DataModel AppUser user = await base.BaseUserManager.FindByIdAsync(id); if (user != null && ModelState.IsValid) { user.Email = email; // 新增接收 使用者管理器類 的變數 IdentityResult validEmail = null, validPass = null; // 先修改了User 中的 Email 的值,後使用預設的驗證 validEmail = await base.BaseUserManager.UserValidator.ValidateAsync(user); // 先不修改原Password原因是怕原本的驗證就沒通過就直接加密後修改,所以先對原字串做驗證 if (!string.IsNullOrEmpty(pwd)) { // 針對當前的 密碼 進行驗證 validPass = await base.BaseUserManager.PasswordValidator.ValidateAsync(pwd); } else { validPass = new IdentityResult("密碼不可為空 必填"); } // 若 信箱 驗證不通過 則透過 AddErrorsFromResult 方法新增錯誤資訊到 ModelState if (!validEmail.Succeeded) base.BaseAddErrorsFromResult(validEmail); // 若 密碼 驗證不通過 則透過 AddErrorsFromResult 方法新增錯誤資訊到 ModelState if (!validPass.Succeeded) base.BaseAddErrorsFromResult(validPass); // 若 密碼 && 信箱 驗證通過 就透過 Identity 的方法修改其資料庫中的資料 if (validEmail.Succeeded && validPass.Succeeded) { // 若驗證成功且 則 將原密碼加密後修改原值 user.PasswordHash = base.BaseUserManager.PasswordHasher.HashPassword(pwd); IdentityResult result = await base.BaseUserManager.UpdateAsync(user); if (result.Succeeded) { return RedirectToAction("Index"); } else { base.BaseAddErrorsFromResult(result); } } } else { ModelState.AddModelError("", "User Not Found"); } return View(user); } } -
新增 Admin 的 Edit 方法對應的 View,於 \Views\Admin\ 新增 Edit.cshtml 頁面
@model MvcIdentityTest2.Models.AppUser

@{
    ViewBag.Title = "Edit";
}

<h2>Edit User</h2>

@using (Html.BeginForm())
{
    @Html.AntiForgeryToken()

    <div class="form-horizontal">
        <h4>AppUser</h4>
        <hr />
        @Html.ValidationSummary(true, "", new { @class = "text-danger" })
        @Html.HiddenFor(model => model.Id)

        <p class="form-control-static">User ID: @Model.Id</p>
        <div class="form-group">
            @Html.LabelFor(model => model.Email, htmlAttributes: new { @class = "control-label col-md-2" })
            <div class="col-md-10">
                @Html.EditorFor(model => model.Email, new { htmlAttributes = new { @class = "form-control" } })
                @Html.ValidationMessageFor(model => model.Email, "", new { @class = "text-danger" })
            </div>
        </div>

        <div class="form-group">
            @Html.Label("Password", htmlAttributes: new { @class = "control-label col-md-2" })
            <div class="col-md-10">
                @*@Html.PasswordFor(model => model.PasswordHash, new { htmlAttributes = new { @class = "form-control" } })*@
                <input class="form-control" value="" id="Password" name="pwd" type="password" />
                @Html.ValidationMessageFor(model => model.PasswordHash, "", new { @class = "text-danger" })
            </div>
        </div>

        <div class="form-group">
            @Html.LabelFor(model => model.UserName, htmlAttributes: new { @class = "control-label col-md-2" })
            <div class="col-md-10">
                @Html.EditorFor(model => model.UserName, new { htmlAttributes = new { @class = "form-control" } })
                @Html.ValidationMessageFor(model => model.UserName, "", new { @class = "text-danger" })
            </div>
        </div>

        <div class="form-group">
            <div class="col-md-offset-2 col-md-10">
                <input type="submit" value="Save" class="btn btn-default" />
            </div>
        </div>
    </div>
}

<div>
    @Html.ActionLink("Back to List", "Index")
</div>
跟著步驟做到了這,試看看刪除與修改是否能正常運作,並觀察資料庫內資料的變化
※到了這裡應該要了解 :
-
Identity 如何與 Owin 的機制來搭配,主要是透過??
我們自定義的 IdentityConfig 這個類別,在這裡載入了 Identity 相關的物件與資訊 -
Identity 使用了什麼方法讓我們可以自訂義 DbContext 的類別,且透過 EF 來達成目的??
1. 最主要就是利用 DIP 的特性,且又繼承自 Identity 的類別所以很多功能可以不用重寫,讓 Identity 可以直接抽換原本的類別
2. 我們自定義的 AppIdentityDbContext : IdentityDbContext<AppUser> 類別,該泛型的中的類型 是我們自定義的 AppUser : IdentityUser 類別 -
Identity 提供了什麼物件,讓我們可以輕鬆的達到對於使用者的資料 - 新刪修查呢??
1. 燈燈 答案就是 UserManager<> 這個類別,這個類別在 Identity 中擔任了 管理使用者的 物件
2. 那 Identity 也是透過實現 DIP 達到了可以抽換底層模組的功能
3. 我們自定義的 AppUserManager : UserManager<AppUser> 類別,該泛型的中的類型 是我們自定義的 AppUser : IdentityUser 類別 -
那或許你有以下疑問 我們應該還自定義了 CustomPasswordValidator && CustomUserValidator 這兩個類別阿 !?
沒錯這兩個類別早就已經被 UserManager<>包裝起來了,那我們後續這兩個類別只是覆蓋原本的兩個屬性罷了
從 AppUserManager 這個自定義類別可以找到這兩行程式碼 :1.
manager.PasswordValidator = new CustomPasswordValidator() {..}這一行使用了自定義 CustomPasswordValidator 類別覆蓋掉了 Identity 原屬性。
2.
manager.UserValidator = new CustomUserValidator(manager) {..}這一行使用了自訂 CustomUserValidator 類別覆蓋掉了 Identity 原屬性
-
以上的解說應該要能大致了解,若不瞭解應該再重新做過一次或者了解其架構與物件的關聯性才能達到最好的學習效果。
多多指教!! 歡迎交流!!
你不知道自己不知道,那你會以為你知道