一直沒有認真依照SOAP來撰寫Web Service,難得有機會被要求依照SOAP開發及測試就遇到滿滿設定問題,使用SoapUI測試Web Service還一直接不到值,學藝不精只好做做筆記。
其實Web Service不必按照SOAP寫也能使用,特別是在寫.Net的時候可以加入服務參考,直接拉進專案還幫你建好class無比方便,但難得有這機會就認真筆記一下。
【開發環境】
開發工具:Visual Studio Professional 2015
.Net Framework:4.6.1
測試工具:SoapUI 5.4.0
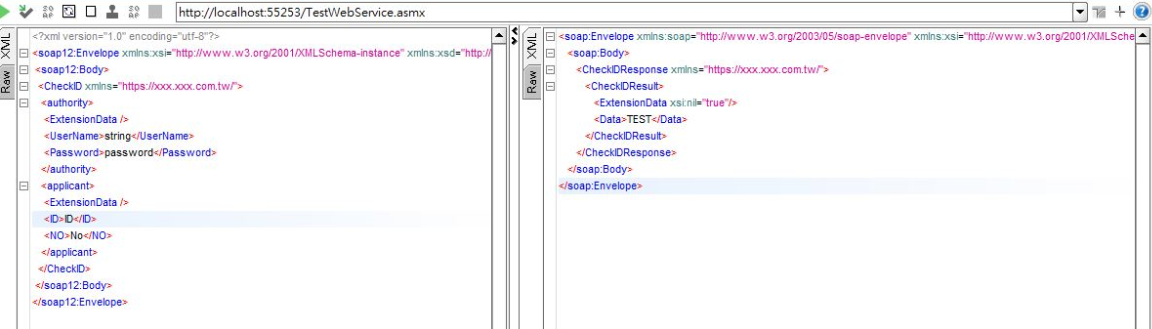
我們先來看看目標SOAP樣子如下。
<!--傳入-->
<?xml version="1.0" encoding="utf-8"?>
<soap12:Envelope xmlns:xsi="http://www.w3.org/2001/XMLSchema-instance"
xmlns:xsd="http://www.w3.org/2001/XMLSchema"
xmlns:soap12="http://www.w3.org/2003/05/soap-envelope">
 <soap12:Body>
  <CheckID xmlns="https://xxx.xxx.com.tw/">
   <authority>
    <ExtensionData />
    <UserName>string</UserName>
    <Password>string</Password>
   </authority>
   <applicant>
    <ExtensionData />
    <ID>string</ID>
    <NO>string</NO>
   </applicant>
  </CheckID>
 </soap12:Body>
</soap12:Envelope>

<!--回傳-->
<?xml version="1.0" encoding="utf-8"?>
<soap12:Envelope xmlns:xsi="http://www.w3.org/2001/XMLSchema-instance"
xmlns:xsd="http://www.w3.org/2001/XMLSchema"
xmlns:soap12="http://www.w3.org/2003/05/soap-envelope">
 <soap12:Body>
  <CheckIDResponse xmlns="https://xxx.xxx.com.tw/">
   <CheckIDResult>
    <ExtensionData xsi:nil="true"/>
    <Data>string</Data>
   </CheckIDResult>
  </CheckIDResponse>
 </soap12:Body>
</soap12:Envelope>
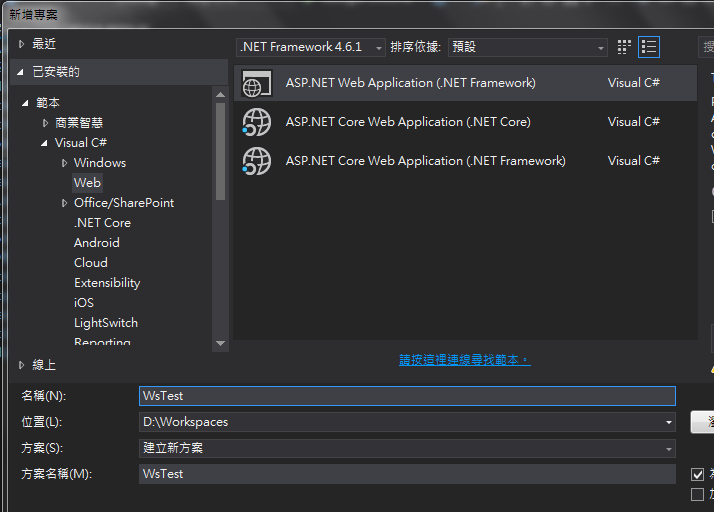
Step 1. 建立Web Service
我們先建立新的空白專案。
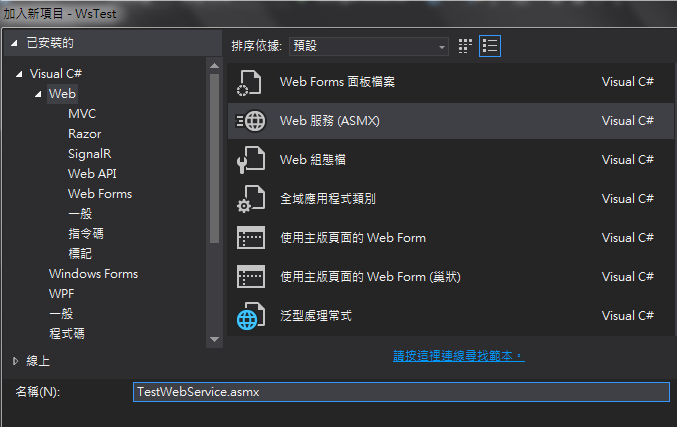
 專案建立好後,對方案點選『右鍵』>『加入』>『新增項目』,選擇加入「Web 服務(ASMX)」,這樣基本就完成了。
PS. 如果找不到的話左邊記得先選到『Web』。
Step 2. 建立Class
再來我們來建立傳入跟回傳的Class。
根據XML結構告訴了我們會傳入『CheckID』,並且namespace為「https://xxx.xxx.com.tw」,裡面還有兩個『authority』、『applicant』標籤,這兩個標籤分別各有內部屬性。
傳入物件的撰寫有兩點要注意,1. namespace 2. 物件的開頭是小寫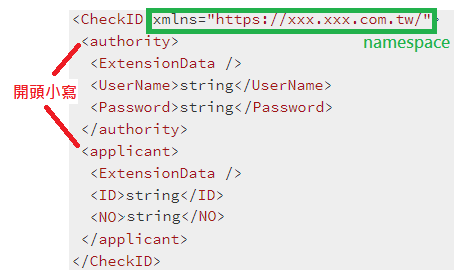
由於尼克物件的屬性就是喜歡用大寫(堅持個屁),因此在Class建立上也要特別處理。
    //加上namespace
    [XmlTypeAttribute(Namespace = "https://xxx.xxx.com.tw/")]
    [XmlRootAttribute("CheckID", Namespace = "https://xxx.xxx.com.tw/", ElementName = "CheckID", IsNullable = false)]
    public class CheckIDRequest
    {
        [XmlElement("authority")] //設定傳入標籤叫什麼
        public Authority Authority { get; set; }

        [XmlElement("applicant")]
        public Applicant Applicant { get; set; }
    }

    public class Authority
    {
        public string ExtensionData { get; set; }
        public string UserName { get; set; }
        public string Password { get; set; }
    }

    public class Applicant
    {
        public string ExtensionData { get; set; }
        public string ID { get; set; }
        public string NO { get; set; }
    }
現在來動手撰寫回傳物件,從結構上來看簡單許多,就是標籤包標籤,然後裡面有屬性的概念。
//加上Namespace
    [XmlTypeAttribute(Namespace = "https://xxx.xxx.com.tw/")]
    [XmlRootAttribute("CheckIDResponse", Namespace = "https://xxx.xxx.com.tw/",
        ElementName = "CheckIDResponse", IsNullable = false)]
    public class CheckIDResponse
    {
        //物件 內部包物件
        public CheckIDResult CheckIDResult { get; set; }
    }
    public class CheckIDResult
    {
        //標籤上的xsi:nil="true"
        [XmlElementAttribute(IsNullable = true)]
        public string ExtensionData { get; set; }
        public string Data { get; set; }
    }
Step 4. 建立Method
物件都建立完成,就可以加上最後一步建立Method,打開.asmx將內容修改如下。
        [WebMethod]
        [SoapDocumentMethod(ParameterStyle = SoapParameterStyle.Bare)] //soap body內不要有方法標籤
        public CheckIDResponse CheckID(CheckIDRequest data)
        {
            var result = new CheckIDResult { Data = "TEST" };
            return new CheckIDResponse { CheckIDResult= result };
        }
完成了! 現在來用Soap UI 來測試看看。