Windows 11、WSL2(Windows Subsystem for Linux)、Ubuntu22.04、Docker、miniconda、PyCorrector、Nlpcda、RTX4060、https://github.com/shibing624/pycorrector/blob/master/README.md、https://pypi.org/project/nlpcda/
最近在研究文本糾錯(Text Correction)功能,剛好使用到pycorrector這個套件裡面的macbert。
https://github.com/shibing624/pycorrector/tree/master/examples/macbert。
踩坑一遍後決定把細節(包含文件位置、環境建置、客製化資料建置與訓練方法)記錄下來。
也因為本人沒有獨立出來的Linux作業系統電腦,於是使用Windows內建子系統的方式達成目標,省去再搞一台有GPU電腦的困擾(我也懶的去用Kaggle和Google Colab訓練環境,最後是去京東商城買了一台RTX4060的天選四筆電回來重灌使用)。
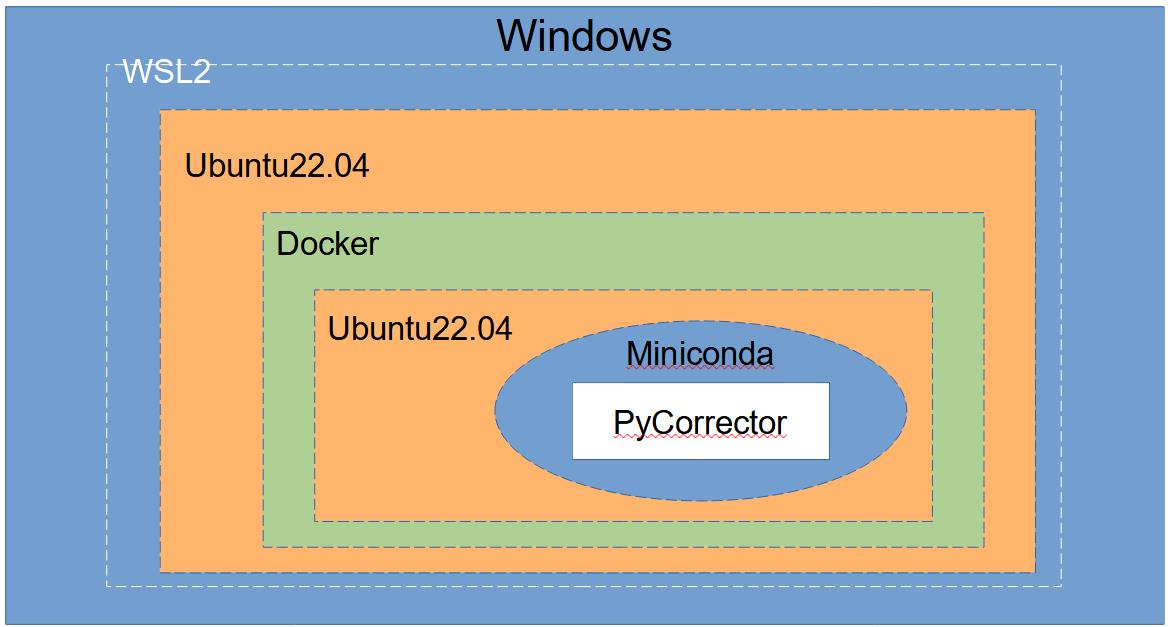
本篇的安裝架構如下圖,利用Windows的WSL2功能去安裝Ubuntu後裝Docker(裡面還是裝Ubuntu)將PyCorrector環境建起來。
一、WSL2安裝
可以直接把WSL想像成在Windows系統中生一個Linux系統出來,不但網路共用,資料還可以輕鬆的複製交換。
參考上面的網頁教學,依序執行和檢查即可安裝WSL2與Linux子系統。
1.啟用 Windows 子系統 Linux 版
進入Windows Powershell後,執行以下指令
	#2024.10.22更新
	#Enable-WindowsOptionalFeature -Online -FeatureName Microsoft-Windows-Subsystem-linux /all /norestart
	dism.exe /online /enable-feature /featurename:Microsoft-Windows-Subsystem-Linux /all /norestart
2.檢查執行 WSL 2 的需求
3.啟用虛擬機器功能
dism.exe /online /enable-feature /featurename:VirtualMachinePlatform /all /norestart4.下載 Linux 核心更新套件
	wsl.exe --update
	wsl.exe --install
5. 將 WSL 2 設定為預設版本
wsl --set-default-version 26.安裝您選擇的 Linux 發行版本
	#2024.10.22更新
	#wsl --install Ubuntu-22.04
	wsl --install -d Ubuntu-22.04
7.重開電腦,使用管理者模式開Powershell後再進行使用
補充指令:
移除原本Linux環境:wsl --unregister Ubuntu-22.04
列出可以安裝的版本:wsl --list --online
關閉WSL:wsl --shutdown
接下來的安裝操作建議用root身分,可下wsl -u root進入wsl ubuntu
二、進WSL後在宿主機Ubuntu-22.04安裝相關必須套件
1.先更新系統
apt update && apt upgrade
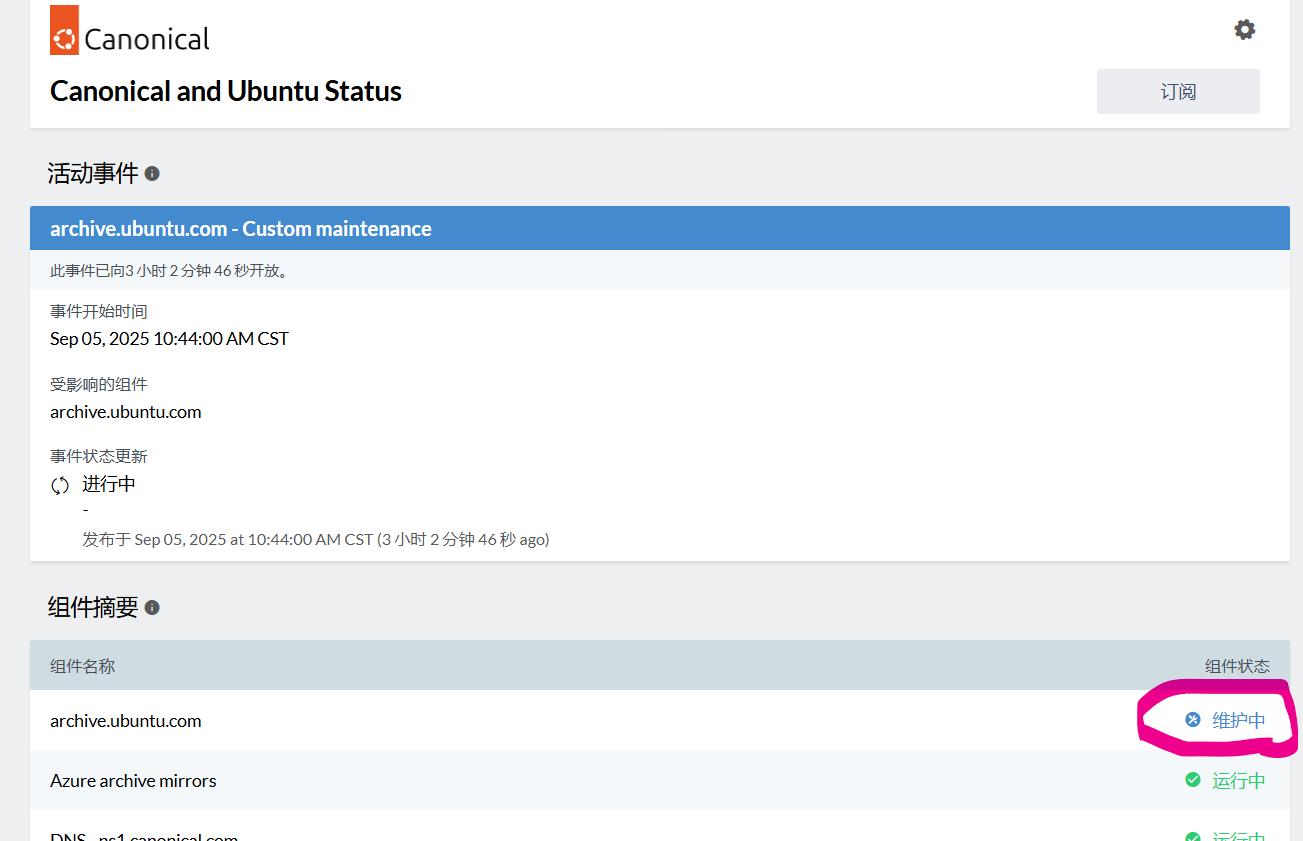
apt-get update -y2025.09.05更新
我在更新的過程中剛好遇到 archive.ubuntu.com、security.ubuntu.com 這兩個鏡像維護中導致無法 apt update (可至 https://status.canonical.com/ 確認)
可加入以下兩行增加鏡像位置後再執行 apt 相關指令
sed -i 's|http://archive.ubuntu.com/ubuntu/|http://free.nchc.org.tw/ubuntu/|g' /etc/apt/sources.list
sed -i 's|http://security.ubuntu.com/ubuntu/|http://free.nchc.org.tw/ubuntu/|g' /etc/apt/sources.list
2.安裝Docker
curl https://get.docker.com | sh3.安裝Nvidia Container Toolkit
https://docs.nvidia.com/datacenter/cloud-native/container-toolkit/latest/install-guide.html
	#2024.10.22修改,因使用root權限,將sudo拿掉
	curl -fsSL https://nvidia.github.io/libnvidia-container/gpgkey | gpg --dearmor -o /usr/share/keyrings/nvidia-container-toolkit-keyring.gpg \
 	&& curl -s -L https://nvidia.github.io/libnvidia-container/stable/deb/nvidia-container-toolkit.list | \
   	sed 's#deb https://#deb [signed-by=/usr/share/keyrings/nvidia-container-toolkit-keyring.gpg] https://#g' | \
   	tee /etc/apt/sources.list.d/nvidia-container-toolkit.list

	apt-get update
	apt-get install -y nvidia-container-toolkit
	nvidia-ctk runtime configure --runtime=docker
直接執行service docker start會發現服務怎樣都起不來,需要先調整以下設定

	#2024.10.22修改
	update-alternatives --config iptables
	输入1 从iptables-nft路径切换至iptables-legacy

	service docker start
4.拉Ubuntu22.04 Official Image
docker pull ubuntu:22.04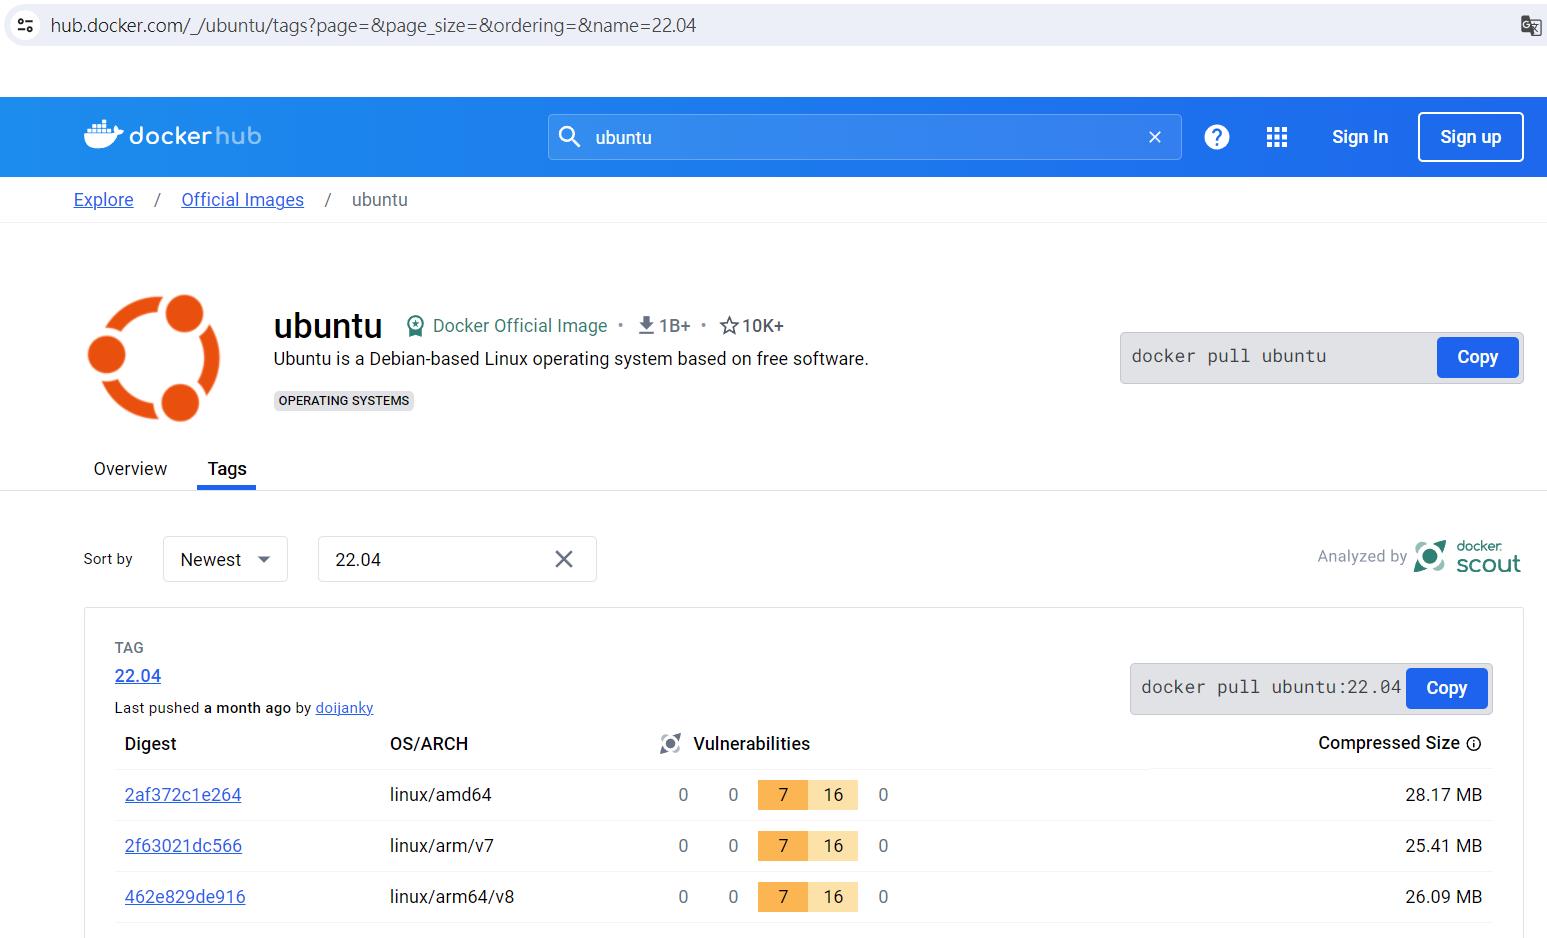
5.啟動Container
docker run -it --name pycorrector_train_server_container -m 32g --gpus all ubuntu:22.04 bash三、安裝Ubuntu Container環境中所需套件
這段也是官方沒有特別說明的,只寫使用pip install pycorrector,但實際上即使你的環境中已安裝cuda、cudnn等可以使用GPU,實際使用的時候還是會遇到套件問題。
我這邊就我安裝使用有遇到缺少的套件做補足,並列出安裝後會影響使用的套件版本。
1.更新系統,安裝必要使用套件
	apt update && apt upgrade -y
	apt-get update -y

	DEBIAN_FRONTEND=noninteractive apt-get install -yq tzdata  #選時區,默認關閉,下面指令去指定
	TZ=Asia/Taipei
	ln -snf /usr/share/zoneinfo/$TZ /etc/localtime && echo $TZ > /etc/timezone
	dpkg-reconfigure --frontend noninteractive tzdata

	apt install vim -y
	apt install zip -y
	apt-get install wget -y
2.安裝miniconda
	mkdir -p ~/miniconda3
	wget https://repo.anaconda.com/miniconda/Miniconda3-latest-Linux-x86_64.sh -O ~/miniconda3/miniconda.sh
	bash ~/miniconda3/miniconda.sh -b -u -p ~/miniconda3
	rm -rf ~/miniconda3/miniconda.sh
	~/miniconda3/bin/conda init bash
	~/miniconda3/bin/conda init zsh
3.建立conda環境
安裝到這裡你會發現conda不能用,也沒辦法啟用base環境,此時下source ~/.bashrc重新載入即可。
	source ~/.bashrc
	conda create -n pycorrector-env python=3.12 -y
	conda activate pycorrector-env

	#如果要刪除環境重建可用以下指令
	#conda remove --name pycorrector-env --all
4.安裝訓練文本糾錯模型所需要的套件以及cuda、cudnn環境
這裡比較雞肋的地方在pytorch_lightning這個套件的版本,我一開始沒指定版本裝了2.x版,結果執行訓練時console一直跳出TypeError: Trainer.__init__() got an unexpected keyword argument 'gpus',後來從github上找到別人也有反應一樣的問題,降版本為1.9.3後就正常。

	pip install pycorrector
	conda install pytorch==2.3.0 torchvision==0.18.0 torchaudio==2.3.0 pytorch-cuda=11.8 -c pytorch -c nvidia
	pip install pytorch_lightning==1.9.3#版本會影響到最後能不能訓練
	pip install chardet
	pip install yacs==0.1.8
我這邊裝的是cuda11.8搭配對應cudnn與torch的版本,若想裝其他版本,可以到torch官網去找自己喜歡的版本後使用對應的指令執行。
5.vi編輯器設定與container環境清理
這段也是我裝完後使用時發現的,在vi編輯器裡面打中文會變成亂碼,只需要補充設定即可。
	vi /etc/vim/vimrc
	於最後一行加上:set encoding=utf-8
接著清理Container安裝套件過程中產生的垃圾與Cache,這樣之後包Image出來時產出的檔案會小一點。
	#清理garbage
	apt-get clean
	rm -rf /var/lib/apt/lists/*


	#清理pip cache
	rm -rf ~/.cache/pip


	#清理conda缓存目錄中的下載的包文件、索引文件和不必要的缓存文件
	conda clean --all
四、開始產生自製資料集
1.收集新聞稿資料並切分句子
雖然官網上已有提供許多公開資料集使用,但如果未來需要針對特定領域去作文本糾錯,資料集還是得自己產生和parsing,既然都花時間研究了就研究的徹底一點,直接土法煉鋼連資料集都自己生。
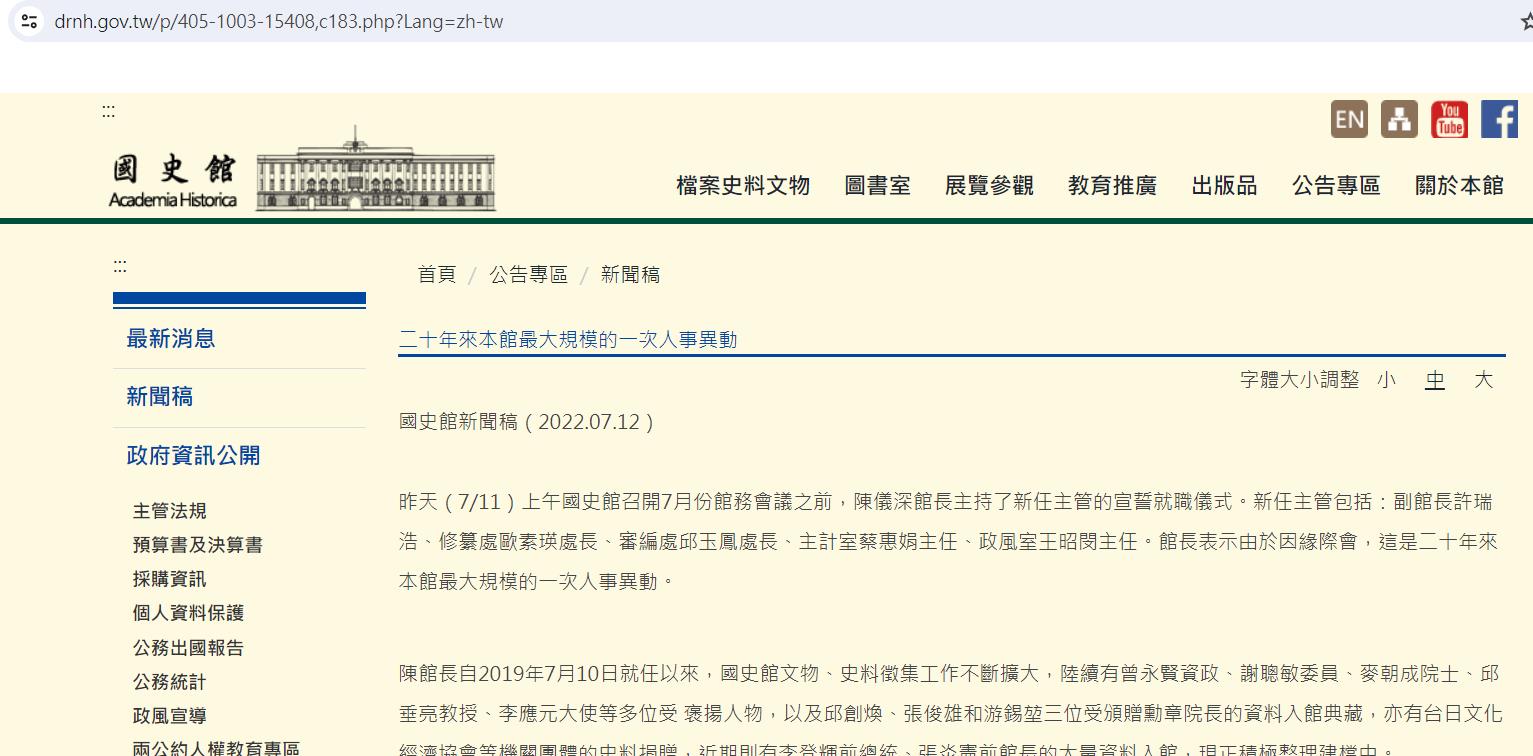
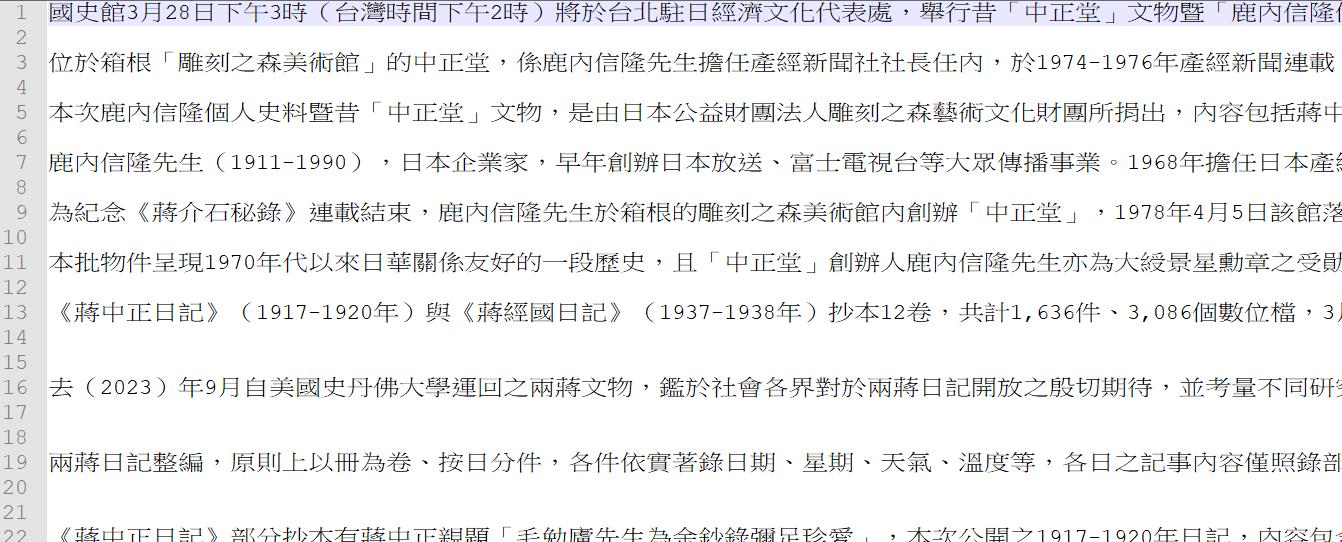
文本糾錯最麻煩的就是要產生出對應領域的資料集去做訓練,我們這裡使用國史館的新聞進行訓練和測試,抓個幾篇新聞稿下來後通通放在同一個資料夾history_data,做資料集產生的基礎。
材料準備好後就可以開始進行句子切割。
import os
#建立讀取完整路徑之function - List
def absoluteFilePathsList(directory):
    pathList = []
    for dirpath,_,filenames in os.walk(directory):
        for f in filenames:
            pathList.append(os.path.abspath(os.path.join(dirpath, f)))
    return pathList

def extractWordByPeriod(newsString, file_write):
    startIndex = 0
    #清乾淨雜訊
    newsString = newsString.replace(" ", "").replace(" ", "").replace("\r", "").replace("\n", "").replace("\"", "").replace("\t","")

    for i in range(0, len(newsString)):
        #以句號、逗號、分號做切分,並限定字元數不可小於20
        if newsString[i] == '。' or newsString[i] == ',' or newsString[i] == ';':
            #print(newsString[startIndex:i+1])
            #file_write.write(newsString[startIndex:i+1] + "\n")

            #此段處理超過500字元時分段
            checkContinue = True
            endIndex = i+1
            while checkContinue:
                if len(newsString[startIndex:endIndex]) <20:
                    break
                else:
                    checkContinue = False
                    #print("小於, " + str(startIndex) + ", " + str(endIndex))
                    file_write.write(bytes(newsString[startIndex:endIndex] + "\n", encoding="utf-8"))
                    startIndex = endIndex
import os
fileNamePathList = absoluteFilePathsList(r'D:\history_data')
file_write = open(r'D:\國史館資料_切句子.txt', 'wb')
try:
for filePath in fileNamePathList:
print(filePath)
with open(filePath, 'r', encoding="utf-8") as file:
# Read the content of the file
file_content = file.read()
# Print the content
#print("File Content:\n", file_content)
extractWordByPeriod(file_content, file_write)
except KeyboardInterrupt:
pass
finally:
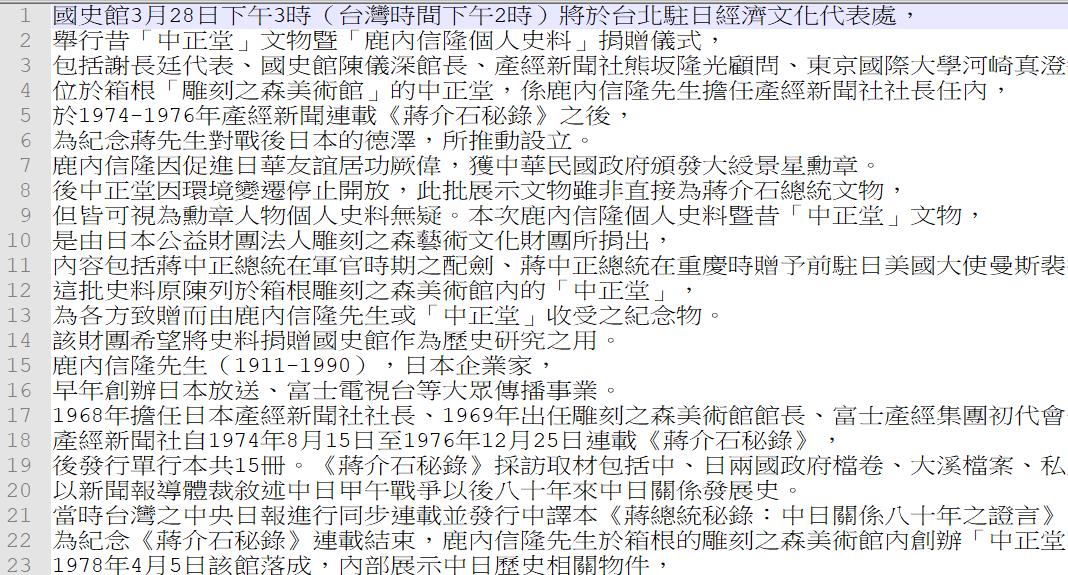
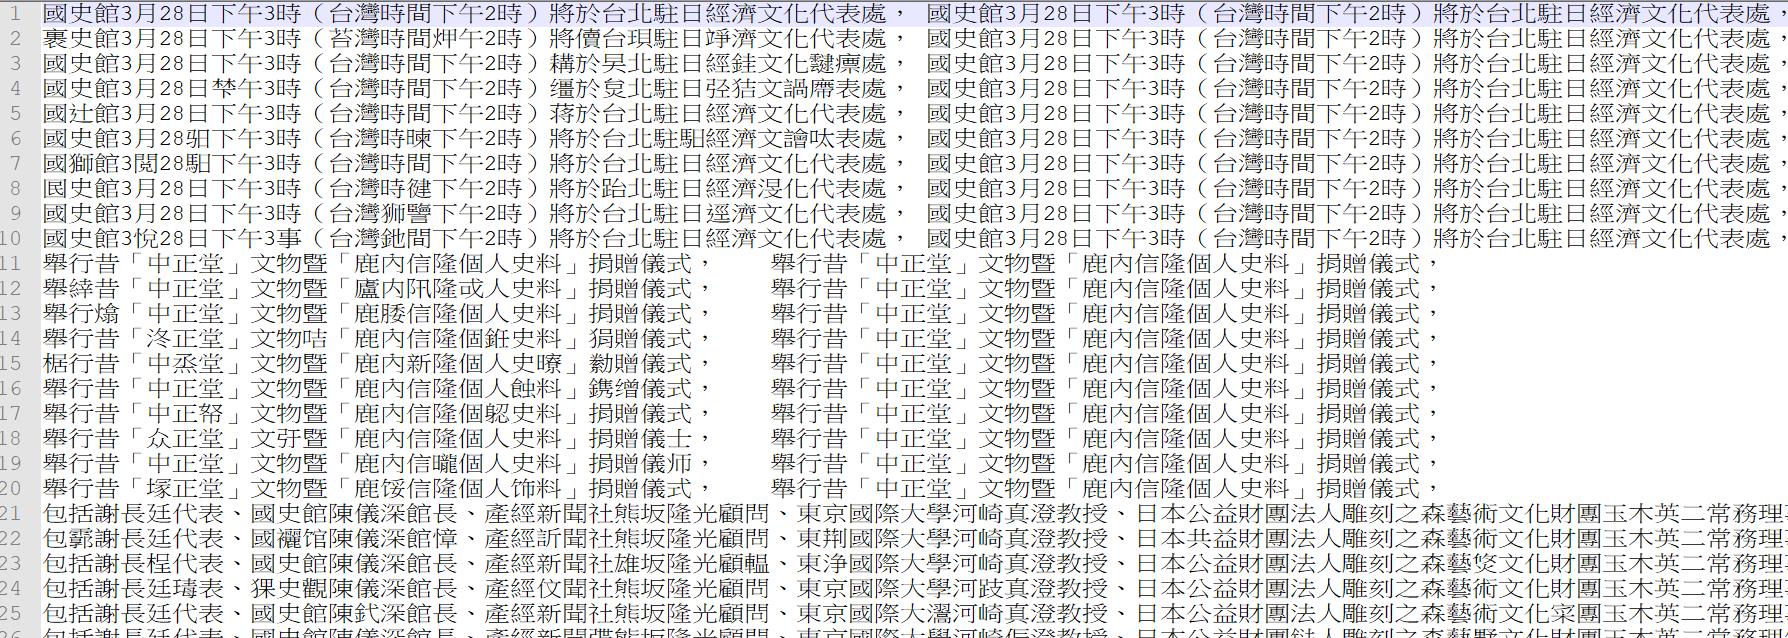
file_write.close()# 關閉檔案原則上就是把這堆阿哩阿紮的新聞稿內容中間的雜訊(全半形空白、換行符號、tab分隔符號、冒號)通通清掉後,依據句號、逗號、分號這三個標點符號去對文章的內容作切割,進而產生出基礎的句子,設定字元數不可小於20主要是怕切分出句子過短的材料導致模型訓練不佳。
切完就變成這樣,我們就有基礎可以拿去做同音字替換的資料了:
2.切分訓練、測試與驗證集
這個很簡單,其實問一下chatgpt就有code了。
import os
import random

# Function to split the text file into train, test, valid sets
def split_text_file(input_file, train_file, test_file, valid_file, split_ratio, seed=None):
    # Read all lines from the input file
    with open(input_file, 'r', encoding='utf-8') as f:
        lines = f.readlines()

    # Shuffle lines if seed is provided for reproducibility
    if seed is not None:
        random.seed(seed)
        random.shuffle(lines)

    # Calculate split sizes based on ratios
    total_lines = len(lines)
    train_split = int(total_lines * split_ratio[0])
    test_split = int(total_lines * split_ratio[1])

    # Split lines
    train_data = lines[:train_split]
    test_data = lines[train_split:train_split + test_split]
    valid_data = lines[train_split + test_split:]

    # Write to output files
    def write_to_file(file_name, data):
        with open(file_name, 'w', encoding='utf-8') as f:
            f.writelines(data)

    write_to_file(train_file, train_data)
    write_to_file(test_file, test_data)
    write_to_file(valid_file, valid_data)

# Example usage
#input_file = r'C:\Users\Ryuichi\Desktop\TEC_whl\訓練資料\newsWordnlpTraining.txt'
input_file = r'D:\國史館資料_切句子.txt'

train_file = r'D:\國史館資料_切句子Train.txt'
test_file = r'D:\國史館資料_切句子Test.txt'
valid_file = r'D:\國史館資料_切句子Valid.txt'

split_ratio = (0.7, 0.2, 0.1)  # 80% train, 10% test, 10% valid
seed = 42  # Optional seed for reproducibility, set to None for randomness

split_text_file(input_file, train_file, test_file, valid_file, split_ratio, seed)
3.使用套件進行同意字替換,產出大量訓練資料基礎
接著使用nlpcda套件進行每個句子隨機同音字的替換。

from nlpcda import Homophone

smw = Homophone(seed=123, create_num=10, change_rate=0.1)
file_write = open(r'D:\國史館資料_切句子Train_同音字替換.txt', 'wb')

try:
    with open(r'D:\國史館資料_切句子Train.txt', 'r', encoding="utf-8") as file:

        line = file.readline()
        while line is not None and line !='':
            #print(line)
            #開始nlp轉換
            rs1 = smw.replace(line)
            for s in rs1:
                file_write.write(bytes(s+'\t'+line, encoding="utf-8"))
            line = file.readline()

except KeyboardInterrupt:
    pass
finally:
    file_write.close()# 關閉檔案
產出以tab分隔的資料,前面為同音字替換後的錯誤句,後面為正確的句子(不過套件產生時預設會將第一句設定為前後都是正確句)。
4.轉換資料為訓練用的Json格式
在pycorrector中,macbert模型的資料input格式如下,基本上就是給一個對的句子和一個有錯的句子,並標示出兩個句子在第幾個index上的字不一樣(這裡要注意,兩個句子字數長度要一樣)。

撰寫程式使其轉換成對應Json的格式(以train資料集為例,其他改檔名轉換)。
try:

    train_file = r'D:\國史館資料_切句子Train_同音字替換.txt'
    test_file = r'D:\國史館資料_切句子Test_同音字替換.txt'
    valid_file = r'D:\國史館資料_切句子Valid_同音字替換.txt'

    file_write = open(r'D:\train.json', 'wb')
    file_write.write(bytes('[' + '\n', encoding="utf-8"))
    index = 10000
    with open(train_file, 'r', encoding="utf-8") as file:

        line = file.readline()
        while line is not None and line !='':
            index = index + 1
            lineSplit = line.replace(" ", "").replace(" ", "").replace("\r", "").replace("\n", "").split('\t')
            s1 = lineSplit[0]
            s2 = lineSplit[1]
            diff = [i for i in range(len(s1)) if s1[i] != s2[i]]

            #寫入json
            tag           = '"A3-'+str(index)+'-1"'
            original_text = s1
            correct_text  = s2

            file_write.write(bytes('    {' + '\n', encoding="utf-8"))
            file_write.write(bytes('        "id": ' + tag + ',\n', encoding="utf-8"))
            file_write.write(bytes('        "original_text": "' + original_text + '",\n', encoding="utf-8"))
            file_write.write(bytes('        "wrong_ids": [' + '\n', encoding="utf-8"))
            file_write.write(bytes('            ' + str(diff).replace("[", "").replace("]", "") + '\n', encoding="utf-8"))
            file_write.write(bytes('        ],'+ '\n', encoding="utf-8"))
            file_write.write(bytes('        "correct_text": "' + correct_text + '"\n', encoding="utf-8"))

            line = file.readline()
            if line is not None and line !='':
                file_write.write(bytes('    },' + '\n', encoding="utf-8"))
            else:
                file_write.write(bytes('    }' + '\n', encoding="utf-8"))

    file_write.write(bytes(']', encoding="utf-8"))
except KeyboardInterrupt:
    pass
finally:
    file_write.close()# 關閉檔案
五、下載pycorrector project進行調整佈置
直接把整個專案用zip的方式下載,載好後再進行內容微調。

將第四大點產生出來的Json檔放到pycorrector-master/examples/data/ryuichi/下,並調整pycorrector-master/examples/macbert/train_macbert4csc.yml對應的Datasets路徑
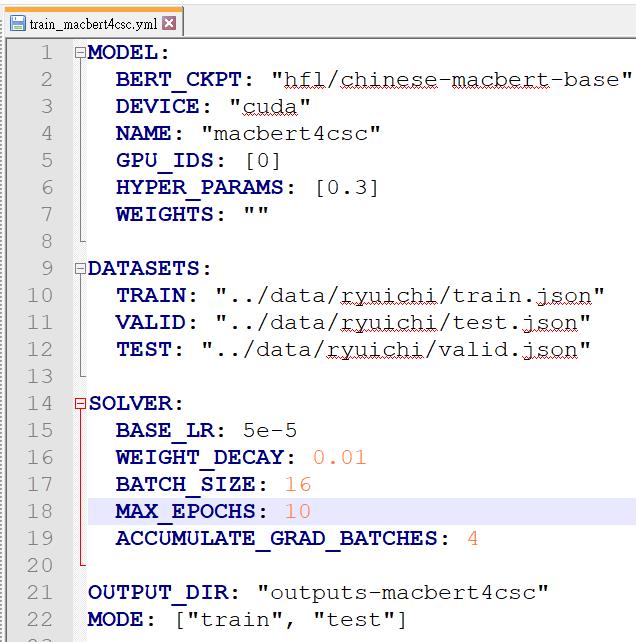
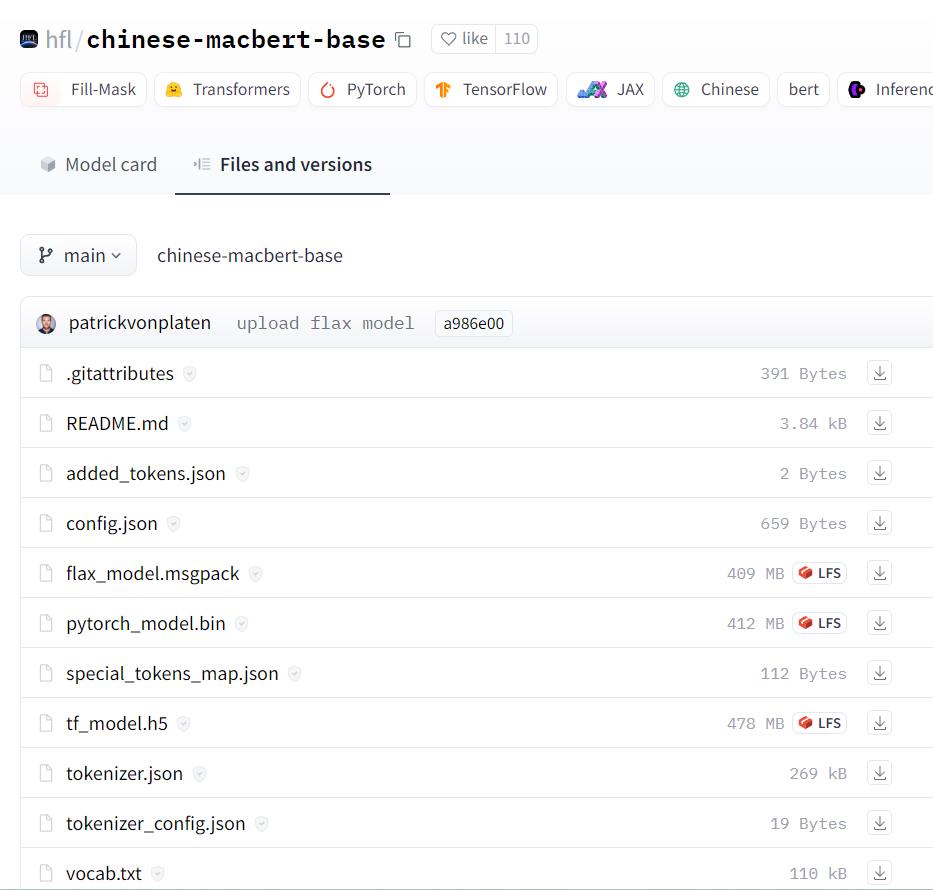
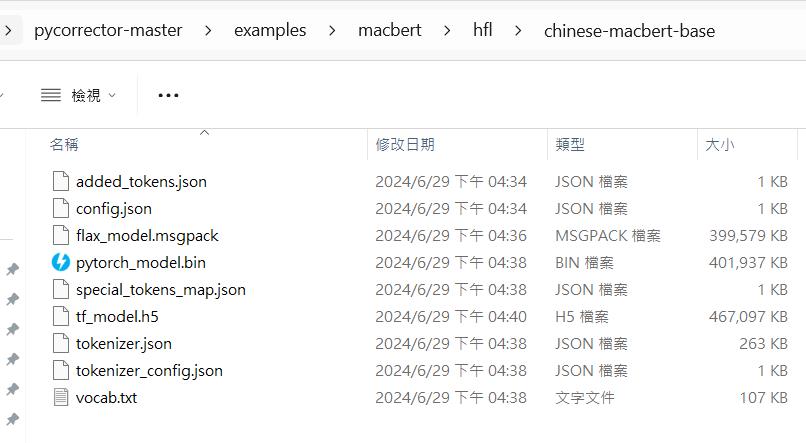
這裡,有一個參數BERT_CKPT,那是預設會去下載官方模型的位置,很弔詭的是,訓練模式會下載就算了,我實際做推論時,即使已經在程式中指定讀我產出的模型,他仍然會先去下載官方的模型到這個位置,我到後來一開始訓練時都直接去官方先把模型載下來放好(下圖畫面上全部的東西都載下來),確保日後container在無網路的狀態下執行訓練時不需要載模型。
六、將調整後的pycorrector專案包壓縮送至container解壓訓練
WSL裝完後應該可以在windows發現有一個Ubuntu路徑,我們將調整好的專案包壓縮放在tmp資料夾下。
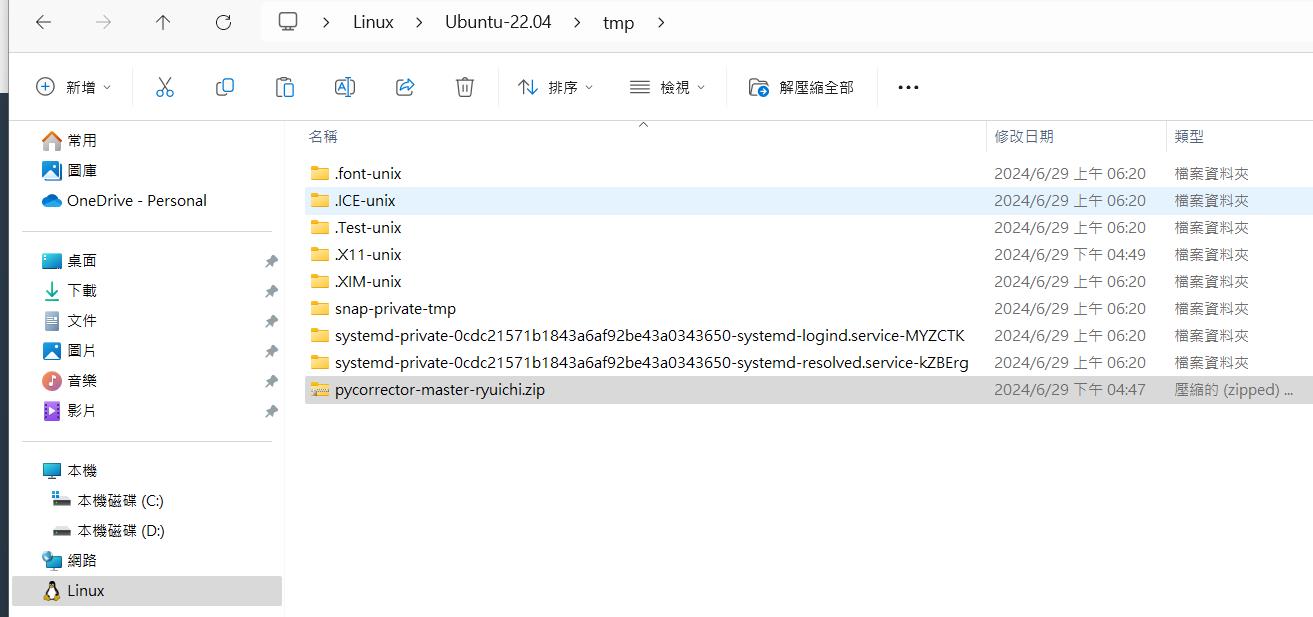
開啟powershell進入wsl,下copy指令把資料丟進container內。
docker cp /tmp/pycorrector-master-ryuichi.zip containerID:/
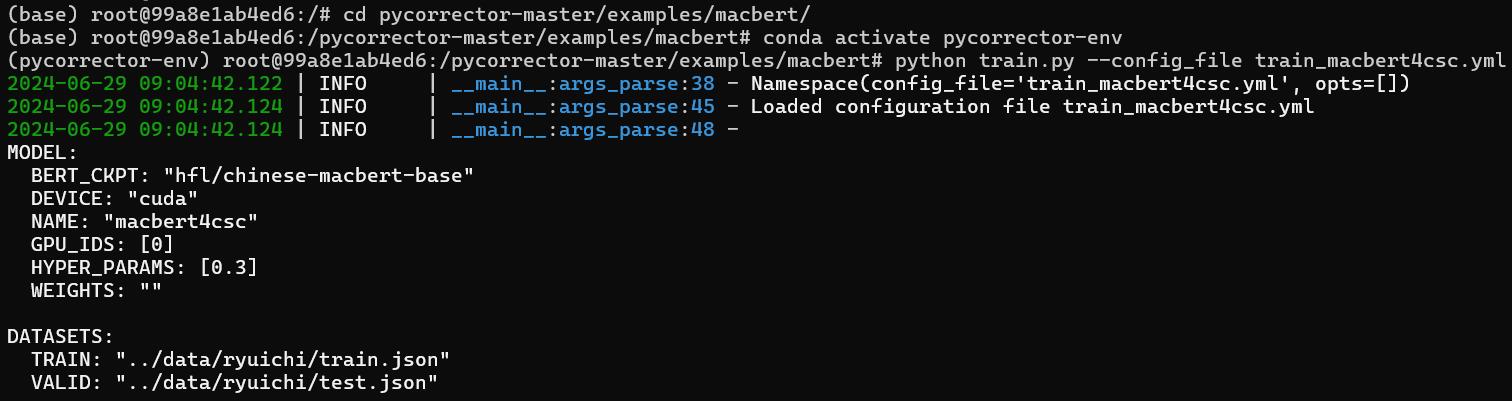
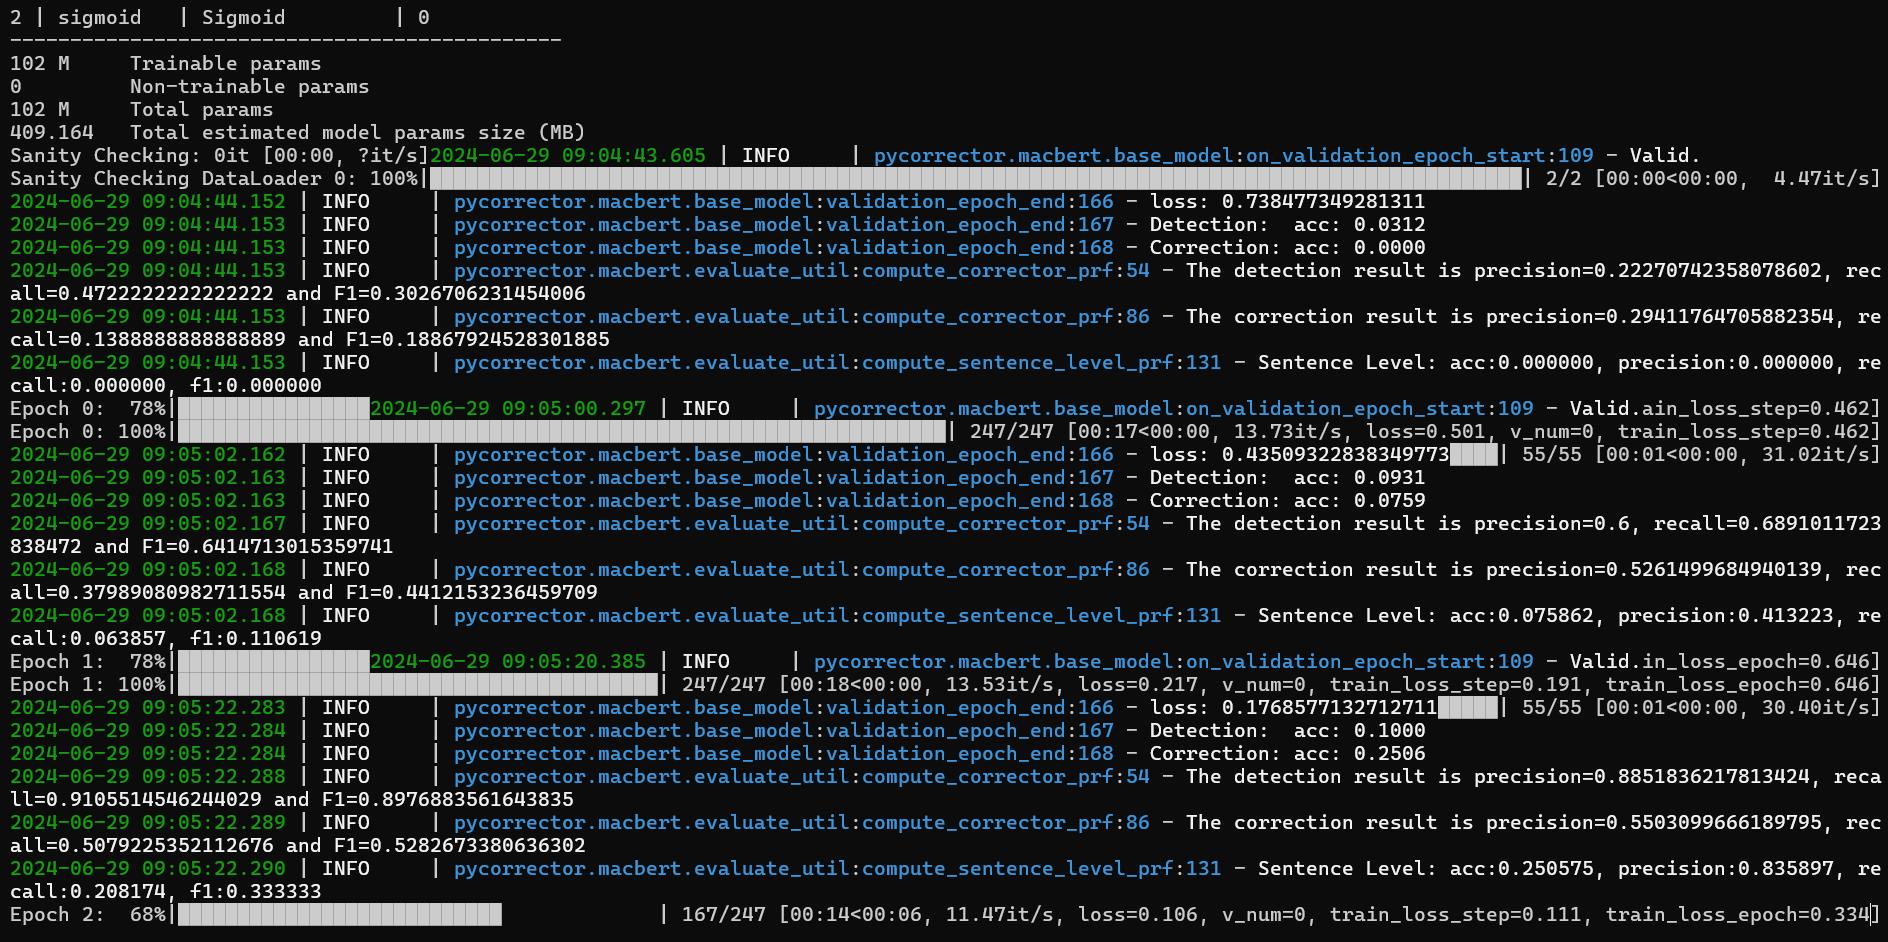
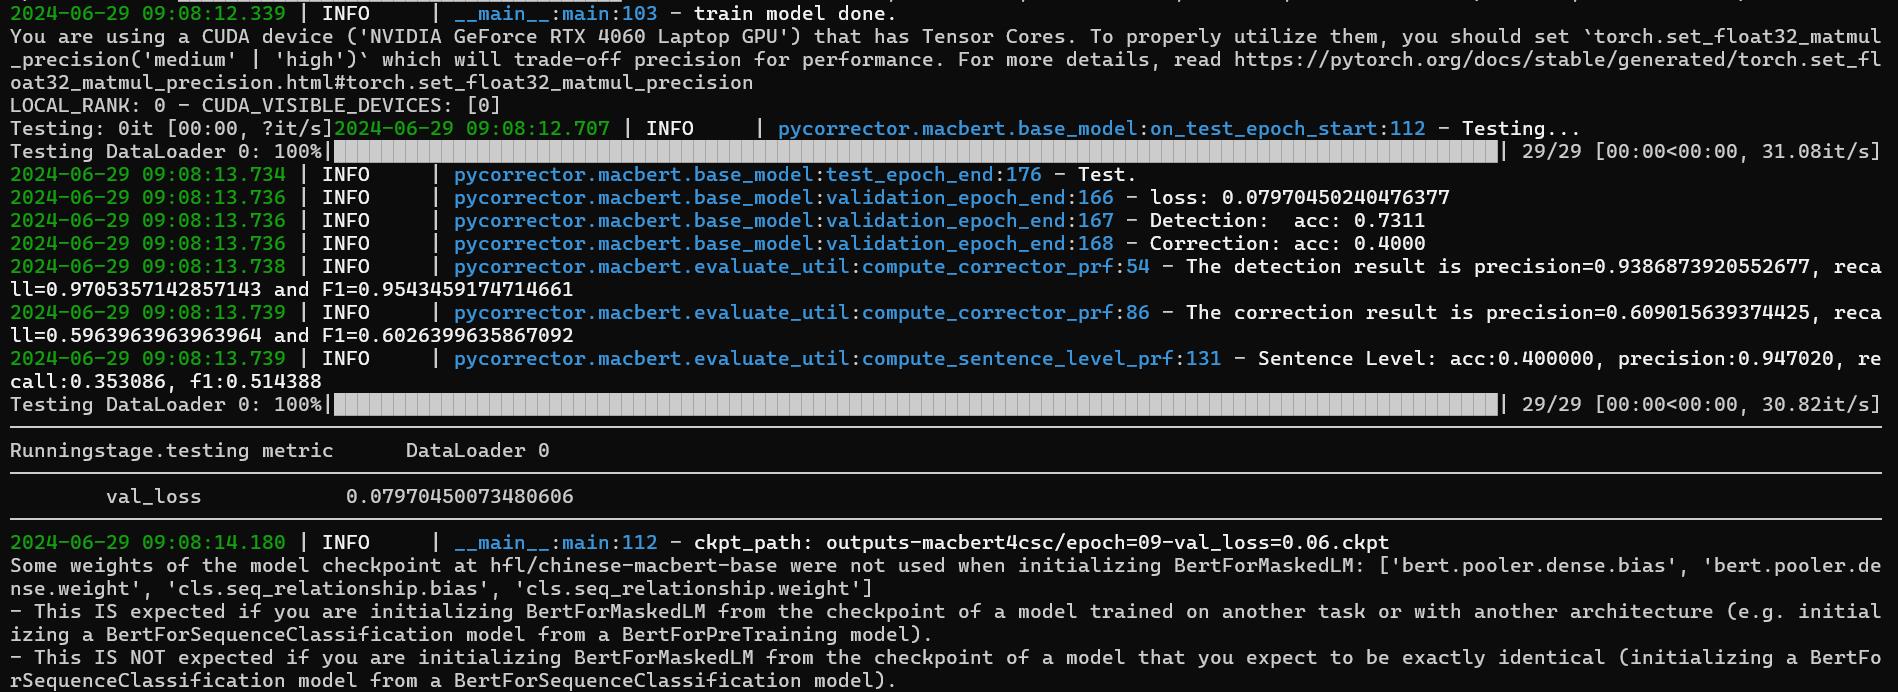
接著進入container,解壓縮專案後進入路徑/pycorrector-master/examples/macbert,啟動環境下python train.py --config_file train_macbert4csc.yml開始進行訓練。
cd pycorrector-master/examples/macbert/
conda activate pycorrector-env
python train.py --config_file train_macbert4csc.yml
下一篇,我將實際用python code撰寫SSL Server Client架構,搭配訓練出來的模型提供API進行推論呼叫,敬請期待。