工作日誌 Day 8
※ 使用 DrawerLayout+AppBarLayout 來產生左邊抽屜和上方menu 注意的事項 和 整體的架構
使用 DrawerLayout+AppBarLayout 來產生左邊抽屜和上方menu 注意的事項 和 整體的架構
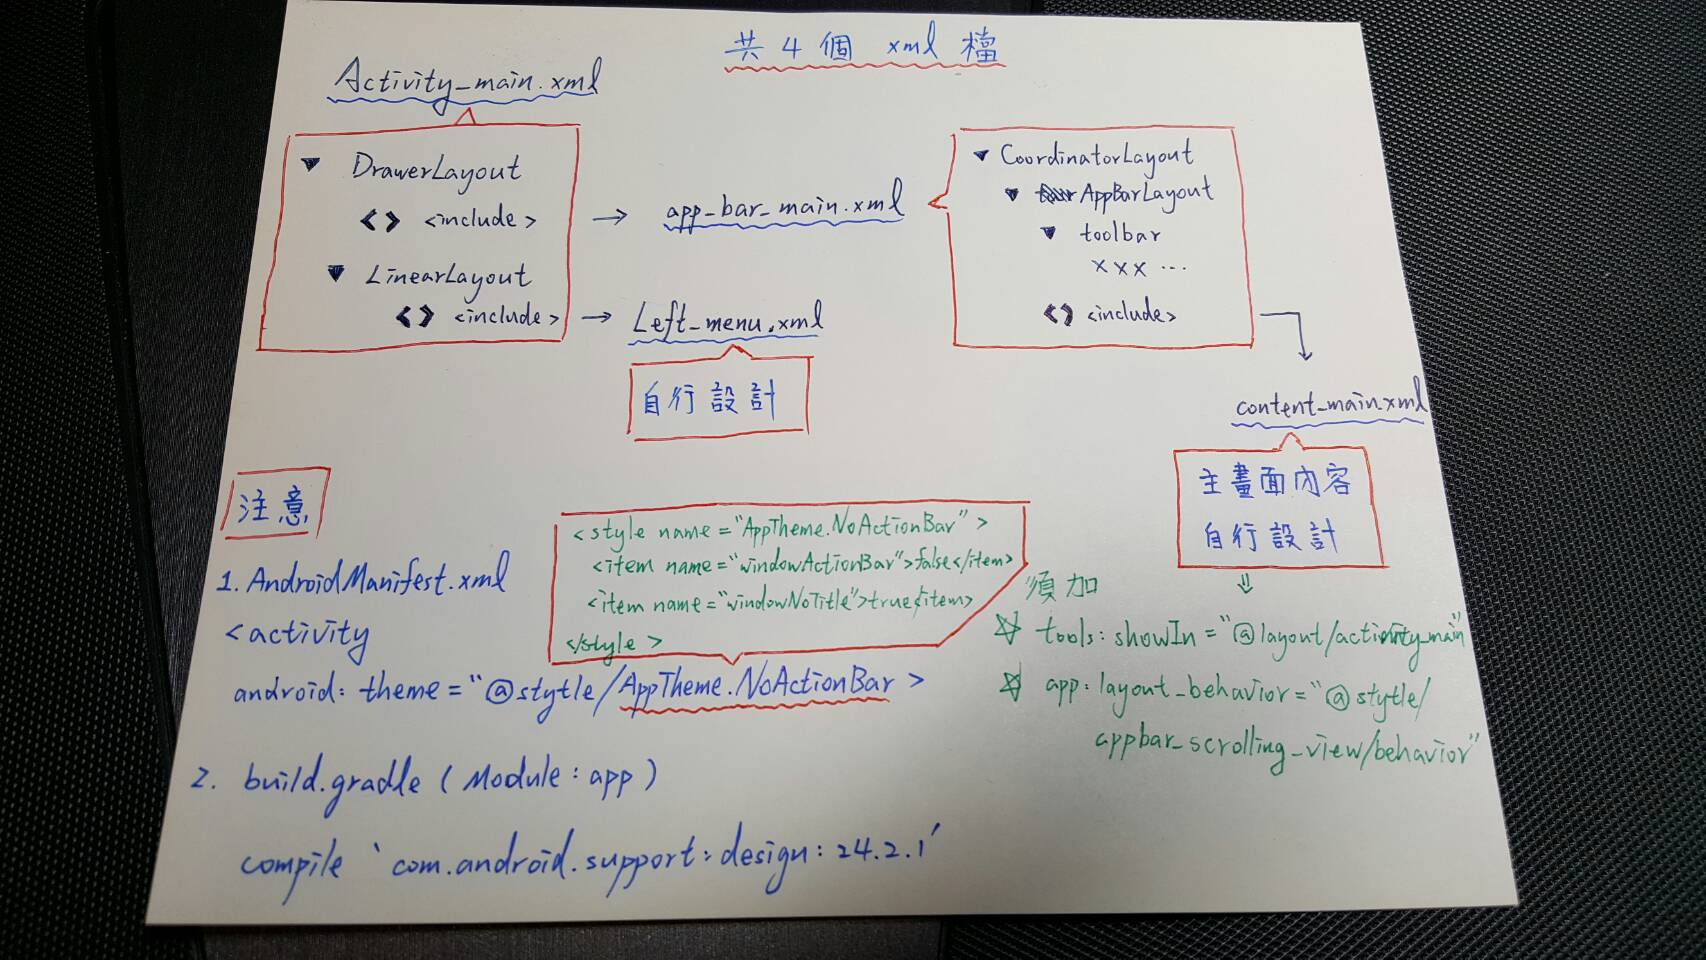
今天自己整理了一下使用 DrawerLayout+AppBarLayout 來產生左邊抽屜和上方menu
所需注意的事項 和 整體的架構圖,自己手畫的(不好看請見諒),大概長這樣
也貼一下架構圖在Android Studio裡的架構長相
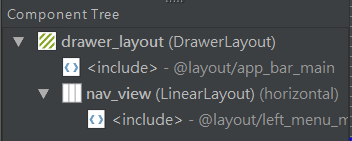
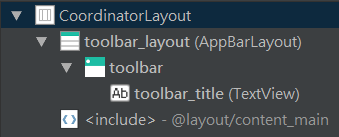
就是我在上面畫的那兩個紅框框的內容
配合上圖,我來解釋一下
首先要使用必須在 AndroidManifest.xml 檔裡的 <activity> 或<application>標籤內 加上
android:theme="@style/AppTheme.NoActionBar"
像這樣
<?xml version="1.0" encoding="utf-8"?>
<manifest xmlns:android="http://schemas.android.com/apk/res/android"
    package="com.example.ystar_000.myapplication">
    <application
        android:allowBackup="true"
        android:icon="@mipmap/ic_launcher"
        android:label="@string/app_name"
        android:supportsRtl="true"
        android:theme="@style/AppTheme.NoActionBar">
        <activity android:name=".Activity.MainActivity">
            <intent-filter>
                <action android:name="android.intent.action.MAIN" />

                <category android:name="android.intent.category.LAUNCHER" />
            </intent-filter>
        </activity>
    </application>
</manifest>
然後在你的 style.xml 檔案裡加上這個
<style name="AppTheme.NoActionBar">
    <item name="windowActionBar">false</item>
    <item name="windowNoTitle">true</item>
</style>
意思是 不要使用 ActionBar ,你可以試著把false改成true
你的應用程式,會馬上崩潰給你看 (因為發生衝突)
第二行是把原本的標題列拿掉 (當然 因為我們要放上新menu )
接著,要在 build.gradle ( Module:app ) 內加上
compile 'com.android.support:design:24.2.1'
因為使用到 AppBarLayout 所以要加上這條
再來,我把實現以上架構的程式碼貼出,方便給客官參考一下
首先是 Activity_main.xml
<?xml version="1.0" encoding="utf-8"?>
<android.support.v4.widget.DrawerLayout
    xmlns:android="http://schemas.android.com/apk/res/android"
    xmlns:app="http://schemas.android.com/apk/res-auto"
    xmlns:tools="http://schemas.android.com/tools"
    android:id="@+id/drawer_layout"
    android:layout_width="match_parent"
    android:layout_height="match_parent"
    android:fitsSystemWindows="true"
    tools:openDrawer="start">

    <include layout="@layout/app_bar_main" />

    <LinearLayout
        android:id="@+id/nav_view"
        android:layout_width="250dp"
        android:layout_height="match_parent"
        android:layout_gravity="left"
        android:orientation="horizontal">

        <include
            layout="@layout/left_menu_main"
            android:layout_width="match_parent"
            android:layout_height="match_parent"
            android:layout_weight="1" />
    </LinearLayout>
</android.support.v4.widget.DrawerLayout>
再來是 app_bar_main.xml
<?xml version="1.0" encoding="utf-8"?>
<android.support.design.widget.CoordinatorLayout
    xmlns:android="http://schemas.android.com/apk/res/android"
    xmlns:app="http://schemas.android.com/apk/res-auto"
    xmlns:tools="http://schemas.android.com/tools"
    android:layout_width="match_parent"
    android:layout_height="match_parent"
    android:fitsSystemWindows="true">

    <android.support.design.widget.AppBarLayout
        android:layout_width="match_parent"
        android:layout_height="wrap_content"
        android:theme="@style/AppTheme.AppBarOverlay">

        <android.support.v7.widget.Toolbar
            android:id="@+id/toolbar"
            android:layout_width="match_parent"
            android:layout_height="?attr/actionBarSize"
            android:background="?attr/colorPrimary"
            app:popupTheme="@style/AppTheme.PopupOverlay" />

    </android.support.design.widget.AppBarLayout>

    <include layout="@layout/content_main" />

</android.support.design.widget.CoordinatorLayout>
剩下兩個檔案
→ left_menu.xml 左邊的抽屜,就自行發揮創意吧
→ content_main.xml 主畫面的內容,這邊也是自行發揮
只是要注意,一定要在 content_main.xml 內加入
app:layout_behavior="@string/appbar_scrolling_view_behavior"
tools:showIn="@layout/activity_main"
第一行不加的話,你的主畫面內容會被塞進上方menu內
第二行是因為我們是從主xml檔include兩次才到達這個檔案(從架構圖來看)
要告訴程式,我們這個畫面是要給activity_main用的
最後是主程式 main_activity.java 要在onCreate()內加入
Toolbar toolbar = (Toolbar) findViewById(R.id.toolbar);
toolbar.setTitle("");
setSupportActionBar(toolbar);

DrawerLayout drawer = (DrawerLayout) findViewById(R.id.drawer_layout);
ActionBarDrawerToggle toggle = new ActionBarDrawerToggle(
        this, drawer, toolbar, R.string.navigation_drawer_open, R.string.navigation_drawer_close);
drawer.setDrawerListener(toggle);
toggle.syncState();
然後實作這三個必要方法
// 讓點擊其他地方的時候,抽屜可以收起來
@Override
public void onBackPressed() {
    DrawerLayout drawer = (DrawerLayout) findViewById(R.id.drawer_layout);
    if (drawer.isDrawerOpen(GravityCompat.START)) {
        drawer.closeDrawer(GravityCompat.START);
    } else {
        super.onBackPressed();
    }
}

// 上方menu的外表
@Override
public boolean onCreateOptionsMenu(Menu menu) {
    // Inflate the menu; this adds items to the action bar if it is present.
    getMenuInflater().inflate(R.menu.main_menu, menu);
    return super.onCreateOptionsMenu(menu);
}

// menu被點擊的設定
@Override
public boolean onOptionsItemSelected(MenuItem item) {
    int id = item.getItemId();
    return super.onOptionsItemSelected(item);
}
大概簡單介紹到這邊,我覺得一定還有別的設計方法
只是雖然這個設計方法需要用到4個xml檔
但優點就是可以各種"客製化"啊啊啊
附上成品圖

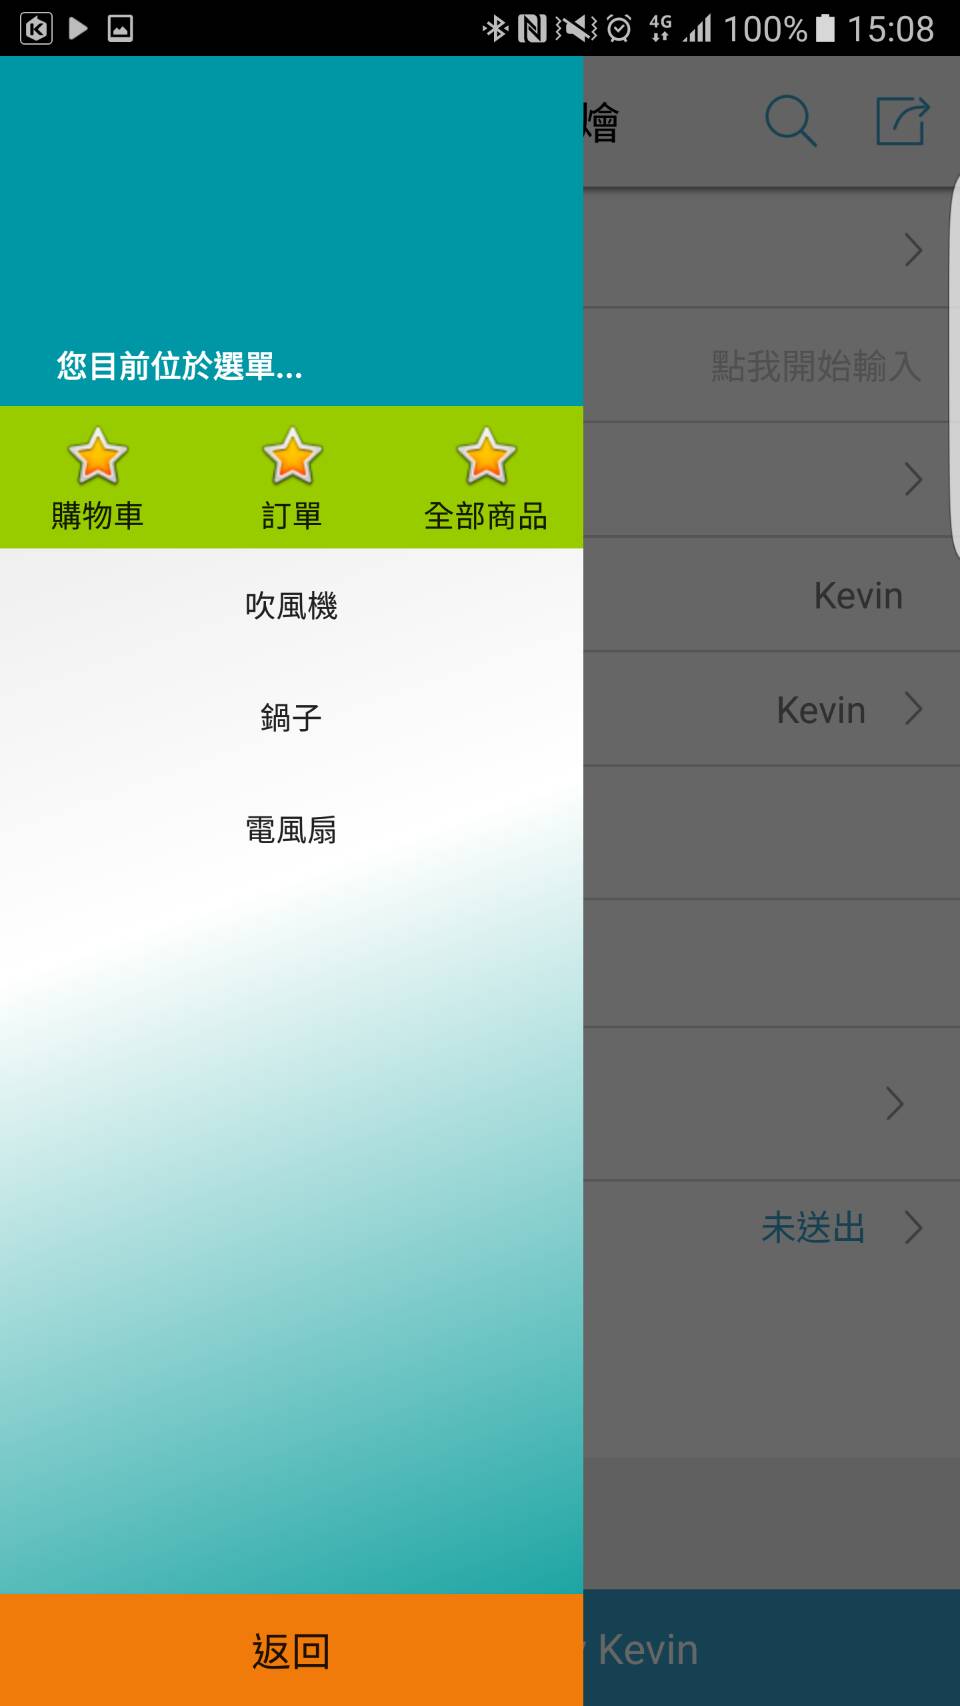 有看我過的其他文章的話,就會發現,又是這個醜醜的menu!!!!!! 沒錯...
 等等要來美化他了...
以上
資料來源
自己摸索....
http://www.bkjia.com/Androidjc/993003.html