工作日誌 Day 17-18
※ UltimateRecyclerView + CardView 的使用
※ Charles 查理/花瓶的簡介
※ Android Studio 的 Terminal 改用 Cygwin
※ 首頁主畫面生成研究
※ UltimateRecyclerView + CardView 的使用
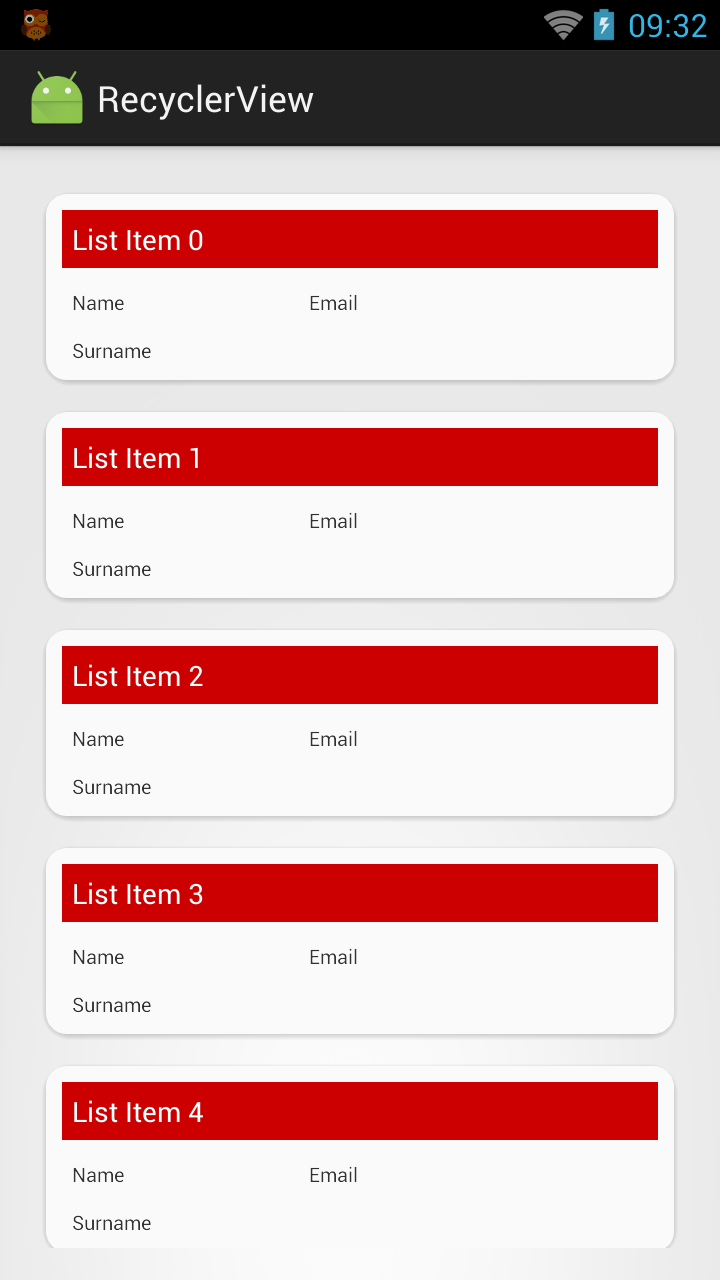
畫面生成是單純用一個 UltimateRecyclerView 然後選用 LinearLayoutManager
再把產生個別項目的adapter裡的layout外加了一層 CardView
是為了讓 UltimateRecyclerView 產生的每個項目 看起來像是一張一張的卡片般 (排版起來較好看,如下圖)
 結果一使用CardView後
按下編譯跳出了類似以下錯誤
" No resource found that matches the given name (at 'cardBackgroundColor' with value '?android:attr/colorBackgroundFloating'). "
關鍵字是這行
'?android:attr/colorBackgroundFloating'
後來查了原因
是因為同時使用了 facebook跟cardView的套件 如下
compile ('com.android.support:cardview-v7:23.2.1')
compile 'com.facebook.android:facebook-android-sdk:4.6.0'
他們都同時用到了
'?android:attr/colorBackgroundFloating'
為了解決以上問題,找到的暫時解是
只要把 CardView的版本降低
compile ('com.android.support:cardview-v7:23.2.0')
就不會發生衝突了
※ Charles 查理/花瓶的簡介
簡單介紹查理,他是debug的神物
他主要是用來 "監測網路封包"
簡單來說就是,它可以幫我偵查任何我與伺服器溝通的封包
譬如說,我點擊了某個商品後
APP會傳送要求向伺服器要這個商品的即時售價與優惠訊息等
伺服器接收到要求後,就會把資料Response回來
此時如果你有打開查理這個程式
他就會幫你 解析這個 要求 和 Response
你可以很輕鬆的直接看到 APP傳送了什麼要求出去 這個要求的詳細內容
跟 伺服器 Response 回了哪些資料
我就是利用查理的這個功能
快速查出伺服器回傳的換購商品資訊放在哪裡
至於怎麼使用他
我查到這個網站寫得不錯
有興趣的朋友可以參考
※ Android Studio 的 Terminal 改用 Cygwin
Cygwin簡單說就是讓你可以在Windows的環境下使用Linux指令
安裝設定請參考 -> 連結
這邊只記錄一下安裝好後
在Android Studio裡的設定
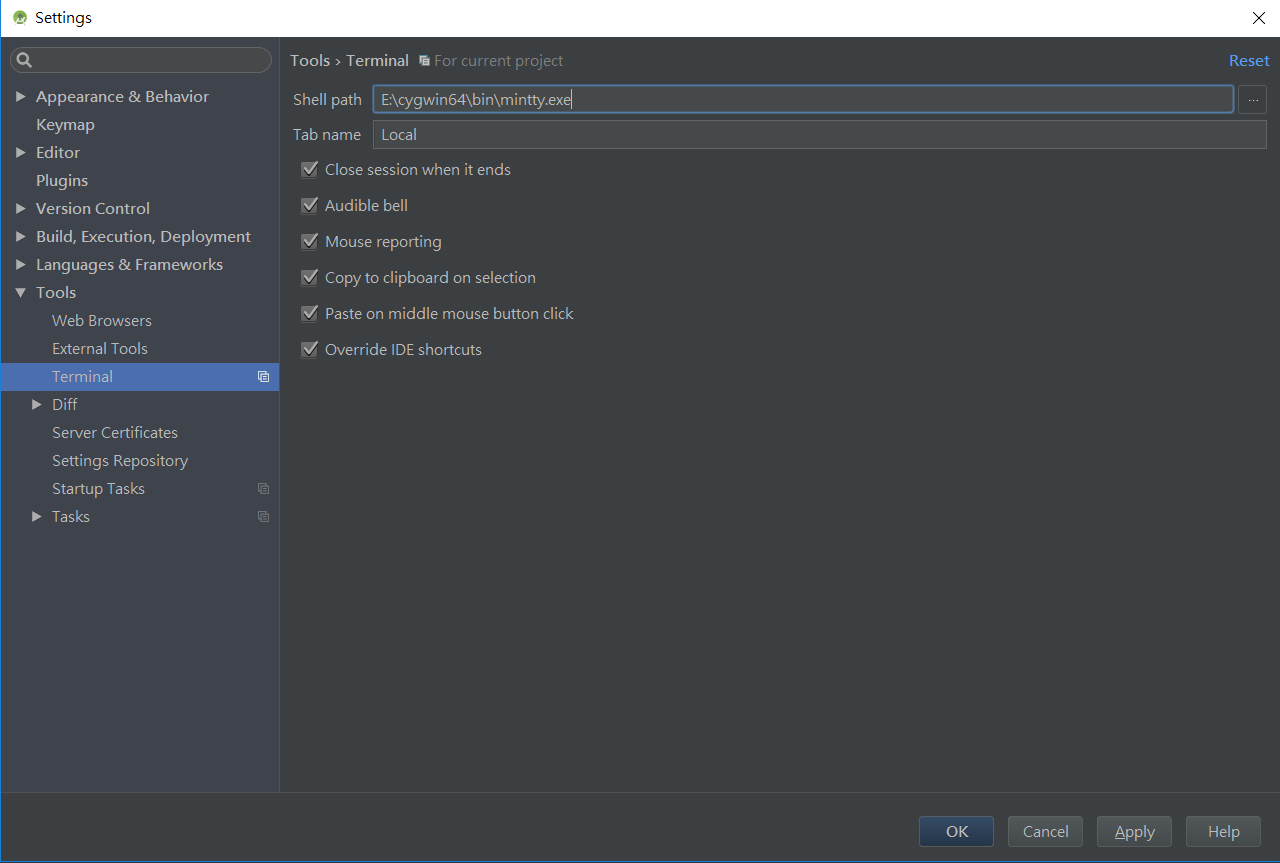
打開Android Studio 按下 Ctrl + Alt + S (Settings)
找到 Tools 裡面的 Terminal
在 Shell path 填上你Cygwin安裝的位置即可 例如: E:\cygwin64\bin\mintty.exe
 接著按下 " OK "
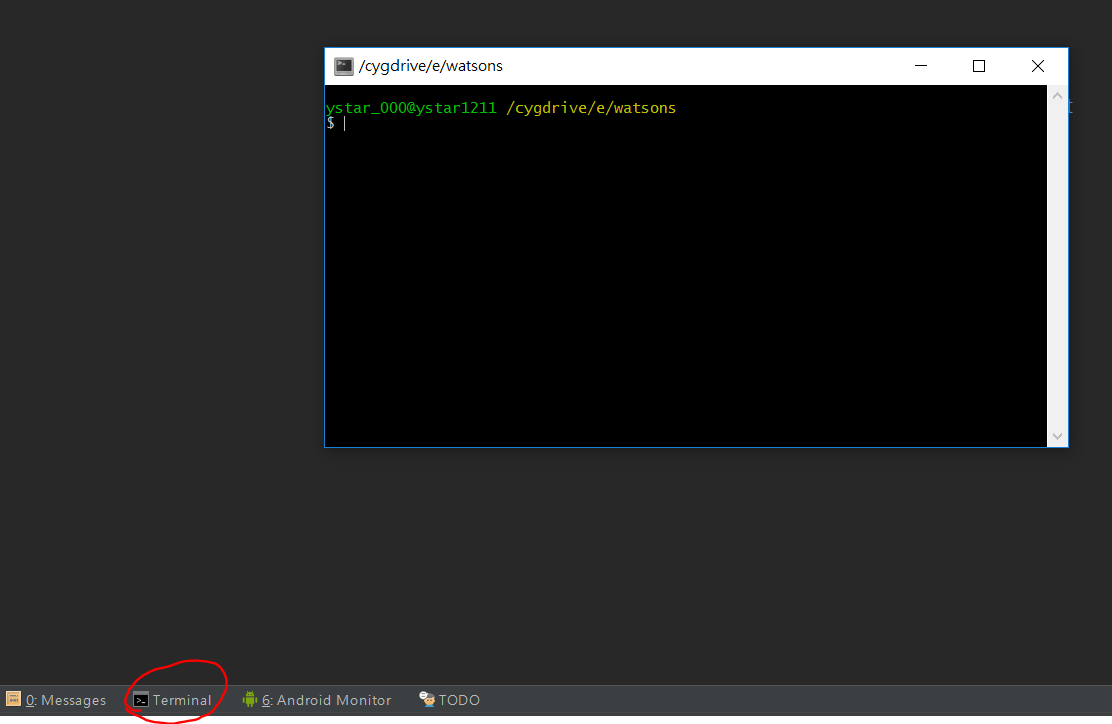
這邊有個最重要的一步
重開你的Android Studio
重開後按下 視窗最下面的 Terminal 出現以下畫面就成功拉
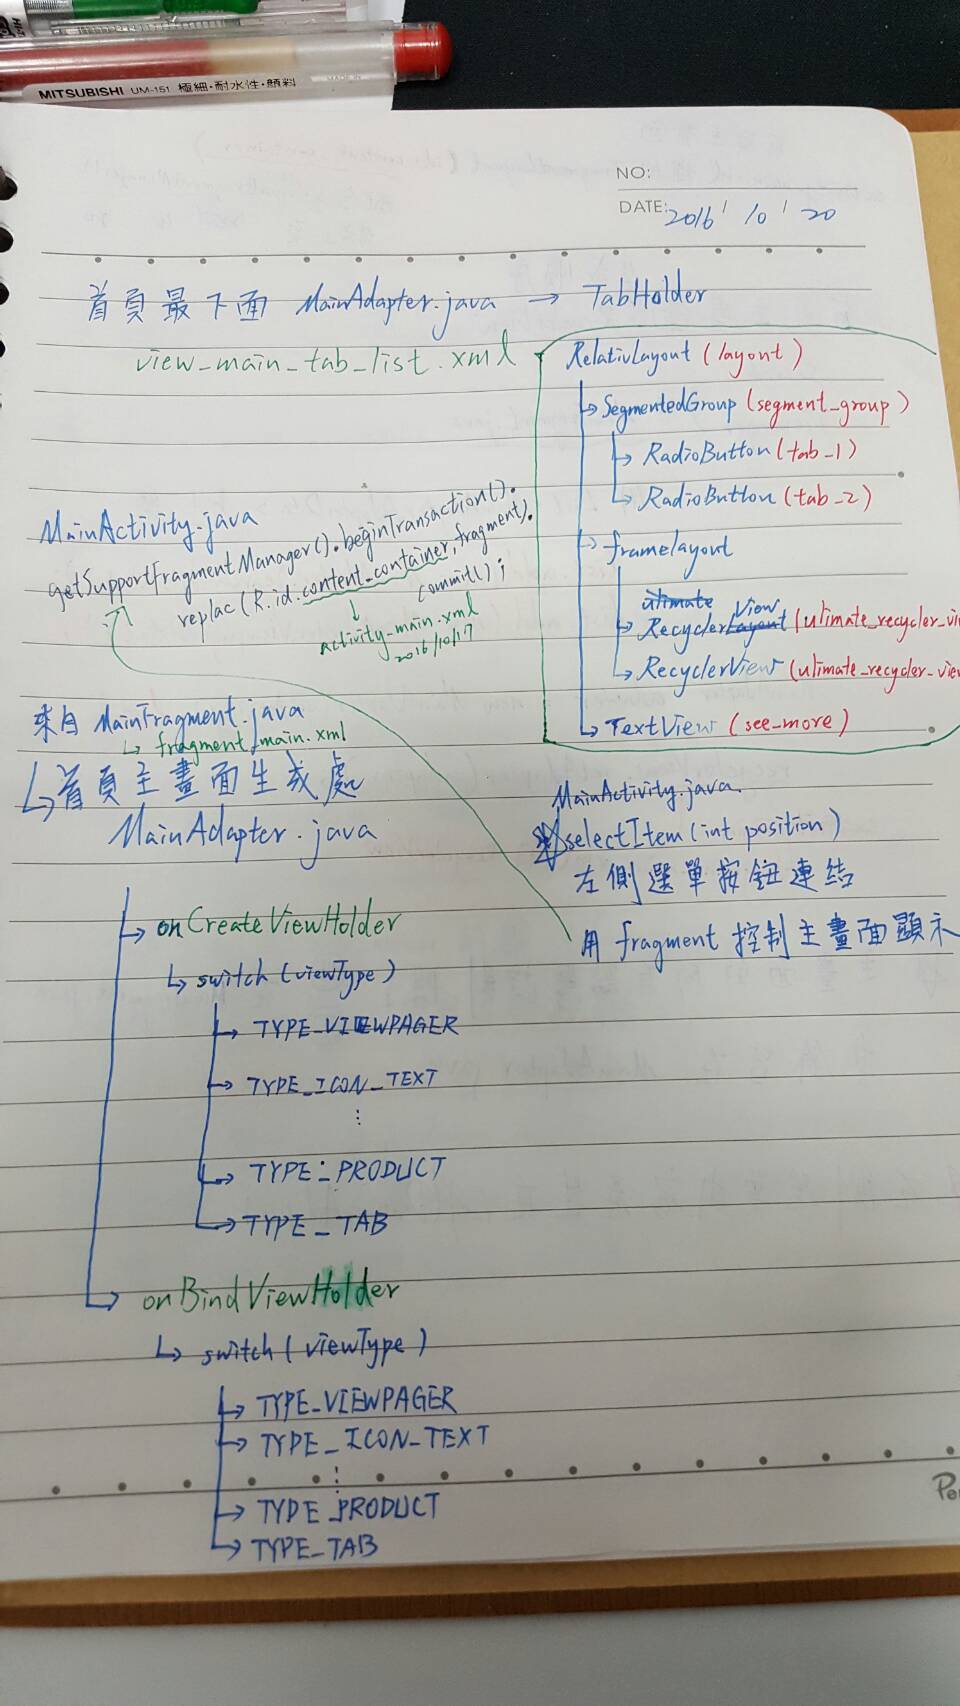
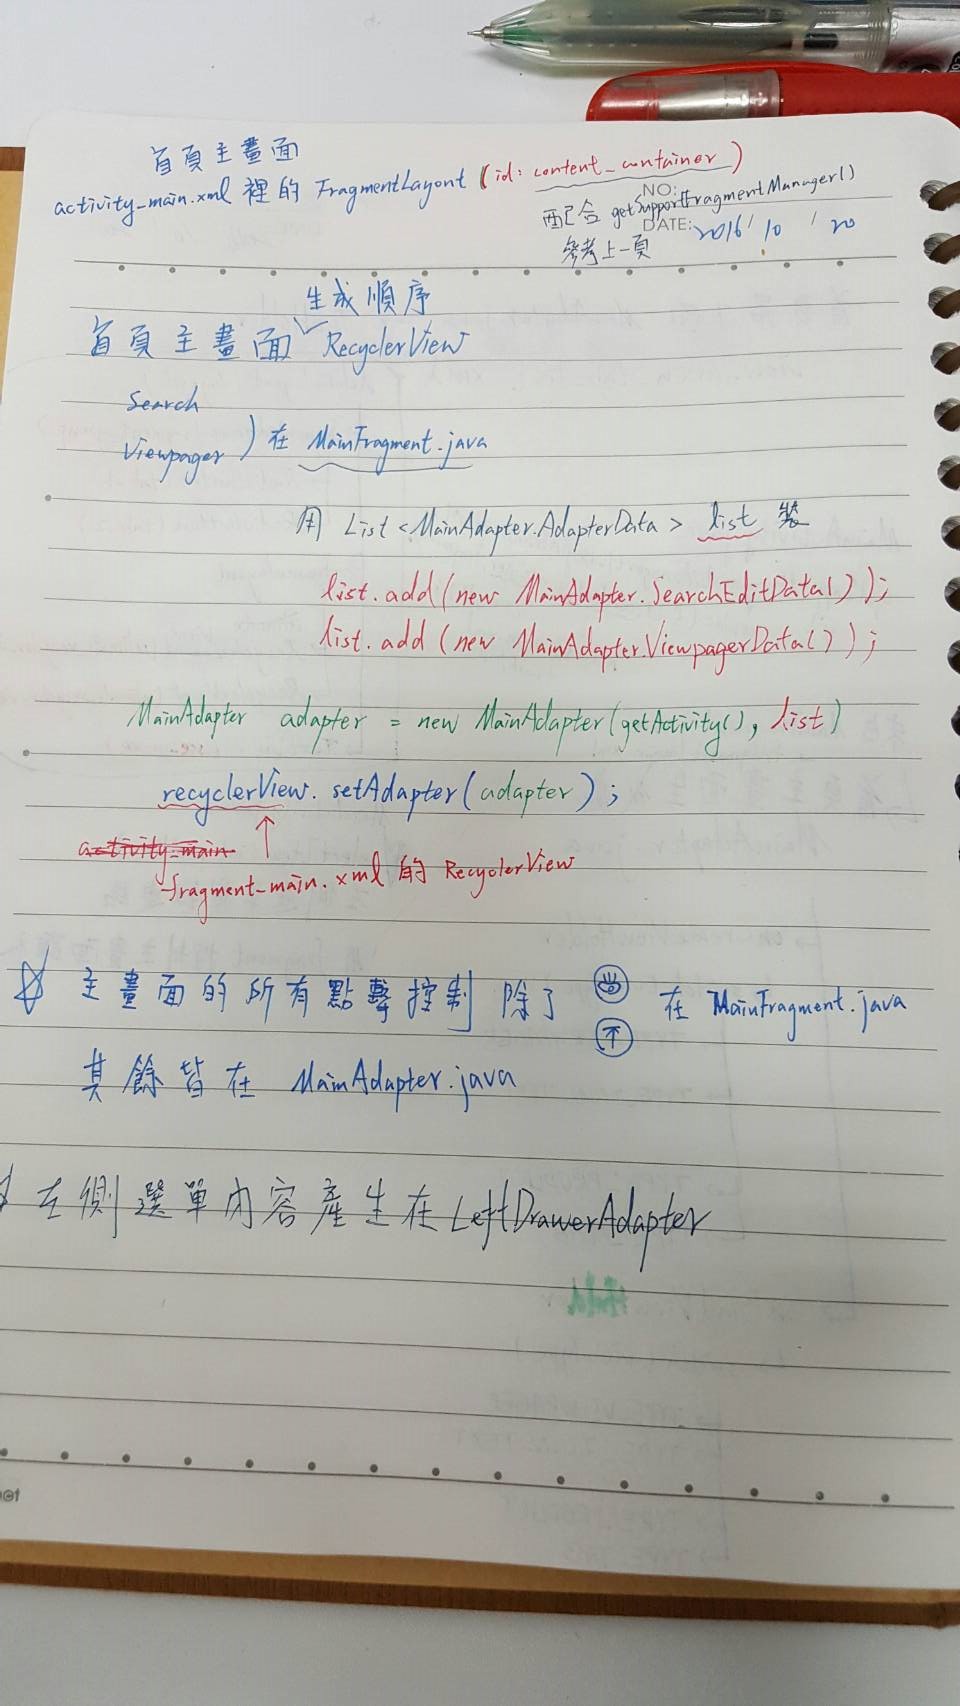
※ 首頁主畫面生成研究
還未整理 只有筆記...
資料來源
http://stackoverflow.com/questions/35963144/no-resource-found-that-matches-the-given-name-at-cardbackgroundcolor-with-val
http://cammykamal.blogspot.tw/2015/04/recyclerview-with-cardview.html
http://dinosaurs.pixnet.net/blog/post/34190585-charles%E6%95%99%E5%AD%B8(1)-%E8%BB%9F%E9%AB%94%E4%B8%8B%E8%BC%89
http://www.cnblogs.com/EasonWu/archive/2012/11/27/git-windows-setup-by-cygwin.html