Let’s Encrypt 免費 SSL 使用 IIS 安裝憑證
ez 2016-11-07 source:https://www.ez2o.com/Blog/Post/Lets-Encrypt-Free-SSL-IIS-Install
Let's Encrypt 是一個於2015年三季度推出的數位憑證認證機構,將通過旨在消除當前手動建立和安裝憑證的複雜過程的自動化流程,為安全網站提供免費的SSL/TLS憑證。Let's Encrypt 憑證簽發為每三個月一次,所以 90 天必須更新一次,可以設定排成自動更新,所以不必擔心。
申請 Let's Encrypt 憑證必須驗證網站是否正常,所以網站需要能正常存取,不可離線申請憑證。
首先必須下載憑證軟體:https://github.com/Lone-Coder/letsencrypt-win-simple/releases
修改網站 web.config,因為 Let's Encrypt 會產生驗證檔案到網站目錄內,但檔案開頭為 . 所以需要修改 web.config 才能存取檔案。
|
1 2 3 4 5 6 7 8 |
|
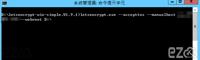
將憑證軟體解壓縮,執行
|
1 2 3 4 |
|
執行後就會開始進行簽發,如果第一次使用會叫你輸入信箱,請依照指示輸入相關資料。
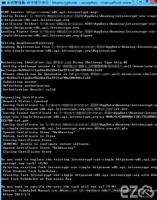
簽發完成,打開 IIS 查看憑證是否已安裝完成!

如果憑證(快)過期,輸入以下指令就可以重新簽發憑證,如果怕過期可以寫成 bat 放入排程,時間到自動執行。
|
1 2 3 4 |
|
本文章網址:
https://www.ez2o.com/Blog/Post/Lets-Encrypt-Free-SSL-IIS-Install
https://www.ez2o.com/Blog/Post/584