摘要:DataBinding - Master Detail應用
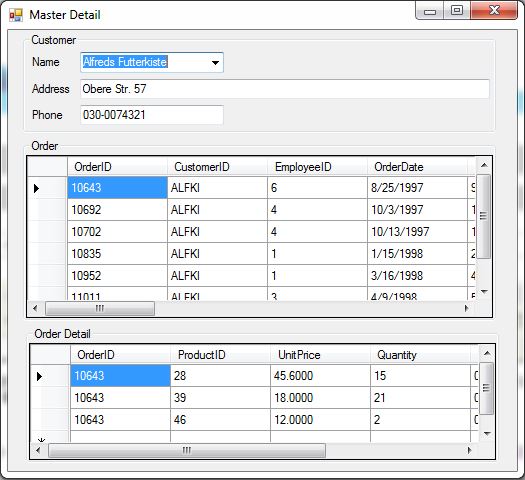
思考一下以下需求需要花多少時間來完成?以NorthWind資料庫為例,有3張table:Customers、Orders、Order Details,users希望可以選取客戶後顯示其相關資訊以及該客戶的訂單,選取某一筆訂單後顯示該訂單的明細,如下圖:
NorthWind資料庫載點:http://archive.msdn.microsoft.com/northwind/Release/ProjectReleases.aspx?ReleaseId=1401
透過data binding你會發現簡單到不行,code少到令人訝異,開工吧!
UI Layout的部份除了顯示客戶的ComboBox、訂單DataGridView、訂單明細DataGridView,其餘的TextBox是用來顯示跟客戶相關的資訊,例如:電話、地址、傳真號碼…只要是Customers table有的你都可以透過TextBox的data binding來顯示。
- 存取資料庫:
這裡是使用Linq To SQL當然你也可以用SqlClient來做,不過為了順便介紹Linq To SQL所以就是它了!
在專案按右鍵 【Add】→【New Item】,在Add New Item視窗的左窗格選取【Data】然後在右邊選取【LINQ To SQL Classes】,如下圖:
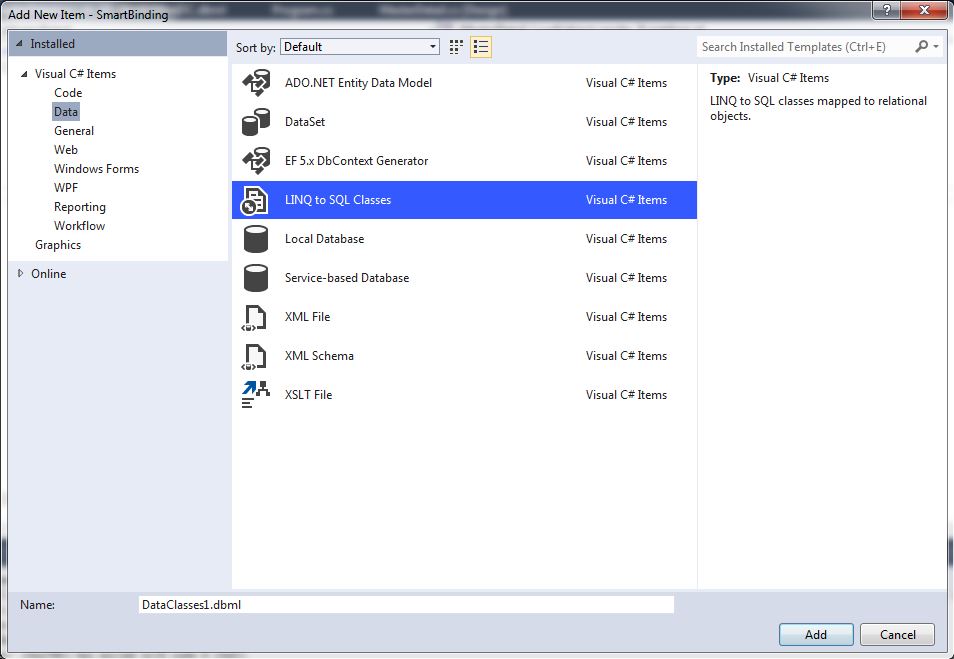
Name命名為NorthWind.dbml,輸入完成後按Add後畫面會出現NorthWind.dbml的O/R Desinger (Object Relational Designer),這個視覺化的介面是讓你可以用拖曳的方式去建立LINQ To SQL的Entity Classes,來源就是NorthWind資料庫的Tables所以先把NorthWind加到Server Explorer這樣我們才能拖曳我們所要的table並建立對應的entity,如果你的Visual Studio左邊沒有看到Server Explorer,你可以到【View】→【Server Explorer】把它顯示出來。
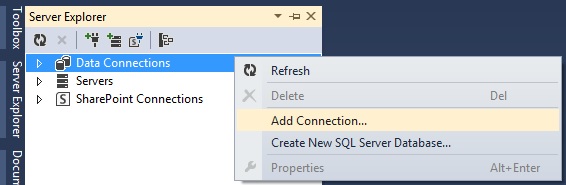
- 加入Data Connection:
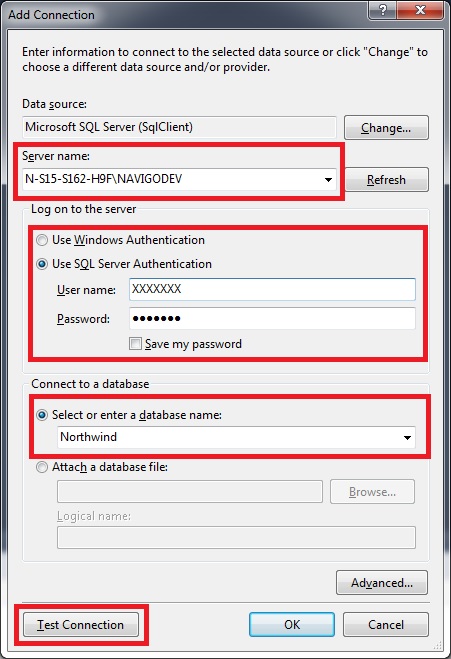
【Server Explorer】→【Data Connections】按右鍵,選【Add Connection】
在【Choose Data Source】對話方塊選取【Microsoft SQL Server】,按【Continue】
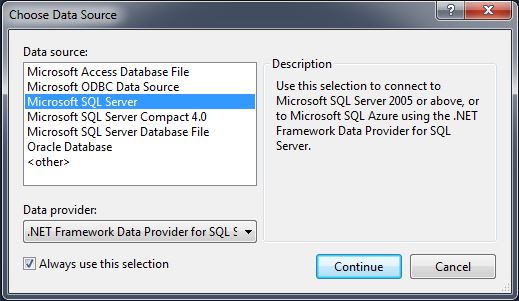
選取Server Name,輸入登入的帳號/密碼最後選擇要連線的資料庫,然後按【Test Connection】確認連線是否成功。
- O/R Desinger加入Entity Classes
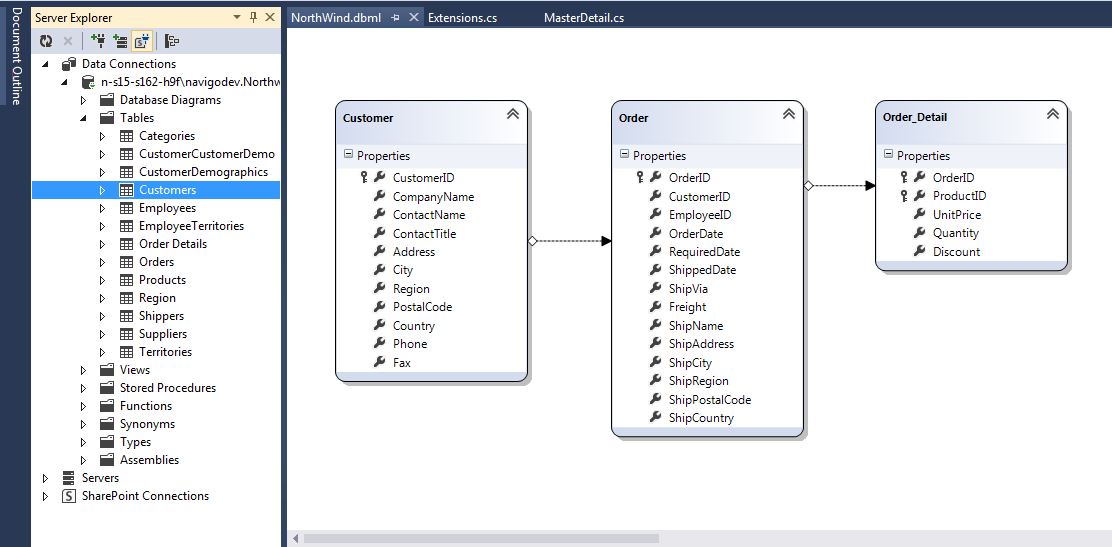
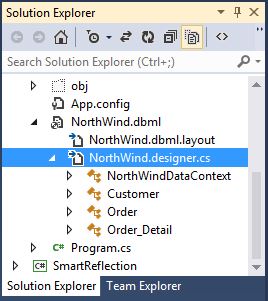
點擊兩下【NorthWind.dbml】開啟O/R Designer,從【Server Explorer】→【DataConnections】→【剛加入的Server】→【Tables】拖曳【Customers】【Orders】【Order Details】到O/R Designer,此時Visual Studio會在【NorthWind.desinger.cs】自動幫你建立對應的Entity Classes
- 動手寫code
因為DataContext.GetTable傳回來的是Table<TEntity>的物件沒辦法直接轉成DataTable所以我寫了一個Extenion Method來把它轉成DataTable (DataContext.GetTable<TEntity>().ToList()再轉成DataTable):
public static class Extensions
{
    public static DataTable ToDataTable(this IList data)
    {
        PropertyDescriptorCollection properties = TypeDescriptor.GetProperties(typeof(T));
        DataTable table = new DataTable(typeof(T).Name);
        foreach (PropertyDescriptor prop in properties)
        {
            table.Columns.Add(prop.Name, Nullable.GetUnderlyingType(prop.PropertyType) ?? prop.PropertyType);
        }
        foreach (T item in data)
        {
            DataRow row = table.NewRow();
            foreach (PropertyDescriptor prop in properties)
            {
                row[prop.Name] = prop.GetValue(item) ?? DBNull.Value;
            }
            table.Rows.Add(row);
        }
        return table;
    }
}
接下來就是如何設定data binding和建立Table間的relation:
private void MasterDetail_Load(object sender, EventArgs e)
{
    NorthWindDataContext dc = new NorthWindDataContext();
    DataSet ds = new DataSet("CustomerOrders");
    // Add Customer, Order and Order detail tables
    ds.Tables.Add(dc.GetTable().ToList().ToDataTable());
    ds.Tables.Add(dc.GetTable().ToList().ToDataTable());
    ds.Tables.Add(dc.GetTable().ToList().ToDataTable());
    // Create data relation between customer and order
    ds.Relations.Add("CustomerOrderRelation",
        ds.Tables["Customer"].Columns["CustomerID"], ds.Tables["Order"].Columns["CustomerID"]);
    // Create data relation between order and order detail
    ds.Relations.Add("OrderDetailRelation",
        ds.Tables["Order"].Columns["OrderID"], ds.Tables["Order_Detail"].Columns["OrderID"]);

    // Set data binding
    this.uxOrderGrid.DataSource = ds.DefaultViewManager;
    this.uxOrderGrid.DataMember = "Customer.CustomerOrderRelation";
    this.uxOrderDetailGrid.DataSource = ds.DefaultViewManager;
    this.uxOrderDetailGrid.DataMember = "Customer.CustomerOrderRelation.OrderDetailRelation";

    this.uxName.DataSource = ds.DefaultViewManager;
    this.uxName.DisplayMember = "Customer.CompanyName";
    this.uxName.ValueMember = "Customer.CustomerID";

    this.uxAddress.DataBindings.Add("Text", ds.DefaultViewManager, "Customer.Address");
    this.uxPhone.DataBindings.Add("Text", ds.DefaultViewManager, "Customer.Phone");
}
需要寫code的部份真的令人意外的少!