閱讀Stephens' C#教材第四十章筆記 介紹介紹WPF的基本操作與設定
Chapter 40 Making WPF Appincations
本章將介紹微軟在 .NET 3.0推出的Windows Presention Fundation(WPF)。詳細的資料請參考微軟網頁
本書過去介紹的程式都是傳統的表單程式(Windows Forms applications),操作的對象就是From表單,以及其上的控制項,例如Buttons, TextBoxes及Labels。
WPF使用一批全新的控制項,有些類似傳統Windows Forms的控制項,例如:WPF也提供Label, TextBox, Button及CheckBox,有些則是全新登場,例如:Grid, Expander, Eillpse, Rectangle及DocumentViewer。
如需更了解WPF,請參考Wrox出版的WPF Programmer's Reference一書
雖然Windows Forms與WPF有一些功能相同的控制項,但是其基本的原理大不相同。
Windows Forms的控制項都是使用Graphics Device Interface(GDI)來顯示物件,雖然很有效率,但技術年代久遠,以致於無法發揮現今圖形處理器的新能力。WPF則使用DirectX API來繪製物件,可充分發揮新處理器的能力。
例如:DirectX 包含3D繪圖指令,可以輕易呈現3D畫面,將圖形進行旋轉、放大縮小,轉換也很容易。
WPF使用的新技術,代表即使在WPF的TextBox, Button也很輕易就可進行旋轉、縮放等效果。
以下是使用WPF的益處:
Hign-performance graphics, Transformations, Multimedia support, 3D drawing。
除此之外還有
Property animations, Retained-mode graphics, More uniform content model, Styles, Templates, Data templates, Scalable controls.
當然使用WPF也有缺點:
首先是它比較複雜,要寫好一個WPF程式,要先搞懂它的控制項, pens, brushes, styles, tempates, data templates, flow documents, resources, property triggers, event triggers, animations, themes, printing, data binding, commanding, transformatinos, page navigation等等好多主題,享受它的益處之前,學習曲線相對更長。
建立一個簡單的WPF應用程式
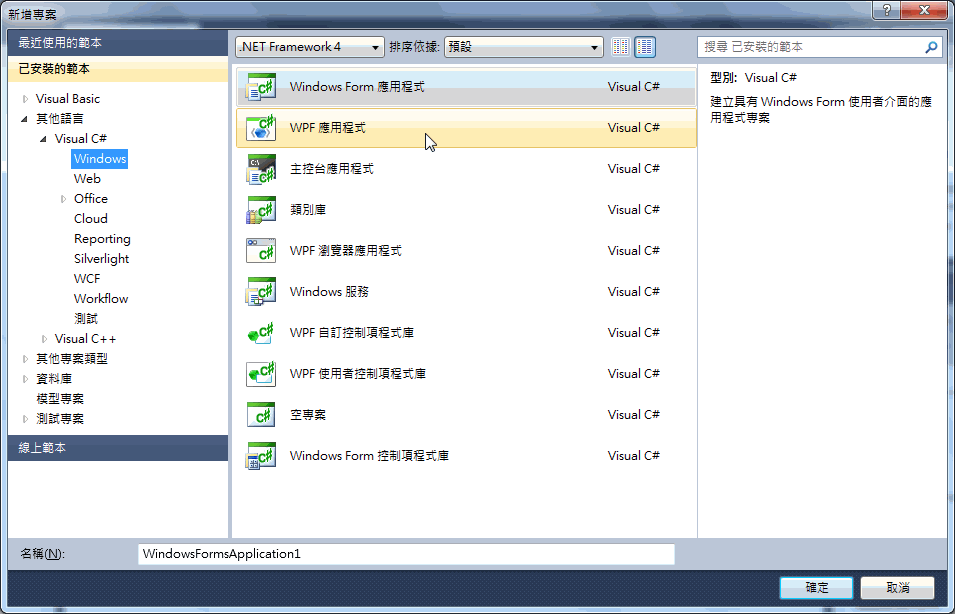
1.與建立Windows Forms應用程式一樣,在檔案選單,選擇建立新專案後,範本選擇WPF應用程式
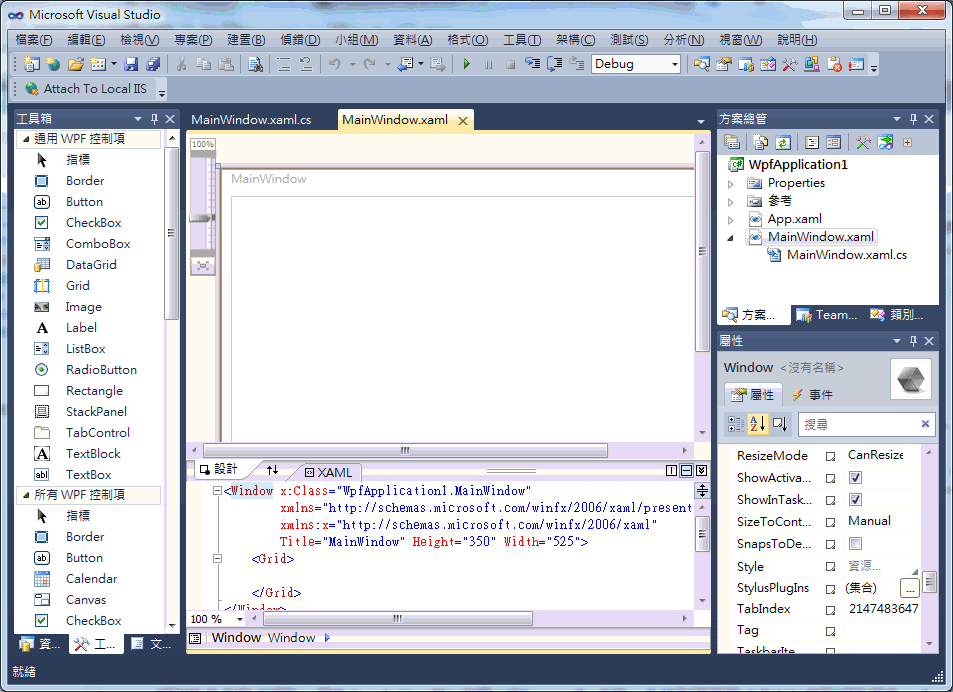
2.Visual Studio平台自動為你建立一個應用程式,你會發現WPF應用程式裡出現的一個Windows而不是Form。 Windows的檔名為MainWindow.xaml還有MainWindow.xaml.cs(放程式碼),中間上方畫面跟傳統Form表單一樣可以擺放物件,設計使用者操作介面,下面則是XAML編輯器,eXtensible Application Markup Language(XAML)是WPF用來定義使用者介面的一種程式語言。詳細的資料請參考微軟網頁
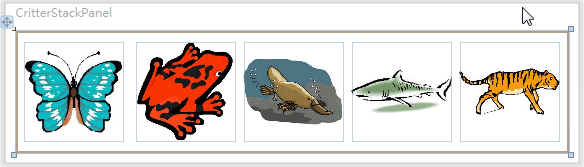
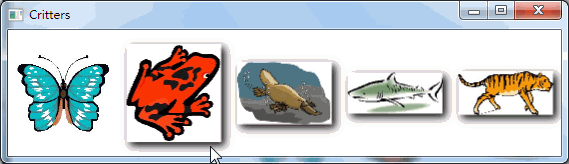
Critters程式示範使用五個Image控制項顯示五張圖片,設定了Name, Image, Width, Height, Stretch等屬性資料,並且在MouseDown事件中讓該圖片的名稱用Message.show方法顯示。
在XAML編輯器裡面會看到的程式碼如下:
<Window x:Class="Critters.MainWindow"
        xmlns="http://schemas.microsoft.com/winfx/2006/xaml/presentation"
        xmlns:x="http://schemas.microsoft.com/winfx/2006/xaml"
        Title="Critters" Height="164" Width="569">
    <Grid>
        <Image Height="100" HorizontalAlignment="Left" Margin="12,12,0,0" Name="butterflyImage" Source="/Critters;component/Butterfly.jpg" Stretch="Uniform" VerticalAlignment="Top" Width="100" MouseDown="butterflyImage_MouseDown" />
        <Image Height="100" HorizontalAlignment="Left" Margin="118,12,0,0" Name="frogImage" Source="/Critters;component/Frog.jpg" Stretch="Uniform" VerticalAlignment="Top" Width="100" MouseDown="frogImage_MouseDown" />
        <Image Height="100" HorizontalAlignment="Left" Margin="224,12,0,0" Name="platypusImage" Source="/Critters;component/Platypus.jpg" Stretch="Uniform" VerticalAlignment="Top" Width="100" MouseDown="platypusImage_MouseDown" />
        <Image Height="100" HorizontalAlignment="Left" Margin="330,12,0,0" Name="sharkImage" Source="/Critters;component/Shark.jpg" Stretch="Uniform" VerticalAlignment="Top" Width="100" MouseDown="sharkImage_MouseDown" />
        <Image Height="100" HorizontalAlignment="Left" Margin="436,12,0,0" Name="tigerImage" Source="/Critters;component/Tiger.jpg" Stretch="Uniform" VerticalAlignment="Top" Width="100" MouseDown="tigerImage_MouseDown" />
    </Grid>
</Window>
如果細看程式碼會發現主要有一個Window物件,裡面包含一個Grid物件,Grid裡面再包含數個Image物件,每一個物件裡的資料就跟屬性視窗中的設定有關聯。(作者註:通常Window物件只能包含一個物件,大部分情況就是Grid物件,再由Grid物件去包含其他物件)
使用WPF應用程式的好處之一是可以容易進行物件的排列,因為所有的物件都包在Grid物件中,而Grid物件能夠將其內的子物件以rows(列)或columns(欄)排列。
例如將MainWindow.xaml內容改成(加了ColumnDefinition, 屬性Margin="4")
<Window x:Class="Critters.MainWindow"
        xmlns="http://schemas.microsoft.com/winfx/2006/xaml/presentation"
        xmlns:x="http://schemas.microsoft.com/winfx/2006/xaml"
        Title="Critters" Height="164" Width="569">
    <Grid>
        <Grid.ColumnDefinitions>
            <ColumnDefinition />
            <ColumnDefinition />
            <ColumnDefinition />
            <ColumnDefinition />
            <ColumnDefinition />
        </Grid.ColumnDefinitions>
        <Image HorizontalAlignment="Center" Margin="4" Name="butterflyImage" Source="/Critters;component/Butterfly.jpg" Stretch="Uniform" VerticalAlignment="Center" MouseDown="butterflyImage_MouseDown" />
        <Image HorizontalAlignment="Center" Margin="4" Name="frogImage" Source="/Critters;component/Frog.jpg" Stretch="Uniform" VerticalAlignment="Center" MouseDown="frogImage_MouseDown" Grid.Column="1" />
        <Image HorizontalAlignment="Center" Margin="4" Name="platypusImage" Source="/Critters;component/Platypus.jpg" Stretch="Uniform" VerticalAlignment="Center" MouseDown="platypusImage_MouseDown" Grid.Column="2" />
        <Image HorizontalAlignment="Center" Margin="4" Name="sharkImage" Source="/Critters;component/Shark.jpg" Stretch="Uniform" VerticalAlignment="Center" MouseDown="sharkImage_MouseDown" Grid.Column="3" />
        <Image HorizontalAlignment="Center" Margin="4" Name="tigerImage" Source="/Critters;component/Tiger.jpg" Stretch="Uniform" VerticalAlignment="Center" MouseDown="tigerImage_MouseDown" Grid.Column="4" />
    </Grid>
</Window>
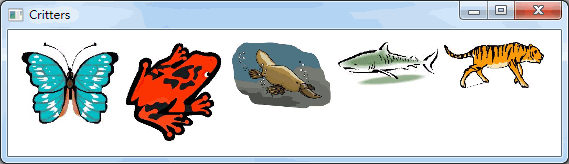
重新執行後結果如下圖:

由於XAML也是XML的形式,所以程式的撰寫也要遵守XML的規定,下圖是在Image物件中設定BitmapEffect屬性為BevelBitmapEffect或DropShadowBitmapEffect的情形。
程式碼寫法為:
(第一張圖)
<Image.BitmapEffect>
<BevelBitmapEffect/>
</Image.BitmapEffect>
(其他張圖)
<Image.BitmapEffect>
<BevelBitmapEffect/>
</Image.BitmapEffect>
另外XAML可以建立所謂Style例如下面程式,建立一個名為imageStyle的Style(x:Key="imageStyle"),這個Style的目標類型是Image(TargetType="Image"),然後就可以簡化原來套在每一個Image上的屬性設定,程式如下:
<Window x:Class="Critters.MainWindow"
        xmlns="http://schemas.microsoft.com/winfx/2006/xaml/presentation"
        xmlns:x="http://schemas.microsoft.com/winfx/2006/xaml"
        Title="Critters" Height="164" Width="569">
    <Window.Resources>
        <Style TargetType="Image" x:Key="imageStyle">
            <Setter Property="HorizontalAlignment" Value="Center"/>
            <Setter Property="VerticalAlignment" Value="Center"/>
            <Setter Property="Margin" Value="8"/>
            <Setter Property="Stretch" Value="Uniform"/>
            <Setter Property="BitmapEffect">
                <Setter.Value>
                    <DropShadowBitmapEffect/>
                </Setter.Value>
            </Setter>
        </Style>
    </Window.Resources>
    <Grid>
        <Grid.ColumnDefinitions>
            <ColumnDefinition />
            <ColumnDefinition />
            <ColumnDefinition />
            <ColumnDefinition />
            <ColumnDefinition />
        </Grid.ColumnDefinitions>
        <Image Style="{StaticResource imageStyle}" Name="butterflyImage" Source="/Critters;component/Butterfly.jpg" MouseDown="butterflyImage_MouseDown" />
        <Image Style="{StaticResource imageStyle}" Name="frogImage" Source="/Critters;component/Frog.jpg" MouseDown="frogImage_MouseDown" Grid.Column="1" />
        <Image Style="{StaticResource imageStyle}" Name="platypusImage" Source="/Critters;component/Platypus.jpg" MouseDown="platypusImage_MouseDown" Grid.Column="2" />
        <Image Style="{StaticResource imageStyle}" Name="sharkImage" Source="/Critters;component/Shark.jpg" MouseDown="sharkImage_MouseDown" Grid.Column="3" />
        <Image Style="{StaticResource imageStyle}" Name="tigerImage" Source="/Critters;component/Tiger.jpg" MouseDown="tigerImage_MouseDown" Grid.Column="4" />
    </Grid>
</Window>
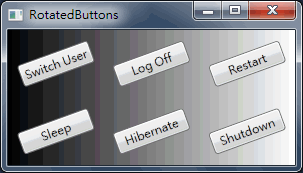
RotatedButtons程式示範按鈕旋轉-20度的WPF程式
TRY IT中示範如何使用逐步撰寫出一個WPF程式,除了Grid還多包一層Panel才放Image物件。