Assistants API 的第三篇就來介紹支援的工具和使用方法的實做範例,目前支援三個工具:程式碼解譯器 (Code Interpreter)、知識檢索 (Knowledge Retrieval)和函示呼叫 (Function calling),未來有再支援新的工具也會再補充在此文裡。
實做
程式碼解譯器 (Code Interpreter)
程式碼解譯器允許 Assistants API 在沙箱執行環境中撰寫和執行 Python 程式碼。該工具可以處理具有不同資料和格式的檔案,並產生具有資料和圖形影像的檔案。程式碼解譯器可讓您的助手迭代執行程式碼以解決具有挑戰性的程式碼和數學問題。當 Assistant 撰寫無法執行的程式碼時,它可以透過嘗試執行不同的程式碼來迭代此程式碼,直到程式碼執行成功。
程式碼解譯器每次會話收費 0.03 美元。如果您的 Assistant 在兩個不同的對話串中同時呼叫程式碼解釋器(例如,每個最終使用者一個對話串),則會建立兩個程式碼解譯器工作階段。預設情況下,每個工作階段的活動時間為一小時,這意味著如果使用者在同一對話串中與程式碼解譯器互動最多一小時,您只需為每個工作階段付費。
要啟用程式碼解譯器只要建立助理的時候使用 CodeInterpreterToolDefinition 來設定工具即可。
Assistant assistant = await assistantClient.CreateAssistantAsync(
model: deploymentName,
new AssistantCreationOptions()
{
	Name = "DEMO 助理",
	Tools = {
		ToolDefinition.CreateCodeInterpreter(), // 程式碼解譯器
	},
});
底下以一個完整範例來示範,啟用程式解譯器來執行一段 Python 語法並且輸出成圖片。
var azureResourceUrl = "https://{your account}.openai.azure.com/";
var azureApiKey = "{Your Api Key}";
var deploymentName = "{Your Model Name}";
OpenAIClient openAIClient = new AzureOpenAIClient(new Uri(azureResourceUrl), new AzureKeyCredential(azureApiKey));
AssistantClient assistantClient = openAIClient.GetAssistantClient();
Assistant assistant = await assistantClient.CreateAssistantAsync(
model: deploymentName,
new AssistantCreationOptions()
{
Name = "DEMO 助理",
Tools = {
ToolDefinition.CreateCodeInterpreter(), // 程式碼解譯器
},
});
AssistantThread thread = await assistantClient.CreateThreadAsync(new ThreadCreationOptions()
{
InitialMessages = { new ThreadInitializationMessage(
[
@"請執行底下的的 python 程式碼並輸出圖片。
import matplotlib.pyplot as plt
import numpy as np
# 生成隨機數據
x = np.arange(1, 11)
y = np.random.randint(1, 20, size = 10)
plt.figure(figsize = (10, 5)) # 設定圖表大小
plt.plot(x, y, marker = 'o', linestyle = '-', color = 'b') # 繪製折線圖
plt.title('Random Data Line Chart') # 圖表標題
plt.xlabel('X Axis Label') # X軸標籤
plt.ylabel('Y Axis Label') # Y軸標籤
plt.grid(True) # 顯示網格"
]) },
});
var runResponse = await assistantClient.CreateRunAsync(thread, assistant);
ThreadRun run = runResponse.Value;
do
{
await Task.Delay(TimeSpan.FromMilliseconds(500));
runResponse = await assistantClient.GetRunAsync(thread.Id, runResponse.Value.Id);
}
while (runResponse.Value.Status == RunStatus.Queued || runResponse.Value.Status == RunStatus.InProgress);
var threadMessages = assistantClient.GetMessagesAsync(thread);
await foreach (ThreadMessage threadMessage in threadMessages)
{
Console.Write($"{threadMessage.CreatedAt:yyyy-MM-dd HH:mm:ss} - {threadMessage.Role,10}: ");
foreach (MessageContent contentItem in threadMessage.Content)
{
if (!string.IsNullOrEmpty(contentItem.Text))
{
Console.Write(contentItem.Text);
}
else if (!string.IsNullOrEmpty(contentItem.ImageFileId))
{
Console.Write($"<image from ID: {contentItem.ImageFileId}");
}
Console.WriteLine();
}
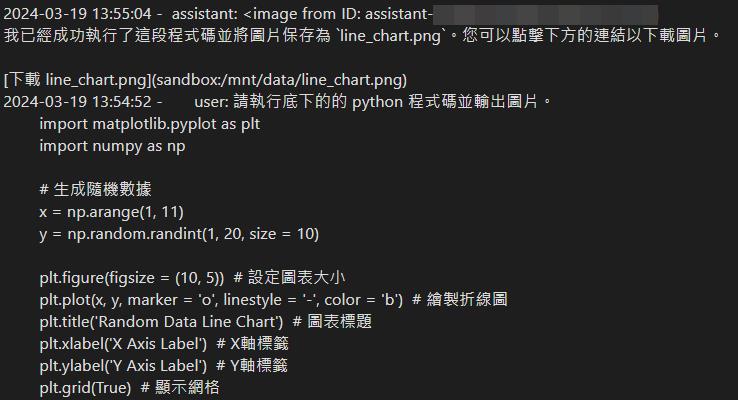
}執行結果可以看到正常執行程式並且輸出了一個檔案存成助理檔案了。後續就可以使用這組 Id 並使用 GetFileContentAsync 來取得檔案的實體內容。
知識檢索 (Knowledge Retrieval)
檢索可以利用模型外部的知識來增強助理,例如專有產品資訊或使用者提供的文件。文件上傳並傳遞給助理後,OpenAI 將自動對文件進行分塊、索引和儲存嵌入,並實施向量搜尋以檢索相關內容來回答使用者查詢。如果您為特定助理啟用檢索,則所有附加文件都將自動索引,並且您將向每個助理每天支付 0.20 美元/GB 的費用。您可以使用修改助理端點啟用 / 停用檢索。
檢索價格為每位助手每天 0.20 美元 / GB。啟用檢索工具後,將單一檔案 ID 附加到多個助理將產生每個助理每天的費用。例如,如果您將同一個 1 GB 檔案附加到啟用了檢索工具的兩個不同助理 (例如,面向客戶的助理 #1 和內部員工助理 #2),您將需要支付兩次儲存費用 (2 * 每天 0.20 美元)。該費用不因最終用戶和聊天串的數量而變化。
此外,啟用知識檢索的助理執行的訊息有包含檔案也會收取費用。例如,在包含 10 個訊息的聊天串上執行啟用檢索功能的助理 (每個訊息有 1 個唯一檔案,總共 10 個唯一檔案),所有 10 個檔案,除了附加到助理的任何檔案之外也將產生每天每 GB 的費用本身)。
要啟用知識檢索只要建立助理的時候使用 FileSearchToolDefinition 來設定工具即可,也記得附上檔案 Id 讓工具可以針對檔案來建立索引,以利後續的檢索使用。
Assistant assistant = await assistantClient.CreateAssistantAsync(
	model: deploymentName,
	new AssistantCreationOptions()
	{
		Name = "DEMO 助理",
		Tools = {
			new CodeInterpreterToolDefinition(), // 程式碼解譯器
			new FileSearchToolDefinition(), // 知識檢索
		},
		ToolResources = new()
		{
			FileSearch = new()
			{
				NewVectorStores =
				{
					new VectorStoreCreationHelper([assistantFile.Id]),
				}
			}
		}
	});
完整的範例
var azureResourceUrl = "https://{your account}.openai.azure.com/";
var azureApiKey = "{Your Api Key}";
var deploymentName = "{Your Model Name}";

OpenAIClient openAIClient = new AzureOpenAIClient(new Uri(azureResourceUrl), new AzureKeyCredential(azureApiKey));
AssistantClient assistantClient = openAIClient.GetAssistantClient();
FileClient fileClient = openAIClient.GetFileClient();

File.WriteAllText(
	path: "sample_file_for_upload.txt",
	contents: "The word 'apple' uses the code 442345, while the word 'banana' uses the code 673457.");

OpenAIFileInfo assistantFile = await fileClient.UploadFileAsync(
	filePath: "sample_file_for_upload.txt",
	purpose: FileUploadPurpose.Assistants);

Assistant assistant = await assistantClient.CreateAssistantAsync(
model: deploymentName,
new AssistantCreationOptions()
{
	Name = "DEMO 助理",
	Tools = {
		new CodeInterpreterToolDefinition(), // 程式碼解譯器
		new FileSearchToolDefinition(), // 知識檢索
	},
	ToolResources = new()
	{
		FileSearch = new()
		{
			NewVectorStores =
			{
				new VectorStoreCreationHelper([assistantFile.Id]),
			}
		}
	}
});

AssistantThread thread = await assistantClient.CreateThreadAsync(new ThreadCreationOptions()
{
	InitialMessages = { new ThreadInitializationMessage(
	[
		"請從上傳的檔案內容中找出 apple 的 Code 為?"
	]) },
});

var runResponse = await assistantClient.CreateRunAsync(thread, assistant);
ThreadRun run = runResponse.Value;

do
{
	await Task.Delay(TimeSpan.FromMilliseconds(500));
	runResponse = await assistantClient.GetRunAsync(thread.Id, runResponse.Value.Id);
}
while (runResponse.Value.Status == RunStatus.Queued	|| runResponse.Value.Status == RunStatus.InProgress);

var threadMessages = assistantClient.GetMessagesAsync(thread);

await foreach (ThreadMessage threadMessage in threadMessages)
{
	Console.Write($"{threadMessage.CreatedAt:yyyy-MM-dd HH:mm:ss} - {threadMessage.Role,10}: ");
	foreach (MessageContent contentItem in threadMessage.Content)
	{
		if (!string.IsNullOrEmpty(contentItem.Text))
		{
			Console.Write(contentItem.Text);
		}
		else if (!string.IsNullOrEmpty(contentItem.ImageFileId))
		{
			Console.Write($"<image from ID: {contentItem.ImageFileId}");
		}
		Console.WriteLine();
	}
}
函示呼叫 (Function calling)
與聊天完成 API 類似,Assistants API 支援函示呼叫。函示呼叫可讓您向助理描述函示,並讓它聰明地傳回需要呼叫的函示及其參數。當 Assistants API 呼叫函示時,它會在執行期間暫停執行,您可以提供函示呼叫的結果以繼續執行。
首先我們要先定義函示跟其對應的方法,這邊我和之前文章「Function Calling 介紹和實做串接」建立一樣的函示範例。
CalFoodPrice
var calFoodPriceFuntionToolDefinition = new FunctionToolDefinition(
    name: "CalFoodPrice",
    description: "計算客戶餐點價錢",
    parameters: BinaryData.FromObjectAsJson(
        new
        {
            Type = "object",
            Properties = new
            {
                Count = new
                {
                    Type = "integer",
                    Description = "客戶點的餐點數量,比如說一份"
                },
                Food = new
                {
                    Type = "string",
                    Enum = new[] { "牛排", "豬排" },
                    Description = "客戶點的餐點,比如說牛排或是豬排。"
                }
            },
            Required = new[] { "count", "food" },
        }, new JsonSerializerOptions() { PropertyNamingPolicy = JsonNamingPolicy.CamelCase })
    )
;
對應的方法內容。
public static decimal CalFoodPrice(FoodInfo foodInfo)
{
    switch (foodInfo.Food)
    {
        case "牛排":
            return 200 * foodInfo.Count;
        case "豬排":
            return 100 * foodInfo.Count;
        default:
            return 0;
    }
}
GetCurrentWeather
var getWeatherFuntionToolDefinition = new FunctionToolDefinition(
    name: "GetCurrentWeather",
    description: "取得指定地點的天氣資訊",
    parameters: BinaryData.FromObjectAsJson(
        new
        {
            Type = "object",
            Properties = new
            {
                Location = new
                {
                    Type = "string",
                    Description = "城市或鄉鎮地點",
                },
                Unit = new
                {
                    Type = "string",
                    Enum = new[] { "攝氏", "華式" },
                }
            },
            Required = new[] { "location" },
        }, new JsonSerializerOptions() { PropertyNamingPolicy = JsonNamingPolicy.CamelCase })
    );
對應的方法內容。
public static string GetCurrentWeather(WeatherConfig weatherConfig)
{
    switch (weatherConfig.Unit)
    {
        case "華式":
            return $"{weatherConfig.Location} 目前華式 86 度";
        case "攝氏":
        default:
            return $"{weatherConfig.Location} 目前攝氏 30 度";
    }
}
建立助理時候設定前面建立的函示定義。
Response<Assistant> assistantResponse = await client.CreateAssistantAsync(
new AssistantCreationOptions("{Model Name}")
{
    Name = "DEMO 助理",
    Tools = {
        getWeatherFuntionToolDefinition,
        getWeatherFuntionToolDefinition
    }
});
Assistant assistant = assistantResponse.Value;
聊天串的範例設定了三個問題範例。
AssistantThread thread = await assistantClient.CreateThreadAsync(new ThreadCreationOptions()
{
    InitialMessages = { new ThreadInitializationMessage(
    [
        "我想要點兩份牛排"
        //"請問台北市的天氣?"
        //"請問 PS5 多少錢?"
    ]) }
});
接下來需要定義 ToolOutput 的結果,針對前面兩個函示來設定輸出的文字。
ToolOutput GetResolvedToolOutput(RequiredAction requiredAction)
        {
            switch (requiredAction.FunctionName)
            {
                case "CalFoodPrice":
                    var foodInfo = JsonSerializer.Deserialize<FoodInfo>(requiredAction.FunctionArguments);
                    var foodPrice = Functions.CalFoodPrice(foodInfo);
                    return new ToolOutput(requiredAction.ToolCallId, $"您點了 {foodInfo.Count} 份 {foodInfo.Food} 總共 {foodPrice} 元");
                case "GetCurrentWeather":
                    var weatherConfig = JsonSerializer.Deserialize<WeatherConfig>(requiredAction.FunctionArguments);
                    return new ToolOutput(requiredAction.ToolCallId, Functions.GetCurrentWeather(weatherConfig));
                default:
                    break;
            }

            return null;
        }
接下來在執行助理的過程,如果遇到 RequiresAction 的狀態時候就需要呼叫 GetResolvedToolOutput 方法來解析模型回傳的參數轉為參數提供給我們的方法。
do
{
	await Task.Delay(TimeSpan.FromMilliseconds(500));
	threadRun = await assistantClient.GetRunAsync(thread.Id, threadRun.Id);

	if (threadRun.Status == RunStatus.RequiresAction)
	{
		List<ToolOutput> toolOutputs = new();
		foreach (RequiredAction action in threadRun.RequiredActions)
		{
			toolOutputs.Add(GetResolvedToolOutput(action));
		}

		threadRun = await assistantClient.SubmitToolOutputsToRunAsync(threadRun, toolOutputs); // 提交工具輸出給執行
	}
}
while (threadRun.Status == RunStatus.Queued || threadRun.Status == RunStatus.InProgress);
最後輸出的程式碼就和前面一樣就不再寫一次了。針對三個問題分別輸出的結果也如我們預期去呼叫對應的函示產生的結果。


結論
花了三篇文章把整個 Assistants API 介紹過了一遍,從基本概念、基本實做、計費方式到完整介紹所有 Assistants API 使用方法以及本文的工具介紹,希望對於 Assistants API 感興趣的朋友會有幫助。透過 Assistants API 可以更方便快速的來建立我們的聊天機器人,雖然目前還在預覽階段,也還沒有實做使用 Dalle 模型來建立圖片以及瀏覽網頁的功能,和 GPTs 可以做的到還有點差距,但是也是可以達到 7 成以上可以辦到的事情,對於想要自己客制化 ChatGPT 還是有很大的幫助,希望未來可以早點支援這兩個工具,這樣就更加強大跟方便了。