Sometimes, we need to write something to file (ex: mdb, txt, …), not only read it. For example, you build an application which need update or insert data to an access mdb file, when you install this application to C:\Program files directory (or C:\Program files(X86), if you installed a X86 application into a X64 Windows), it will work perfectly in Windows XP environment. But how about Window Vista/7 ?
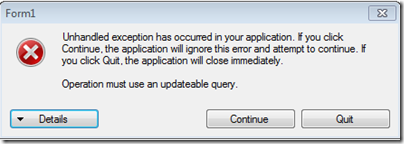
Sometimes, we need to write something to file (ex: mdb, txt, …), not only read it. For example, you build an application which need update or insert data to an access mdb file, when you install this application to C:\Program files directory (or C:\Program files(X86), if you installed a X86 application into a X64 Windows), it will work perfectly in Windows XP environment. But how about Window Vista/7 ? You will get an exception like this:
This is caused by UAC, when we installed software into some specific directory (in this case C:\Program files), these files will be under the UAC control. Even though you login Windows Vista/7 with administrator account, your file permission will be changed to same as “Users Group”, unless you run the program with “Run as administrator”.
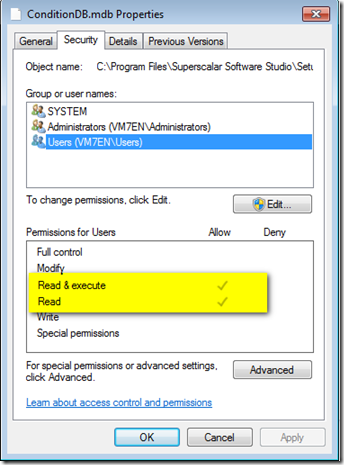
See the properties of this “ConditionDB.mdb”, we will find out the security setting for users group is “Read & execute” as picture below:
In this time, if we changed Users Group’s permissions for to “Full Control” manually, this simple demo application will work fine in Windows Vista/7.
For resolving it, we need a tool named Orca, you can find this tool in Microsoft Windows SDK (For the download page for the Windows SDK, see Microsoft Windows Software Development Kit (SDK). ).
After you have installed the Orca, please follow step as below to change files permission:
(1) Run Orca.exe as administrator
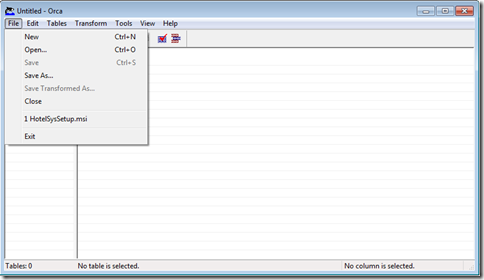
(2) Open msi file by [File] ->[Open]
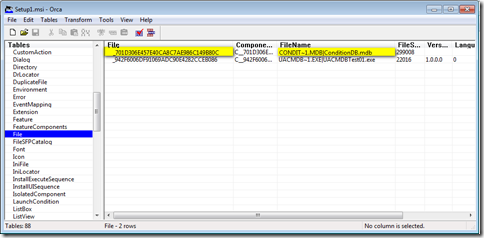
(3) Find out the “File” row in Tables Column
(4) Look the FileName Column , in this case , we want to change the permissions of ConditionDB.mdb; then note the text of File column, in this case is “_701D306E457E40CA8C7AE986C149B80C”.
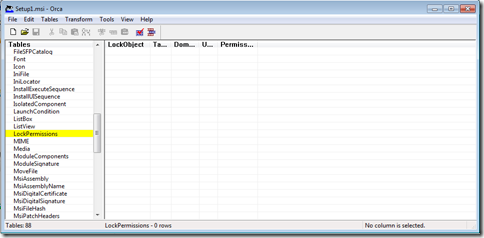
(5) Next Step is to find out the “LockPermissions” row in Tables Column.
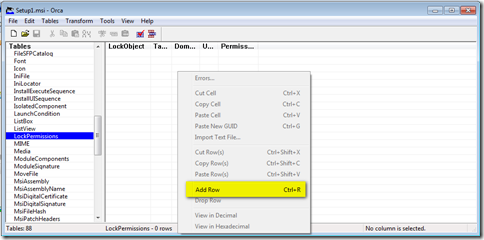
(6) Right click mouse and click “Add Row”
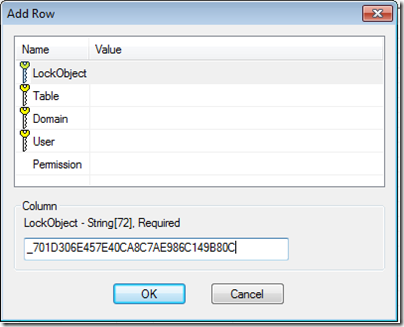
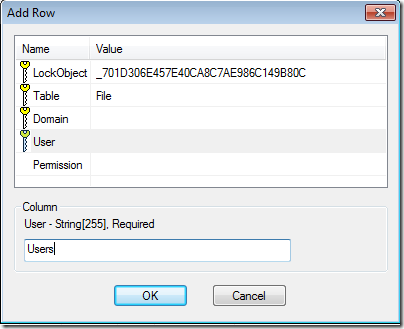
(7) In LockObject field , input the text we noted at steps(4)
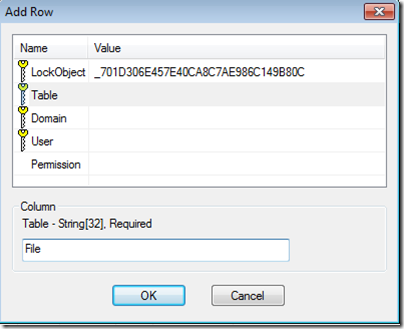
(8) In Table field, input “File”.
(9) In User field, input “users”, means setting the permissions of user group.
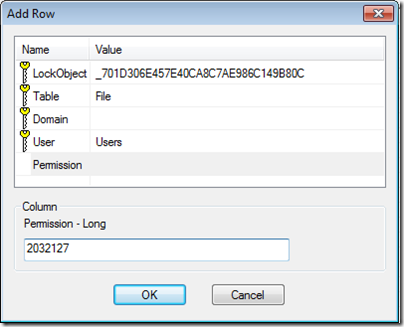
(10) In Permission filed, input 2032127, means “Full Control”
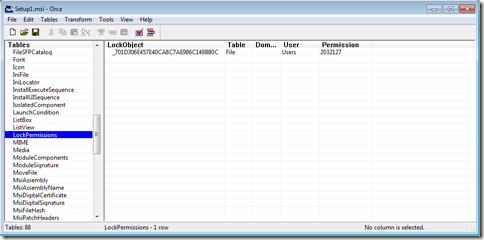
(11) Click “OK”, you will see the result as below:
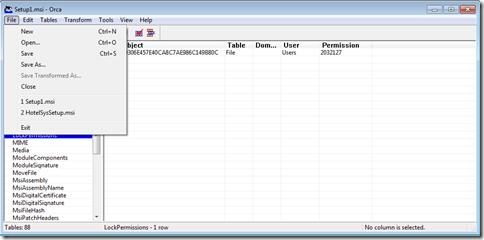
(12) Click [File]->[Save] to save changes to msi file.
(13) Congratulation! It will work fine now.
References
