本文將使用 VueFire 套件實作一個簡單的聊天室功能,並用 Firebase 達成 Google 帳戶驗證,包含登入及登出功能。
前言
之前有一個想法是要做一個 Chrome Extension,讓使用者可以在當下開啟的 URL 下一起聊天或留下ㄧ些資訊,在沒有要另外寫後端程式的前提下,就想說用 Firebase 實做看看順便當作技術研究囉。
完整程式碼參考: https://github.com/brian90191/Vue-Firebase-Chat
建立 Vue 專案
使用 Vue-Cli 建立專案,並安裝 vuetify、firebase、vuefire
$ vue create vue-firebase-chat
$ cd vue-firebase-chat
$ npm install vuetify firebase vuefire
新增 Firebase 專案
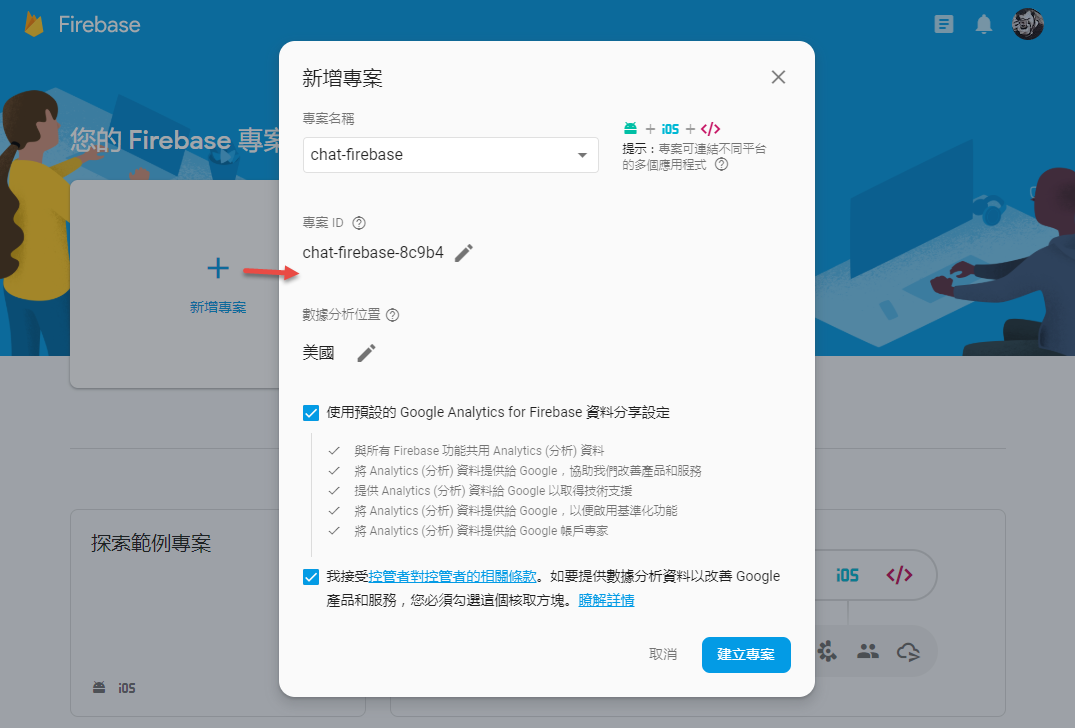
有 Firebase 帳戶後,在首頁點選新增專案並輸入名稱即可建立專案。
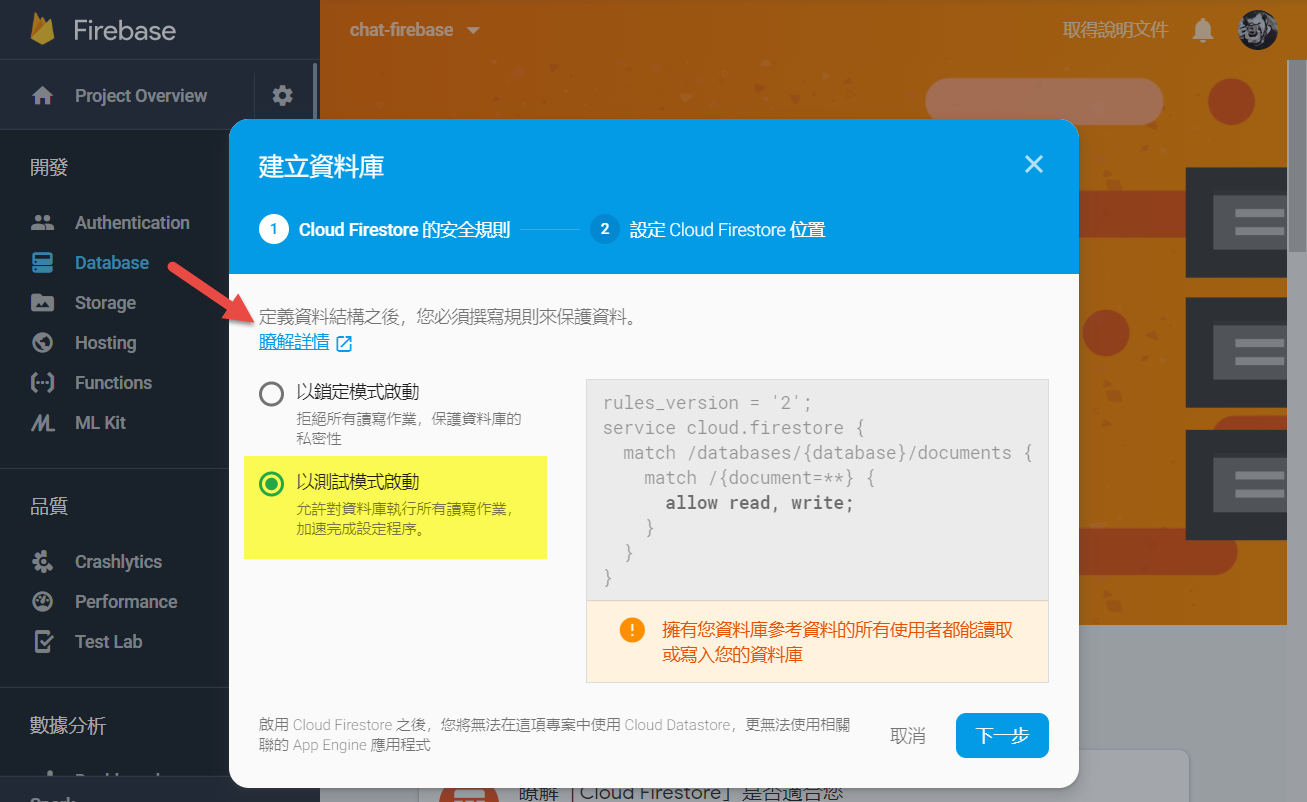
建立 Firestore 資料庫
需要使用資料庫來存放聊天的訊息資料,所以建立一個 Firestore 作為資料庫,並設定為「允許」讀寫作業。
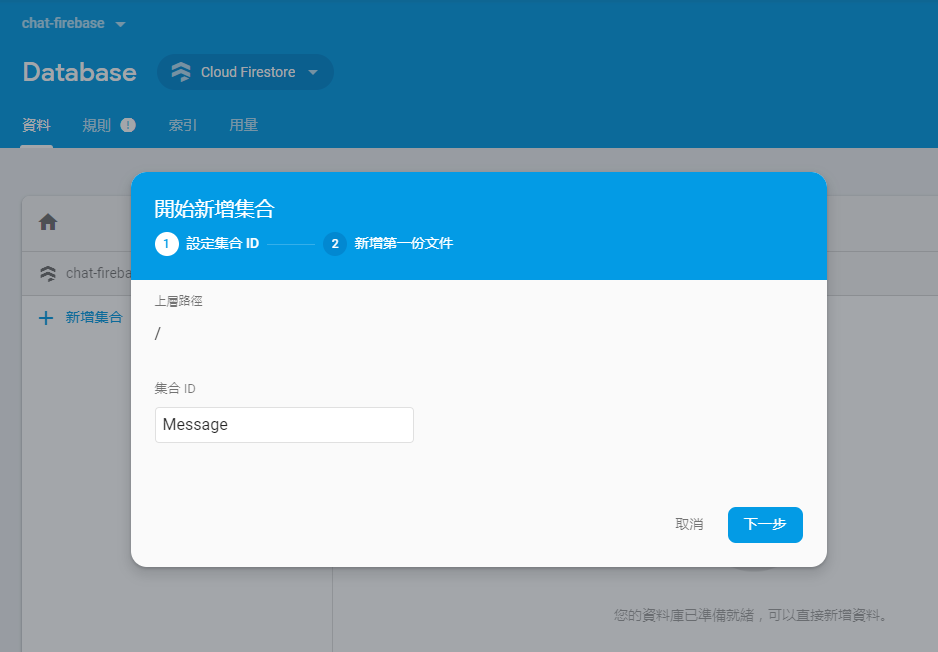
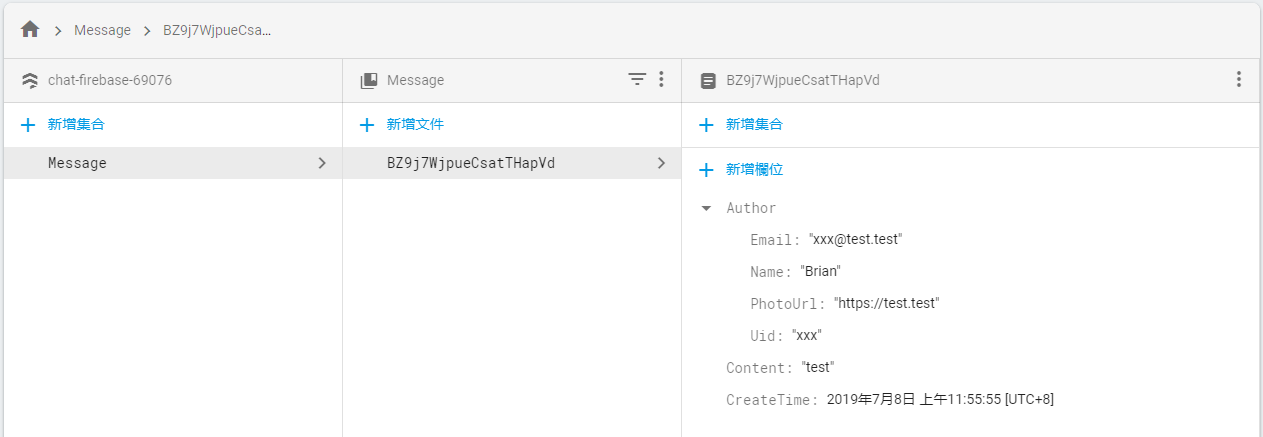
當 Firestore 建立好後,就可以新增集合 Collection ,這個集合 ID 會作為之後程式存取、新增、更新資料的主鍵,所以請務必好好命名。
我所規劃的聊天訊息資料格式如下,Author 的內容會由 Google 登入後取得的帳戶資訊得到,Content 為使用者輸入的訊息內容,CreateTime 為訊息被新增的時間。
{
    "Message": {
        "ID_001": {
            "Author": {
                "Uid": "",
                "Name": "",
                "PhotoURL": "",
                "Email": ""
            },
            "Content": "",
            "CreateTime": ""
        }
    }
}
所以就可以依照規劃的格式新增一筆範例文件看看。
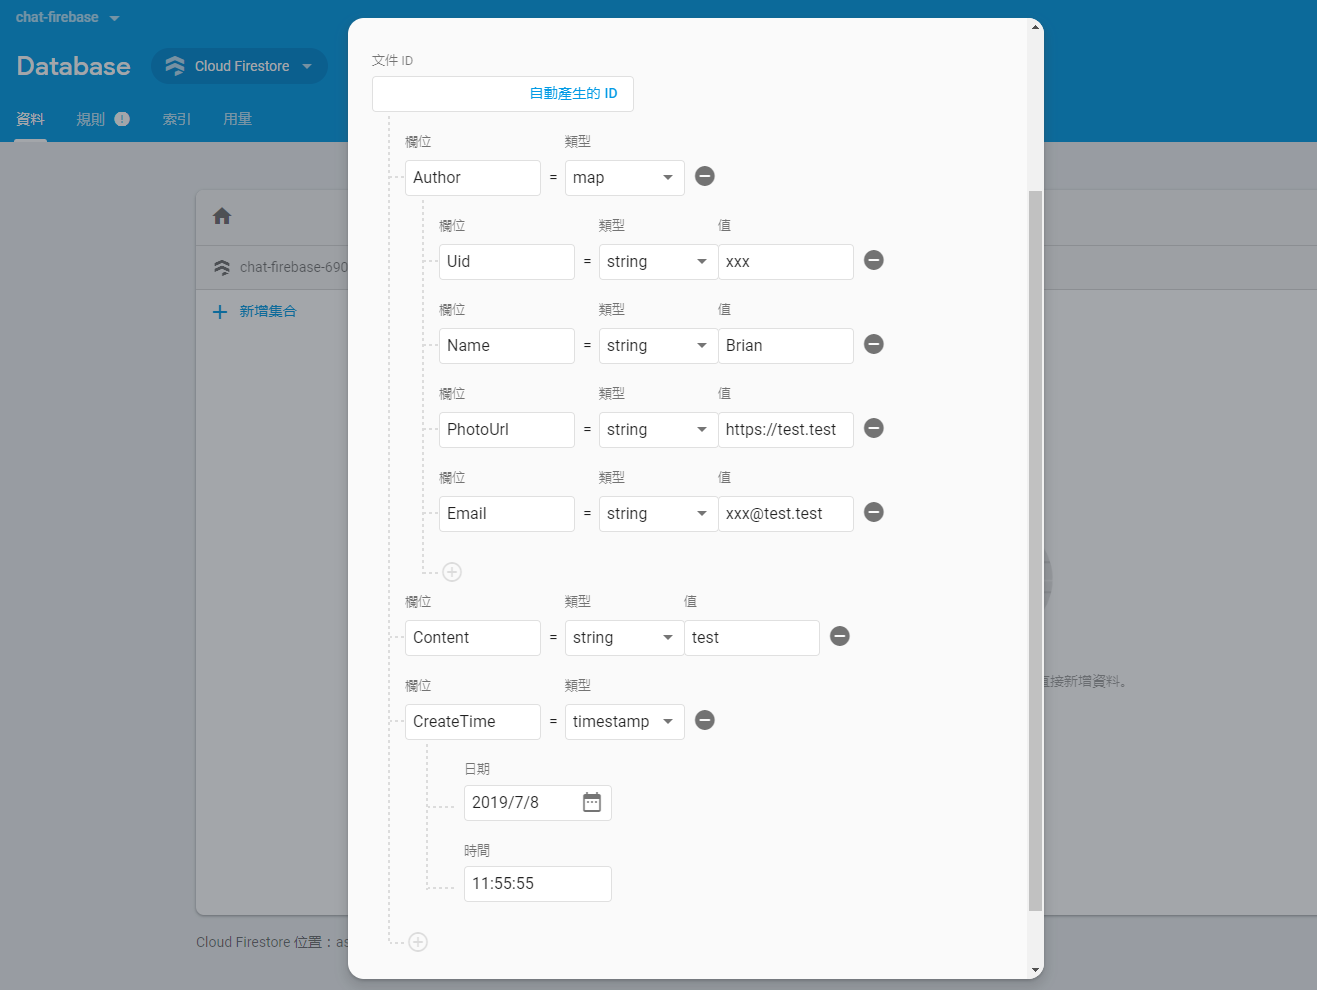
新增文件完成後的樣子,接下來就可以開始寫程式跟 Firestore 溝通囉。
加入 Vuefire 套件
在 Vue 專案的 main.js 加入 Vuefire 套件。
import Vue from 'vue'
import App from './App.vue'
import { firestorePlugin } from 'vuefire'

Vue.use(firestorePlugin)

Vue.config.productionTip = false

new Vue({
  render: h => h(App),
}).$mount('#app')
初始化 Firebase 設定
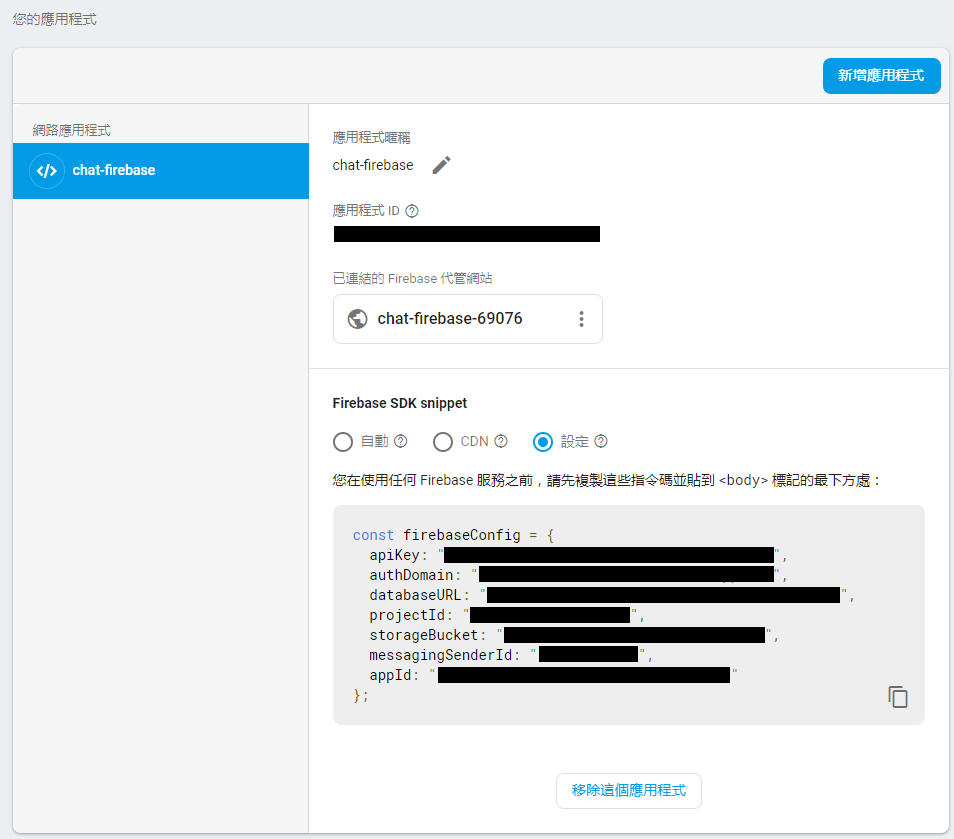
建議新增另一隻 js 檔來做 firebase 初始化,這樣未來就可以在其他地方直接 import 使用。
import firebase from 'firebase/app'
import 'firebase/firestore'

// Firebase configuration
const firebaseConfig = {
    apiKey: "",
    authDomain: "",
    databaseURL: "",
    projectId: "",
    storageBucket: "",
    messagingSenderId: "",
    appId: ""
};

// Get a Firestore instance
const firebaseApp = firebase.initializeApp(firebaseConfig)

export const db = firebaseApp
在其他要引用的地方直接 import 並使用 firestore
import { db } from '../db'
const fStore = db.firestore()
Config 是來自於 firebase 的應用程式,所以必須要先在 firebase 上新增應用程式喔。
讀取 Firebase的資料
VueFire 主要提供兩種綁定資料的方式。
import { db } from '../db'

const fStore = db.firestore()

export default {
  data() {
    return {
      messages: [],
    }
  },
  firestore: {
    documents: fStore.collection('Message'),
  },
}
import { db } from '../db'

const fStore = db.firestore()

export default {
  data() {
    return {
      messages: [],
    }
  },
  mounted: function () {
    this.$bind(
      'messages',
      fStore.collection('Message').orderBy('createTime')
    )
  },
}
差別在於編程式的綁定運用較為靈活,可以在任何需要取得/操控資料的情境下使用,以我的範例來說,我是在 mounted 時去把資料掛起來,所以也可以放到其他生命週期去執行,例如使用 watch 監看使用者的變化,然後去 firebase 重新取得想要的資料。
watch: {
  userID: {
    immediate: true,
    handler(id) {
      this.$bind('message', fStore.collection('Message'))
    },
  },
},
新增資料至 Firebase
使用 Vuefire 新增資料就更簡單了,使用 .add 並插入符合格式的資料即可。
addMessage: function () {
  if (this.inputMessage === '') return

  // Add message to firestore
  fStore.collection('Message').add({
    'author': {
      'uid': this.user.uid,
      'name': this.user.displayName,
      'photoURL': this.user.photoURL,
      'email': this.user.email
    },
    'content': this.inputMessage,
    'createTime': firebase.firestore.Timestamp.fromDate(new Date())
  })
  .then(() => {
    this.inputMessage = ''
  })
}
Firebase 上的 createTime 欄位我是設定為 timestamp 格式,透過 js 可以使用 firebase.firestore.Timestamp.fromDate() 做時間格式化,這裡的 firebase 物件是來自於我在 db.js 匯入的 firebase/app 。
而新增資料後照理說要把新的資料也同步呈現於畫面,這部分可以不用擔心,Vuefire 已經預設使用 Firebase 的 onSnapshot() 來做資料的即時更新。
Firebase 針對 onSnapshot 的說明: https://firebase.google.com/docs/firestore/query-data/listen
加入登入驗證功能
使用 Firebase 做都入驗證非常方便快速,因為服務都已經包好好的了 (笑),基本上想的到的登入供應商都已涵蓋,如 Google, Facebook, Twitter, Yahoo, Microsoft, Github ... 等。
以下我會使用 Googe 登入來示範!
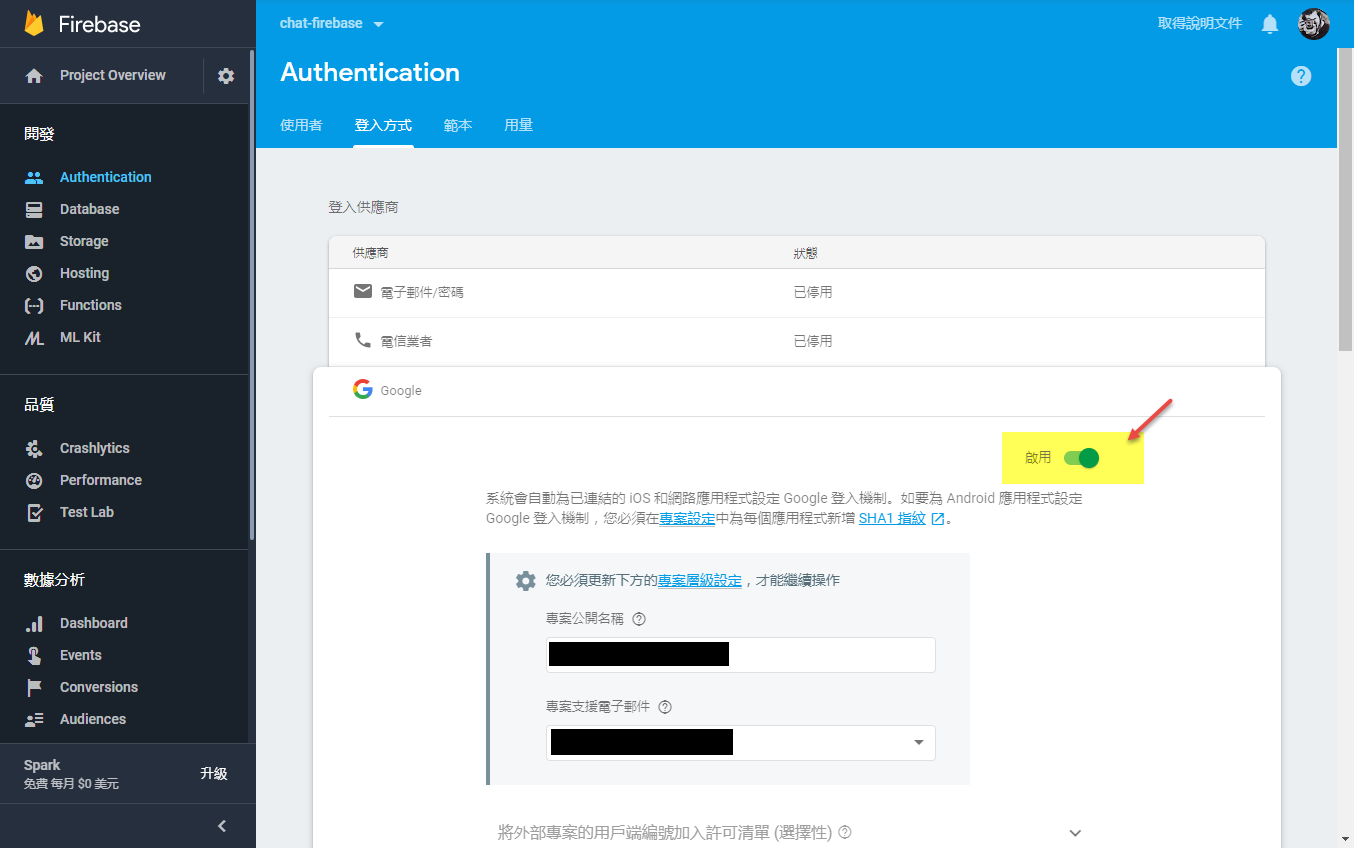
首先到 Authentication 下的登入方式,把需要的登入服務啟用。
先在 db.js 裡面 import 'firebase/auth' ,接下來在需要作登入的地方就可以接用 db.auth() 來取得 auth 相關功能。
登入使用 signInWithPopup() ,登出則使用 logout() ,並建議在 created 或 mounted 生命週期階段使用 onAuthStateChanged 做權限狀態的判斷。
import firebase from 'firebase/app'
import { db } from '../db'
const fAuth = db.auth()

export default {
  data () {
    return {
      user: {},
      isAuth: false
    }
  },
  created () {
    fAuth.onAuthStateChanged(user => {
      if (user) {
        this.user = user
        this.isAuth = true
      } else {
        this.user = {}
        this.isAuth = false
      }
    })
  },
  methods: {
    login () {
      const authProvider = new firebase.auth.GoogleAuthProvider()
      fAuth.signInWithPopup(authProvider)
        .then(result => {
          this.user = result.user
          this.isAuth = true
        })
        .catch(err => console.error(err))
    },
    logout () {
      fAuth.signOut()
        .then(() => {
          this.user = {}
          this.isAuth = false
        })
        .catch(err => console.log(err))
    }
  }
}
基本上這樣已經接近完成了一個登入的模組,只要在再新增登入及登出按鈕並指派 click 行為就可以完成。
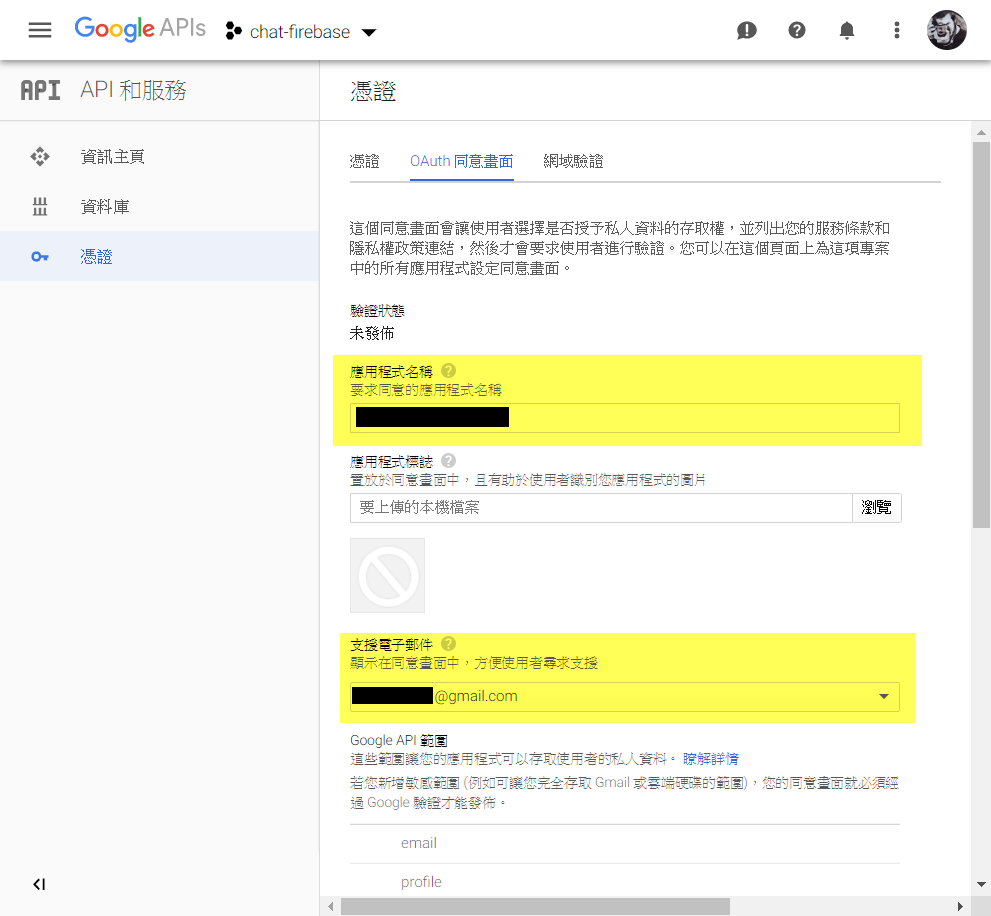
不過我在按下登入按鈕時,彈出的的視窗卻得到以下訊息。

這時候只要按下畫面上的 Learn More 連結,在 OAuth 同意畫面上修改應用程式名稱及支援電子郵件即可解決使此問題。
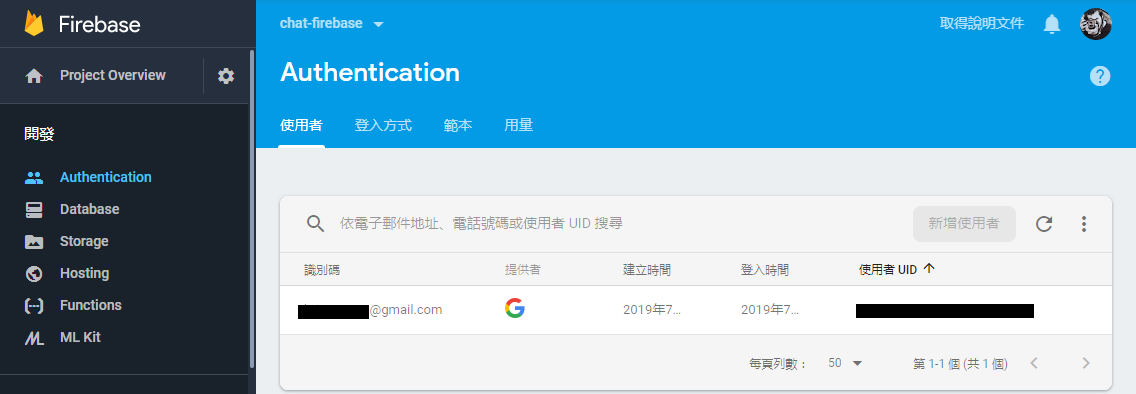
成功登入後,可以在使用者頁籤下看到成功登入過的使用者清單。
在此建議,當系統已經有採用 Firebase 的 Authentication 的登入方式後,應該要把取存資料的規則改為判斷使用者,而非全部開放,以避免非符合驗證的使用者存取,auth.uid 則是上圖使用者的 UID。
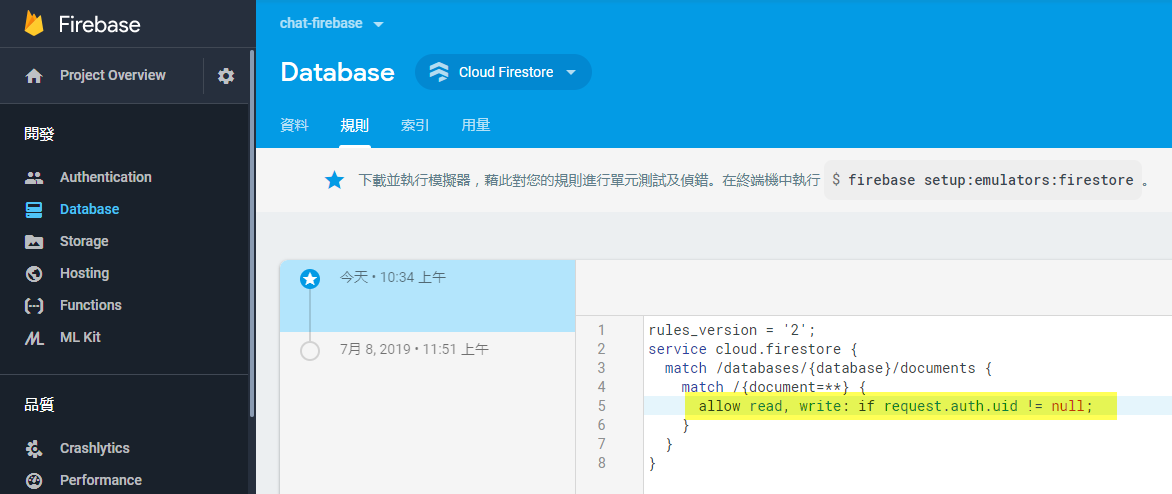
設定完成後,程式如果沒有登入就存取資料,則會返回沒有權限錯誤的訊息,系統設計時需要再對沒有權限的流程做一番規劃囉。
