Telegram.Bot.申請及Channel使用方式
Telegram是個通訊軟體,但也可以自行開發程序,做個像Line機器人一樣的功能,故用這個來當系統運行Fail時的通知。
本文分成:
1. 申請bot流程
2. 如何使用Telegram的Channel,來推送訊息
3. Telegram bot 傳送訊息時,注意事項
流程如下:
1. 申請bot流程(安裝Telegram及申請帳號,要看別的網路資料,這邊就不介紹)
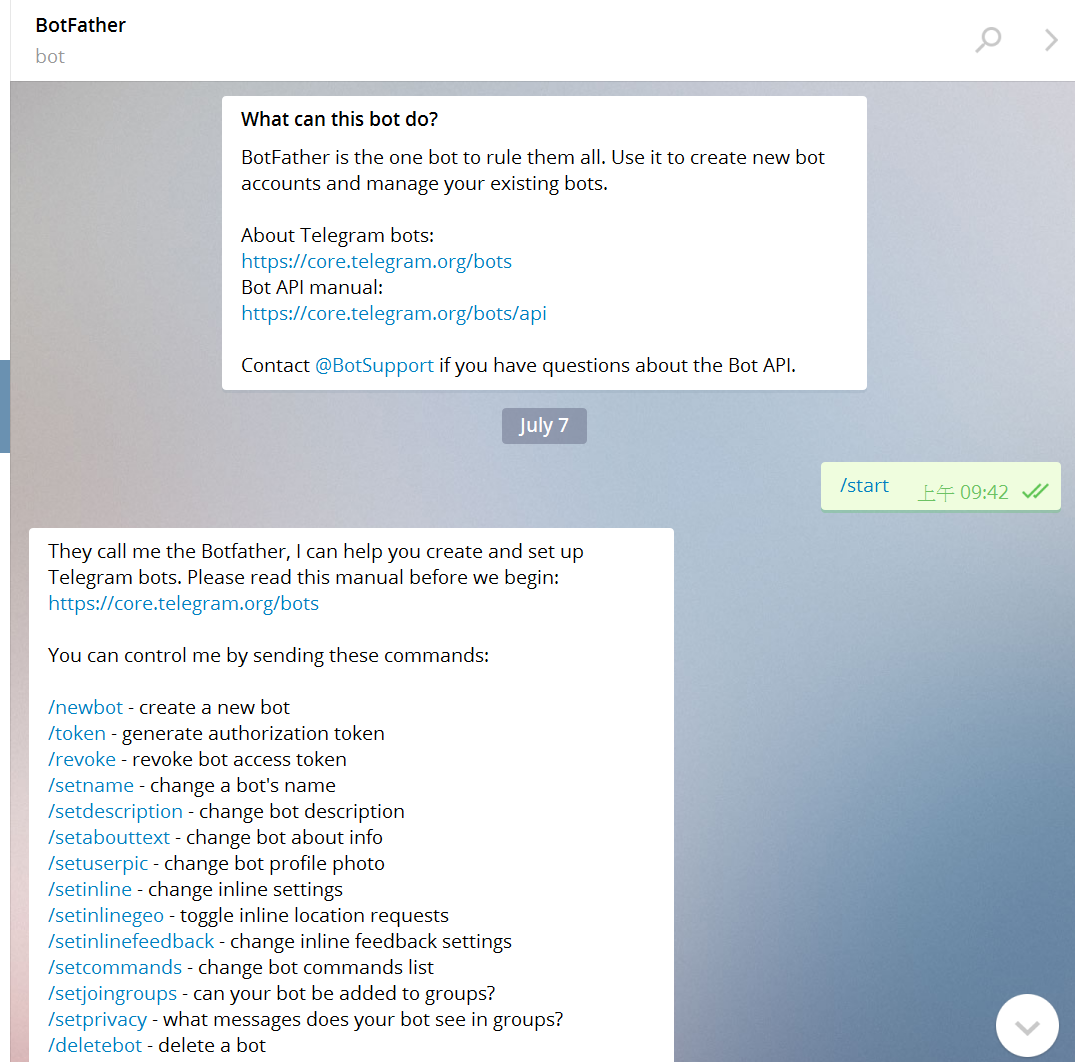
找到Telegram的bot申請帳號: 【BotFather】,跟他對話,出現如下圖:
Telegram BotFather 申請畫面,BotFather也會直接將可用指令秀出。
申請的對話流程,如下: 以下模擬對話流程
me =>申請人,BotFather=> Telegram的申請帳號Bot
me : /newbot
BotFather: Alright, a new bot. How are we going to call it? Please choose a name for your bot.
me: 這邊打上,你要設定的bot name
BotFather: Good. Now let's choose a username for your bot. It must end in `bot`. Like this, for example: TetrisBot or tetris_bot.
me: 這邊打上,bot的username,注意 名稱內一定要打上【bot】,這個也是未來別人要找你的bot時,用的名稱。
BotFather: ps=> 回覆分兩種 ,
如果跟別人的bot名稱重複,就會申請失敗,出現=>Sorry, this username is already taken. Please try something different
下面就是正常回應狀況,代表成功=> 最重要的是這邊會顯示Token,未來程序會用這個當作登入密碼,可用【/token】再次申請。
Done! Congratulations on your new bot. You will find it at telegram.me/ambersysbot. You can now add a description, about section and profile picture for your bot, see /help for a list of commands. By the way, when you've finished creating your cool bot, ping our Bot Support if you want a better username for it. Just make sure the bot is fully operational before you do this.
Use this token to access the HTTP API:
【這邊會顯示Token】
For a description of the Bot API, see this page: https://core.telegram.org/bots/api
----到這邊就算申請成功,如果要看下可用指令,可打【/help】。
2. 取得 Group or Chanel 的Chatid
bot要發送訊息,需要 chatid 才能知道要發訊息到那邊,而 chatid 取得方式是用 telegram api 提供的 [ getUpdates ],
使用方式:
- 將 bot 加入到 Group or Chanel,並設置為[ administrators ],才能獲得該群的資料。
- 在群裡,隨便傳遞各訊息。
- 打開瀏覽器使用 https://api.telegram.org/bot{token}/getUpdates ,在回傳的訊息中,就可以看到chatid。
- 透過tg api : sendmessage,測試傳遞訊息,https://api.telegram.org/bot{token}/sendMessage?chat_id={chatid}&text={訊息}。
2. 如何使用Telegram的Channel,來推送訊息(Console application專案)
- 在visual studio 專案內,透過Nuget 安裝【telegram.bot】
- 連接Telegram platfrom及寄送訊息,程序碼如下
- {0},上面步驟拿到的chatid
- {1},申請時拿到的token
-
        static Telegram.Bot.Api Bot;
        static long chanelId={0};
        static void Main(string[] args)
        {
            // 在初始化設定{1},給予Token
            Bot = new Telegram.Bot.Api("{1}");
            // 透過SendTextMessageAsync來傳送訊息,傳入chanelid及要傳送的訊息
            Bot.SendTextMessageAsync(chanelId, "每5秒傳送一個訊息");
            Bot.SendTextMessageAsync(chanelId, @"If you're sending bulk notifications to multiple users, the API will not allow more than 30 messages per second or so. Consider spreading out notifications over large intervals of 8—12 hours for best results.

Also note that your bot will not be able to send more than 20 messages per minute to the same group.");

            Console.ReadLine();

        }
3. Telegram bot 傳送訊息時,注意事項
注意事項如官方說明(如下),簡單來說,就是不能在一分鐘內傳送20個訊息及一秒鐘內不能傳超過30個訊息,不然會被Telegram擋掉,
不過測試時,發現以每3秒做傳送的話,會被TG擋掉,現在測試後,以每次5秒傳送訊息,基本上沒問題,給大家參考。
If you're sending bulk notifications to multiple users, the API will not allow more than 30 messages per second or so. Consider spreading out notifications over large intervals of 8—12 hours for best results.
Also note that your bot will not be able to send more than 20 messages per minute to the same group.
申請時會用到的指令:
/newbot : 申請新的bot
/setname : 設定bot的名稱
/token : 重新申請token
參考網址:
API文件,https://core.telegram.org/bots/api
官方說明BOT,https://core.telegram.org/bots
Walker,http://studyhost.blogspot.tw/2016/06/telegram-bot.html
Telegram 即時通活用教學:10大最愛技巧包含中文化,http://www.playpcesor.com/2015/12/telegram-10.html