Windows 10 UWP 9 of N: Surface Hub, InkCanvas handwriting focus
在Windows 10發布時就順帶一併推出得硬體設備!用途很簡單就是會議室裝置。
在Surface Hub有以下幾點重點!
- Runs ONLY Universal Windows Apps (Not Win32 or Windows Store applications)
- Apps scale automatically.
- Support Neutral, x86 and x64 package.
以上幾點就是說明在Surface Hub上的幾點特性!Surface Hub只有兩種解析度 1080P-55吋以及 4K-84吋。
硬體上有WiFi, NFC, Bluetooth, Microphone, Camera … more!輸入裝置有Touch或是Pen(觸控筆)
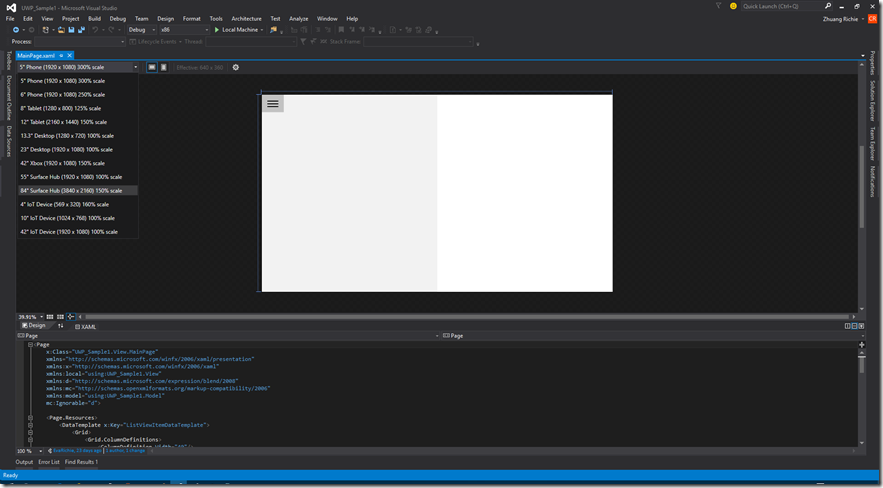
在Visual Studio 2015上可以使用XAML designer來預覽Surface Hub的裝置。
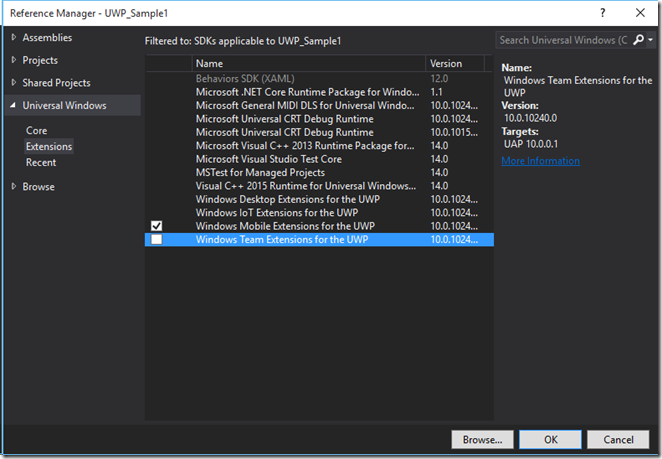
開發Surface Hub的時候需加入Windows Team的Extension。
由於目前Surface Hub還沒有出貨且基本上台灣公司不會購入,所以只好題設計這樣裝置特殊的部分!
之前再說UWP的時候就說過設計模式(UI)的獨立設計Tailor。開發Surface Hub UWP需要考慮幾點操作方式
- Every session looks like the app is running for the first time.
- Optimize for Pen and Touch.
- Right-size UI and positioning controls appropriately.
Surface Hub可以看作為大螢幕版本的Surface。
但由於該裝置是針對會議設計每次啟動APP都會算是起重新開啟APP!(Surface Hub在關閉APP後會清空該APP儲存資訊,所以需要存放資料到雲端或是其他儲存裝置。)
對於Pen以及觸控需要做最佳化因為Surface Hub支援多點觸控以及觸控筆同時操作(當然可以用BLE來串接 Mouse以及Keyboard,但...鍵盤滑鼠對於超大尺吋[ 是尺寸非解析度 ]操作上非常不方便)。
然後MSFT定義了Surface Hub的操作距離以做為開發UI上的依據!
主要分為兩大區塊
Zone 1 => 也就是主講人的位置約1.3M的距離。
Zone 2 for 55 inch => 55吋Surface hub的與會著的距離,約1.3M ~ 4M。
Zone 2 for 84 inch => 84吋Surface hub的與會著的距離,約1.3M ~ 6M。
所以將會Focus在Surface Hub的中央點為主要呈現Context的部分!並且善用新的控制項。
像是輸入文字控制項就用InkCanvas來取代TextBox在Surface hub的裝置上會是較為方便的!
要Deploy UWP在Surface Hub的方式則是使用Remote Machine。
接者來介紹Inking的控制項在Windows 10有怎樣令人期待的新技術~
Inking就是針對手寫而來的設計的API,包含手寫筆以及手指。DirectInk就是使用DirectX的渲染技術讓原先顯示路徑是用網格的點變成GPU加速的圖形處裡
接者來寫個簡單的筆跡辨識的功能
在XAML上需要加上一個API就可以
<Button Content="Reconize the word" Tag="RecognizeBtn" Click="Button_Click"/>
接者撰寫以下的程式碼
attribute.PenTip = PenTipShape.Rectangle;
attribute.Size = new Size(2, 10);
attribute.IgnorePressure = false;
attribute.FitToCurve = true;
attribute.Color = Windows.UI.Colors.Yellow;
inkCanvas.InkPresenter.UpdateDefaultDrawingAttributes(attribute);
inkCanvas.InkPresenter.InputDeviceTypes = CoreInputDeviceTypes.Mouse | CoreInputDeviceTypes.Pen | CoreInputDeviceTypes.Touch;
這樣就是基本的建立好筆觸的顏色以及大小,重點是第八行的InputeDeviceType一定需要加入!
if (recInkCanvas.InkPresenter.StrokeContainer.GetStrokes().Count > 0)
	{
        var result = await inkRecContainer.RecognizeAsync(recInkCanvas.InkPresenter.StrokeContainer, InkRecognitionTarget.All);
        if (result != null)
        {
        	var resultStr = string.Empty;
        	foreach (var r in result)
        	{
        		System.Diagnostics.Debug.WriteLine(r.GetTextCandidates().FirstOrDefault());
			}
	}
}
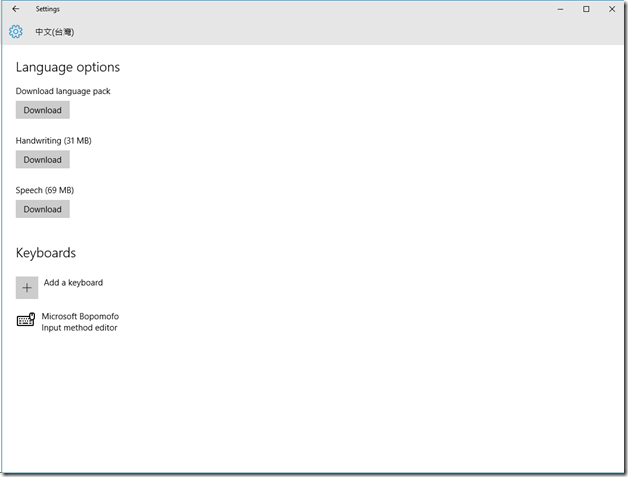
接者使用InkRecognizer的方式並將InkCanvas內的Stroke傳入就可以進行辨識的動作!預設的辨識系統會系統的設定直接有關係,如下圖就是台灣中文的語言設定,需要安裝手寫的功能才可以進行手寫辨識的功能!
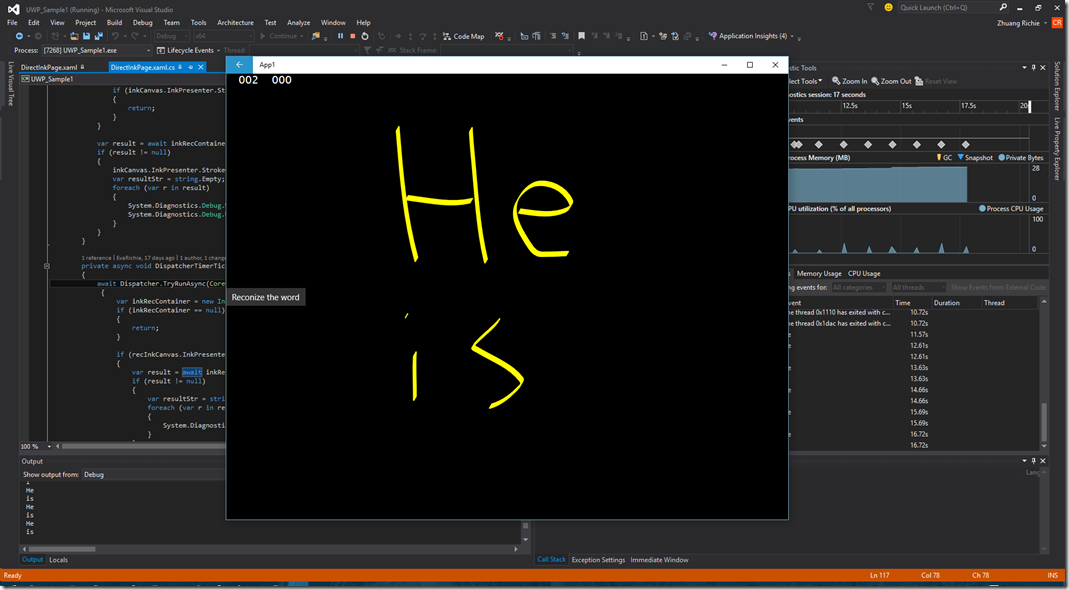
辨識的結果如下
可以看到英文辨識的單字顯示在Debug的視窗中。
Windows 10加強了手寫辨識以及手寫的API讓這項功能更加強大!很多的應用也是可以使用這樣的方式,像是文件簽屬的APP功能就可以用這API達成。
***以上Code以及說明都有可能隨著Windows 10 的版本以及Visual Studio 2015版本有所調整!***
參考資料 Surface Hub Building Windows Universal Apps for Surface Hub and the Large Screen, Harness the Full Power of Digital Inking in Your Universal Windows App, Introducing DirectInk
下次再分享Windows 10 的新技術拉~


