介紹Microsoft Store Service SDK.
今天要介紹的是Microsoft Store Service SDK,這個SDK整合裡幾個功能
- A/B testing for UWP
- App feedback for UWP
- Display ads in UWP
基本整個SDK包含以上三個新功能以下段落分別介紹該如何使用這個SDK八~
測試環境:
Windows Dev Center in Dev Insider Program
Windows 10 x64 14393
Visual studio 2015 update 3
Microsoft Store Services SDK 10.0
AB testing sample
先來介紹何謂A/B testing八~
A/B testing 基本上就是能讓Developer能夠測試新功能在APP上,例如測試 變更操作流程、In-app purchase、User experience。將APP的各個區塊拆解出來分析最佳化App。
接者來看一下Code如何實作A/B testing功能八!
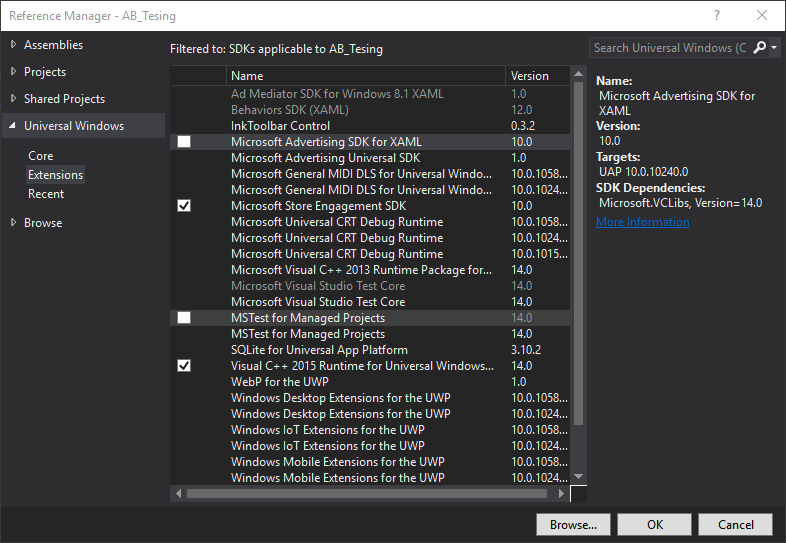
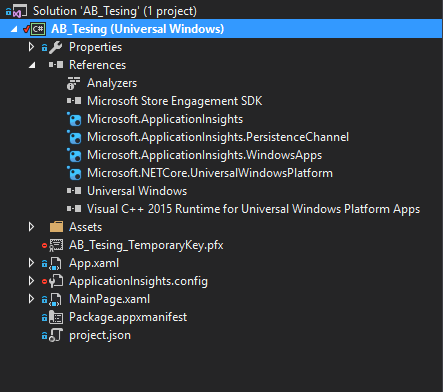 上圖在Reference中加入Microsoft Store Engagement SDK加入後會自動加入Visual C++ 2015 Runtime for Universal Windows Platform Apps!然後在MainPage.xaml.cs寫下如下的Code
using Microsoft.Services.Store.Engagement;
public sealed partial class MainPage : Page
    {
        private string projectId = "把Project ID放這邊";
        private StoreServicesExperimentVariation variation;
        private StoreServicesCustomEventLogger logger;

        public MainPage()
        {
            this.InitializeComponent();
#pragma warning disable CS4014
            InitializeEngagementService();
#pragma warning restore CS4014
        }

        private async Task InitializeEngagementService()
        {
            if (logger == null)
            {
                logger = StoreServicesCustomEventLogger.GetDefault();
            }

            var result = await StoreServicesExperimentVariation.GetCachedVariationAsync(projectId);
            variation = result.ExperimentVariation;
            if (result.ErrorCode != StoreServicesEngagementErrorCode.None || result.ExperimentVariation.IsStale)
            {
                result = await StoreServicesExperimentVariation.GetRefreshedVariationAsync(projectId);
                if (result.ErrorCode == StoreServicesEngagementErrorCode.None)
                {
                    variation = result.ExperimentVariation;
                }
            }

            var btnStr = variation.GetString("buttonString", "RedButton");
            var color = Color.FromArgb(255, (byte)variation.GetInt32("ColorR", 0), (byte)variation.GetInt32("ColorG", 0), (byte)variation.GetInt32("ColorB", 0));
            await Btn1.Dispatcher.RunAsync(Windows.UI.Core.CoreDispatcherPriority.Normal, () =>
             {
                 Btn1.Content = btnStr;
                 Btn1.Foreground = new SolidColorBrush(color);
             });

            logger.LogForVariation(variation, "事件名稱");
        }
    }
說明一下ProductID 需要在Windows Dev center中進行設定,而一開始在MainPage Construct的時候就得要抓取 StoreServiceExperimentVariation所以需要有個async的Task連線到Windows Dev Center抓取A\B testing的相關設定,使用pragma的語法讓Async的Task可以在Construct中使用而不會丟出錯誤!然後在抓取完的variation可以去取得測試的資料( variation.GetString 就是抓取設定在Dev Center的值)然後記下Log回報給Dev Center目前使用的是哪個variation。
以上就是在APP端的Sample,接下來要說如何在Dev Center新增Variation的設定。
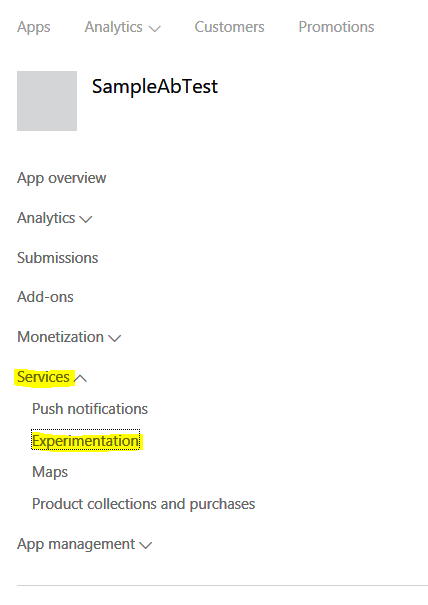 在Services的選單展開可以看到Experimentation的選項。
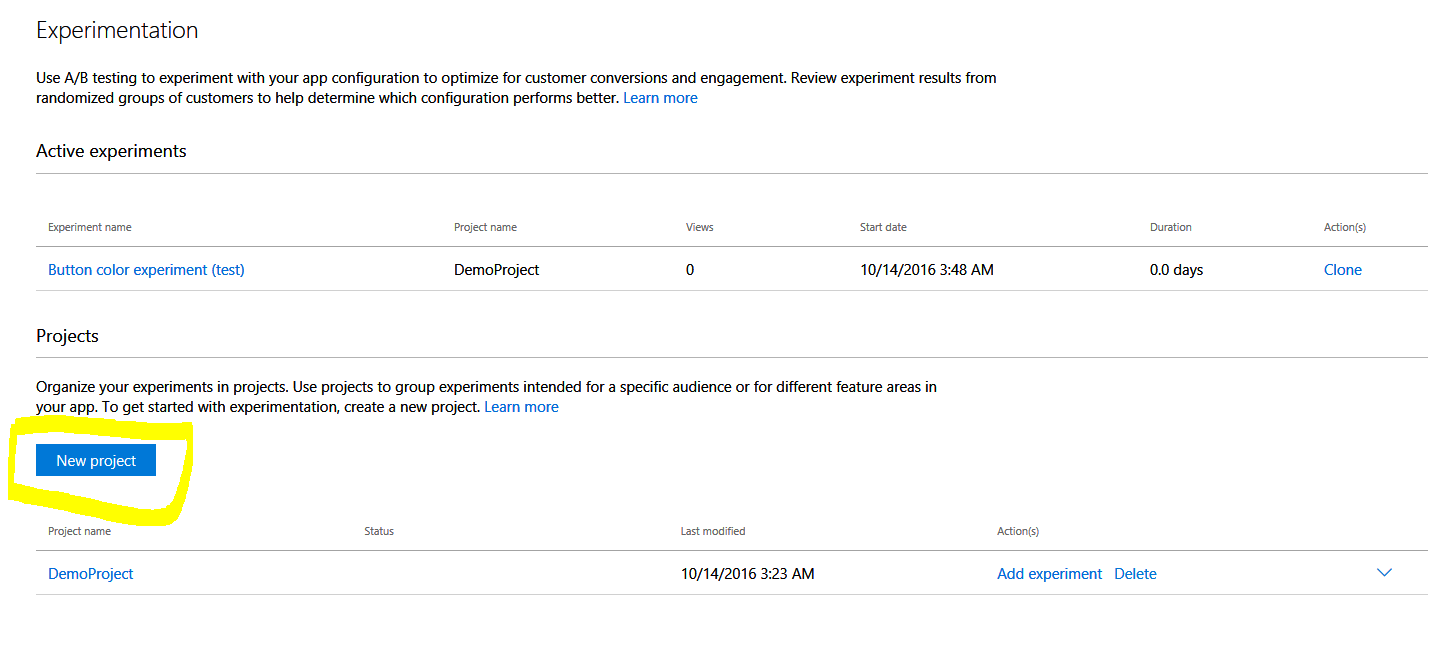 接者可以新增AB testing的專案。
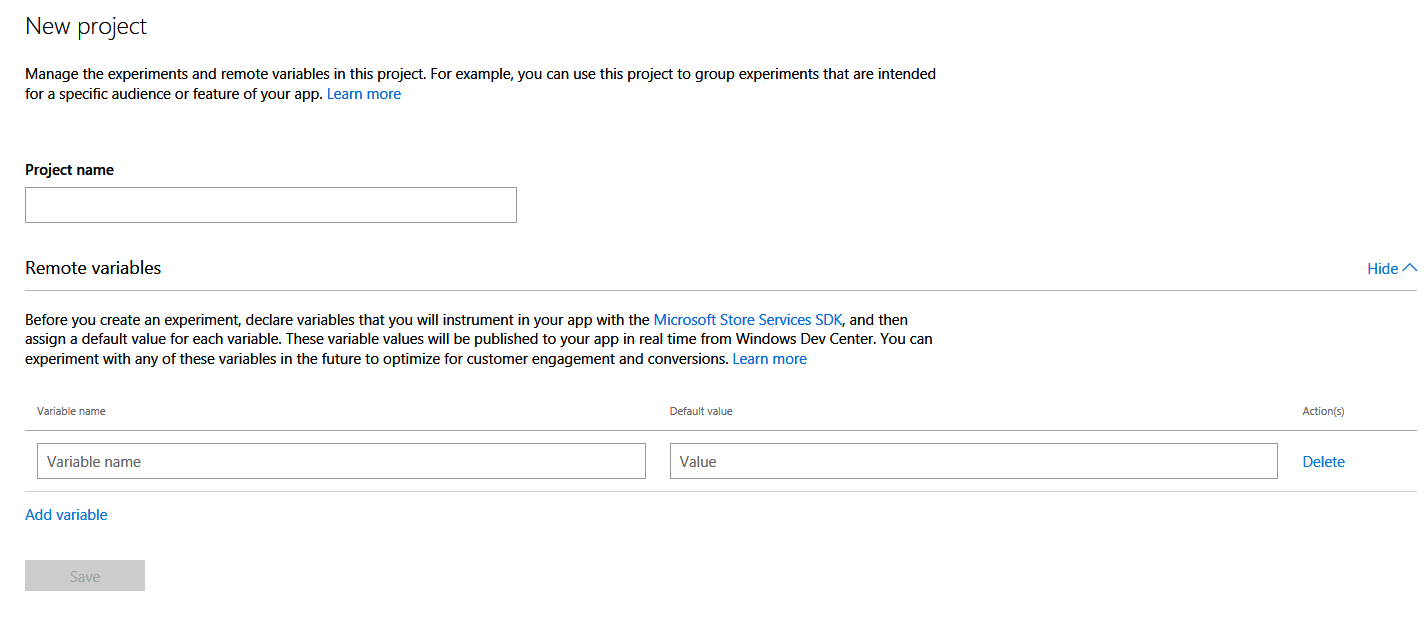 專案建立需要有專案名稱以及遠端參數!這邊需要注意的是遠端參數一旦設定完好初始值就無法變更,主要是因為對於該情境如何測試的變數須要有準確的基準值。
建立好Ab testing的專案後就可以建立測試實驗(Experiment)
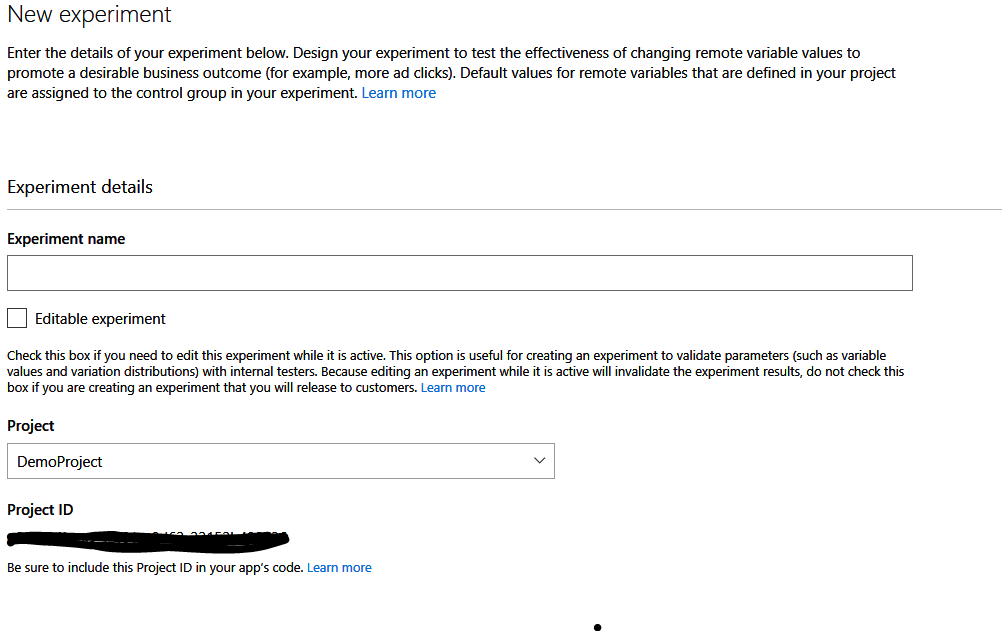
測試情境需要測試名稱以及附屬再哪個專案!這邊會給予Project ID,這個就是在Code需要的ProjectID。
接下來需要建立view event,也就是讓使用者看到的UI事件的定義
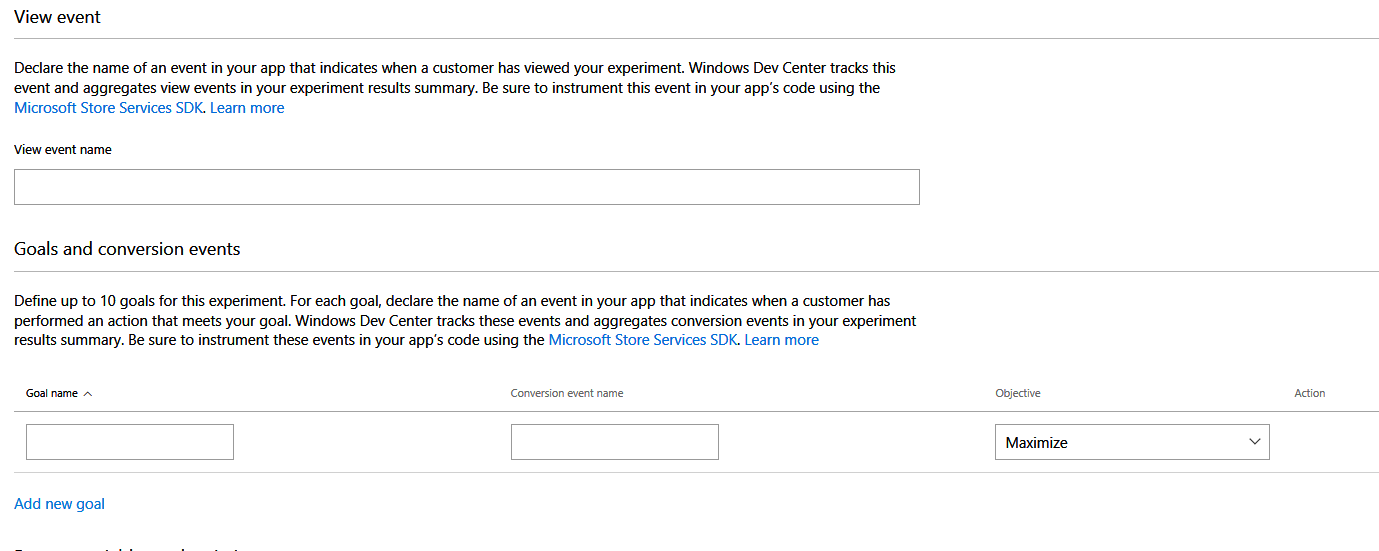 需要建立事件名稱以及達成目標(Goal name)及該對應到的事件名稱( Conversion event name )並設定目標達成是要最大化還是最小化。
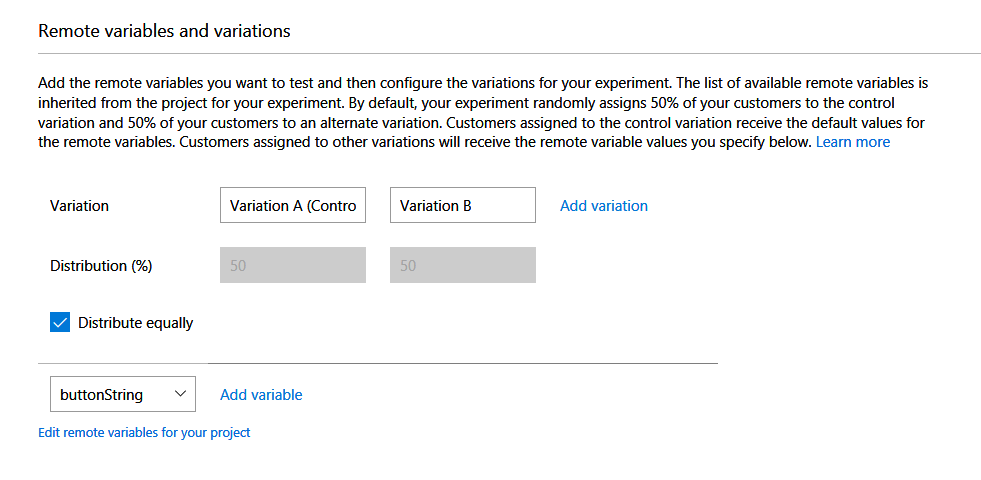 接者把遠端變數的情境比例設定(如上圖是A、B各50%) 、設定遠端變數在情境B的時候的變數值。
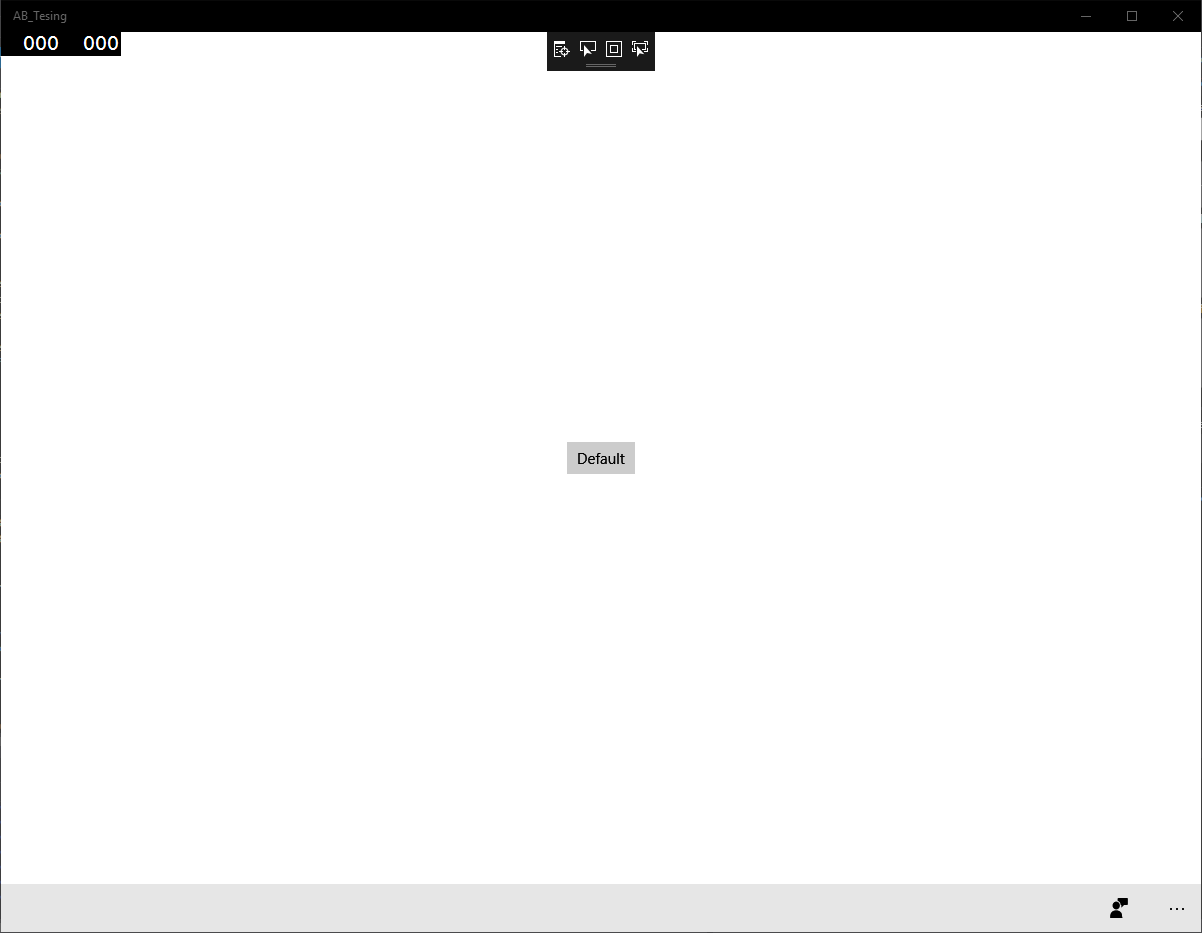
接者儲存好設定並且啟動後就可以測試!執行結果如下
總結一下再使用ABTesting的時候最好只有兩個情境(Variation),並設定成平均的比例會直接的比較數據顯示!
詳細原文連結 https://msdn.microsoft.com/en-us/windows/uwp/monetize/run-app-experiments-with-a-b-testing
Launch Feedback hub from your app
接者來介紹如何整合App feedback到自己的APP上!
Project的設定一樣是在Reference加上Microsoft Store Engagement SDK,如下圖。
接者使用以下API來確認系統是否有達到14271的版本以上
var isSupport = StoreServicesFeedbackLauncher.IsSupported();
而要Launch Feedback app的寫法也一樣很簡單的如下所示
await StoreServicesFeedbackLauncher.GetDefault().LaunchAsync();
這樣呼叫系統提供的Feedback App讓使用者回饋App的Bug或是Recommand都可以比較直接的提供單一回饋方式!而且之後的Developer dashboard也將會支援Feedback的report。
在XAML上面可以使用FontIcon有內建的ICON圖示!
<FontIcon FontFamily="Segoe MDL2 Assets" Glyph=""/>
實際執行結果如下

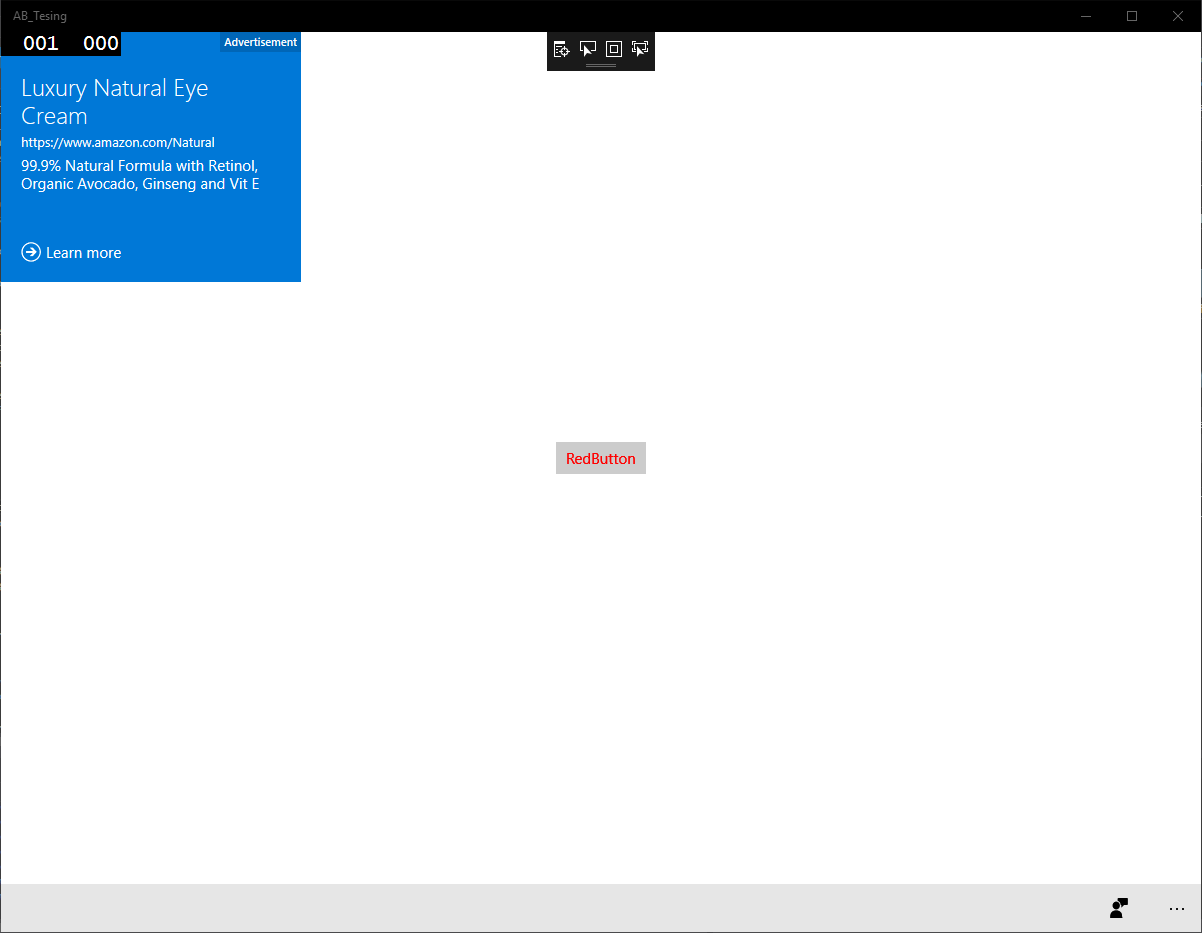
最後則是在APP中放入廣告!一直以來Advertisement的SDK都有很多的3rd-party廠商開發,現在要說的就是取代先前8.1的Ad套件在Phone和Store必須安裝兩個SDK而現在在MSFT Store Engagement SDK。
安裝好之後廣告的部分分成兩種UI Control!
- AdMediatorControl
- AdControl
兩者最大差異就是AdControl的廣告提供者是MSFT而在AdMediatorControl則是能整合多組的廣告提供商!先來介紹如何使用AdControl在XAML上吧!
而另外一個Microsoft Advertising Universal SDK是做甚麼用的請參考下圖:
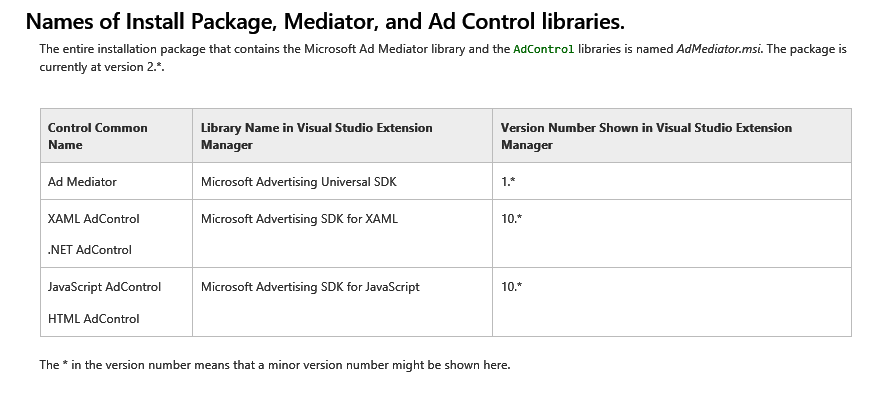 如果要使用AdMediatorControl就是要使用Universal SDK~ 圖片以及參考連結 https://msdn.microsoft.com/en-us/library/mt313181.aspx
接者來實作AdControl在XAML上八,在Reference加入好Advertising SDK for XAML後在XAML上加入namespace以及Control 如下
<Page
    x:Class="AB_Tesing.MainPage"
    xmlns="http://schemas.microsoft.com/winfx/2006/xaml/presentation"
    xmlns:x="http://schemas.microsoft.com/winfx/2006/xaml"
    xmlns:local="using:AB_Tesing"
    xmlns:d="http://schemas.microsoft.com/expression/blend/2008"
    xmlns:mc="http://schemas.openxmlformats.org/markup-compatibility/2006"
    xmlns:adUI="using:Microsoft.Advertising.WinRT.UI"
    mc:Ignorable="d">

    <Grid Background="{ThemeResource ApplicationPageBackgroundThemeBrush}">
        <Grid.ColumnDefinitions>
            <ColumnDefinition Width="Auto"/>
            <ColumnDefinition Width="*"/>
        </Grid.ColumnDefinitions>
        <adUI:AdControl ApplicationId="3f83fe91-d6be-434d-a0ae-7351c5a997f1" AdUnitId="10865270" HorizontalAlignment="Left" Height="250" VerticalAlignment="Top" Width="300"/>
    </Grid>
</Page>
namespace會是WinRT.UI作為結尾但是這個沒有再分成Phone或是Store之分,要注意的是AdControl需要設定ApplicationId以及AdUnitId才會正常的顯示。MSFT提供一組測試AdControl的測試碼如下表
For video interstitial ads:
| AdUnitId | AppId |
|---|---|
|
11389925 |
d25517cb-12d4-4699-8bdc-52040c712cab |
For banner ads:
| AdUnitId | AppId |
|---|---|
|
10865270 |
3f83fe91-d6be-434d-a0ae-7351c5a997f1 |
以這邊需要設定Width以及Height以便最佳化AdControl的變化廣告使用,以下列表列出
For Mobile/Phone device
| Size | Landscape or portrait |
| 300 x 50 | Portrait |
| 320 x 50 | Portrait |
| 480 x 80 For Silverlight only |
Portrait |
| 640 x 100 | Landscape |
For Tablet/PC
| Size |
| 300 x 250 |
| 728 x 90 |
| 160 x 600 |
| 300 x 600 |
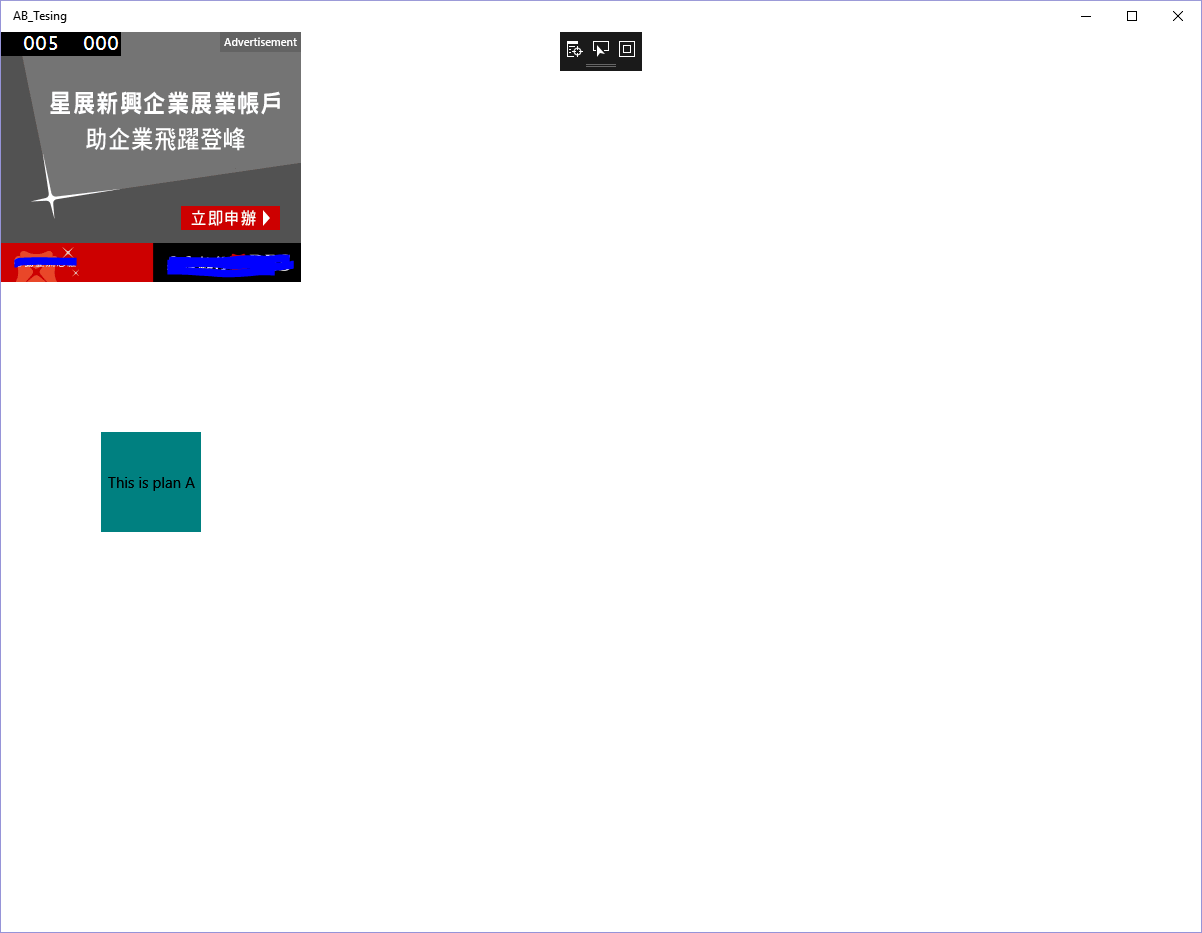
實際執行的App UI如下
***以上Code以及說明都有可能隨著Windows 10 的版本以及Visual Studio 2015版本有所調整!***
參考資料 MSDN、A,B Testing for UWP Apps Experiment for Success, App Feedback
下次再分享Windows 10 的新技術拉~