多工新特性在UWP上~
前言
在現在的APP開發上很重要的一點就是Multi-tasking( 多工 )的概念以及功能,如何讓APP在非啟動狀態下能夠執行某些功能~ 從傳統Win32到現在UWP的App 生態和架構已經大為不同那麼在新的Creator update上又有甚麼新功能讓multi-tasking能夠更加強大呢?
先來複習一下有哪些功能關於 multi-tasking 在UWP的APP上
- Out of process background task
- In-process background task
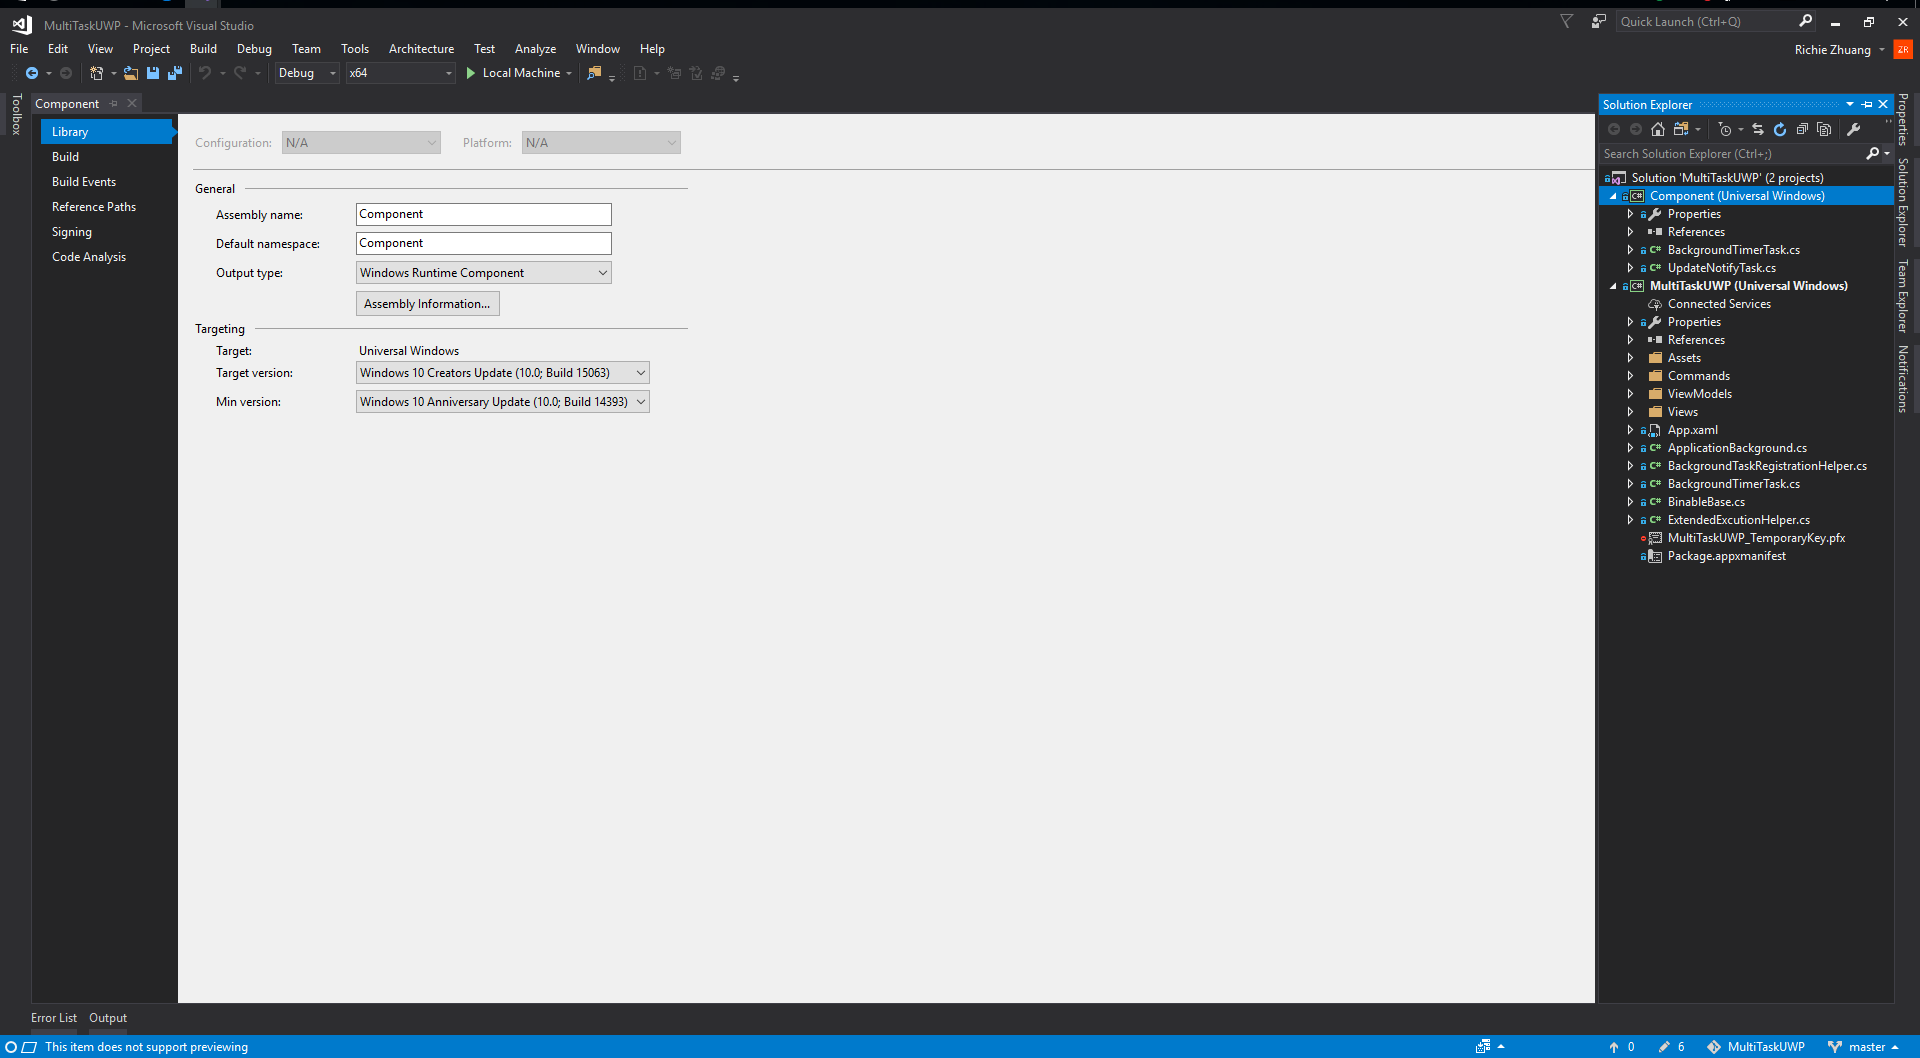
在 10240和10586的 UWP app使用的是 seperate process background task。這個模式的background task需要額外建立 Windows Runtime Component專案!而這個專案需要注意的是使用的 API 會是 Windows Runtime的型別! 在Microsoft Docs可以參考這篇文章 ( https://docs.microsoft.com/en-us/windows/uwp/winrt-components/ )使用這個專案產生出來的輸出檔案會是 winmd 的格式,是針對Windows Store app or UWP app。使用Windows Runtime component的特性會是可以跨語言( C, C++/CX, Javascript, C#, VB.net )使用的Library在UWP或是Store app~
然後再 Windows 10 Anniersary update( Build 14393 )介紹了 in-process background task,這個模式的background task可以使用一般型別的API而不需使用Windows Runtime的API而且Background task會和App可以在同一個Process之下!
接者來實際Demo一下這兩個不同模式的Background task八
開發環境如下:
- Visual Studio 2017 lastest release
- Windows 10 Creator update
- Windows 10 Creator update SDK
 方案結構會包含 App 和 Windows Runtime component的專案
簡單的Sample Code in C# 如下
public sealed class BackgroundTimerTask : IBackgroundTask
    {
        private BackgroundTaskDeferral deferral;

        public void Run(IBackgroundTaskInstance taskInstance)
        {
            deferral = taskInstance.GetDeferral();
            taskInstance.Canceled += TaskInstance_Canceled;

            var message = $"Out of process backgroundtask is timer trigger, Time is {DateTime.Now}";
            System.Diagnostics.Debug.WriteLine(message);
            ShowToast(message);
        }

        private void TaskInstance_Canceled(IBackgroundTaskInstance sender, BackgroundTaskCancellationReason reason)
        {
            deferral?.Complete();
        }

        private void ShowToast(string message)
        {
            var templateXml = ToastNotificationManager.GetTemplateContent(ToastTemplateType.ToastText01);
            templateXml.GetElementsByTagName("text")[0].AppendChild(templateXml.CreateTextNode(message));
            var notification = new ToastNotification(templateXml);
            ToastNotificationManager.CreateToastNotifier().Show(notification);
        }
    }
這個簡單的Code單純的顯示toast notification當background task被觸發啟動。
使用 out of process background task會有以下幾點需要注意
- 需要額外建立Windows Runtime component專案並在UWP App中加入該專案之參考。
- Background task的Code需要實作IBackgroundTask的介面,該Class必須為Sealed且某些API需要使用Windows Runtime API。
- 需要再Package.manifest中註冊background task。
- 在註冊Background task的時候需要提供 Task Entry Point(String)來識別是哪個Windows Runtime Component的Background task。
接者說明 in-process background task 這個功能讓UWP在開發background task上可以很簡單的操作~可以無痛使用.Net on UWP的 API。 使用了 in-process的機制會改變原本使用的 app lifecycle(加入了 enter background、leave background的事件判斷是否進入background)
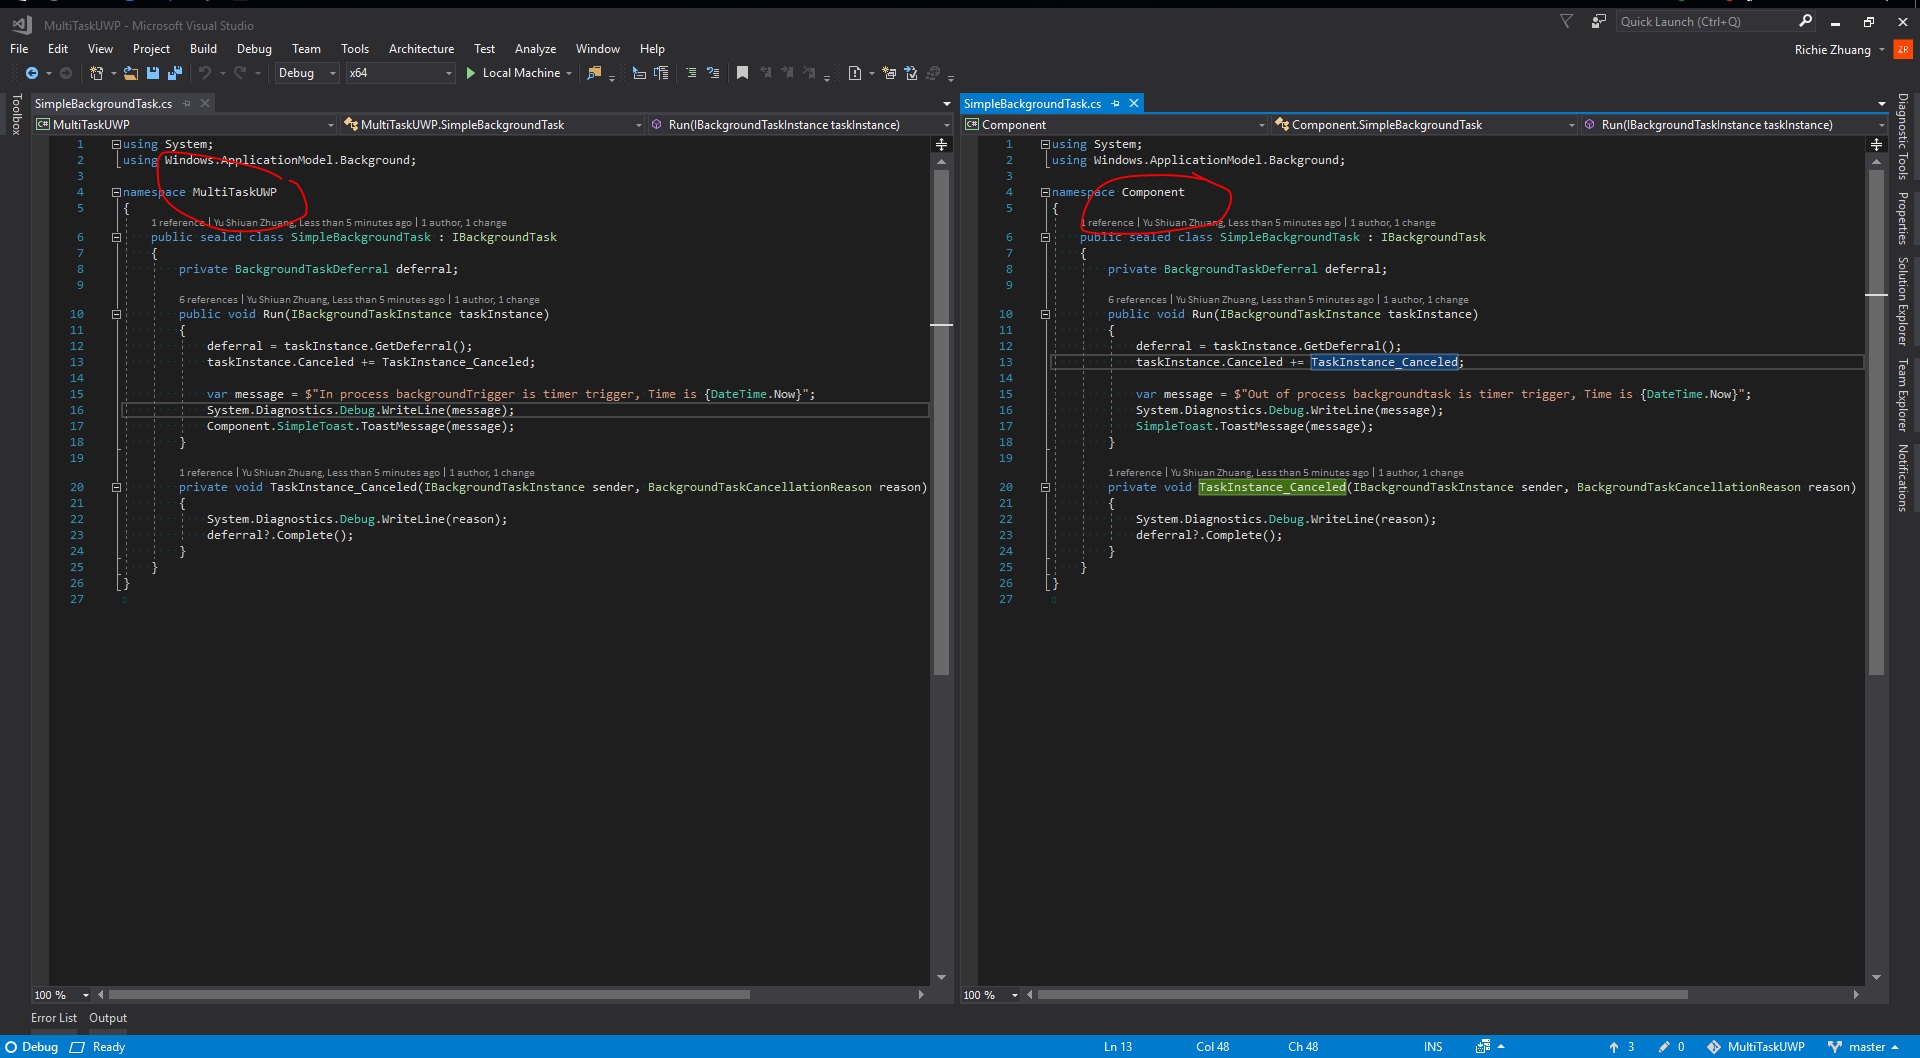
要使用in-process background task其實很簡單,主要把先前放在Windows Runtime component中繼承IBackgroundTask的Class搬到App的Project中,如下圖所示
不論是否是 Out-of-process 還是 In-process 的BackgroundTask都需要使用BackgroundTaskBuilder的API來建立BackgroundTask,如下Sample Code
public static async Task<BackgroundTaskRegistration> RegistBackgroundTaskAsync()
        {
            var builder = new BackgroundTaskBuilder();
            builder.Name = taskName;
            builder.TaskEntryPoint = taskEntryPoint;
            builder.SetTrigger(trigger);
            var taskRegistration = builder.Register();
            return taskRegistration;
        }
如果使用 In - process background task的就得要知道App life cycle也因此而改變!先前的狀態會是 Not running -> running -> suspending。 而在加入了 in-process的background task就有 EnteredBackground 和 LeavingBackground的兩個事件在App的Class之下。然後需要override掉在App的OnBackgroundActivated的event handler來決定呼叫哪個Background task,Sample code如下
protected override void OnBackgroundActivated(BackgroundActivatedEventArgs args)
        {
            base.OnBackgroundActivated(args);

            var backgroundTask = new BackgroundTimerTask();
            backgroundTask.Run(args.TaskInstance);
        }
在使用in-process background task的時候還需要注意記憶體的使用量!在out-of-process background task的時候background task的code將會執行在另外一個process上!所以能獲得較多的資源(相較於in-process background task)所以究竟要取決使用哪總類型的background task就看開發人員自行考量。
New feature : Grouped BackgroundTask
接著是這次Creator update的新功能! Grouped BackgroundTask,也就是可以把多個Background task做成一個群組的方式來分割,在多人合作的專案上可以比較方便的切割負責不同的Background task~直接來看Code是如何建立Grouped background task八
public static BackgroundTaskRegistrationGroup CreateOrGetBackgroundTaskGroup(string groupId, string groupName)
        {
            if (string.IsNullOrEmpty(groupId) || string.IsNullOrWhiteSpace(groupId) && (string.IsNullOrEmpty(groupName) || string.IsNullOrWhiteSpace(groupName)))
            {
                throw new ArgumentNullException(groupId);
            }

            var group = BackgroundTaskRegistration.GetTaskGroup(groupId);
            if (group == null)
            {
                group = new BackgroundTaskRegistrationGroup(groupId, groupName);
            }

            return group;
        }
藉由ID 和Name的方式來建立group,然後再先前的註冊backgroundtask的方法就會修改成如下Sample code
public static async Task<BackgroundTaskRegistration> RegistBackgroundTaskAsync()
        {
            var builder = new BackgroundTaskBuilder();
            builder.Name = taskName;
            builder.TaskEntryPoint = taskEntryPoint;
            builder.SetTrigger(trigger);
            builder.TaskGroup = group;
            var taskRegistration = builder.Register();
            return taskRegistration;
        }
將建立好的backgroundtask group丟給BackgroundTaskBuilder的TaskGroup屬性就好了!
然後需要註冊grouped background task的event handler分成兩類~
- BackgroundTaskCompletedEventHandler 、BackgroundTaskProgressEventHandler
- BackgroundActivated
如果需要在Background task instance中回報Background task progress使用第一種組合就好~ 如果不需要顯示進度的可以用BackgroundActivated就好,Sample code如下
private async void GroupBackgroundTaskRegist()
        {
            BackgroundTaskRegistrationHelper.UnRegisterAllTask();

            var trigger = new TimeTrigger(20, false);

            _group = BackgroundTaskRegistrationHelper.CreateOrGetBackgroundTaskGroup(App.groupId, App.groupName);
            _group.BackgroundActivated += group_BackgroundActivated;
            await BackgroundTaskRegistrationHelper.RegistBackgroundTaskAsync("groupTask3", trigger, null, null, false, _group);
            await BackgroundTaskRegistrationHelper.RegistBackgroundTaskAsync("groupTask4", trigger, null, null, false, _group);
        }
或是使用
private async void GroupBackgroundTaskRegist()
        {
            BackgroundTaskRegistrationHelper.UnRegisterAllTask();

            var trigger = new TimeTrigger(20, false);

            _group = BackgroundTaskRegistrationHelper.CreateOrGetBackgroundTaskGroup(App.groupId, App.groupName);

            await BackgroundTaskRegistrationHelper.RegistBackgroundTaskAsync("groupTask3", trigger, null, null, false, _group);
            await BackgroundTaskRegistrationHelper.RegistBackgroundTaskAsync("groupTask4", trigger, null, null, false, _group);

            foreach (var task in _group.AllTasks)
            {
                task.Value.Progress += Value_Progress;
                task.Value.Completed += Value_Completed;
            }
        }
視情況來決定使用哪種Event handler在Grouped background task。
因為在UWP中可以使用 In process background task 或是 out of process background task那在grouped background task會有甚麼影響呢?這邊做了個小實驗。
- 使用 in process background task 配合 backgroundtaskcompletedeventhandler, backgroundtaskprogresseventhandler 會直接跑到completed 的event handler!
- 使用 out of process background task 配合 backgroundtaskcompletedeventhandler, backgroundtaskprogresseventhandler 可以在taskInstance做Progress的處理。
- 使用 in process background task 配合 backgroundactivated 可以正常在taskInstance class中執行。
- 使用 out of process background task 配合backgroundactivated 可以正常在taskInstance class中執行。
在 in proces background task 中使用 backgroundtaskcompletedeventhandler, backgroundtaskprogresseventhandler 會是錯誤的搭配模式。
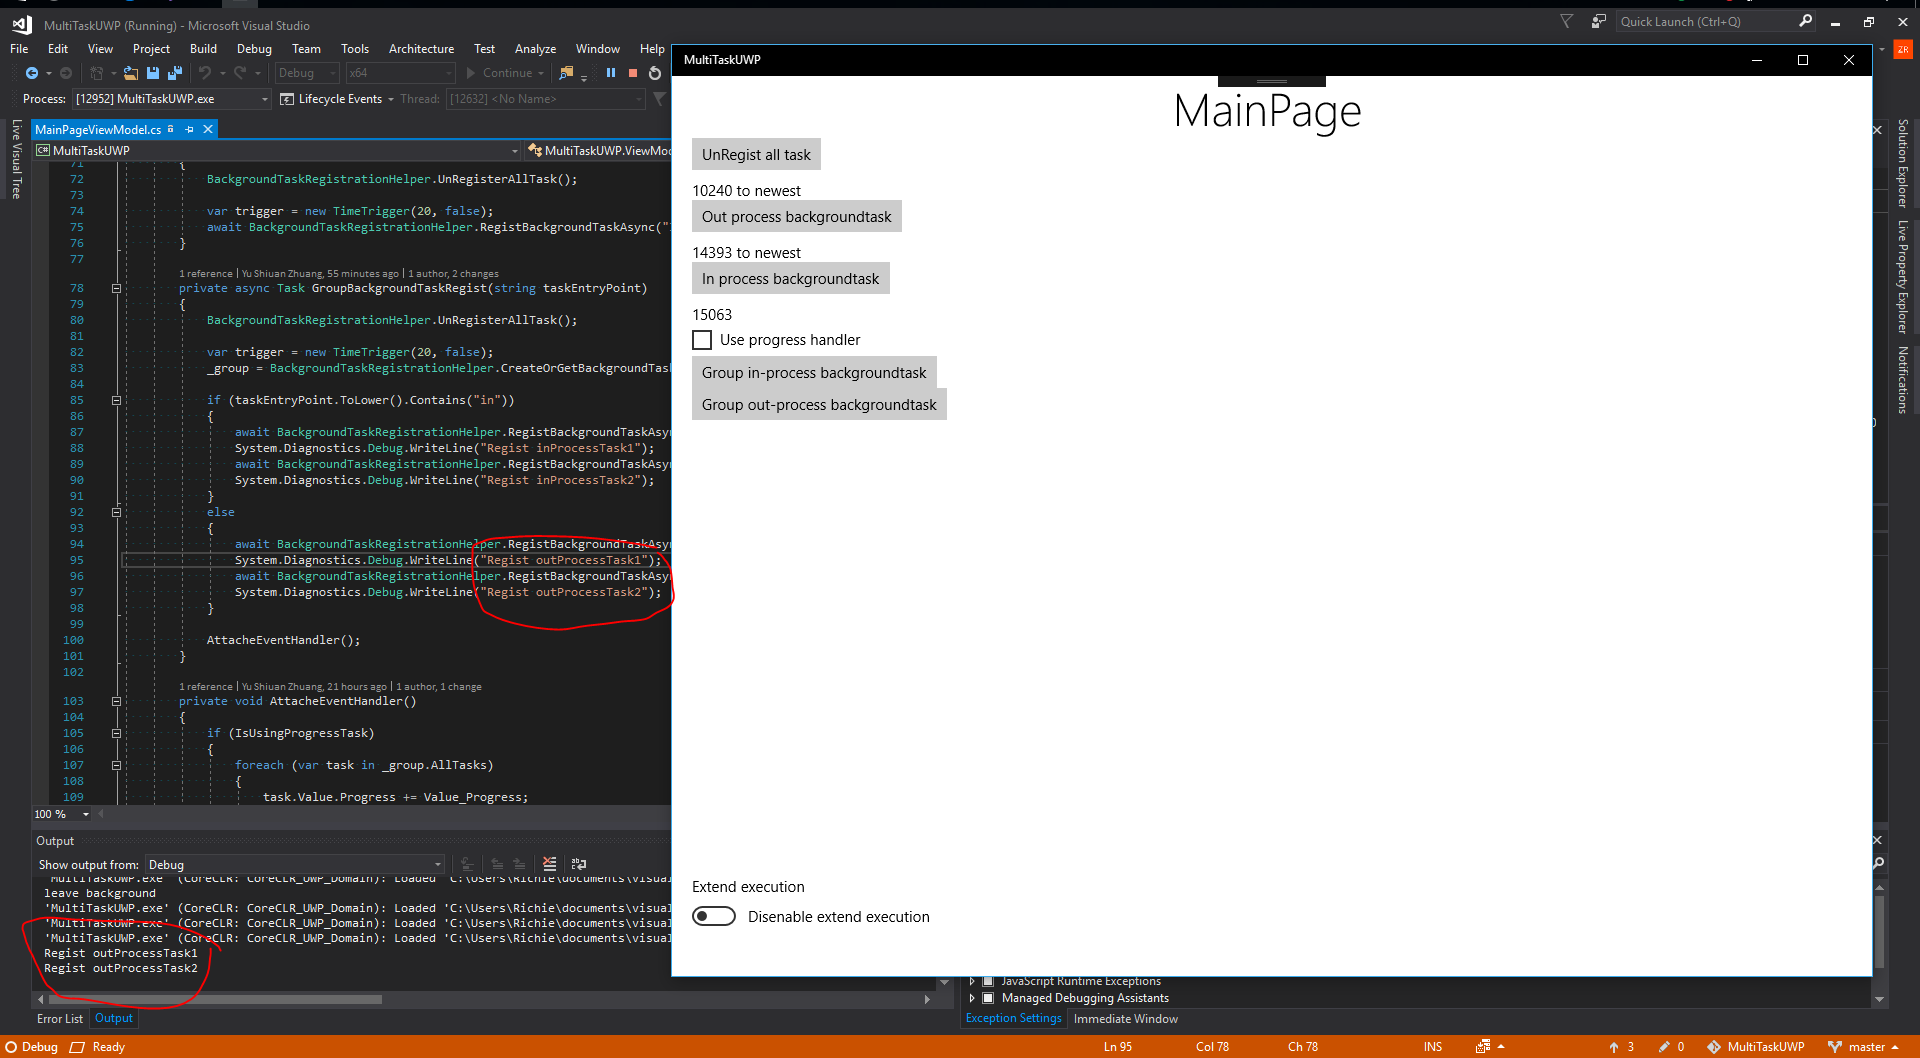 註冊兩個Out of process的 background task並且放在同一個Group中
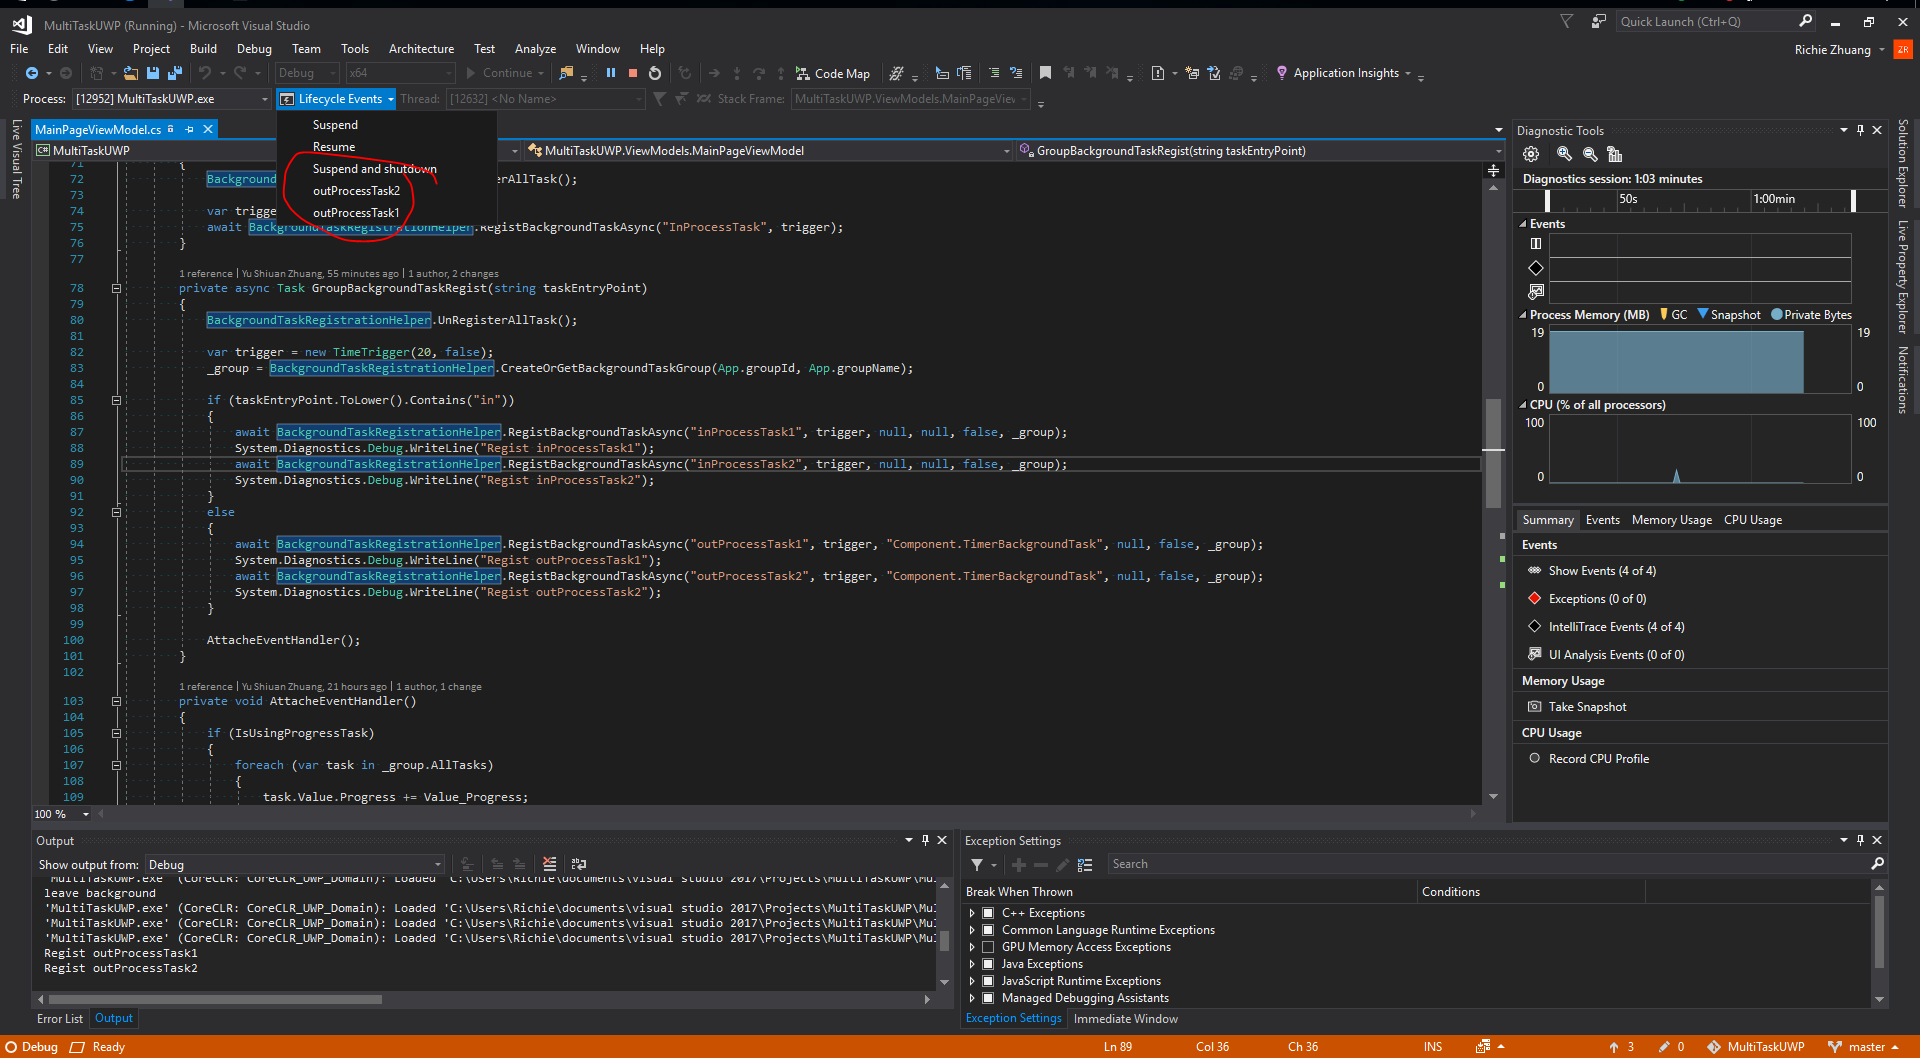 在Debug選單就可以看到有兩個被註冊起來的Background task的Name。
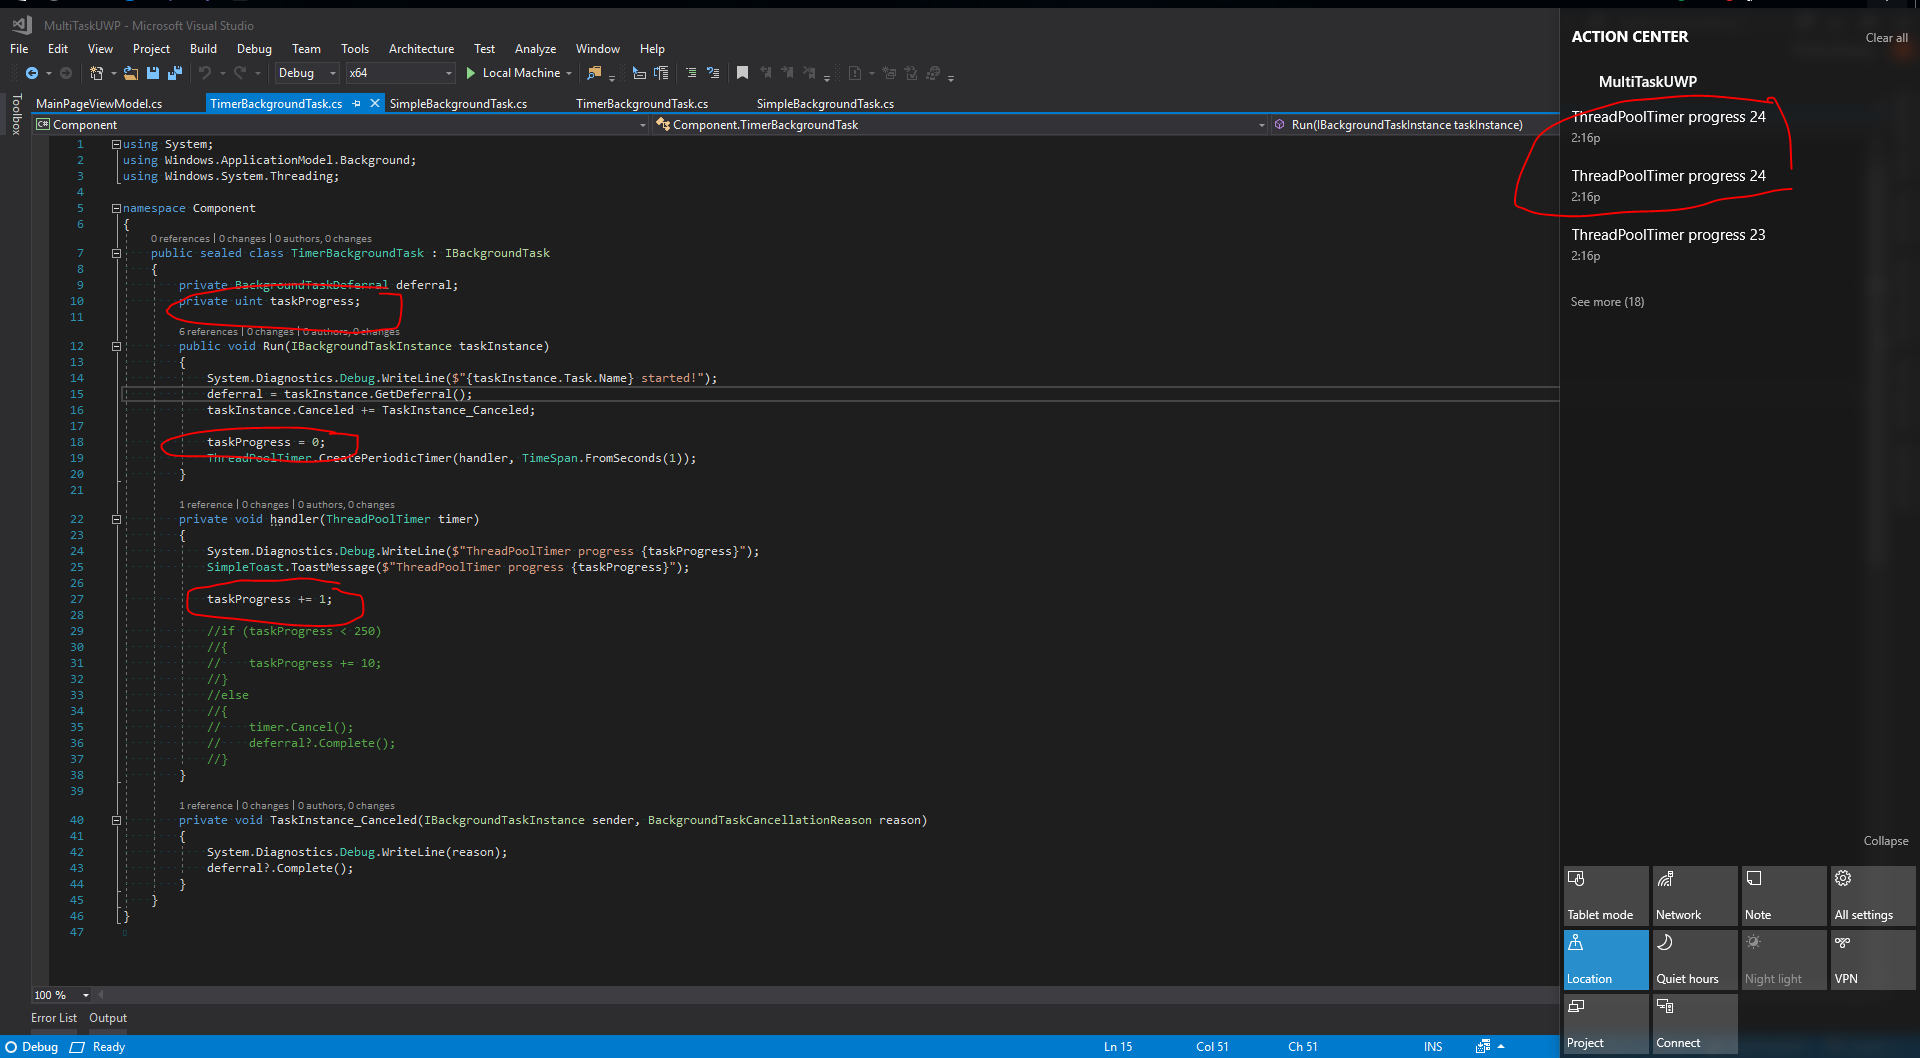 這邊我測試的Trigger是使用 TimeTrigger,這個trigger算是一班類型的Trigger所以可以執行25秒的時間,這邊看到Sample code就是使用ThreadPool的Periodic timer來搭配顯示Toast notification(0~24),而顯示兩個相同的toast notification則是因為註冊兩個Background task在同一群組且使用同一個background task的class 來Run。
這邊說道Background task的新功能就告一段落~
接者來說明Extended execution的功能,這個功能在Anniversary update上就已經推出了主要特性是當App在最小化的時候還可以繼續執行!使用情境大致區分兩類
- 最小化時可以無時間限制的繼續執行而不會像預設的APP會進入到Suspending,但依然會受到Container的控管當系統資源較少的時候!
- 在Suspending的時候可以獲得更長的時間進行資料的儲存
在Doc和Build上有提到最佳的使用狀況是能夠注意電池狀態,在低電量或是使用內建電池(有含電池之裝置)的時候注意是否依然開啟Extended execiton模式。Extended execution 的Sample code如下
private async Task ExtendedExecutionAsync()
        {
            ExtendedExcutionHelper.WatchBatteryStatus();
            System.Diagnostics.Debug.WriteLine(ExtendedExcutionHelper.BatteryStatus);
            ExtendedExcutionHelper.WatchPowerSavingStatus();
            System.Diagnostics.Debug.WriteLine(ExtendedExcutionHelper.EnergySaverStatus);

            await ExtendedExcutionHelper.CheckBackgroundActivityAsync();

            if (!_isExtended)
            {
                _session = await ExtendedExcutionHelper.RequestExtendAsync(ExtendedExecutionReason.Unspecified);
                var message = _session != null ? "Extended is enabled" : "Error";
                Component.SimpleToast.ToastMessage(message);
                _isExtended = !_isExtended;
            }
            else
            {
                ExtendedExcutionHelper.EndExtend(_session);
                Component.SimpleToast.ToastMessage("End extended");
            }
        }
這邊時做個Battery和PowerSaving的Helper來監控電量使用情況。 接者在存取是否使用者有開啟權限設定;之後就是建立Extended execution的實體,如果建立成功就代表可以使用Extended execution的功能。
再針對 Enterprise的部分提供個restrictedCapability
<Capabilities>
 <rescap:Capability Name="exetendedBackgroundTaskTime" />
</Capabilities>
這邊還加入新的MDM的Group policy
.Vendor/MSFT/Policy/Config/Privacy/LetAppsRunInBackground
.Vendor/MSFT/Policy/Config/Privacy/LetAppsRunInBackground_ForeceAllowTheseApps
.Vendor/MSFT/Policy/Config/Privacy/LetAppsRunInBackground_ForceDenyTheseApps
.Vendor/MSFT/Policy/Config/Privacy/LetAppsRunInBackground_UserInControlOfTheseApps
這些Policy能夠控管App是否有在背景執行的能力。
隱私權設定
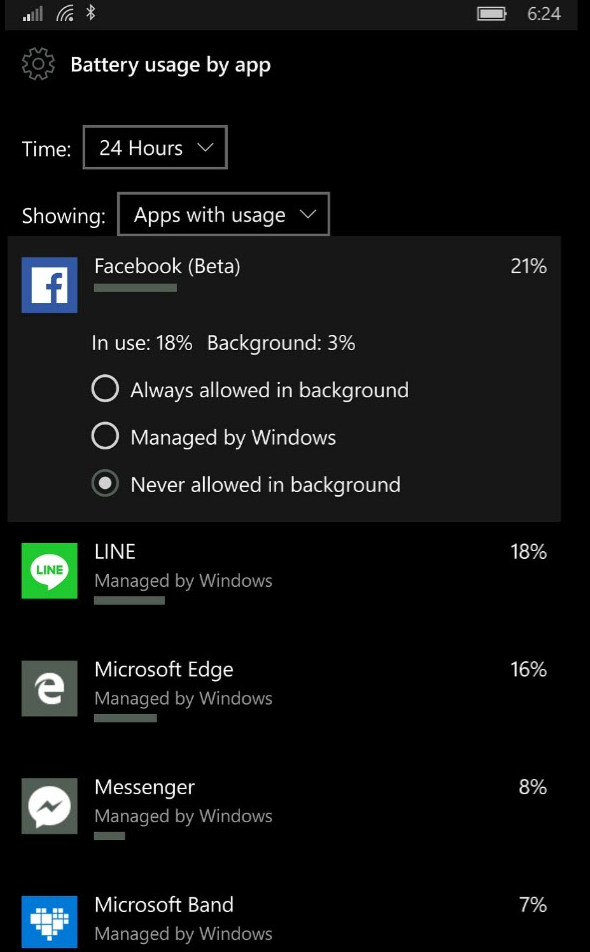 上圖為調整APP是否能夠在背景中執行的選項!在有含電池的裝置中才可以看到電池的選項喔~
在UWP的框架下開發人員需要在存取某些功能時會必須在Package.manifest的XML檔案中宣告需要使用那些權限。而在針對使用者的部分會是在Settings(設定)的APP之下的隱私權選單可以做細部的功能控制。
總結
UWP能夠適應在多種裝置之上這也會考驗開發人員對於各裝置特性、使用者的隱私權等問題,而如何利用這些功能做出既有彈性又實用的APP將是一大挑戰!
***以上Code以及說明都有可能隨著Windows 10 的版本以及Visual Studio 版本有所調整!***
參考資料 Microsoft Docs, Build 2017 P4172 What`s new for multi-tasking in UWP ?
下次再分享Windows 10 的新技術拉~