Microsoft Bot Framework v4, Asp .NET Core, Azure Bot, Facebook Bot, LINE Bot, Microsoft Team Bot !
前言
在 Part 1 介紹了如何設定相關的帳號服務的設定,今天來介紹如何撰寫簡單的 Bot 做 Echo (回聲)的機器人吧~
開發環境:
- Visual Studio 2019 ( Winodws or Mac )
- VIsual Studio Code ( Optional 如果不想用 VIsual Studio的話可以用 )
- .NET Core 3.1 or upper.
- Bot Framework emulator
- Windows 10 / MacOS / Linux... etc
基本上兩個開發工具都可以使用拉~ 就看你習慣哪樣的環境!在Visual Studio 2019 都可以直接開發 Asp .NET Core 用 Kestrel 這樣就可以不需要掛在 IIS 上 加上 .NET Core 本身就支援跨平台,甚至可以放進到 Docker裡面. 基本上環境的部份就看要使用哪樣的工具拉~
在Windows 版本的 Visual Studio 可以再安裝 Template就會比較好快速開發喔!
實際實作
我們來使用 Visual Studio Code 配合 Dotnet CLI 的方式來建立Bot App吧,這邊使用 ASP .NET Core 配合 Bot Framework for C# 開發
以下開始實作步驟
mkdir <YourFolderName>先建立個資料夾,記得把<YourFolderName>換成你要叫的資料夾名稱
cd <YourFolderName>
dotnet new mvc進去該資料夾並然後建立MVC的App
然後這邊就可以用
code .來開啟 visual studio code了! 在macOS上面要先安裝該CLI command才能使用喔 請參考 ( Launch from CommandLine )
接著可以看到大致如下的畫面
這樣就是把MVC的專案建立好的專案格式
然後這時候加入如下的 CLI 指令
dotnet add package Microsoft.Bot.Builder.Integration.AspNet.Core這樣就可以加入 nuget package 的參考,使用 Bot Framework V4 的SDK了!
然後再Controller的資料夾加入 BotController.cs的檔案,並加入以下的程式碼
using System.Threading.Tasks;
using Microsoft.AspNetCore.Mvc;
using Microsoft.Bot.Builder;
using Microsoft.Bot.Builder.Integration.AspNet.Core;

namespace BotApp.Controllers
{
    [Route("api/messages")]
    [ApiController]
    public class BotController : ControllerBase
    {
        private readonly IBotFrameworkHttpAdapter _adapter;

        private readonly IBot _bot;

        public BotController(IBotFrameworkHttpAdapter adapter, IBot bot)
        {
            _adapter = adapter;
            _bot = bot;
        }

        [HttpGet]
        [HttpPost]
        public async Task PostAsync()
        {
            await _adapter.ProcessAsync(Request, Response, _bot);
        }
    }
}
這邊就是把 API 丟去給 IBot 的實體去處理相關的細項工作,然後再加入 Bots的資料夾並加入BotHandler.cs的檔案. 然後加入以下程式碼
using System;
using System.Threading;
using System.Threading.Tasks;
using Microsoft.Bot.Builder;
using Microsoft.Bot.Schema;

namespace BotApp.Bots
{
    public class BotHandler : ActivityHandler
    {
        protected override async Task OnMessageActivityAsync(ITurnContext<IMessageActivity> turnContext, CancellationToken cancellationToken)
        {
            var message = $"Your input is here! => {turnContext.Activity.Text}";
            await turnContext.SendActivityAsync(MessageFactory.Text(message, message), cancellationToken);
        }
    }
}
BotHandler 繼承自ActivityHandler 基本上就是做了相關的處理,這邊都需要用 override的方式來複寫處理流程. OnMessageActivityAsync 就是使用者跟Bot 使用訊息的方式在交流的時候進行額外邏輯處理的方法.
然後再加入 BotAdapter.cs 並且加入一下程式碼
using Microsoft.Bot.Builder.Integration.AspNet.Core;
using Microsoft.Extensions.Configuration;
using Microsoft.Extensions.Logging;

namespace BotApp
{
    public class BotAdapter : BotFrameworkHttpAdapter
    {
        public BotAdapter(IConfiguration configuration, ILogger<BotFrameworkHttpAdapter> logger) :
            base(configuration, logger)
        {
            OnTurnError = async (turnContext, ex) =>
            {
                await turnContext.SendActivityAsync("Okay.. something went wrong");
            };
        }
    }
}
這邊就是要繼承BotFrameworkHttpAdapter 這個Class可以處理相關Http 的請求在Bot framework上的相關回應,這邊我們只有處理當發生錯誤的時候傳送訊息給使用者.
最後在Startup.cs的調整並加入以下Code
public void ConfigureServices(IServiceCollection services)
{
services.AddControllersWithViews();
services.AddControllers();
services.AddSingleton<IBotFrameworkHttpAdapter, BotAdapter>();
services.AddTransient<IBot, BotHandler>();
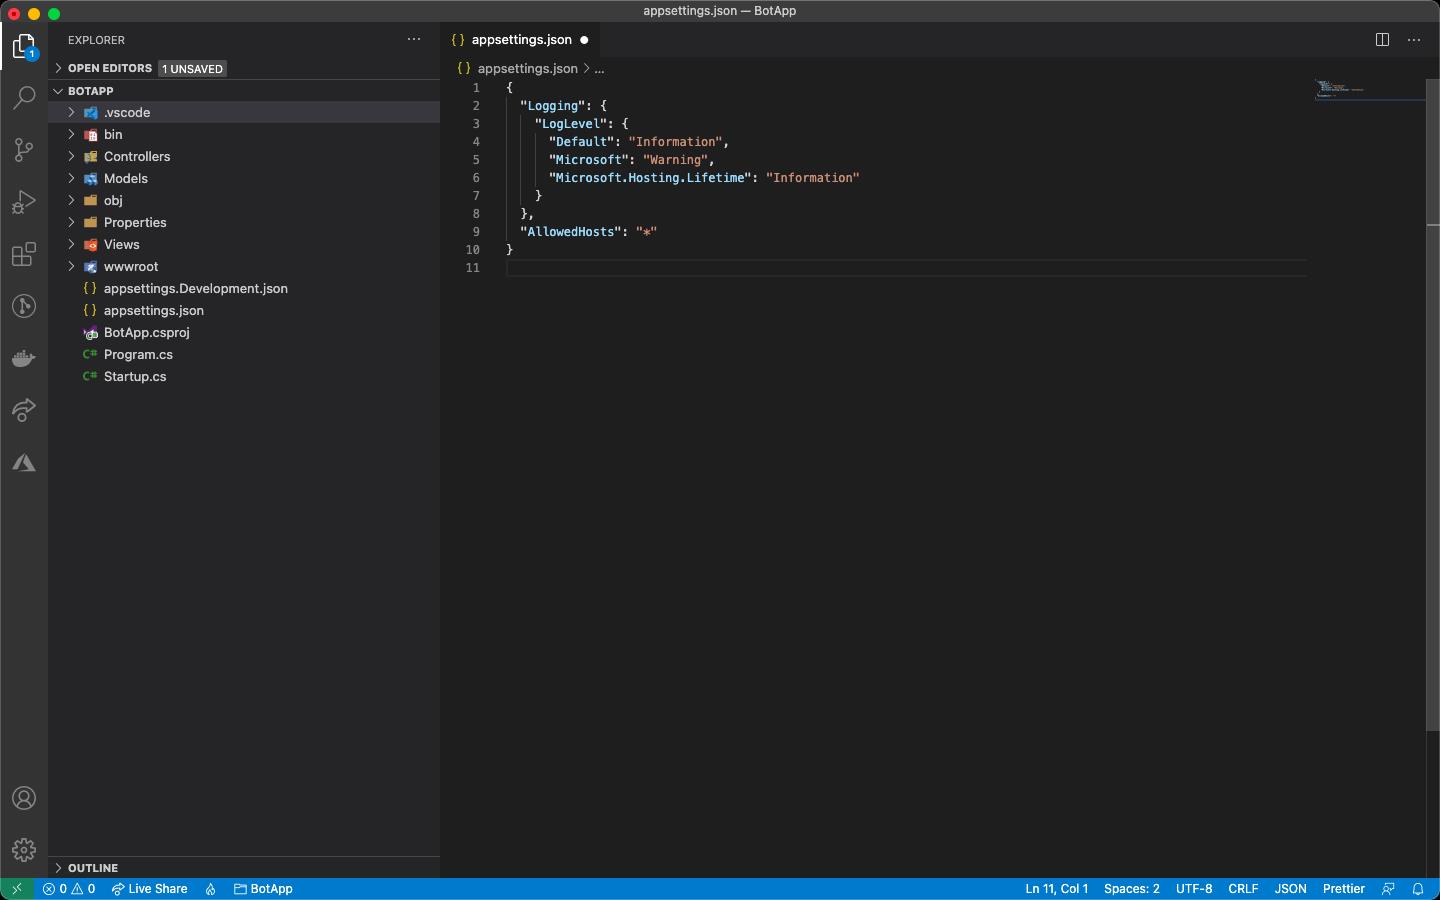
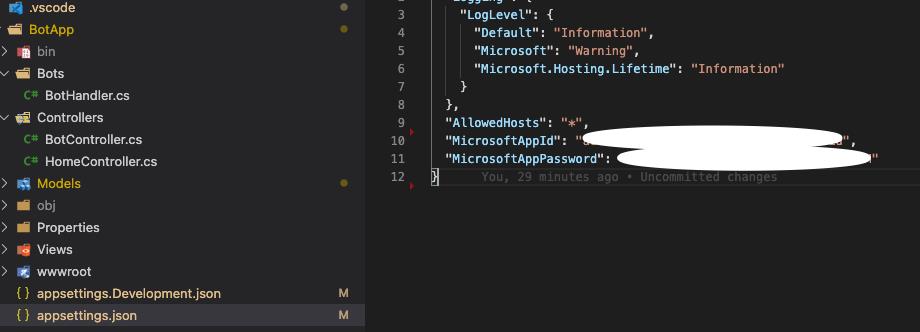
}最後一步就是要加入兩個 config 在appsettings.json 裡面喔如下所示 MicrsoftAppId 以及 MicrosoftAppPassword
{
  "Logging": {
    "LogLevel": {
      "Default": "Information",
      "Microsoft": "Warning",
      "Microsoft.Hosting.Lifetime": "Information"
    }
  },
  "AllowedHosts": "*",

  "MicrosoftAppId": "",
  "MicrosoftAppPassword": ""
}
要注意一點是在使用Bot Framework emulator的時候這兩個都不需要設定值進去 要不然一定會出錯喔!
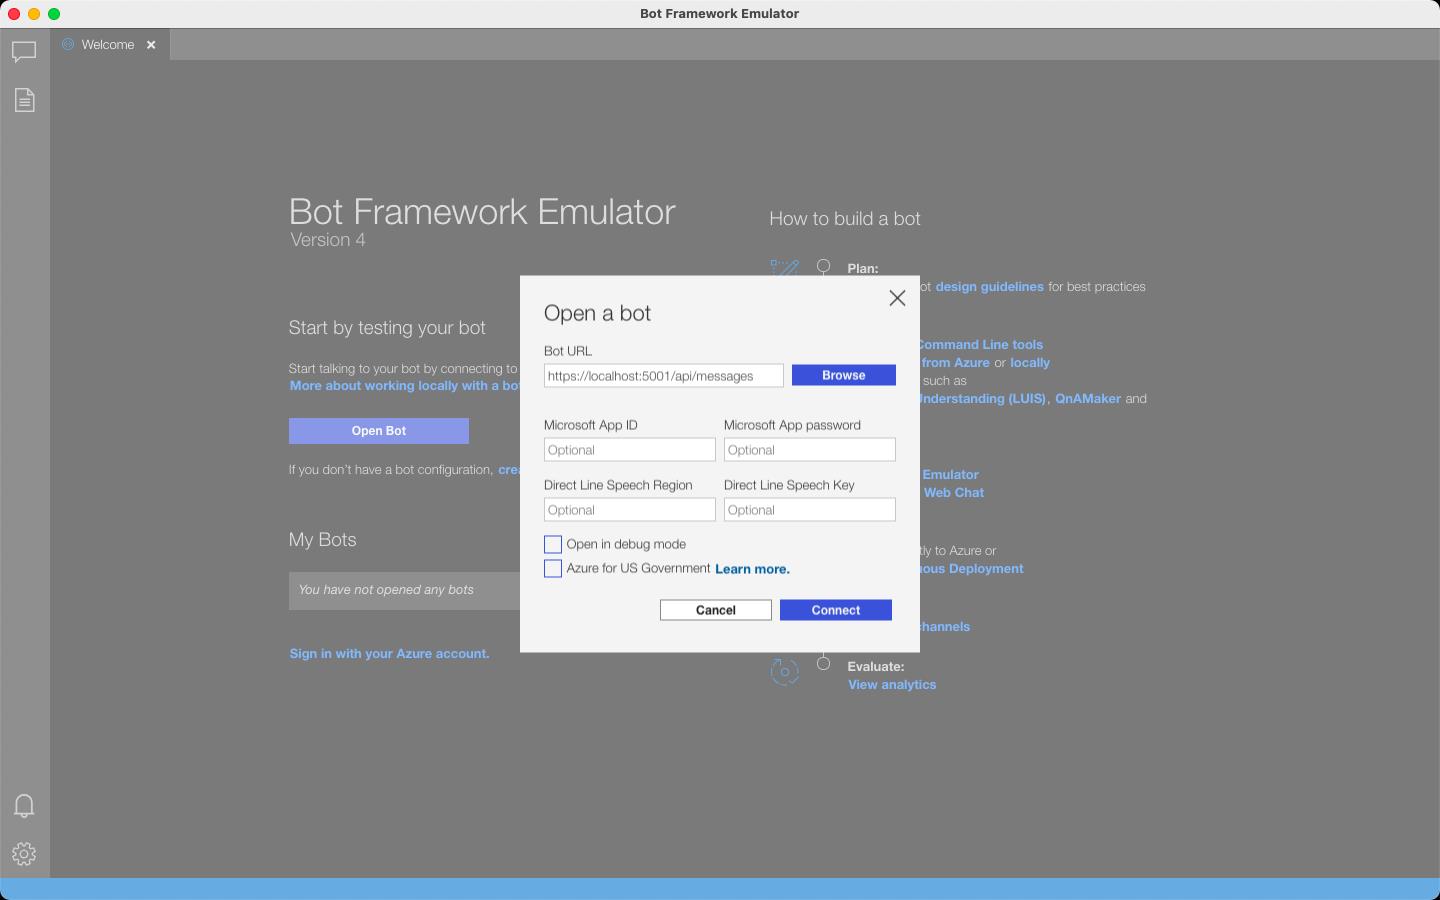
這樣就是可以開始使用 Bot Framework emulator來做測試了
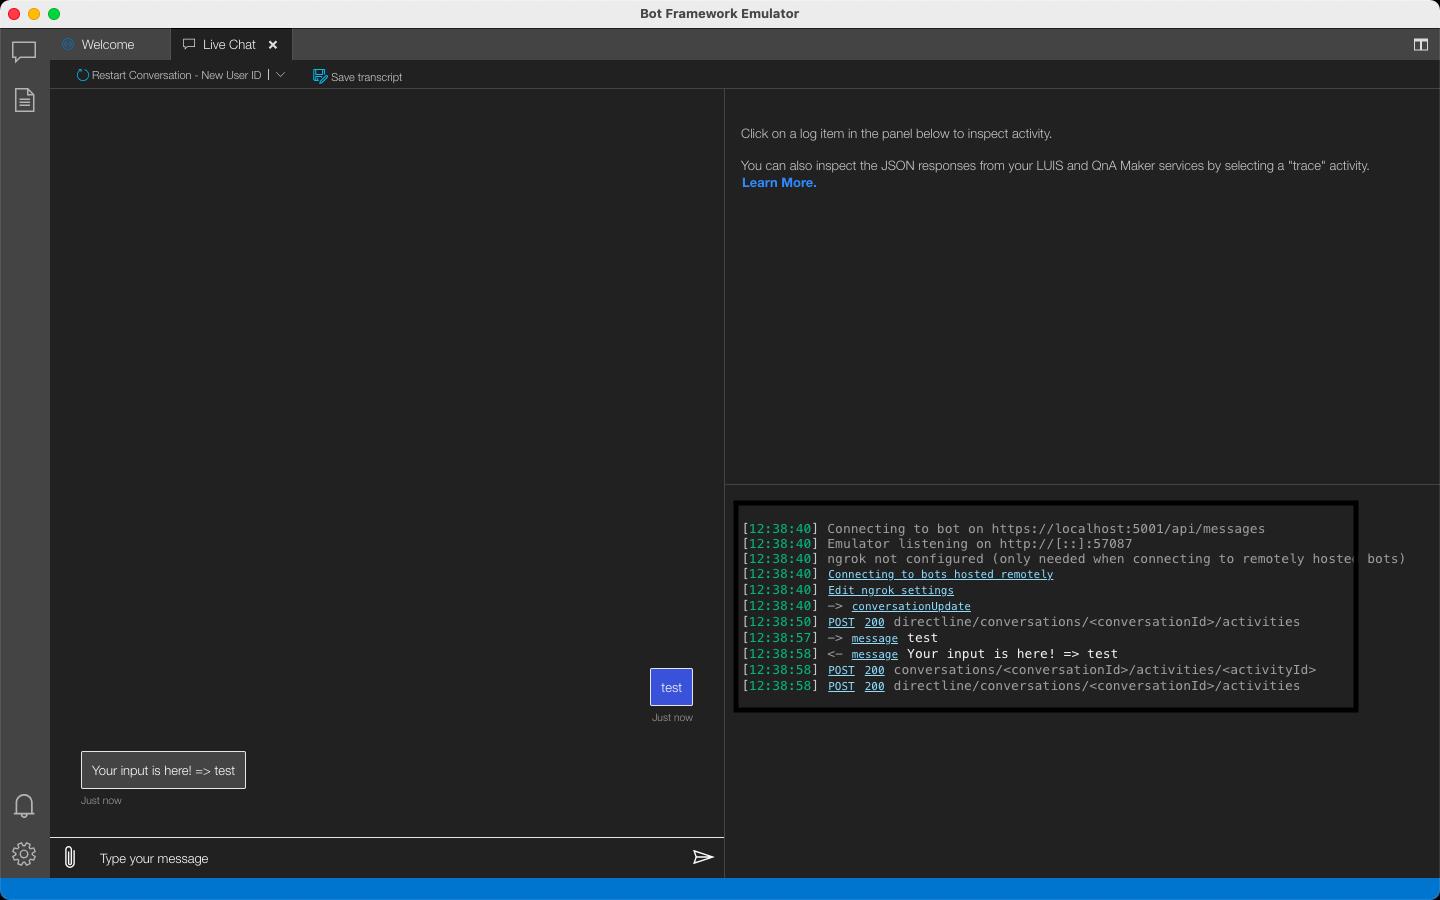
這樣就是在local端進行測試完成了! 下個階段就是發佈到Azure App service上並整合到上個章節設定好的Azure Bot Channel regsitration service了
這邊直接到Azure portal,並建立Web App
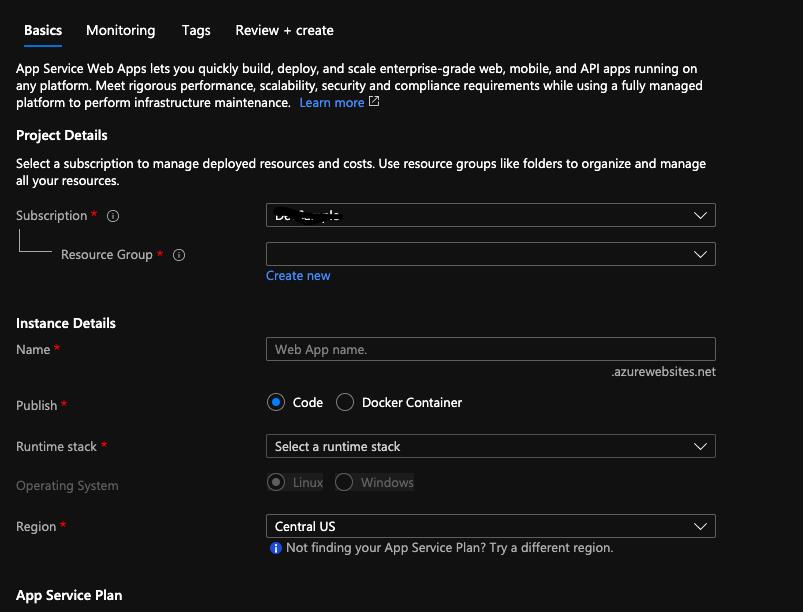
這邊就可以設定WebApp的存放資料中心以及相關的Runtime資訊~
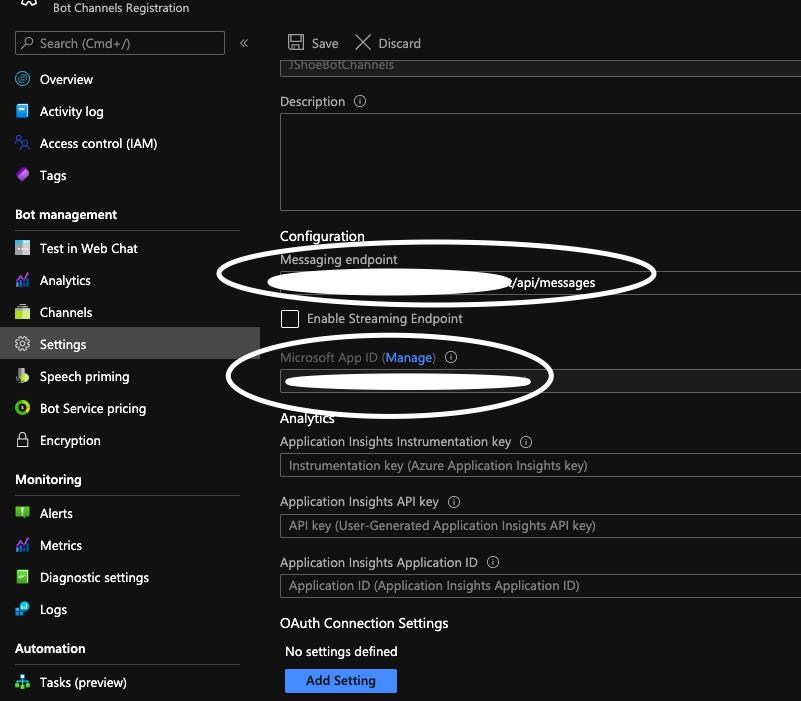
這時候到 Azure Portal 進去上次設定好的 Bot Channel Registration 的服務,如下圖在Bot management 類別清單下方的 Settings 可以設定 messaging endpoint 然後 Microsoft App ID 就是放在appsettings.json內的那個直也會出現在這個頁面上.
這邊也就說明 Bot Framework 需要支援個 Restful API是以 api/messages 做為結尾的!
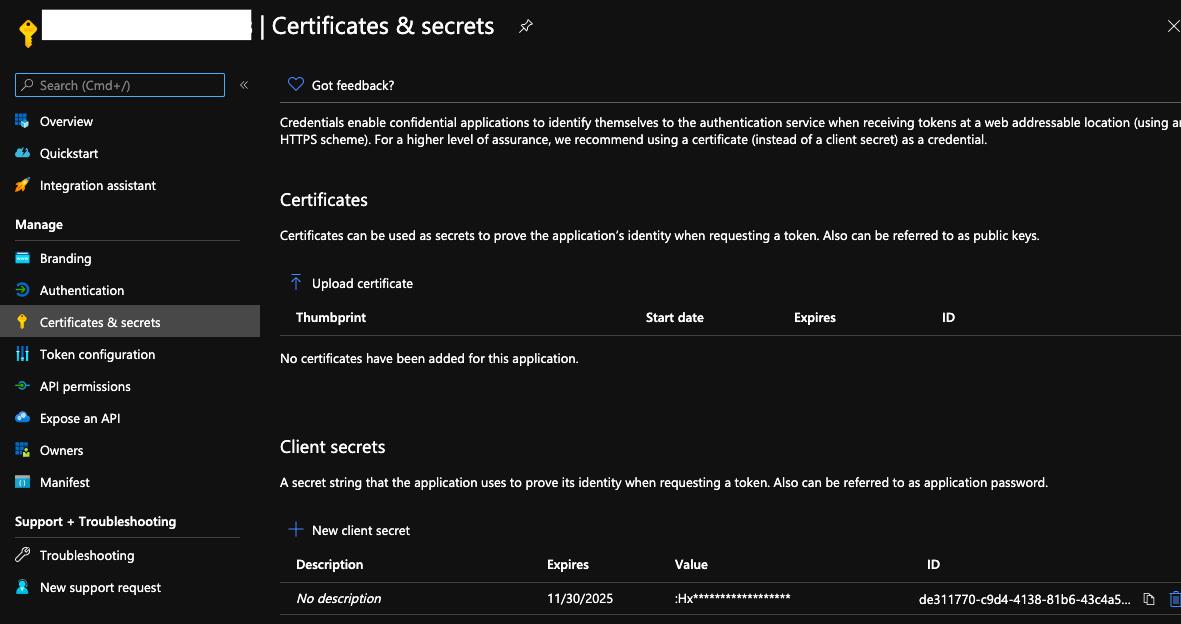
在Microsoft App ID 的右方的 Manage 按鈕按下後可以看到 Bot Framework 的 Client secrets 以及 certificates,這邊我們可以按下 New client secret 來建立一個新的Microsoft App Secret 這也是要填入 appsettings.json 的欄位值.
記得要把MicrosoftAppId和MicrosoftAppPassword寫在 appsettings.json 檔案喔! 如下圖所示
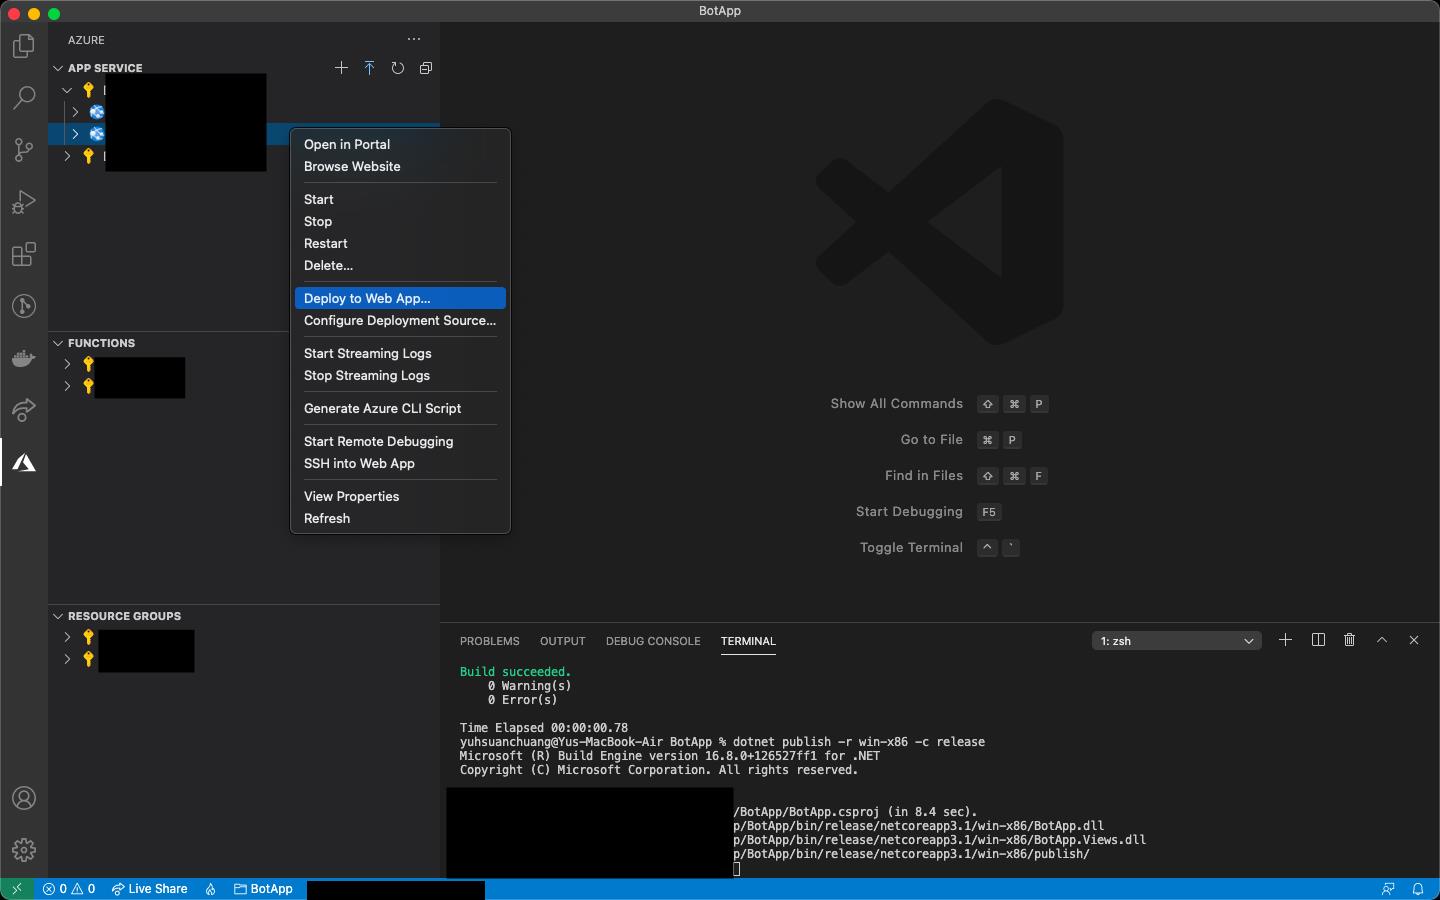
接著看如果習慣使用GUI的就可以開啟Visual Studio 2019 / Visual Studio 2019 for mac 就可以用GUI介面的方式發佈到Azure App Service.若是使用VIsual Studio Code則需要再安裝Azure App Service的Extension才會有比較好的發佈體驗.
使用 dotnet CLI 基本上只需要做publish的指令就好 大致如下
dotnet publish -r win-x64 -c release以下圖片是使用 Visual Studio Code + Azure App Service Extension 的方式發佈到 Azure App Service
這樣就會部署到 Azure App Service 了喔!
總結一下現在基本上大致的網站都會使用BOT 作為簡單的客服窗口除了減少人力之外也可以更加深入整合AI / ML的相關應用,加上語意辨識或是影像分析可以做到更多客製化的使用體驗!或是使用Adaptive Card可以做出讓使用者簡單操作的GUI
有機會加入Azure Cognitive Service整合到BOT 再寫一篇文章了~
相關參考
微軟的官方Docs連結 => Bot Framework SDK documentation - Bot Service | Microsoft Docs
Bot Framework emulator => Releases · microsoft/BotFramework-Emulator · GitHub
GitHub 官方 Samples => BotBuilder-Samples/README.md at main · microsoft/BotBuilder-Samples · GitHub
VIsual Studio Bot Template v4 => Bot Framework v4 SDK Templates for Visual Studio - Visual Studio Marketplace