react.js webpack 新手教學,使用 ES6 完整介紹。
最近在編寫 react.js 時候,由於使用ES6,故引用 babel 來進行 compiler。
<script src="https://cdnjs.cloudflare.com/ajax/libs/babel-core/5.8.34/browser.js"></script>
<script type="text/babel"></script>
然而這有個很大的缺點,就是為了compiler,會讓整個DOM render效率降低,
因此 webpack 就是這麼來著,webpack 為基於 node.js 環境底下執行,透過 npm 即可安裝,
專門將你寫好的 react.js 打包為一支檔案,真的快很多~
以下為安裝設定過程,本篇使用 ES6 作為範例。
初始化專案
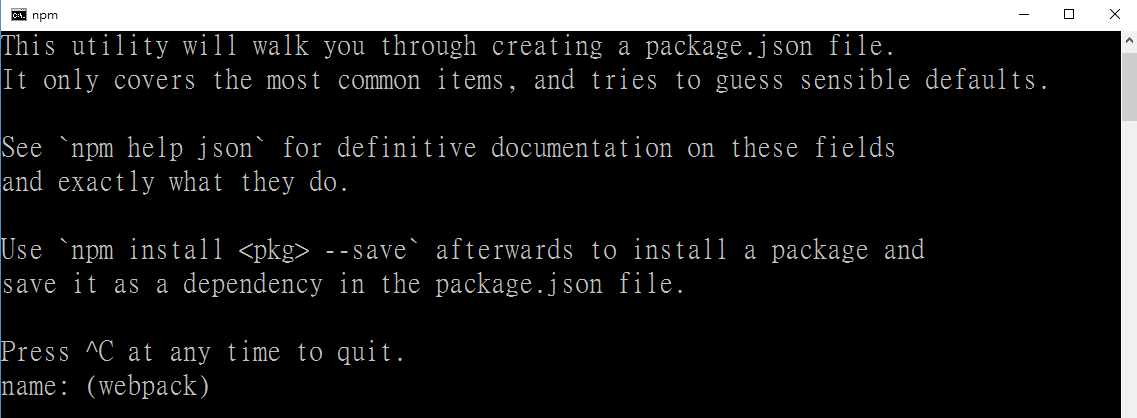
過程為本專案的基本資訊,預設 Enter 到底即可,
完成後則會建立 package.json。
npm init
安裝 React.js
安裝 react、react.dom 兩個模組。
npm install react
npm install react-dom

安裝 Webpack
安裝 webpack、webpack-dev-server,
webpack-dev-server 為 debug 模式下所用的模組。
npm install webpack
npm install webpack-dev-server

錯誤ERR!
安裝時,若出現此畫面,更改 package.json 裡面的 name(專案名稱)即可。

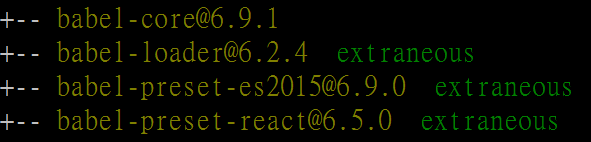
安裝 Babel
安裝babel-loader、babel-core、babel-preset-es2015、babel-preset-react。
npm install babel-loader
npm install babel-core
npm install babel-preset-es2015
npm install babel-preset-react
編寫 React component
建立 apple.jsx,記得存為 jsx 檔案,若發現 syntax 顏色有點怪怪的,
在 sublime 中可安裝 HTML/CSS/JS Prettify。
可參考文章:Sublime【Package Control】 - HTML/CSS/JS Prettify - JSX
import React from 'react';
import ReactDOM from 'react-dom';
class Apple extends React.Component{
render(){
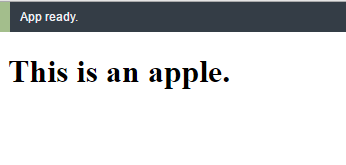
return <h1>This is an apple.</h1>;
}
}
ReactDOM.render(<Apple />,document.getElementById('fruit'));
建立一個 main.js,此檔案專門將所有 component 集合起來。
import Apple from './apple.jsx';
建立主文件 index.html。
<!DOCTYPE html>
<html>
<head>
	<meta charset="utf-8">
	<meta http-equiv="X-UA-Compatible" content="IE=edge">
	<title></title>
</head>
<body>
	<div id="fruit"></div>
</body>
</html>
接下來為重點,建立 webpack.config.js,此為設定 webpack 檔案打包來源及輸出等等。
- enrty:為專門 Import 所有 jsx 之檔案,即 component
- output:為指定輸出檔案,經過 webpack 打包後,將會產出 bundle.js
- module:query本篇使用 ES6(ECMAScript6)
var path = require('path');
var webpack = require('webpack');

module.exports = {
  entry: './main.js',
  output: { path: __dirname, filename: 'bundle.js' },
  module: {
    loaders: [
      {
        test: /.jsx?$/,
        loader: 'babel-loader',
        exclude: /node_modules/,
        query: {
          presets: ['es2015', 'react']
        }
      }
    ]
  },
};
修改 index.html,產出的 bundle.js 為我們要引用的檔案,故加入此檔案。
<script src="bundle.js"></script>
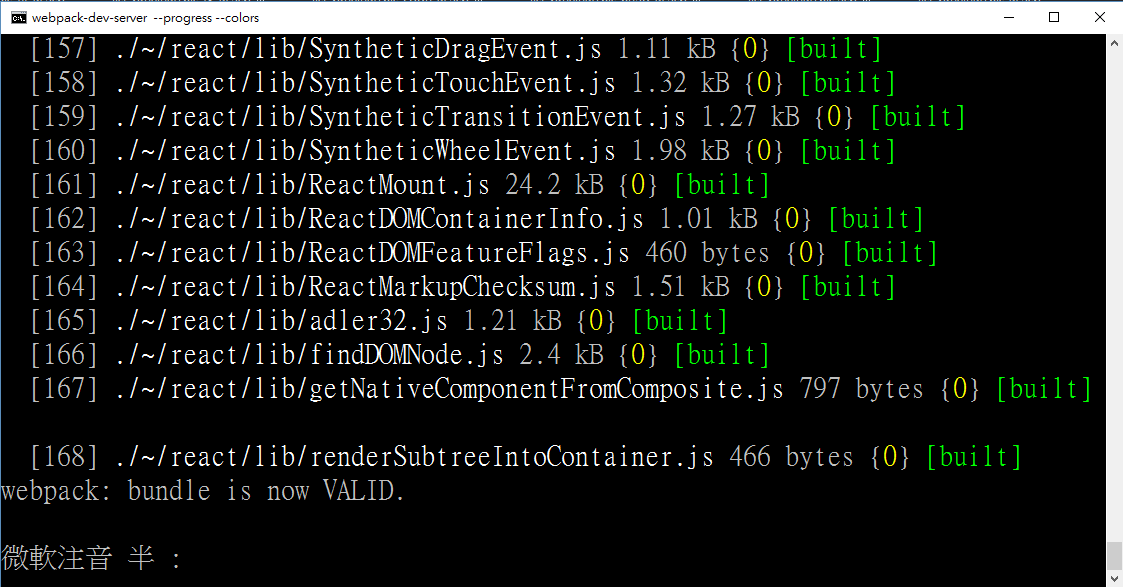
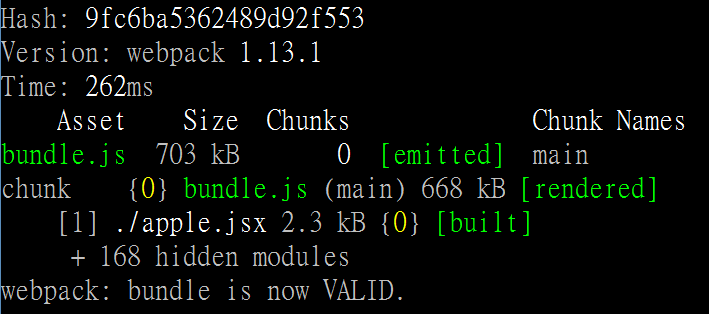
完成後我們開始打包吧~
webpack-dev-server 進行 debug 模式編譯,且處於 listening 監聽狀態。
正常為顯示:webpack:bundle is now VALID
webpack-dev-server --progress --colors
現在打開網址即可查看預覽結果:http://localhost:8080/webpack-dev-server/
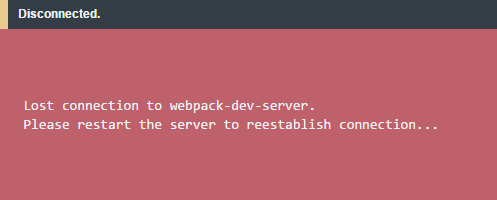
進行檔案修改時,亦會監聽檔案進行打包。
停止 webpack-dev-server ,網頁上則會警示目前 lost connection。
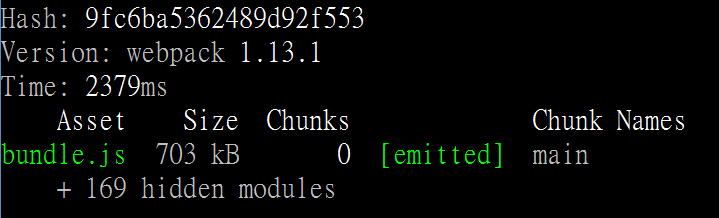
debug 無誤後,我們可以安心正式產出 bundle.js 檔案。
webpack
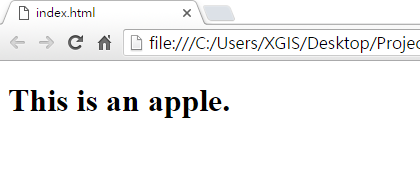
打開 index.html 即可看到畫面~
想到要打一長串才可進行 webpack 監聽就會頭疼,如何加速或客製指令處理?
在 package.json 中,在 script 加入自訂指令以及實際運作指令即可:
{
  "name": "webpack",
  "version": "1.0.0",
  "description": "",
  "main": "index.js",
  "scripts": {
    "test": "echo \"Error: no test specified\" && exit 1",
    "build": "webpack",
    "dev": "webpack-dev-server --devtool eval --progress --colors --hot --content-base build"
  },
  "author": "",
  "license": "ISC"
}
要使用的時候直接輸入:
npm run build
npm run dev
以下為完整目錄結構:
- node_modules
- index.html
- bundle.js
- main.js
- webpack.config.js
- package.json
- apple.jsx
Multiple Component
相信大家在刻 component 時候,不可能只有一個,
要如何將多數檔案進行 webpack 打包是面臨的問題,以及如何產出於特定目錄。
以下為假設有兩個元件 c_apple.js、c_orange.js 要分別進行打包,
在 webpack.config.js 中,我們修改來源:
- bundleApple、bundleOrage :即為產出的 bundle 檔名
- path.resolve(_dirname,'app/c_apple.js'):為指定 app 目錄中的 c_apple.js 檔案
 entry: {
        bundleApple: [path.resolve(__dirname, 'app/c_apple.js')],
        bundleOrange: [path.resolve(__dirname, 'app/c_orange.js')]
    }
在 output 部分則為:
- path.resolve(_dirname),'build'):產出目錄指定於 build
- '[name].js':依據 entry 中的名稱命名(bundleApple.js、bundleOrage.js)
 output: {
        path: path.resolve(__dirname, 'build'),
        filename: '[name].js'
    }
調整後目錄結構為:
- 新建 app 資料夾,存放所有 component
- 新建 build 資料夾,將 webpack 打包後的檔案放置於此
- 記得調整 index.html 引用 bundle 的 src
- node_modules
- app   - apple.jsx
        - orange.jsx
        - c_apple.js
        - c_orange.js

- build - bundleApple.js
        - bundleOrange.js

- index.html

- webpack.config.js
- package.json
後記
簡單來說,寫 react.js 真心建議使用 webpack,效率!
有勘誤之處,不吝指教。ob'_'ov
