[Windows 8 App]圖形-----【Brush】
Brush就是筆刷,筆刷對圖形、文件、控制項的內部或輪廓上色都是相當重要的
筆刷能提高美觀性,這可以讓使用者操作時享受著曼妙的藝術
筆刷分成三種:單色筆刷、線性漸層筆刷、圖像筆刷
先介紹單色筆刷
- 單色筆刷
單色筆刷是使用單一顏色來繪製圖形
有兩種構造方法:一種是沒有傳進參數的,另一種是傳入一個顏色的屬性
在XAML code中有三種方式可以來表示顏色
第一種:預定義的顏色名稱
Windows 的應用程式中共有256種已經定義好的顏色
在開發時,只需要使用Fill屬性便能將自己喜歡的顏色填滿上去
第二種:十六進制的顏色值
是使用8位元組成的一組值來表示
例如:" 001122FF "
前面的二位 00 表示:Alpha(透明度)
中間的二位 11 表示:紅色
中間的二位 22 表示:綠色
後面的二位 FF 表示:藍色
第三種:屬性元素語法
這是指定元素 Opacity 屬性值,Opacity 值範圍是 0~1
值越大越不透明,相反的,值越小越透明
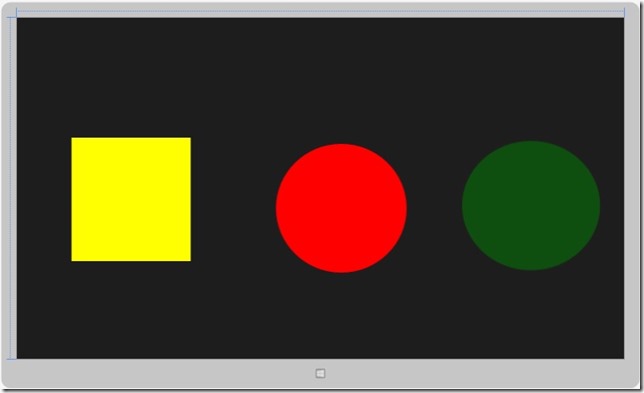
我們來做一個範例,將上面的三種方式都實作一次
新增一個空白的市集專案,取名為【Brush1】,然後開啟【MainPage.xaml】
底下是程式碼的部分:
<Page
    x:Class="Brush1.MainPage"
    xmlns="http://schemas.microsoft.com/winfx/2006/xaml/presentation"
    xmlns:x="http://schemas.microsoft.com/winfx/2006/xaml"
    xmlns:local="using:Brush1"
    xmlns:d="http://schemas.microsoft.com/expression/blend/2008"
    xmlns:mc="http://schemas.openxmlformats.org/markup-compatibility/2006"
    mc:Ignorable="d">

    <Grid Background="{StaticResource ApplicationPageBackgroundThemeBrush}">
        <Rectangle Fill="Yellow" Margin="123,270,975,220" />
        <Ellipse Fill="#FFFF0000" Margin="583,284,489,194" />
        <Ellipse Margin="1001.69,277.381,53.69,199.381" RenderTransformOrigin="0.5,0.5" UseLayoutRounding="False" d:LayoutRounding="Auto">
            <Ellipse.Fill>
                <SolidColorBrush Color="Green" Opacity="0.5" />
            </Ellipse.Fill>
        </Ellipse>
    </Grid>
</Page>
設計畫面如下:
- 線性漸層筆刷
線性漸層筆刷是使用【GradientStop】來指定漸層漸變的顏色和位置
【GradientStop】的【Offset】屬性是表示漸層停駐點在漸層軸上的位置
【Offset】的範圍值是 0 ~ 1
值越接近 0 表示漸層的停駐點會靠近 LinearGradientBrush的StartPoint
值越接近 1 表示漸層的停駐點會靠近EndPoint
線性漸層【StartPoint】和【EndPoint】市政來指定漸層軸的方向
使用【GradientStop】的【Color】屬性是指定漸層停駐點的顏色
我們就來做一個範例:
首先,新增一個專案,命名為【LinearBrushPage】,開啟【MainPage.xaml】
程式碼如下:
<Page
    x:Class="LinearBrushPage.MainPage"
    xmlns="http://schemas.microsoft.com/winfx/2006/xaml/presentation"
    xmlns:x="http://schemas.microsoft.com/winfx/2006/xaml"
    xmlns:local="using:LinearBrushPage"
    xmlns:d="http://schemas.microsoft.com/expression/blend/2008"
    xmlns:mc="http://schemas.openxmlformats.org/markup-compatibility/2006"
    mc:Ignorable="d">

    <Grid Background="{StaticResource ApplicationPageBackgroundThemeBrush}">
        <Rectangle Height="700" Width="700">
            <Rectangle.Fill>
                <LinearGradientBrush StartPoint="0,0" EndPoint="0.5,1">
                    <GradientStop Color="Blue" Offset="0.0"/>
                    <GradientStop Color="Yellow" Offset="0.4"/>
                    <GradientStop  Color="Green" Offset="0.7"/>
                    <GradientStop  Color="Red" Offset="1.0"/>
                </LinearGradientBrush>
            </Rectangle.Fill>
        </Rectangle>
    </Grid>
</Page>
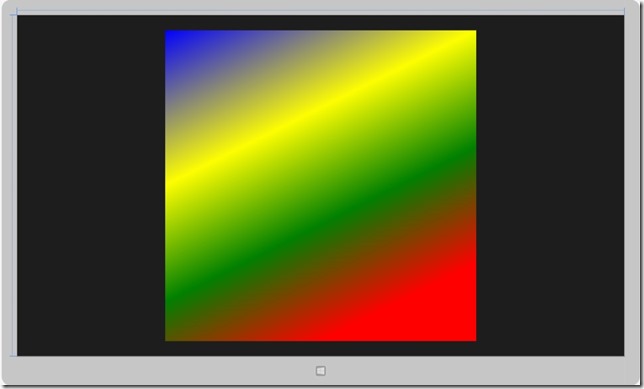
我們設置【StartPoint】為 (0,0) ,【EndPoint】 為 (0.5,1)
【Offset】簡單來說就是,開始換顏色的起點
設計畫面如下:
- 拼貼筆刷
簡單的拼貼筆刷我們在之前的【圖像】就有介紹過了
這裡我們要介紹繪製Button類型的背景圖片
首先,新增一個專案,命名為【ImgBtnBrushPage】,開啟【MainPage.xaml】
程式碼如下:
<Page
    x:Class="ImgBtnBrushPage.MainPage"
    xmlns="http://schemas.microsoft.com/winfx/2006/xaml/presentation"
    xmlns:x="http://schemas.microsoft.com/winfx/2006/xaml"
    xmlns:local="using:ImgBtnBrushPage"
    xmlns:d="http://schemas.microsoft.com/expression/blend/2008"
    xmlns:mc="http://schemas.openxmlformats.org/markup-compatibility/2006"
    mc:Ignorable="d">

    <Grid Background="{StaticResource ApplicationPageBackgroundThemeBrush}">
        <Button Content="ImageBrush" Foreground="Yellow" FontWeight="Bold" FontSize="100" FontFamily="Verdana" Padding="20" BorderThickness="7" Margin="356,304,0,236" Height="228">
            <Button.Background>
                <ImageBrush ImageSource="images/cat.jpg" />
            </Button.Background>
        </Button>
    </Grid>
</Page>
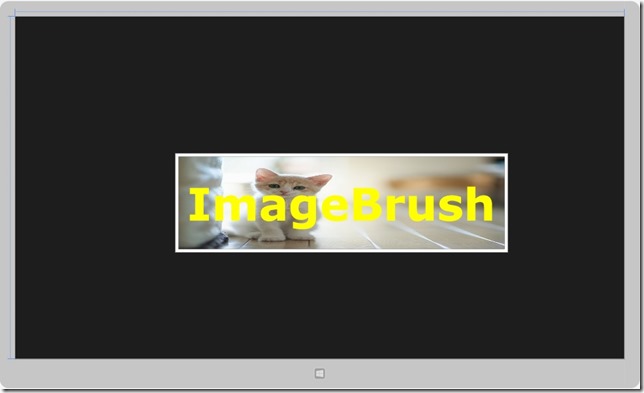
在Button控制項中的Background屬性中使用【ImageBrush】設定按鈕的背景圖片
設計畫面:


