摘要:使用Google Authenticator 加強SSH登入安全性
前言
Google Authenticator是一個一次性密碼產生器,
支持HOTP(HMAC-based one time password,由RFC 4226定義)和TOTP(Time-based one time password)。
Google Authenticator在Android、iOS和Blackberry上面都有原生的Client端,
同时還有人開發了j2me版本的Client端,
因而基本上市面上的所有智慧型手機、手持裝置(移動設備)都可以使用。
Google Authenticator同時還提供了PAM模組,所以也可用於Unix/Linux的驗證工作。
我們就是用Google Authenticator的PAM模組對SSH進行驗證。
Linux Server配置
CentOS release 6.2 x86_64 Final
1. SSH驗證配置
a. vim /etc/pam.d/sshd
第一行加入
auth required pam_google_authenticator.so
b. vim /etc/ssh/sshd_config
找到『ChallengeResponseAuthentication』和『UsePAM』
確認設定都為『yes』
ChallengeResponseAuthentication yes
UsePAM yes (註:預設為yes)
儲存後再重新啟動服務
service sshd restart
2. 安裝相關模組
a. yum -y install gcc pam-devel libpng-devel
3. 安裝qrencode
此工具可以產生QRCode,Google Authenticator命令行產生QRCode就是調用它。
wget http://fukuchi.org/works/qrencode/qrencode-3.3.1.tar.gz
tar zxvf qrencode-3.3.1.tar.gz
cd qrencode-3.3.1
./configure --prefix=/usr
make && make install
註:按說明是可以產出,不過我測試時沒產出,所以還是使用Google Chart API產出的QRCode來用,
因此此工具可有可無。
4. 安裝Google Authenticator PAM
wget http://google-authenticator.googlecode.com/files/libpam-google-authenticator-1.0-source.tar.bz2
tar jxvf libpam-google-authenticator-1.0-source.tar.bz2
cd libpam-google-authenticator-1.0
make && make install
5. Google Authenticator配置
首先需要切換到對應的User(因為我目前是測試用,所以先以root來進行操作),如果只有一個User的話,
可以省略這一步。
a. google-authenticator
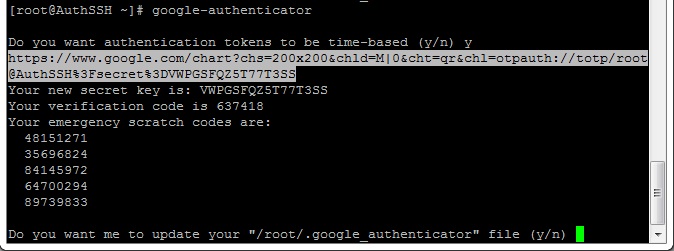
輸入『google-authenticator』後,會詢問『Do you want authentication tokens to be time-based (y/n)』,
基本上就是以時間為基礎產生的驗證碼,選擇『y』。
結果類似下圖(我的qrencode沒執行成功,所以沒有QRCode):
qrencode有執行成功的話,如下圖:
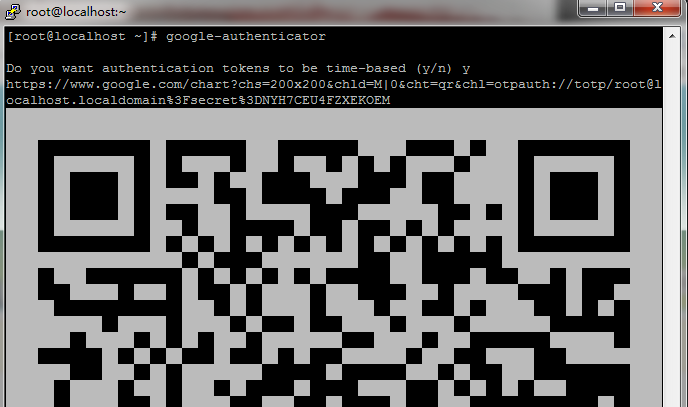
第一張圖反白的密鑰URL複製到瀏覽器上,其為使用Google Chare API產出的QRCode,可進行掃描(如下圖)。
也可以按照密鑰URL下面的文字密鑰手工輸入。
當Google Authenticator識別了這個帳號後,驗證器就配置好了。而在文字密鑰下提供了幾個緊急驗證碼,
此為當手機丟了或是不在身邊時所用的,請妥善保管。

b. 儲存設定
此時Google Authenticator雖然已在執行了,但剛剛產出的文字密鑰及緊急驗證碼等相關設定尚未儲存,
所以會問『Do you want me to update your “/root/.google_authenticator” file (y/n)』 ,選擇『y』。
c. 多人使用
是否限制多人使用相同的驗證金鑰,以安全性來說,當然選『y』。
d. 時間差
是否開啟設定防止Client與Server因時間差距太大而導致驗證失敗,可根據實際情況來設定。我是選擇『n』 ,
除非Server常時間不準(那應該要換主機板了)
或未設定ntp,或者是手機等移動設備不常上網,那就要選『y』了。
e. 次數限制
不用說,一定選『y』。
以上設定完畢後,目錄中會多一個檔案『.google_authenticator』(默認為400),此時系統已經完整運作了,
之後除非為新User產生或是需要重新產生,否則不需再執行google-authenticator。
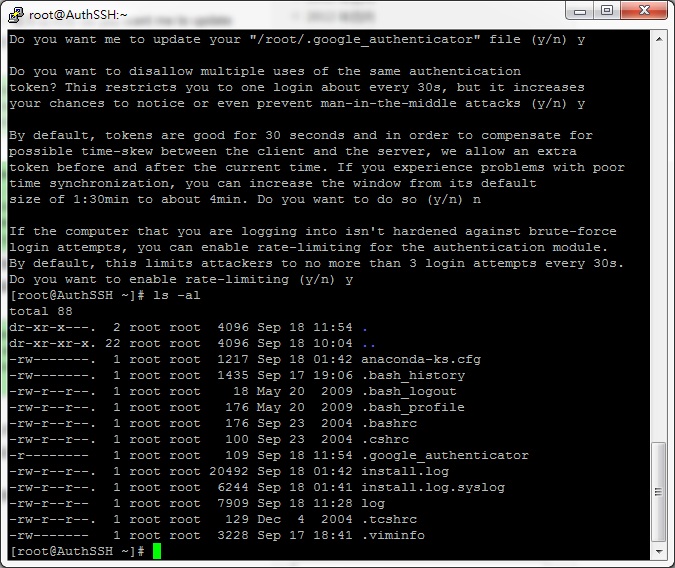
Server登入測試圖
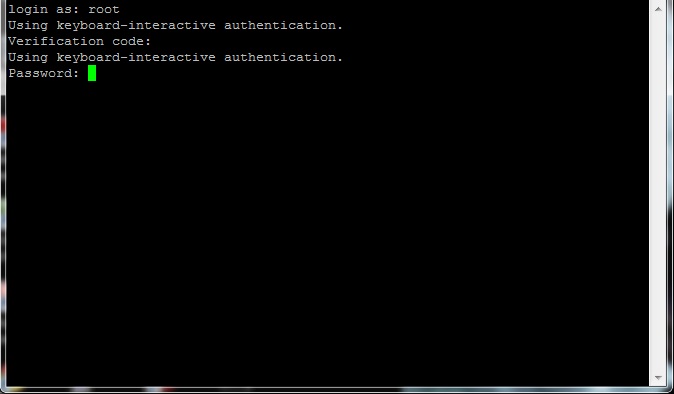
Client端設置
Android:https://play.google.com/store/apps/details?id=com.google.android.apps.authenticator2
或到Google Play 搜尋並安裝 Google Authenticator
iOS:http://itunes.apple.com/us/app/google-authenticator/id388497605?mt=8
其他:請自行搜尋下載安裝或參考http://support.google.com/accounts/bin/answer.py?hl=en&answer=1066447
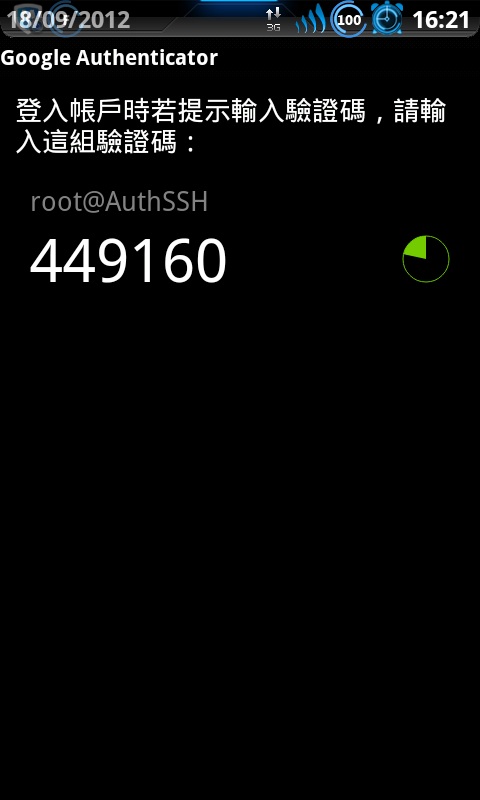
我是使用Android手機,掃完QRCode後,每30秒產生一組新驗證碼,如下圖:
注意事項
1. Selinux:需設定為disabled
2. 可與rsa公私鑰認證一起使用,但只差別在與電腦裡有沒有rsa key而已,如果沒有的話才會用到。
3. 同一個『.google_authenticator』可用在別台Server上,所以在安全性上仍須注意。
4. 商用OTP系統一般是C/S網路版方式,有一個統一的Authentication Server,為了保證高可用性,
一般會有一主一備兩台伺服器。
5. Google Authenticator是一個基於時間的產生驗證碼的程式,因此不管是伺服器端還是手機用戶端,
對時間的要求都是非常嚴格的,要時刻保持與NTP伺服器同步。
6. Google Authenticator和條型碼掃瞄器默認是不會產生任何GPRS和WIFI流量的。
7. 如果不需要使用者登入時輸入OTP密碼,而是在使用者su到root時要求輸入,
可以把PAM認證語句加入到『/etc/pam.d/su』中。
8. 當伺服器啟用PAM認證之後,所有使用者都是要求輸入TOTP密碼,
所以需要每個使用者在自己的目錄下產生一個『.google_authenticator』檔案。
參考資料來源
https://app.shopback.com/RBANl9P3Ysb
http://code.google.com/p/google-authenticator/
http://m114.org/system/google-authenticator-strengthen-ssh-login-security.html
https://wzyboy.im/post/765.html
http://www.ipcpu.com/2012/07/google-auth-sshd/
http://blog.onovps.com/archives/centos-ssh-google-authenticator.html
http://heikezhi.com/2011/09/26/simple-two-factor-ssh-authentication-with-google-authenticator/