摘要:CentOS 6:新增硬碟
每次都忘記的設定,記錄一下
1. df -h
掛載前,先確認目前狀況

2. fdisk -l
加新硬碟後,確認目前狀況

3. fdisk /dev/sdb
加硬碟後開始新增分割區及掛載點

a. n:新增掛載點
b. p:建立主要分割區
c. Fisrt cylinder:開始磁柱數,使用預設
d. Last cylinder:結束磁柱數,使用預設
e. w:將變更寫入
f. Command (m for help):p:列出目前硬碟狀況
g. Command (m for help):q :離開
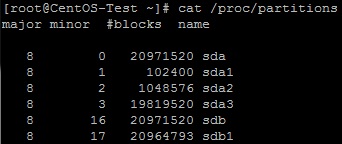
4. cat /proc/partitions
查看系統分割區資訊,CentOS 6 會自動辨識,CentOS 5.x則必須輸入『partprobe』。
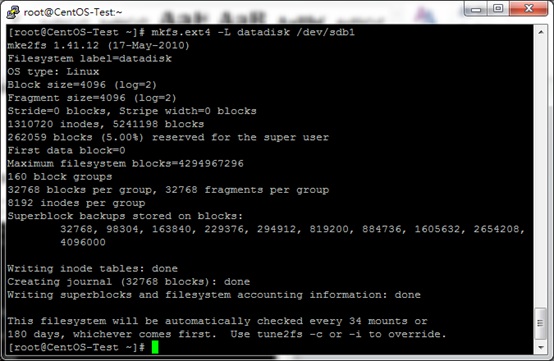
6. mkfs.ext4 -L datadisk /dev/sdb1
格式化『/dev/sdb1』並指定檔案系統標籤名稱為『datadisk』
7. blkid
查看Block ID資訊

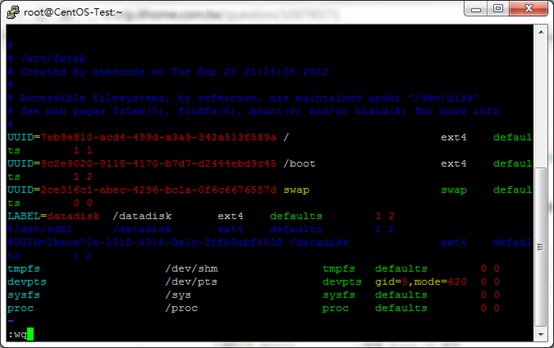
8. vim /etc/fstab
修改掛載設定,三種方式:
a. UUID
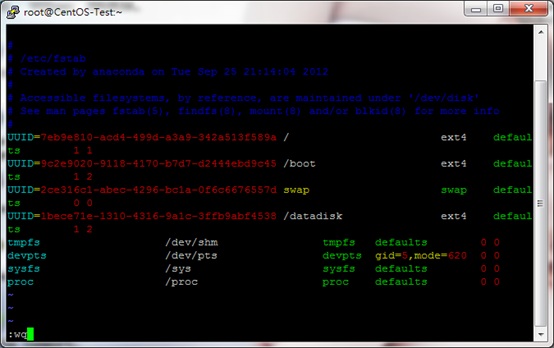
b. 硬碟裝置

c. 硬碟標籤
9. 最後步驟

a. mkdir /datadisk:建立預定掛載資料夾
b. mount -a:重新讀取(套用)fstab
c. df -h:確認是否掛載成功
參考來源