大綱:利用Zabbix結合Telegram發送告警訊息與圖示
一、安裝套件版本
01. System OS:CentOS Linux release 7.7.1908 (Core)
02. Zabbix:4.4
03. Mariadb:5.5.64
04. PHP:5.4.16
二、Zabbix安裝
01. Selinux關閉
vim /etc/selinux/config
SELINUX=diabled
02. OS相關套件安裝
yum install -y wget telnet vim ntp net-tools bind-utils traceroute unzip git
03. DNS解析檢查
vim /etc/reslov.conf
04. Zabbix相關套件安裝
A. Zabbix Repo
rpm -ivh https://repo.zabbix.com/zabbix/4.4/rhel/7/x86_64/zabbix-release-4.4-1.el7.noarch.rpm
B. yum install httpd mariadb mariadb-server php php-mysql
C. yum install php-gd php-xml php-ldap php-bcmath php-mbstring
D. yum install zabbix-server-mysql zabbix-web-mysql zabbix-agent
05. 服務開機啟動
A. systemctl enable httpd
B. systemctl enable mariadb
C. systemctl enable zabbix-server zabbix-agent
06. 啟動服務
A. systemctl start httpd
B. systemctl start mariadb
C. systemctl start zabbix-server zabbix-agent
07. Mariadb相關設定
mysql_secure_installation
NOTE: RUNNING ALL PARTS OF THIS SCRIPT IS RECOMMENDED FOR ALL MariaDB
SERVERS IN PRODUCTION USE! PLEASE READ EACH STEP CAREFULLY!

In order to log into MariaDB to secure it, we'll need the current
password for the root user.  If you've just installed MariaDB, and
you haven't set the root password yet, the password will be blank,
so you should just press enter here.

Enter current password for root (enter for none):按Enter鍵
OK, successfully used password, moving on...

Setting the root password ensures that nobody can log into the MariaDB
root user without the proper authorisation.

Set root password? [Y/n] Y
New password:root密碼
Re-enter new password:root密碼
Password updated successfully!
Reloading privilege tables..
... Success!

By default, a MariaDB installation has an anonymous user, allowing anyone
to log into MariaDB without having to have a user account created for
them. This is intended only for testing, and to make the installation
go a bit smoother. You should remove them before moving into a
production environment.

Remove anonymous users? [Y/n] Y
... Success!

Normally, root should only be allowed to connect from 'localhost'. This
ensures that someone cannot guess at the root password from the network.

Disallow root login remotely? [Y/n] Y
... Success!

By default, MariaDB comes with a database named 'test' that anyone can
access. This is also intended only for testing, and should be removed
before moving into a production environment.

Remove test database and access to it? [Y/n] Y
- Dropping test database...
... Success!
- Removing privileges on test database...
... Success!

Reloading the privilege tables will ensure that all changes made so far
will take effect immediately.

Reload privilege tables now? [Y/n] Y
... Success!

Cleaning up...

All done! If you've completed all of the above steps, your MariaDB
installation should now be secure.

Thanks for using MariaDB!
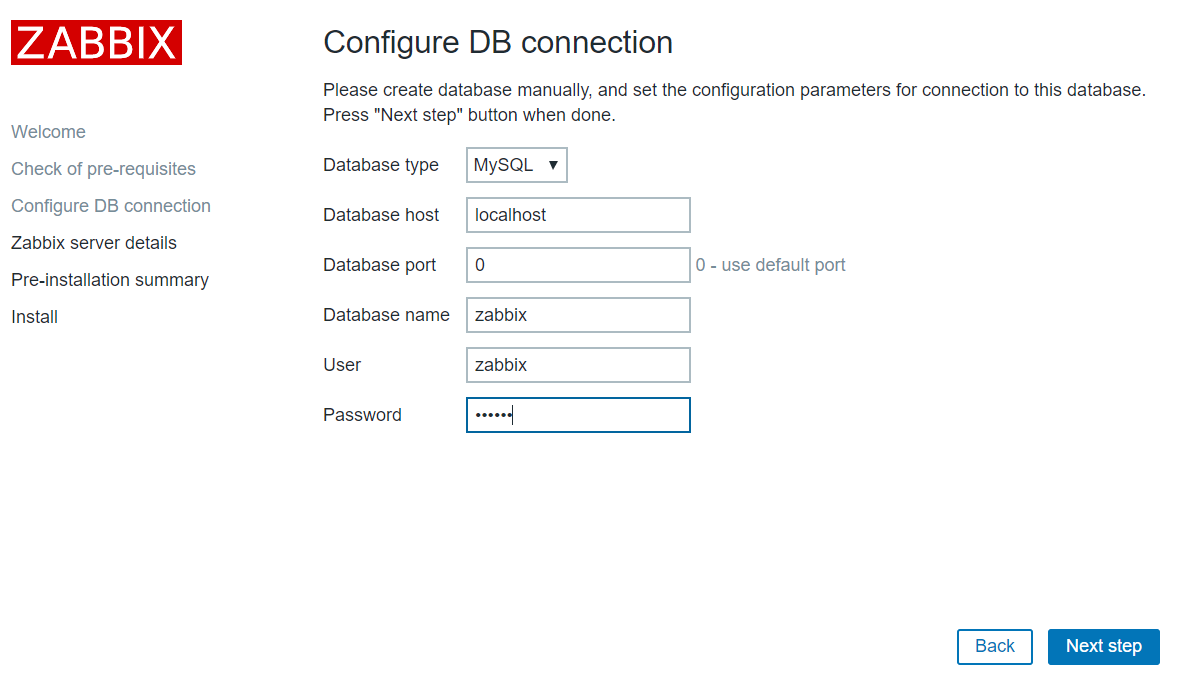
08. Zabbix DB設定
A. mysql -uroot -p
Enter password:root密碼
Welcome to the MariaDB monitor.  Commands end with ; or \g.
Your MariaDB connection id is 59
Server version: 5.5.64-MariaDB MariaDB Server

Copyright (c) 2000, 2018, Oracle, MariaDB Corporation Ab and others.

Type 'help;' or '\h' for help. Type '\c' to clear the current input statement.

#新增zabbix資料庫跟設定utf8編碼
MariaDB [(none)]>create database zabbix character set utf8 collate utf8_bin;
Query OK, 1 row affected (0.00 sec)

#新增資料庫使用者帳密並給權限
MariaDB [(none)]>grant all privileges on zabbix.* to zabbix@localhost identified by 'zabbix';
Query OK, 0 rows affected (0.00 sec)

MariaDB [(none)]> quit
Bye
註:https://www.zabbix.com/documentation/4.4/manual/appendix/install/db_scripts
B. 匯入資料庫
zcat /usr/share/doc/zabbix-server-mysql-4.4.4/create.sql.gz | mysql -uzabbix -p zabbix
C. vim /etc/zabbix/zabbix_server.conf
DBName=zabbix
DBUser=DB UserName
DBPassword=DB UserPassword
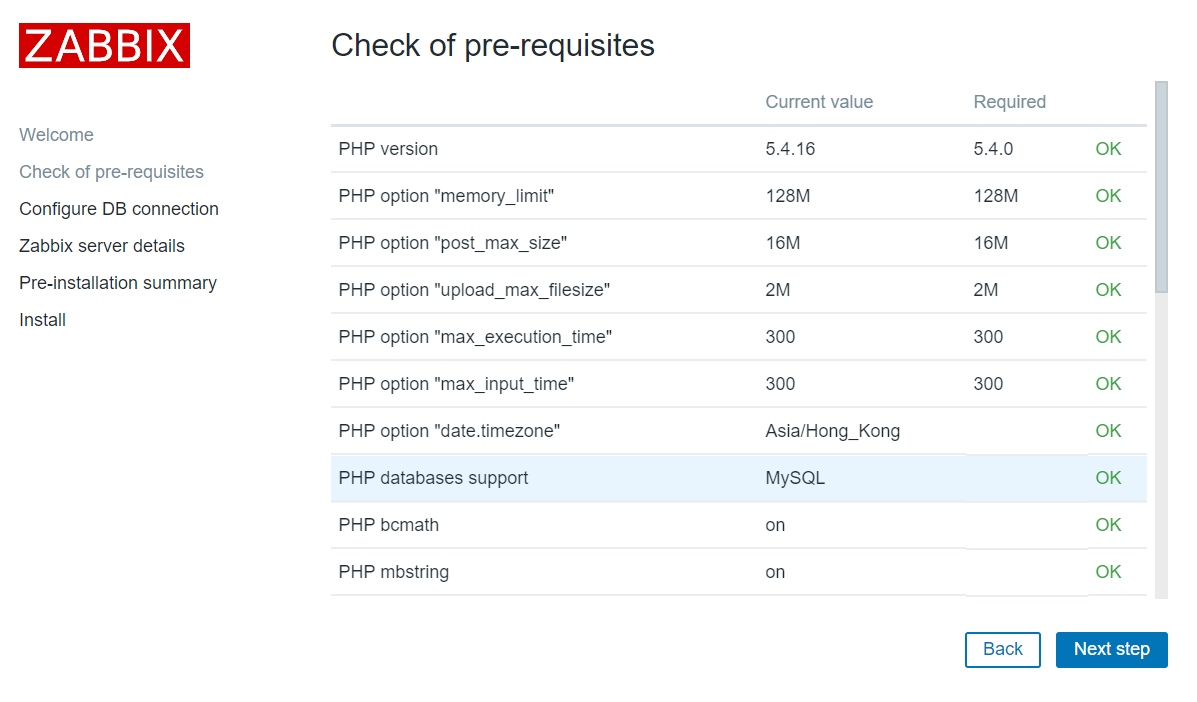
09. PHP設定
vim /etc/php.ini
memory_limit = 128M
post_max_size = 16M
max_execution_time = 300
max_input_time = 300
session.auto_start = 0
mbstring.func_overload = 0
date.timezone = Asia/Taipei
always_populate_raw_post_data = -1
10. 複製
cp -r /usr/share/zabbix/ /var/www/html/
11. 重新啟動服務
A. systemctl restart httpd
B. systemctl restart mariadb
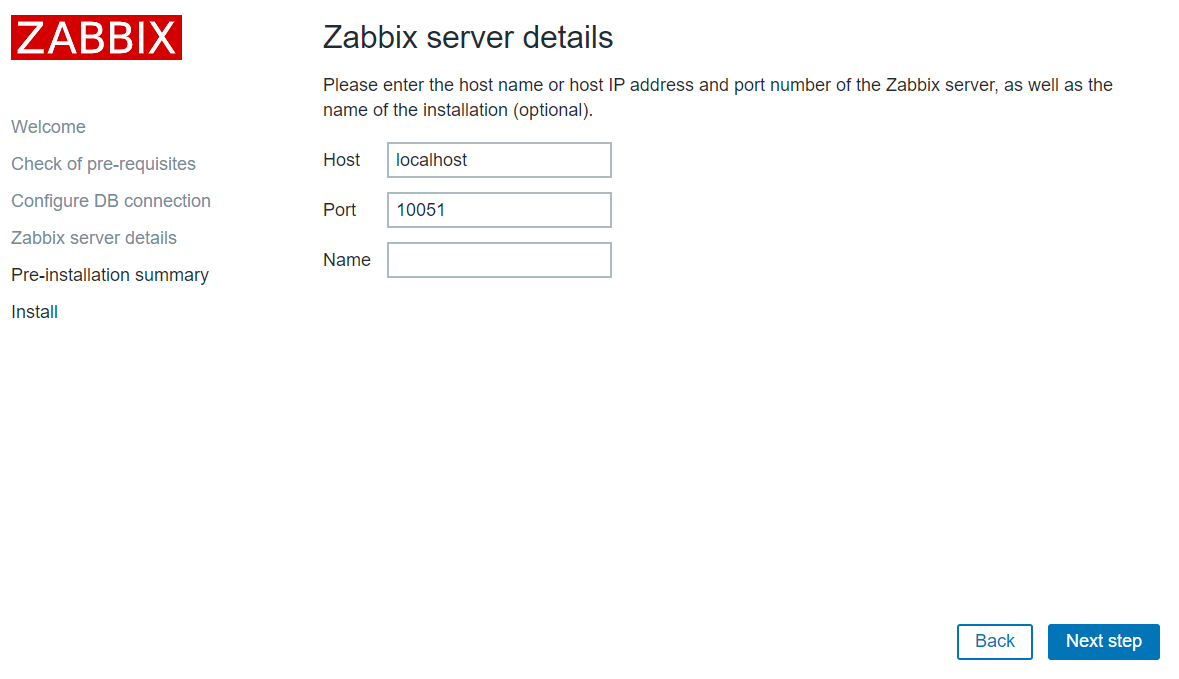
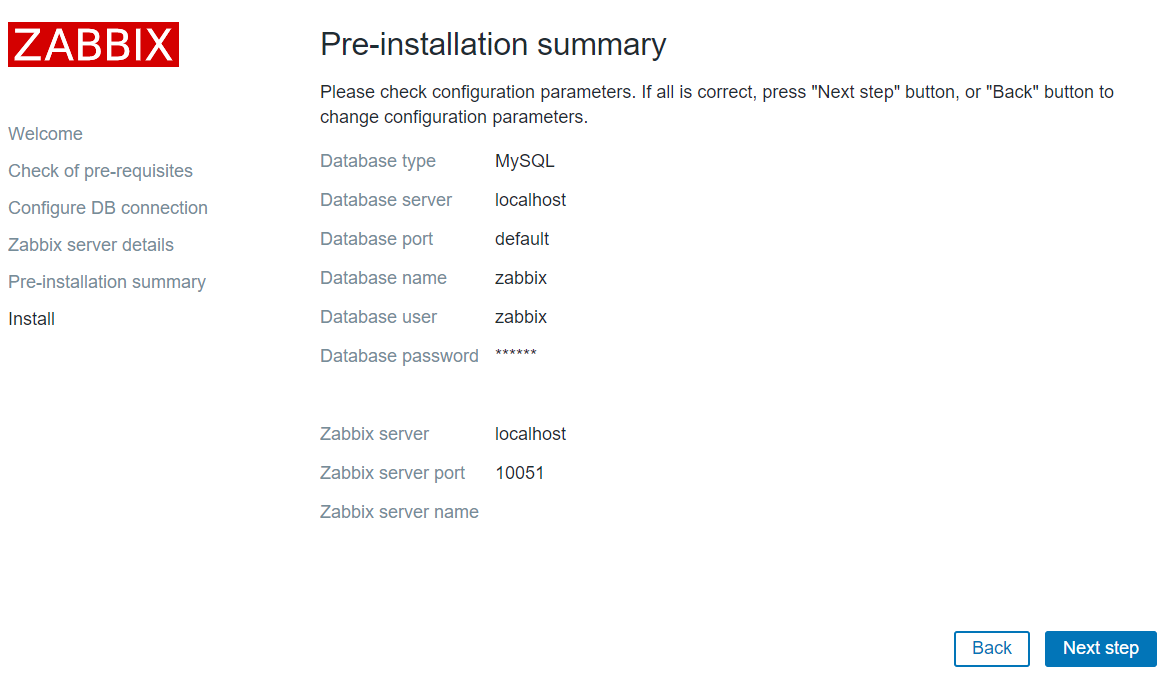
12. Zabbix Web Console
http://zabbix_ip/zabbix

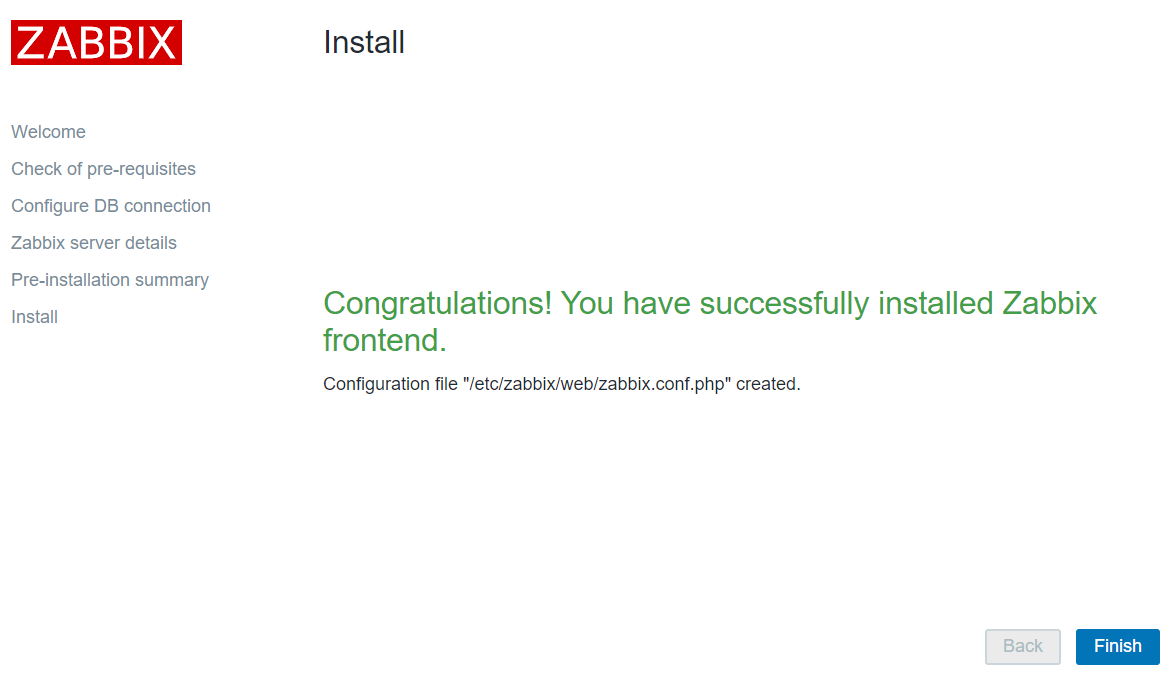
註1:預設帳密 Admin / zabbix
註2:若無法開啟,請檢查防火牆
影片:Zabbix 4.4 Install
三、Telegram Bot申請
01. 連結: https://telegram.me/botfather
02. 輸入:/newbot
03. 輸入:Bot Name,例:zabbix-telegram-alert
04. 輸入:Bot UserName,例:zabbix-telegram-alert_bot(必須以bot結尾)
05. 取得 Bot Token API
06. 取得個人Telegram ID:https://api.telegram.org/botToken/getUpdates
註:請先跟機器人發訊息
07. 取得群組Telegram ID:https://api.telegram.org/botToken/getUpdates
註:請先在群組輸入/start
08. 在Zabbix Server上用Bot向個人Telegram ID發送訊息
curl -X POST "https://api.telegram.org/botToken/sendMessage" -d "chat_id=Personal ID&text=my test text"
09. 在Zabbix Server上用Bot向群組Telegram ID發送訊息
curl -X POST "https://api.telegram.org/botToken/sendMessage" -d "chat_id=Group ID&text=group text"
10. 參考資料
A. https://core.telegram.org/bots#creating-a-new-bot
B. https://core.telegram.org/bots/api
四、Zabbix Server上的Telegram相關設定
01. 安裝Python-pip
A. curl "https://bootstrap.pypa.io/get-pip.py" -o "get-pip.py"
B. python get-pip.py
02. 查詢Python有無安裝Requests模組
A. pydoc modules |grep requests
B. 若沒有裝:pip install requests
03.下載與設定
A. cd /usr/lib/zabbix/alertscripts/
B. git clone https://github.com/ghostliang47/zbx_telegram.git
註:或是至此下載
C. mv zbx_telegram/* .
D. vim zbxtg_settings.py
#zbx bot api
tg_key = "BotToken"  #telegram bot api key

#zbx_server版本設定
#zbx_server_version = 2  # for Zabbix 2.x version
#zbx_server_version = 3  # for Zabbix 3.x version, by default, not everyone updated to 4.x yet
zbx_server_version = 4  # for Zabbix 4.x version, default will be changed in the future with this

#zbx_db設定
zbx_db_host = "localhost"
zbx_db_database = "zabbix"
zbx_db_user = "username"
zbx_db_password = "password"
E. 調整權限
a. chmod 775 zbxtg.py
b. chmod 775 zbxtg_settings.py
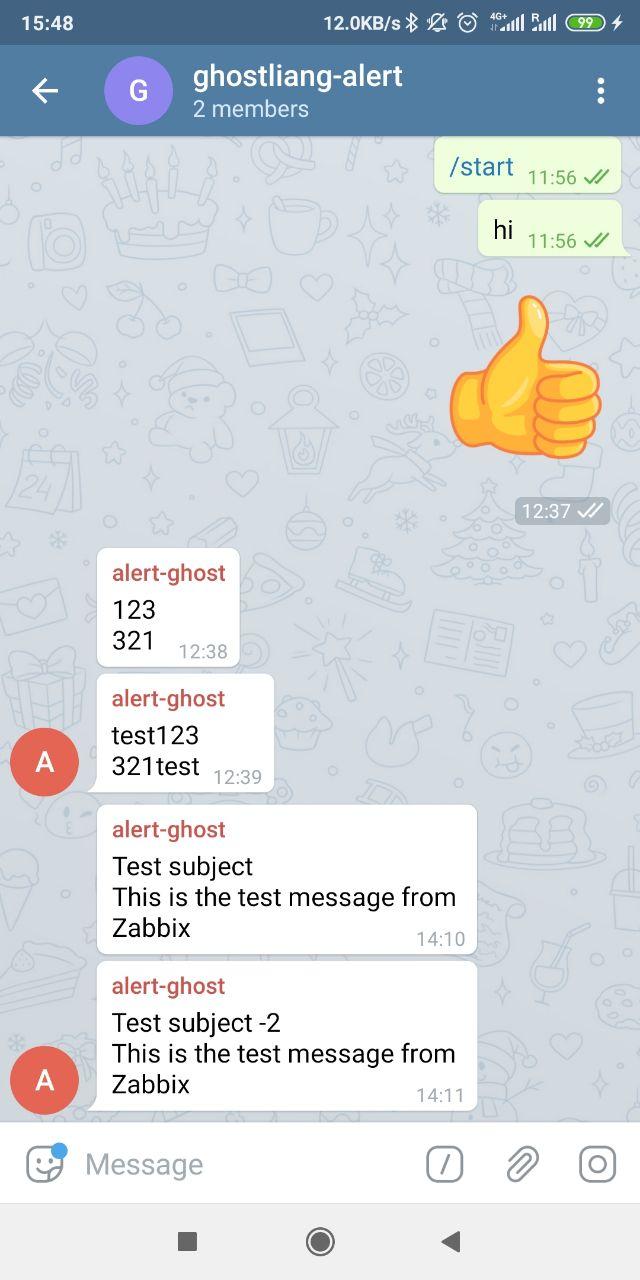
F. 測試發送訊息
a. [root@zabbix alertscripts]#./zbxtg.py "@UserName" "test" "test123" --debug
b. [root@zabbix alertscripts]# ./zbxtg.py "Group Name" "123" "321" --debug --group
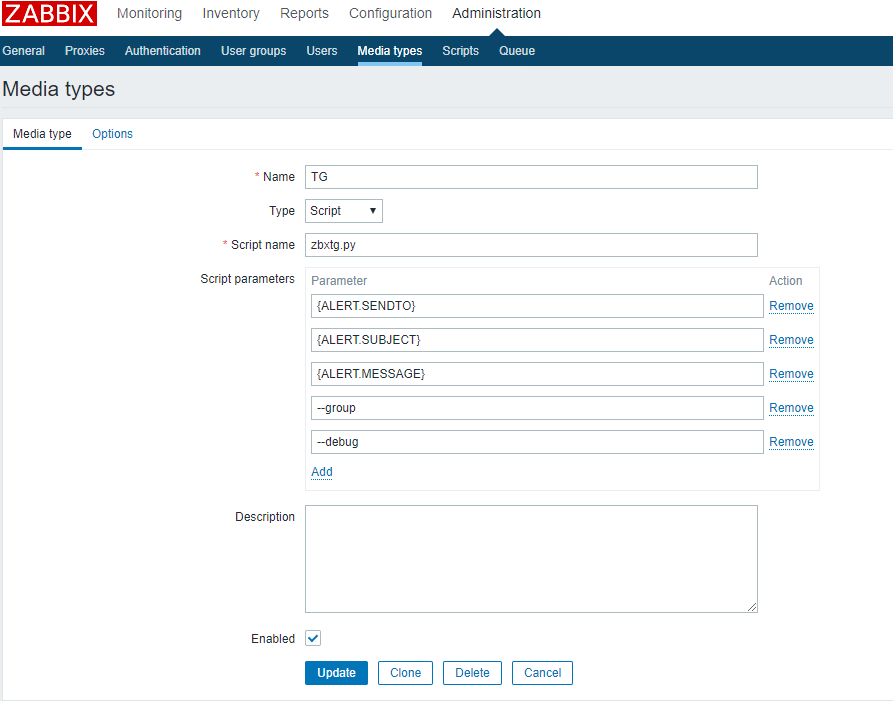
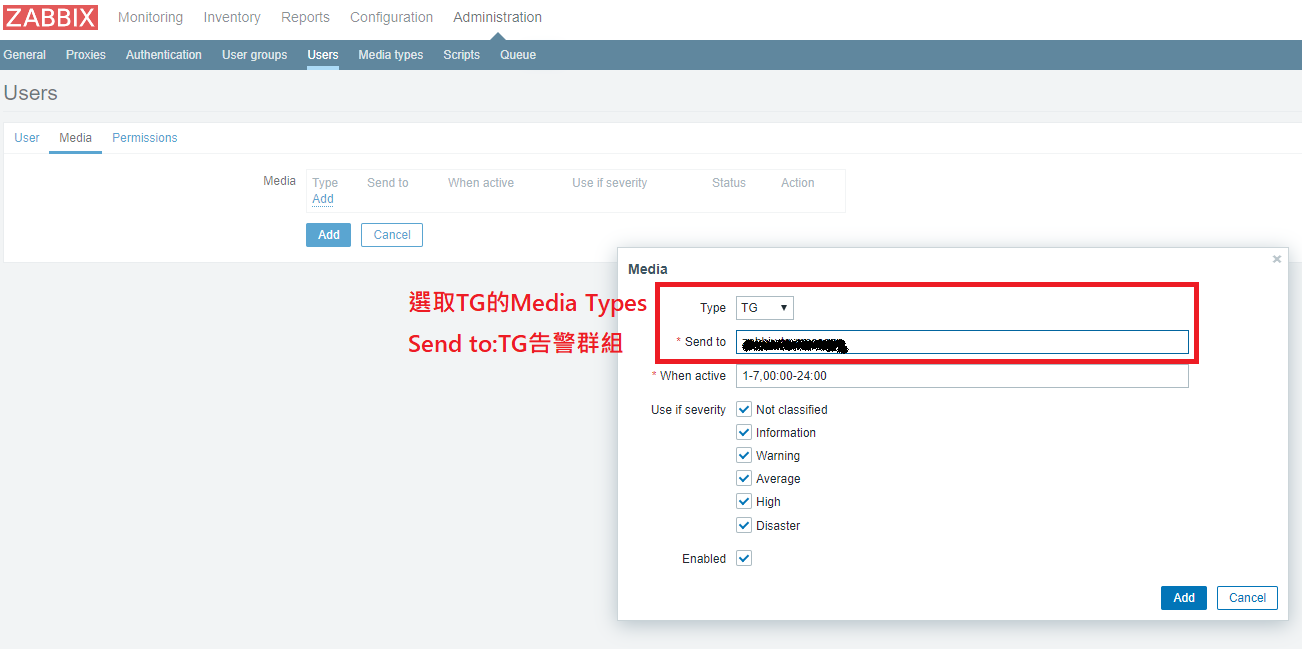
G. Media types:Administration → Media types → Create media type
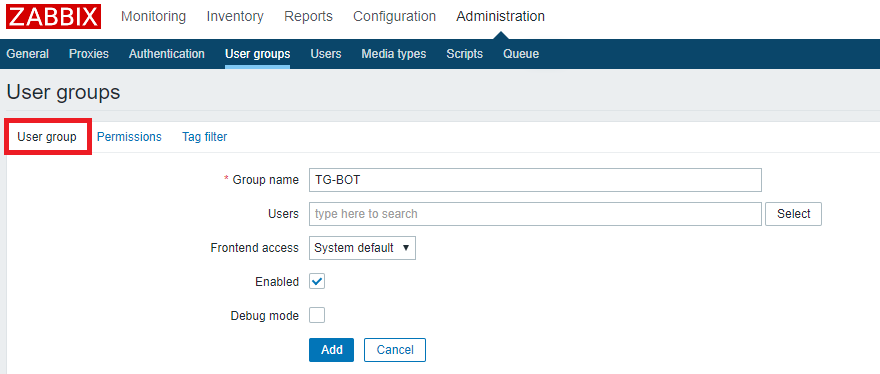
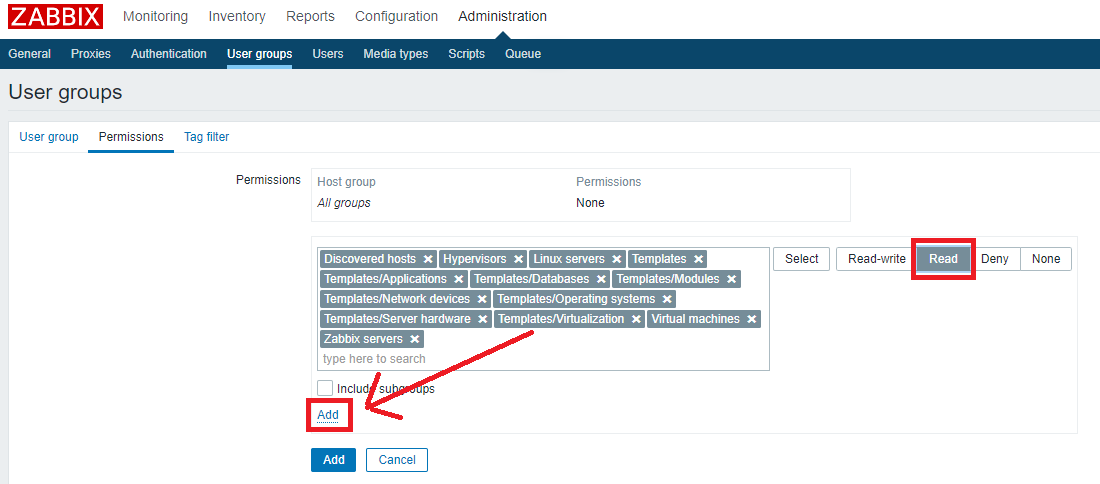
H. User groups:Administration → User groups → Create User Group
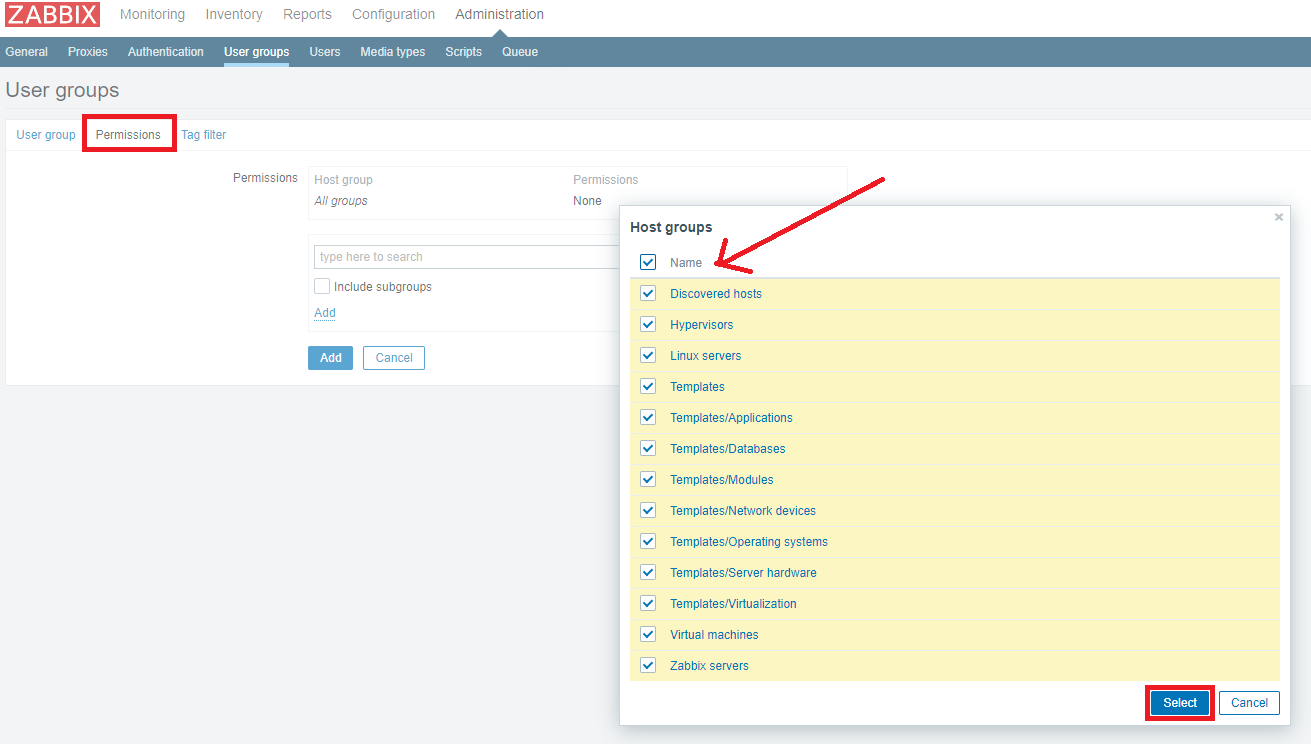
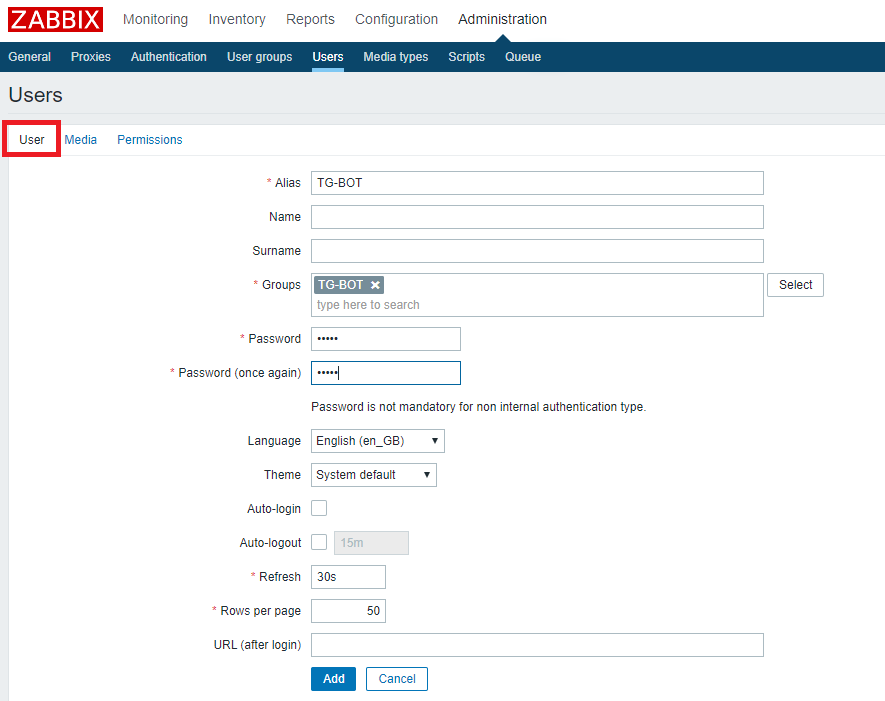
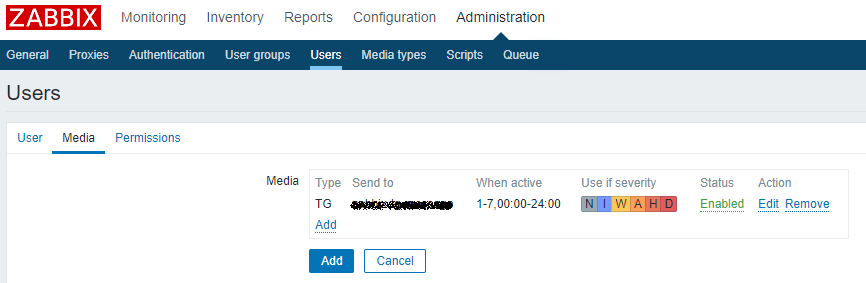
I. Users:Administration → Users → Create User
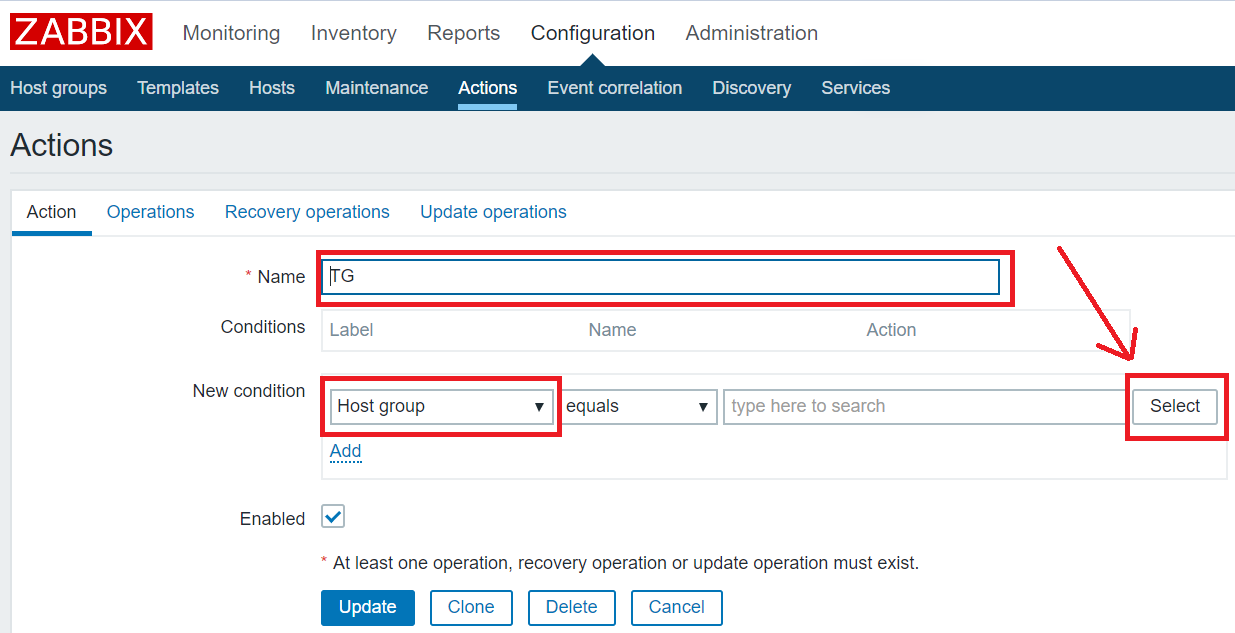
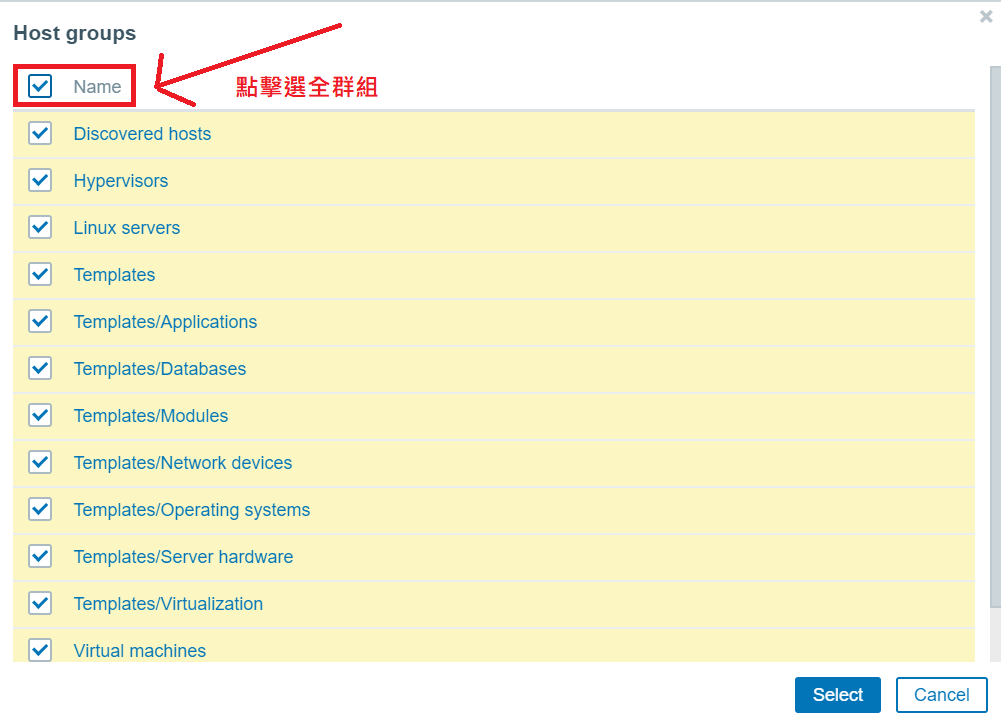
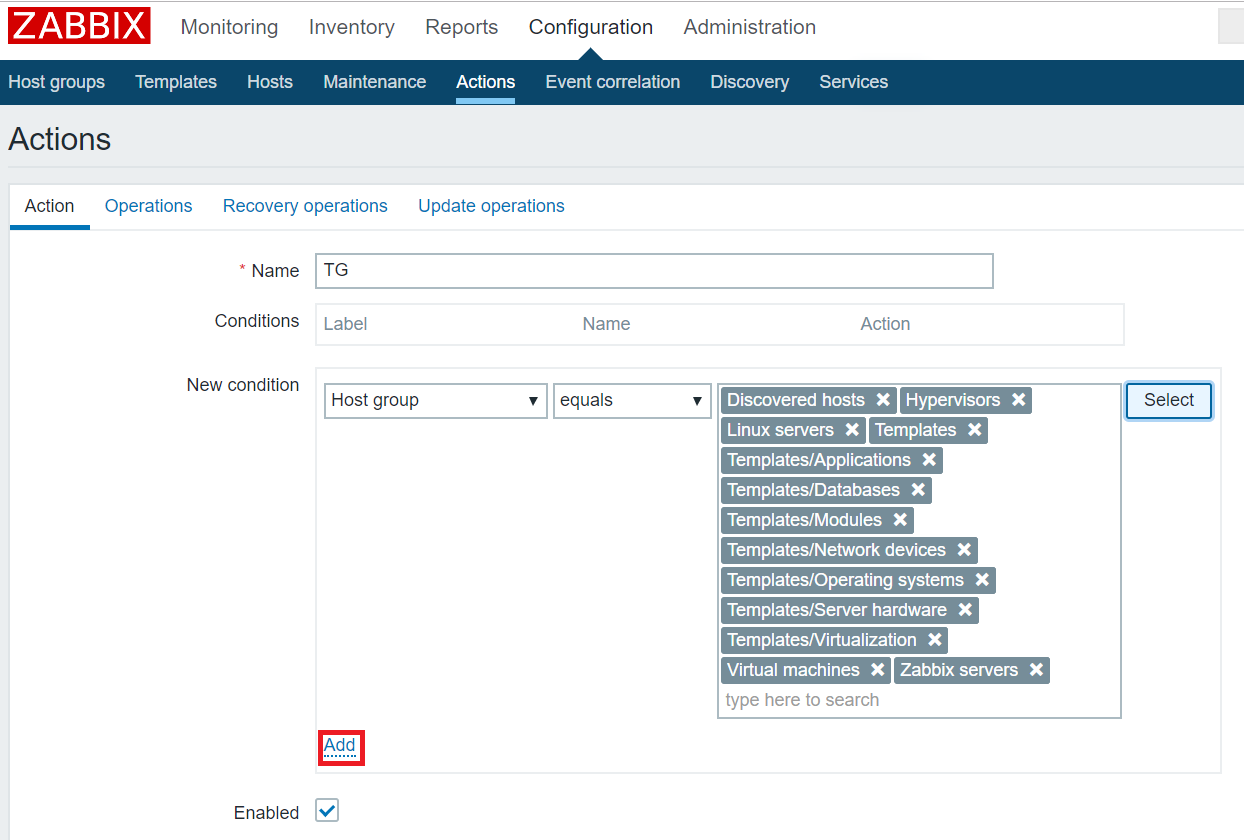
J. Actions:Configuration → Actions → Create Action
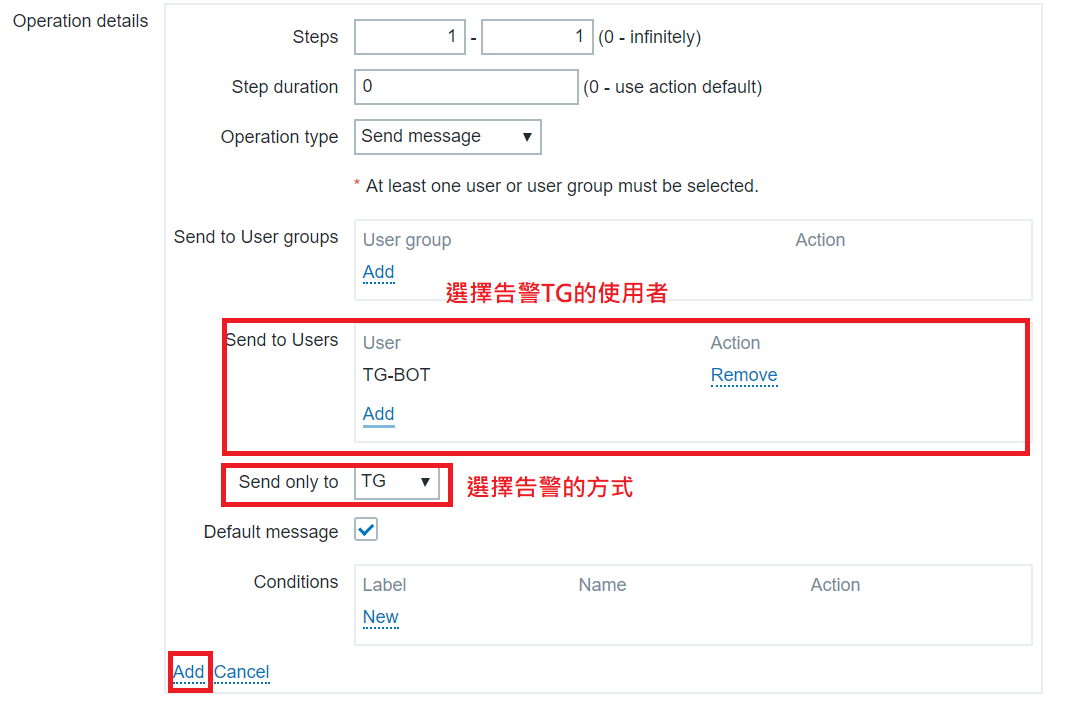
K. Operations:Configuration → Actions → Operations
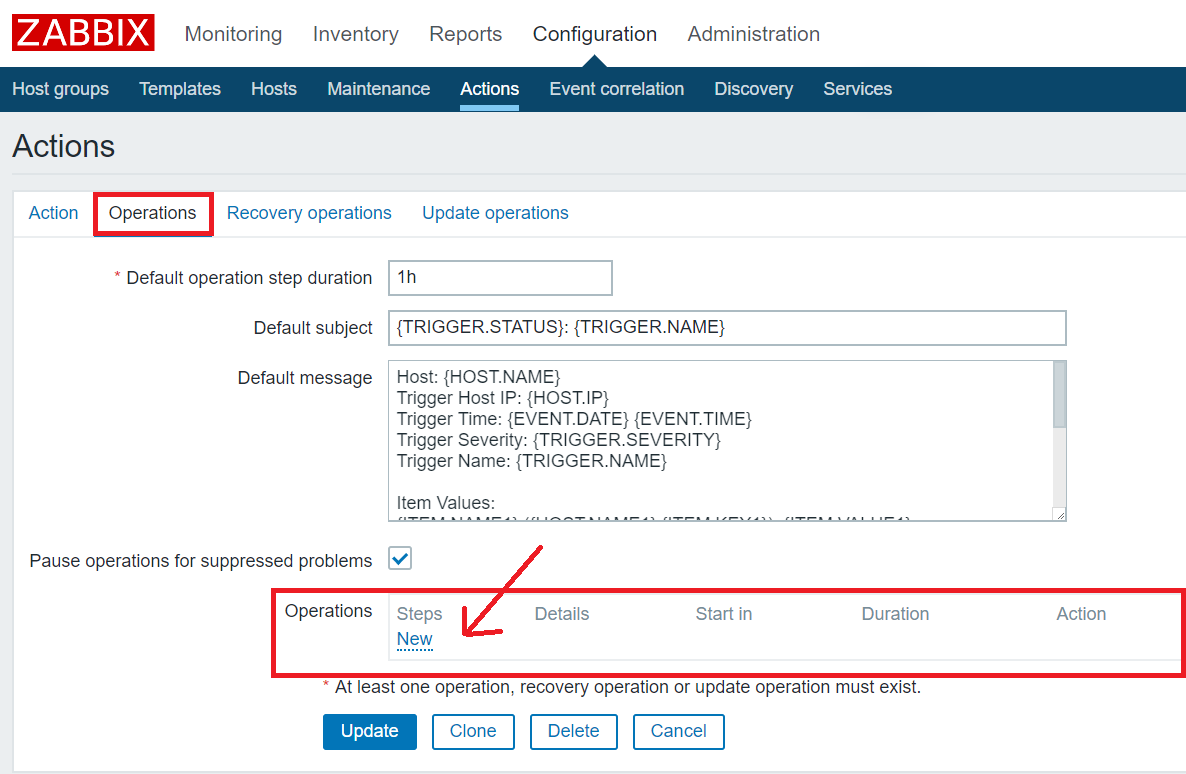
範例:標題
{TRIGGER.STATUS}: {TRIGGER.NAME}
範例:內容
Host: {HOST.NAME}
Trigger Host IP: {HOST.IP}
Trigger Time: {EVENT.DATE} {EVENT.TIME}
Trigger Severity: {TRIGGER.SEVERITY}
Trigger Name: {TRIGGER.NAME}


Item Values:
{ITEM.NAME1} ({HOST.NAME1}:{ITEM.KEY1}): {ITEM.VALUE1}


Original event ID: {EVENT.ID}


Last value: {ITEM.LASTVALUE1} ({TIME})
zbxtg;graphs                    #圖形
zbxtg;graphs_period=3600        #圖形時間單位為秒(3600=1 hr)
zbxtg;itemid:{ITEM.ID1}
zbxtg;title:{HOST.HOST} - {TRIGGER.NAME}
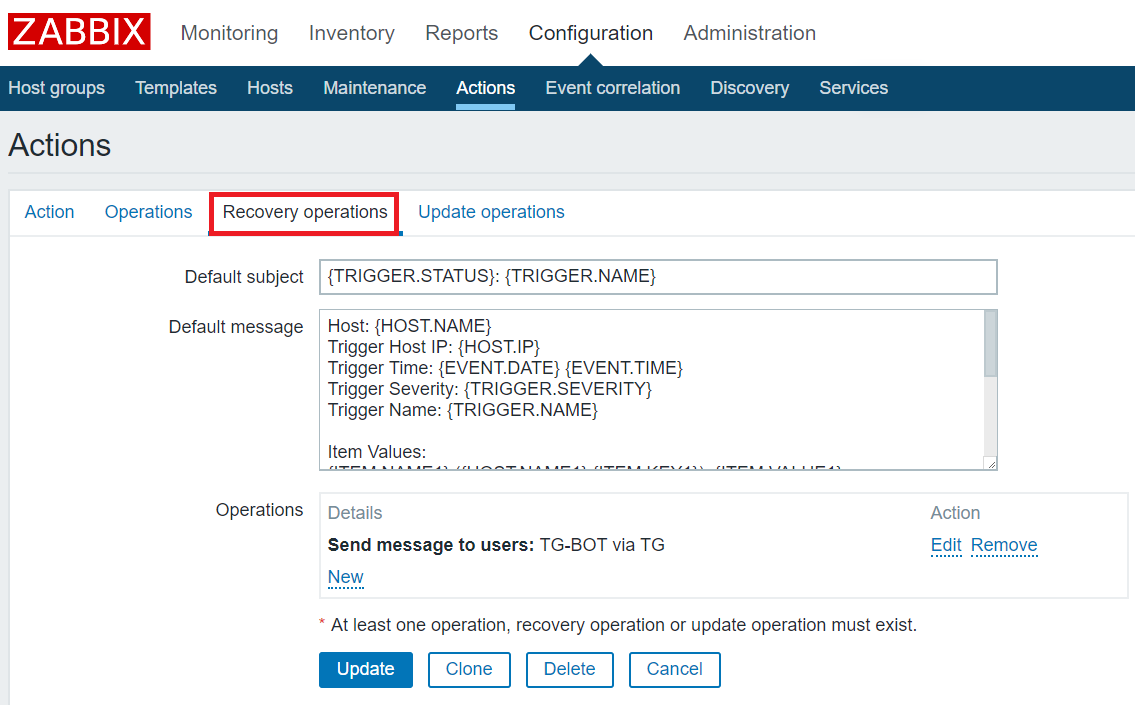
L. Recovery operations:Configuration → Actions → Recovery operations
內容同 K.
M. 修改zbxtg_settings為TG告警的使用者
vim zbxtg_settings.py
zbx_server = "http://127.0.0.1/zabbix/"  # zabbix server full url
zbx_api_user = "TG-BOT"  #使用者帳號
zbx_api_pass = "zabbix"   #使用者密碼
zbx_api_verify = True  # True - do not ignore self signed certificates, False - ignore
N. 設定防火牆
firewall-cmd --zone=public --permanent --add-service=http
firewall-cmd --zone=public --permanent --add-service=https
firewall-cmd --zone=public --permanent --add-service=zabbix-server
firewall-cmd --zone=public --permanent --add-service=zabbix-agent
O. 效果呈現
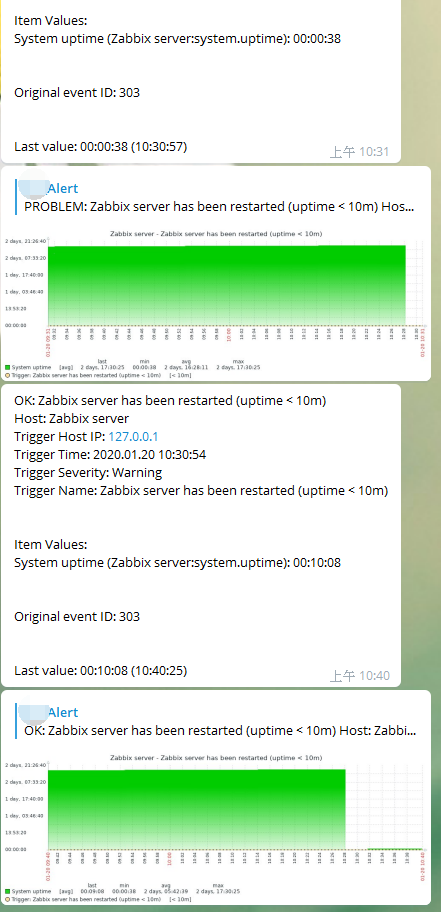
註:Telegram Bot
註:Zabbix and Telegram Test