[Windows Store App 開發筆記] Bing Map應用---Pushpin圖示的客製化
前言
小編最近開發APP,接觸到了一個相當好玩的東西─Bing Map,可以讓使用者查詢想要的地理位置,大幅提升APP的使用者經驗喔!!!
關於初步的設定可以參考下面這篇,內容相當清楚,小編也是造著他做的呢!!!
http://www.dotblogs.com.tw/frank12690/archive/2013/11/06/127051.aspx
而Pushpin是一個常用的功能,可以幫你標示想要的座標位置
MainPage.xaml:
1: <Grid Background="{StaticResource ApplicationPageBackgroundThemeBrush}">
2: <bm:Map x:Name="map" ZoomLevel="12" HomeRegion="Us" Credentials="INSERT_YOUR_BINGMAP_KEY">
3: <bm:Map.Center>
4: <bm:Location Latitude="25.038399956956642" Longitude="121.56906366348267" />
5: </bm:Map.Center>
6: <bm:Pushpin >
7: <bm:MapLayer.Position>
8: <bm:Location Latitude="25.038399956956642" Longitude="121.56906366348267" />
9: </bm:MapLayer.Position>
10: </bm:Pushpin>
11: </bm:Map>
12: </Grid>
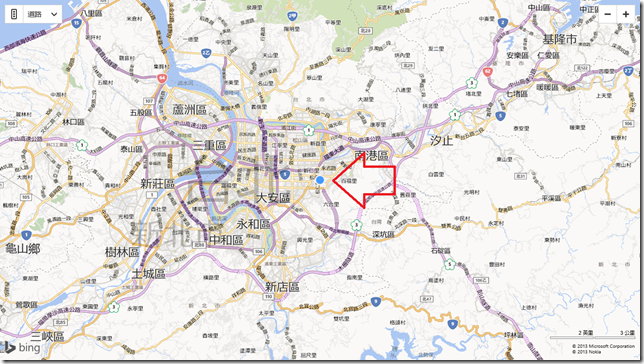
執行結果:
上面是Pushpin預設的圖示,可能很多人會不喜歡,而且他其實不太顯眼,如果小編沒有用箭頭標示,相信很多人都找不到,所以今天小編就來分享如何自己客製化Pushpin的圖示喔。
實作
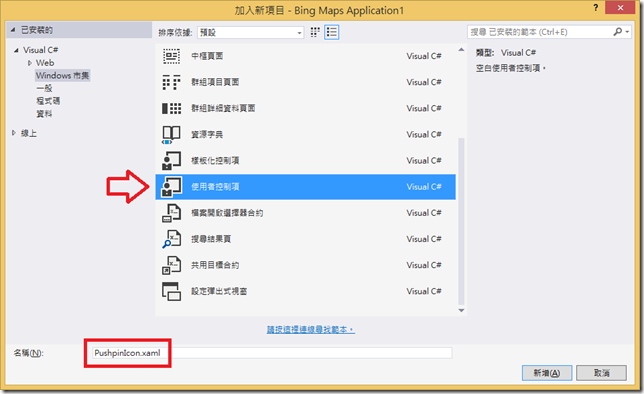
1. 首先我們要創建一個新的「使用者控制項」的xaml,將之命名為PushpinIcon.xaml
2. 接著在裡面就可以製作自己喜歡的樣式囉!!!
1: <Canvas>
2: <Ellipse Height="35" Width="35" Fill="#FFF0F0F0" Margin="-12.5,-12.5,0,0"></Ellipse>
3: <Ellipse Height="25" Width="25" Fill="Red" Margin="-10,-10,0,0"></Ellipse>
4: <Ellipse Height="15" Width="15" Fill="WhiteSmoke" Margin="-5,-5,0,0"></Ellipse>
5: </Canvas>
3. 接著是 MainPage.xaml 的部分,我們將在cs檔中實作Pushpin的設定~
1: <Grid Background="{StaticResource ApplicationPageBackgroundThemeBrush}">
2: <bm:Map x:Name="map" ZoomLevel="12" HomeRegion="Us" Credentials="INSERT_YOUR_BINGMAP_KEY">
3: <bm:Map.Center>
4: <bm:Location Latitude="25.038399956956642" Longitude="121.56906366348267" />
5: </bm:Map.Center>
6: </bm:Map>
7: </Grid>
4. 最後就是 MainPage.xaml.cs
1: public sealed partial class MainPage : Page
2: {
3: MapLayer mMapLayer;
4: PushpinIcon mIcon;
5: public MainPage()
6: {
7: this.InitializeComponent();
8: mMapLayer = new MapLayer();
9: mIcon = new PushpinIcon();
10: map.Children.Add(mIcon);
11: }
12: protected override void OnNavigatedTo(NavigationEventArgs e)
13: {
14: double lat = 25.038399956956642;
15: double lon = 121.56906366348267;
16: Location location = new Location(lat, lon);
17: MapLayer.SetPosition(mIcon, location);
18: map.SetView(location, 12);
19: }
20: }
執行結果:
是不是清楚多了呢,當然其實還有很多更特殊更精美的圖示,就等各位開發者自己去實現囉!!!


