一般我們在開發Windows Phone 8 時,常常會接收網路上的資料來放進UI裡,也就是說我們的資料數目是動態的,這時我們與其自己一項項建立UI,不如將這些不固定長度的資料透過Binding的方式放入ListBox中,如此一來可省去使用者處理資料上的麻煩。
本文章將引導您透過Binding的方式,將資料放進ListBox。
一般我們在開發Windows Phone 8 時,常常會接收網路上的資料來放進UI裡,也就是說我們的資料數目是動態的,這時我們與其自己一項項建立UI,不如將這些不固定長度的資料透過Binding的方式放入ListBox中,如此一來可省去使用者處理資料上的麻煩。
本文章將引導您透過Binding的方式,將資料放進ListBox。
首先假設要建立的是學生的資料,以【姓名】和【座號】為例。
步驟一:
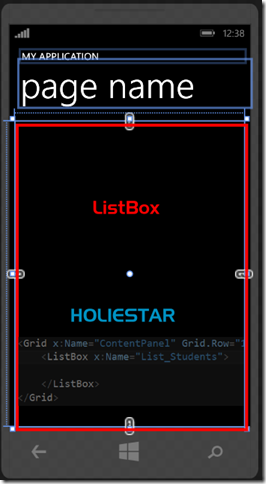
在MainPage.xmal中放置一個ListBox的控制向,並命名為【List_Students】
步驟二:
在MainPage.xmal裡的ListBox的子屬性下建立Template,也就是樣板,假設目前資料數目有5筆,ListBox就會根據Template自動創建五次來放資料的內容。
所以在Template中我們需要兩個TextBlock來放置【姓名】和【座號】,Text的屬性要放置【Binding XXX】,XXX是等會兒實作程式時會用到的,這邊以Name和ID做示範。
<ListBox x:Name="List_Students">
        <ListBox.ItemTemplate>
            <DataTemplate>
                <StackPanel Orientation="Horizontal">
                    <TextBlock Text="{Binding ID}" />
                    <TextBlock Text="{Binding Name}" />
                </StackPanel>
            </DataTemplate>
        </ListBox.ItemTemplate>
</ListBox>
步驟三:
建立一個學生資料的Class 並透過【自動屬性】建立該類別叫做【Student_Item】,其中包含【姓名】和【座號】
這邊的屬性名稱要跟剛剛在Xaml上TextBlockk的Text屬性相對應,也就是Name和ID。
class Student_Item
    {
        public string Name { get; set; }//學生的姓名
        public string ID{ get; set; }//學生的座號
    }
步驟四:
在主程式MainPage.xaml.cs裡建立Student_Item的陣列來放置學生的資料。
onNavigatedTo頁面巡覽請參閱Windows Phone 8 C# 換頁傳遞參數 兩種方法 Navigation 、PhoneApplicationService
//宣告學生的陣列
private List<Student_Item> Student_Items;
//當該頁面被開啟時
protected override void OnNavigatedTo(NavigationEventArgs e)
{
    base.OnNavigatedTo(e);
    AddStudentData();//建立假資料
}

//建立學生的假資料
private void AddStudentData() {
    Student_Items = new List<Student_Item>(); //初始化Student_Items物件
    //開始裝假資料
    Student_Items.Add(new Student_Item(){Name="王小明",ID="1"});
    Student_Items.Add(new Student_Item() { Name = "王一明", ID = "1" });
    Student_Items.Add(new Student_Item() { Name = "王二明", ID = "2" });
    Student_Items.Add(new Student_Item() { Name = "王三明", ID = "3" });
    Student_Items.Add(new Student_Item() { Name = "王四明", ID = "4" });
    Student_Items.Add(new Student_Item() { Name = "王五明", ID = "5" });
    Student_Items.Add(new Student_Item() { Name = "王六明", ID = "6" });
    Student_Items.Add(new Student_Item() { Name = "王七明", ID = "7" });
    //裝完假資料
    List_Students.ItemsSource = Student_Items;//指定ListBox的資料來源為Student_Items的陣列
}
步驟五:
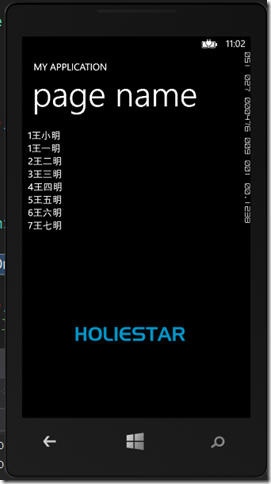
執行看看,完美運行,突然覺得世界很美好!!
若日後在指定ItemsSource時發現ListBox沒有同步更新,卻還停留在舊資料,可以試試看以下兩種方法
方法一:
先指定null再指定回來。
List_Students.ItemsSource = null;
List_Students.ItemsSource = Student_Items;
方法二:
方法一+更新UI
List_Students.ItemsSource = null;
List_Students.ItemsSource = Student_Items;
List_Students.UpdateLayout();
綜合上述我們已透過Binding的方式,將資料放進ListBox囉!!
文章中的敘述如有觀念不正確錯誤的部分,歡迎告知指正 謝謝
轉載請註明出處

