一般我們在開發Windows Store App時,時常會利用AppBar來將更多的選項放置在AppBar,也可以讓畫面更乾淨,讓使用者偶而才會用到的功能放到AppBar裡面去,AppBar在Windows 8.1 中有了更快速的建立方法,那就是透過Commandbar來建立AppBar!
本文將引導您在Xaml中使用Commandbar快速鍵立AppBar。
一般我們在開發Windows Store App時,時常會利用AppBar來將更多的選項放置在AppBar,也可以讓畫面更乾淨,讓使用者偶而才會用到的功能放到AppBar裡面去,AppBar在Windows 8.1 中有了更快速的建立方法,那就是透過Commandbar來建立AppBar!
本文將引導您在Xaml中使用Commandbar快速鍵立AppBar,並以C# + Xaml 的Windows Store App 專案做範例。
開啟Windows Store App 的專案後在,在想要加入的頁面中加入以下程式碼。便可以呈現出AppBar囉!
1: <Page.BottomAppBar>
2: <CommandBar>
3: <!--可以新增開關按鈕-->
4: <AppBarToggleButton Icon="Shuffle" Label="Shuffle"/>
5: <AppBarToggleButton Icon="RepeatAll" Label="Repeat" />
6: <!--也可以利用AppBarSeparator來分類按鈕的區塊-->
7: <AppBarSeparator/>
8: <!--在預設的情況下按鈕是在右邊的-->
9: <AppBarButton Icon="Back" Label="Back" />
10: <AppBarButton Icon="Stop" Label="Stop" />
11: <AppBarButton Icon="Play" Label="Play" />
12: <AppBarButton Icon="Forward" Label="Forward" />
13: <!--次要的CommandBar是在左邊-->
14: <CommandBar.SecondaryCommands>
15: <AppBarButton Icon="Like" Label="Like"/>
16: <AppBarButton Icon="Dislike" Label="Dislike"/>
17: </CommandBar.SecondaryCommands>
18: </CommandBar>
19: </Page.BottomAppBar>
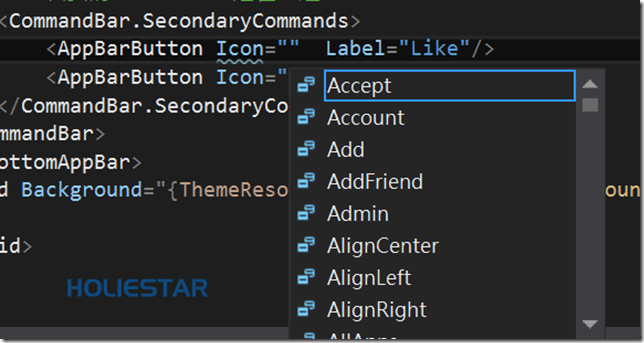
以往在設定AppBar中的按鈕我們必須使用Standard的樣式,但是在Windows 8.1的開發上提供了Icon的選項,可以快速地選擇內建的圖示,減少開發者的開發時程。
如此一來我們便可以使用Windows 8.1在Xaml中使用Commandbar快速鍵立AppBar囉!!
Refrences: Controls (XAML with C#/C++/VB)
文章中的敘述如有觀念不正確錯誤的部分,歡迎告知指正 謝謝
轉載請註明出處,並且附上本篇文章網址 ! 感謝。
SUKI


