ABP (ASP.NET Boilerplate) 應用程式開發框架 新手教學 No.4 資料庫遷移 Migration
ABP (ASP.NET Boilerplate) 應用程式開發框架 新手教學 No.0 索引
這篇主要是Migration
首先一樣先按照架構,Migration相關檔案應該放在基礎設施層 MyCompany.MyProject.EntityFramework 專案的 Migrations 資料夾
1.Migrations SeedData Creator
這邊我先建立 SeedData 種子資料,也就是預設一些資料列,包含Creator(單一實體產生)跟Builder(基於Creator組合的建立)
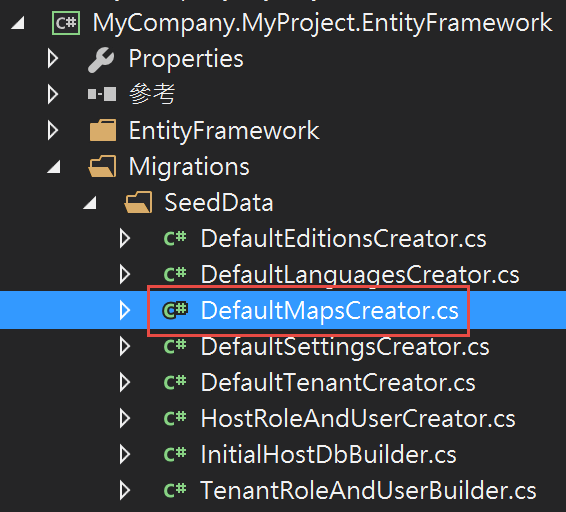
SeedData 集中在 Migrations 資料夾下的 SeedData 資料夾內

Map產生器:DefaultMapsCreator.cs
using MyCompany.MyProject.Entities;
using MyCompany.MyProject.EntityFramework;
using System.Linq;

namespace MyCompany.MyProject.Migrations.SeedData
{
    class DefaultMapsCreator
    {
        private readonly MyProjectDbContext _context;

        public DefaultMapsCreator(MyProjectDbContext context)
        {
            _context = context;
        }

        public void Create()
        {
            CreateMaps();
        }

        public void CreateMaps()
        {
            var defaultMap = _context.Maps.FirstOrDefault(t => t.MapName == Map.DefaultMapName);
            if (defaultMap == null)
            {
                _context.Maps.Add(new Map { MapName = Map.DefaultMapName });
                _context.SaveChanges();
            }
        }
    }
}
Player產生器:DefaultPlayersCreator.cs
using MyCompany.MyProject.Entities;
using MyCompany.MyProject.EntityFramework;
using System.Linq;

namespace MyCompany.MyProject.Migrations.SeedData
{
    class DefaultPlayersCreator
    {
        private readonly MyProjectDbContext _context;

        public DefaultPlayersCreator(MyProjectDbContext context)
        {
            _context = context;
        }

        public void Create()
        {
            CreatePlayers();
        }

        public void CreatePlayers()
        {
            var defaultPlayer = _context.Players.FirstOrDefault(t => t.PlayerName == Player.DefaultPlayerName);
            if (defaultPlayer == null)
            {
                _context.Players.Add(new Player { PlayerName = Player.DefaultPlayerName });
                _context.SaveChanges();
            }
        }
    }
}
2.Migrations SeedData Builder
Player與Map建立:PlayerAndMapBuilder.cs
using MyCompany.MyProject.EntityFramework;

namespace MyCompany.MyProject.Migrations.SeedData
{
    public class PlayerAndMapBuilder
    {
        private readonly MyProjectDbContext _context;
        public PlayerAndMapBuilder(MyProjectDbContext context)
        {
            _context = context;
        }

        public void Create()
        {
            new DefaultMapsCreator(_context).Create();
            new DefaultPlayersCreator(_context).Create();
        }
    }
}
這邊主要可以控制建立的先後順序,因為Player相依於Map,所以我先呼叫DefaultMapsCreator再叫用DefaultPlayersCreator
或是你可以先入一些判斷,相依的資料表存在與否的不同處理流程...等等
到這邊SeedData基本已經建立完成,再來我們設定Migration來呼叫SeedData建立作業
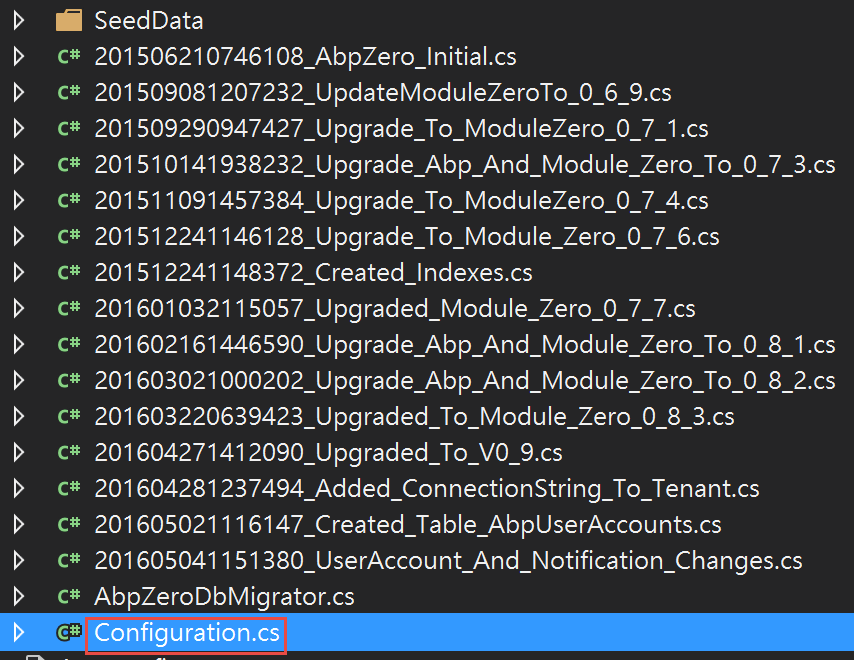
Migration 設定檔位於 MyCompany.MyProject.EntityFramework\Migrations\Configuration.cs

我們到最下面SaveChanges之前加上PlayerAndMapBuilder的呼叫
using System.Data.Entity.Migrations;
using Abp.MultiTenancy;
using Abp.Zero.EntityFramework;
using MyCompany.MyProject.Migrations.SeedData;
using EntityFramework.DynamicFilters;

namespace MyCompany.MyProject.Migrations
{
    public sealed class Configuration : DbMigrationsConfiguration<MyProject.EntityFramework.MyProjectDbContext>, IMultiTenantSeed
    {
        public AbpTenantBase Tenant { get; set; }

        public Configuration()
        {
            AutomaticMigrationsEnabled = false;
            ContextKey = "MyProject";
        }

        protected override void Seed(MyProject.EntityFramework.MyProjectDbContext context)
        {
            context.DisableAllFilters();

            if (Tenant == null)
            {
                //Host seed
                new InitialHostDbBuilder(context).Create();

                //Default tenant seed (in host database).
                new DefaultTenantCreator(context).Create();
                new TenantRoleAndUserBuilder(context, 1).Create();
            }
            else
            {
                //You can add seed for tenant databases and use Tenant property...
            }
            new PlayerAndMapBuilder(context).Create();
            context.SaveChanges();
        }
    }
}
如此一來在建立資料庫時就會把預設資料塞進去了
3.Migrations Add-Migration
再來到 套件管理主控台 輸入指令 Add-Migration Created_Table_PlayersAndMaps
來建立一個新的 Migration 版本 名稱為 Created_Table_PlayersAndMaps (可自定義)
 成功後會自動產生一個檔案 MyCompany.MyProject.EntityFramework\Migrations\201607270707459_Created_Table_PlayersAndMaps.cs
namespace MyCompany.MyProject.Migrations
{
    using System;
    using System.Data.Entity.Migrations;

    public partial class Created_Table_PlayersAndMaps : DbMigration
    {
        public override void Up()
        {
            CreateTable(
                "dbo.Maps",
                c => new
                    {
                        Id = c.Long(nullable: false, identity: true),
                        MapName = c.String(),
                        CreationTime = c.DateTime(nullable: false),
                    })
                .PrimaryKey(t => t.Id);

            CreateTable(
                "dbo.Players",
                c => new
                    {
                        Id = c.Long(nullable: false, identity: true),
                        PlayerName = c.String(),
                        CreationTime = c.DateTime(nullable: false),
                        MapID = c.Long(nullable: false),
                    })
                .PrimaryKey(t => t.Id)
                .ForeignKey("dbo.Maps", t => t.MapID, cascadeDelete: true)
                .Index(t => t.MapID);

        }

        public override void Down()
        {
            DropForeignKey("dbo.Players", "MapID", "dbo.Maps");
            DropIndex("dbo.Players", new[] { "MapID" });
            DropTable("dbo.Players");
            DropTable("dbo.Maps");
        }
    }
}
這裡分成Up(從上一版更新到這個版本所需要的資料庫變更)與Down(降版所需的變更)
實現了專案內 資料庫定義的版本控制
入後可以利用 [Update-Database 版本名稱] 回到指定版本
EX:Update-Database Created_Table_PlayersAndMaps
4.更新資料庫
於套件管理主控台 輸入指令 Update-Database

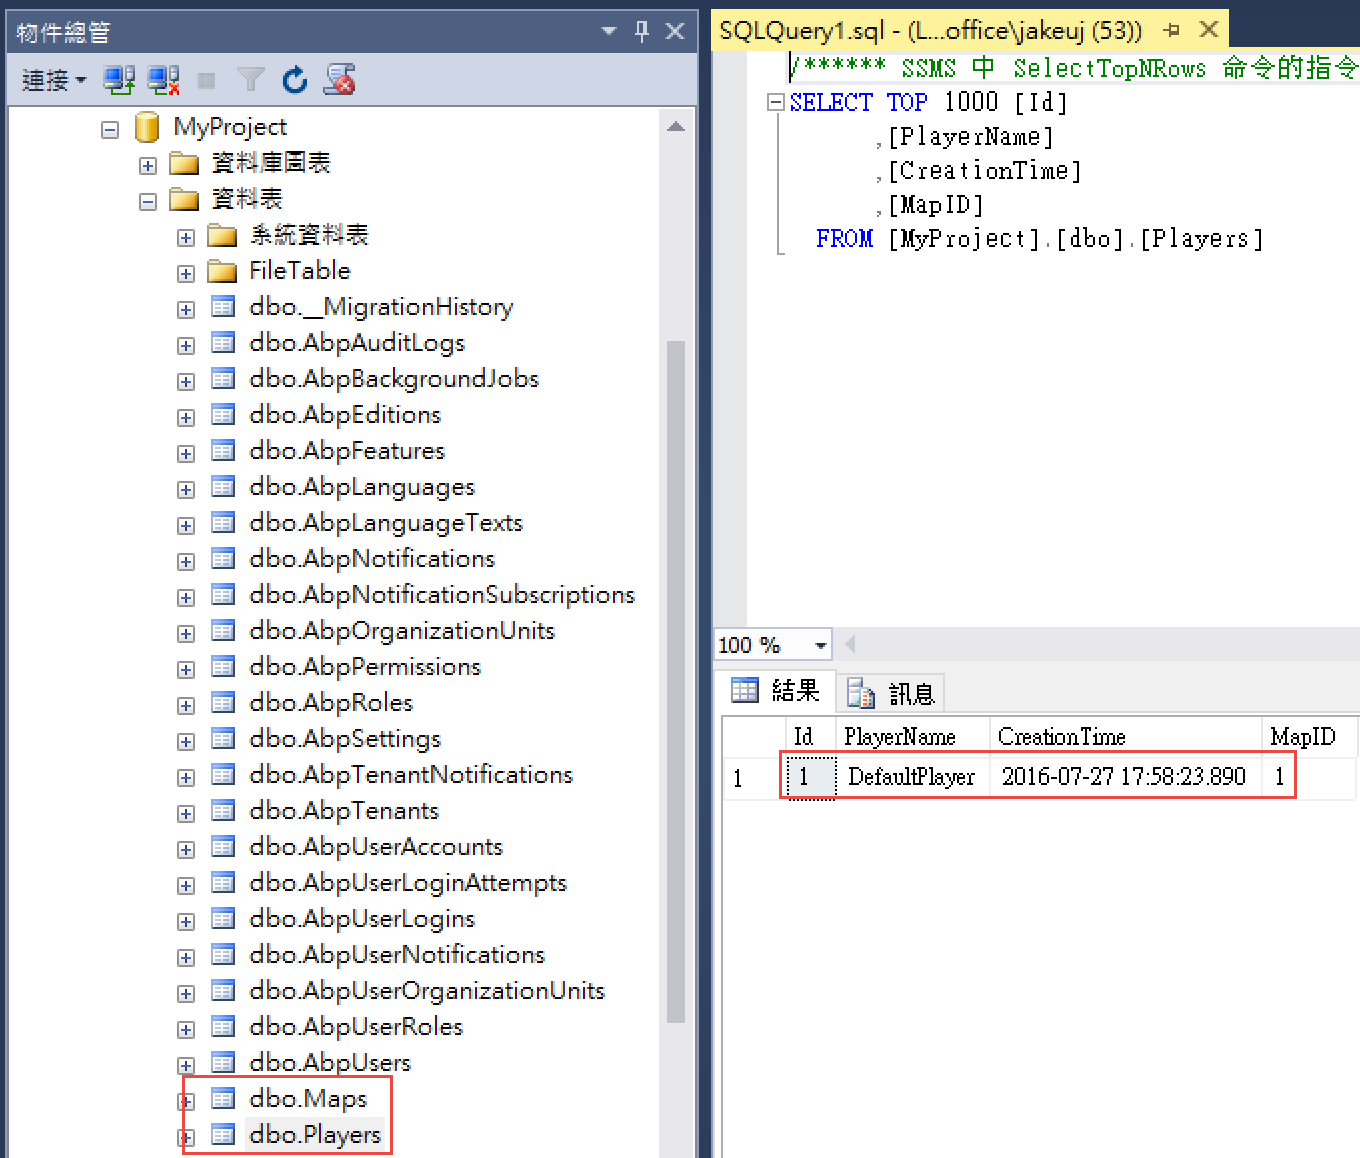
就會把變更部分實際套用至資料庫並產生SeedData
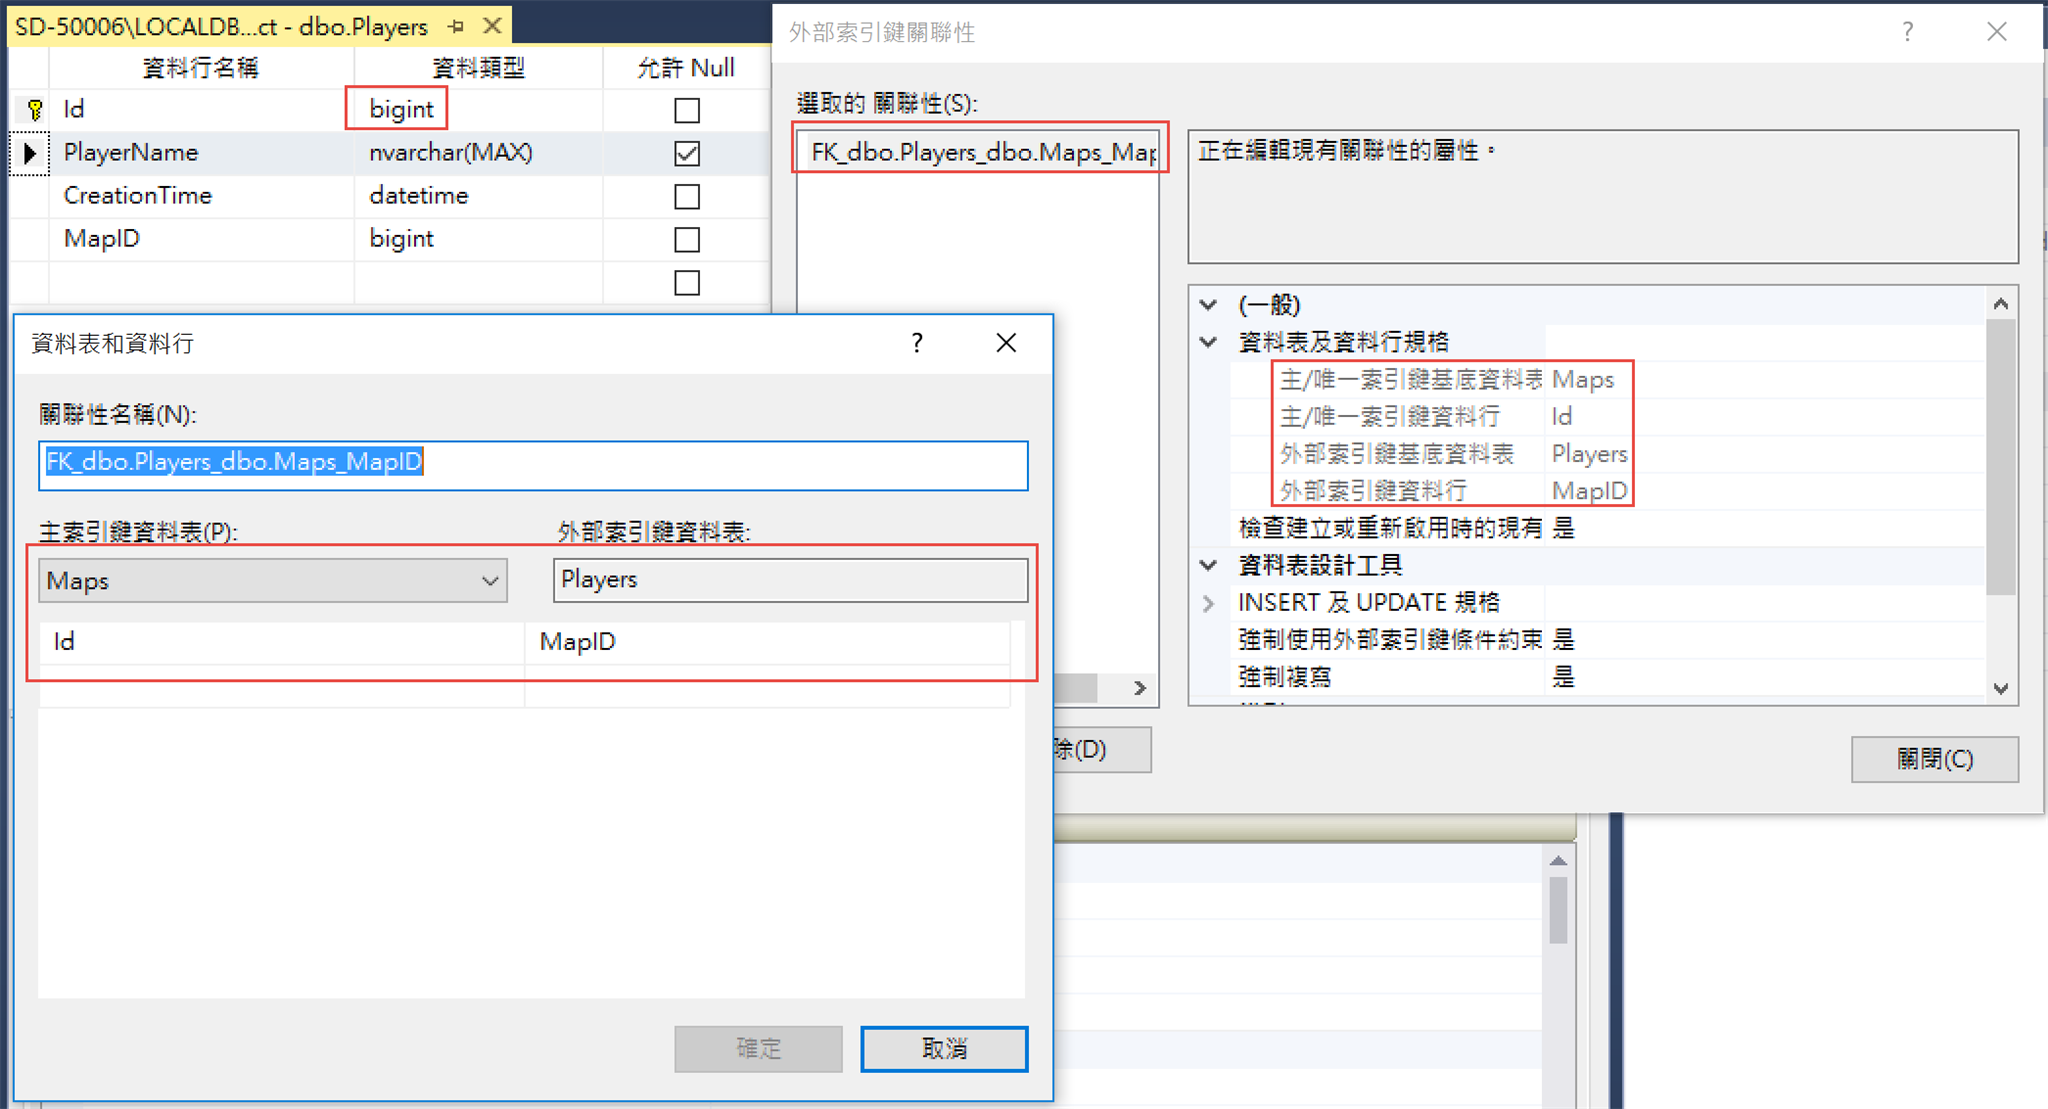
 同時也會建立關聯性
 到這邊Migration部分就先到這邊,下一篇是建立資料倉儲的部分
下一篇
ABP (ASP.NET Boilerplate) 應用程式開發框架 新手教學 No.5 建立倉儲 Repository
參照
