筆記下用 NSwag 產生 HttpClient 的設定注意事項
結論
- 按照微軟官方文件下載並安裝 NSwag 桌面應用程式
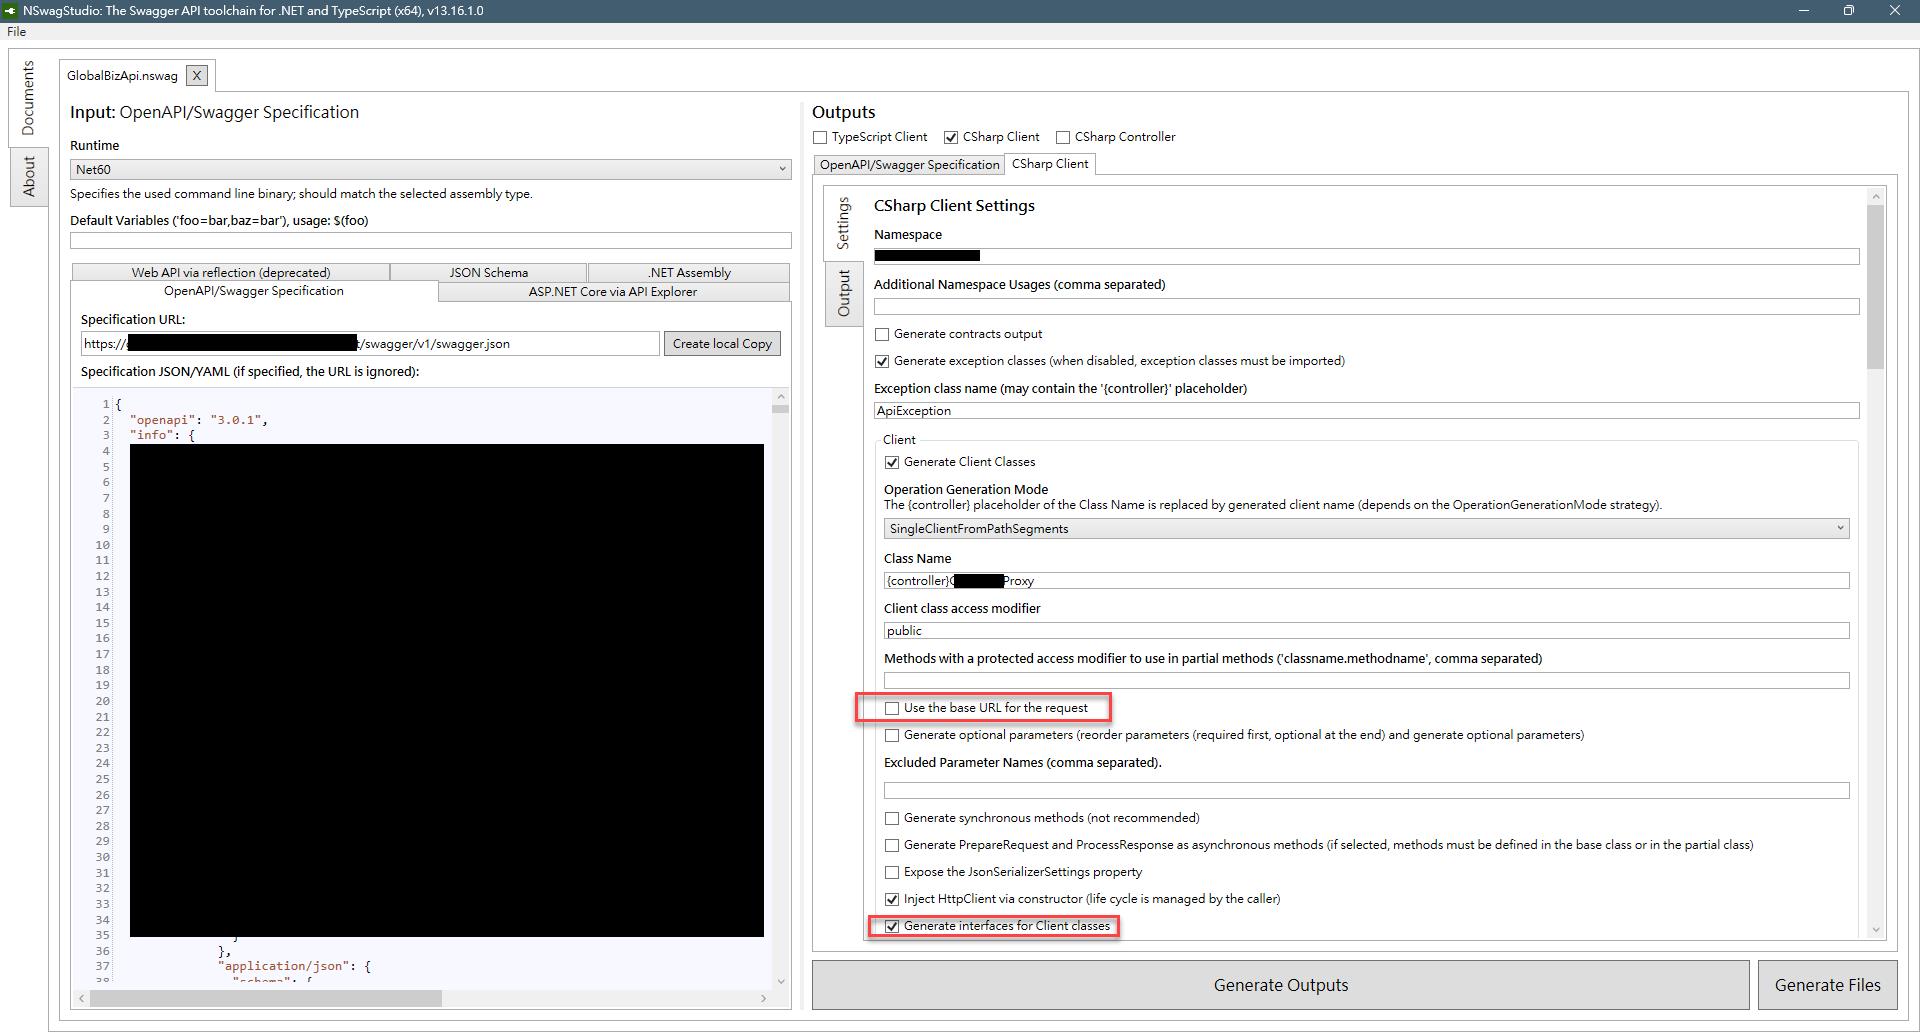
NSwag 與 ASP.NET Core 使用者入門 | Microsoft Learn - 設定 NSwag 產生 Client 的細節,改命名空間跟類別名稱
這邊因為我打算從 Startup 用 Typed Client 的方式設定 baseUrl
所以需要特別取消勾選 Use the base URL for the request

3. 在專案內建立一個程式碼檔案,並將產生的 Outputs 程式碼複製貼上,例如 TestProxy.cs
4. 在 Startup 註冊該 TypedClient,並由 appsettings 設定 baseUrl
private void ConfigureHttpClient(
    ServiceConfigurationContext context,
    IConfiguration configuration)
{
    context.Services.AddHttpClient<ITestProxy,TestProxy>(opt =>
    {
        if(Uri.TryCreate(configuration["TestProxy:URL"], UriKind.Absolute,out var uri))
        {
            opt.BaseAddress = uri;
        }
    });
}
5. 最後在需要使用的地方直接注入該 TypedClient,範例是 ITestProxy
private readonly ITestProxy _service;

public TestManager(ITestProxy service)
{
    _service = service;
}