介紹使用 TypeScript + AngularJs 於 ASP.NET MVC 整合的 Service 撰寫方式
前言
Angular Service 的撰寫相對應就比較單純,在使用 TypeScript 撰寫的時候很相似於 C# 的 Class 寫法。
TypeScript AngularJs Service
在實務上一般我們會將向 Server REST API 取得資料的操作放置於 Service 中,以下就來做一個基本的範例。
首先在 MVC 的 HomeController 中加入一個簡單的取得資料方法名為 GetBookInfo 並且回傳 JSON 格式資料,如下
[HttpGet]
public JsonResult GetBookInfo()
{
    var model = new Book()
    {
        ID = "1",
        BookName = "ASP.NET",
        BookAuthor = "Microsoft"
    };

    return Json(model, JsonRequestBehavior.AllowGet);
}
接者加入一個 HelloWorld.Service.ts 檔案,在內容加入一個 module 名為 ExampleApp.Services,並建立一個 HelloWorldService Class,如下
module ExampleApp.Services {

    export class HelloWorldService {

    }

}
依照慣例加上 $name 指示為 Service 名稱,另外因為需要操作 Request 呼叫 API,所以在此也需要加入 $inject 變數指示注入 $http 服務,如下
module ExampleApp.Services {

    export class HelloWorldService {
        static $name = "HelloWorldSvc";
        static $inject = ["$http"];

        private http: ng.IHttpService;

        constructor($http: ng.IHttpService) {
            this.http = $http;
        }
    }

}
定義一個 Model 型別來接受 API 所回傳的資料,或者也可以直接定義一個 interface,如下
export class Book {
    public ID: string;
    public BookName: string;
    public BookAuthor: string;
}
接下來增加一個方法名為 GetBookInfo 主要用來取得資料,由於使用的 $http 是使用非同步的 Promise 機制,所以這個方法我們透過使用傳入 callback 函式的方式,等待呼叫成功或失敗後再接續處理,最後還要記得將 Service 註冊入 module 中,如下
module ExampleApp.Services {

    export class HelloWorldService {
        static $name = "HelloWorldSvc";
        static $inject = ["$http"];

        private http: ng.IHttpService;

        constructor($http: ng.IHttpService) {
            this.http = $http;
        }

        /**
         * 取得書籍資訊
         */
        public GetBookInfo(callback: (data: Models.Book, error: Error) => void): void {
            this.http.get("GetBookInfo")
                .success((data: Models.Book) => {
                    callback(data, null);
                })
                .error((error: Error) => {
                    callback(null, error);
                });
        }
    }

}

ExampleApp.RegisterAngular.RegisterService(
    ExampleApp.Services.HelloWorldService.$name,
    ExampleApp.Services.HelloWorldService);
到這裡 Service 基本上已經完成,但是如果需要在網頁上點擊按鈕操作還需要修改一下 HelloWorld.Controller.ts 檔案,調整 HelloWorldCtrl Class 在注入服務的部分增加 HelloWorldSvc,讓 Controller 中可以使用到此服務,並且增加一個取得資料的事件處理名為 GetBookInfo,如下
module ExampleApp.Controllers {

    export interface IHelloWordCtrlScope extends ng.IScope {
        model: Models.HelloWorldViewModel;

        helloWorldSvc: Services.HelloWorldService;

        SayHello(): void;
    }


    export class HelloWorldCtrl {
        static $name = "HelloWorldCtrl";
        static $inject = ["$scope", "HelloWorldSvc"];

        private scope: IHelloWordCtrlScope;

        constructor(
            $scope: IHelloWordCtrlScope,
            helloWorldSvc: Services.HelloWorldService) {

            this.scope = $scope;

            this.scope.helloWorldSvc = helloWorldSvc;

            this.scope.SayHello = this.SayHello;

            var model = new Models.HelloWorldViewModel;
            model.Message = "Hello World!!!";

            this.scope.model = model;

            this.scope.$on("destroy", () => {

            });
        }

        public SayHello(): void {
            var scope: IHelloWordCtrlScope = <any>this;
            scope.model.Message = "Hello Arvin!!!";
        }

        public GetBookInfo(): void {
            var scope: IHelloWordCtrlScope = <any>this;
            scope.helloWorldSvc.GetBookInfo((data, error) => {
                if (error != null) {
                    console.error(error);
                    return;
                }

                scope.model.BookInfo = data;
            });
        }

    }

}
接著 HTML 頁面稍作調整,如下
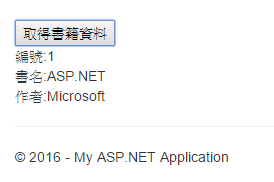
<input type="button" value="取得書籍資料" ng-click="GetBookInfo()" />
<div>
    編號:<span ng-bind="model.BookInfo.ID"></span><br />
    書名:<span ng-bind="model.BookInfo.BookName"></span><br />
    作者:<span ng-bind="model.BookInfo.BookAuthor"></span><br />
</div>
執行後顯示如下
結語
Service 的部分也講完了,建議在 Service 操作 REST API 的時候,再將 $http 操作的部分在包裝過,並且定義一個 API 資料傳輸介面,包含 StatusCode 與 Data 欄位統一傳輸的規格。現在 AngularJs 撰寫比較常用的 Controller、Service、Directive 都已經介紹過了,之後的主題將再繼續補完一些其他部分。
接下一篇 TypeScript + AngularJs 自訂 ErrorHandlerProvider
範例程式碼
TypeScriptAngularJsArticleExample
以上文章敘述如有錯誤及觀念不正確,請不吝嗇指教
如有侵權內容也請您與我反應~謝謝您 :)