[Python+Django]初心者筆記13(form表單介紹 part2:model form實例之create, update, delete)
上篇介紹完畢modelform的基本作法,這篇繼續介紹範例來實做create, update, delete
以資料表Author為範例,來實做create, update, delete
首先在locallibrary/catalog/views.py加入以下內容:
#modelform實做範例
#利用Django的skeleton快速建立create, update, delete功能
from django.views.generic.edit import CreateView, UpdateView, DeleteView
from django.urls import reverse_lazy
from .models import Author

class AuthorCreate(CreateView):
    model = Author
    #選取Author資料表全部的欄位
    fields = '__all__'
    initial={'date_of_death':'05/01/2018',}

class AuthorUpdate(UpdateView):
    model = Author
    #選取特定欄位
    fields = ['first_name','last_name','date_of_birth','date_of_death']

class AuthorDelete(DeleteView):
    model = Author
    #刪除成功之後,自動導向到下列的網址
    success_url = reverse_lazy('authors')
接著新增此template檔locallibrary/catalog/templates/catalog/author_form.html,這個template檔將會用於Author資料的create以及update,檔案內容如下:
{% extends "base_generic.html" %}

{% block content %}

<form action="" method="post">
    {% csrf_token %}
    <table>
    {{ form.as_table }}
    </table>
    <input type="submit" value="Submit" />

</form>
{% endblock %}
接著新增此template檔,locallibrary/catalog/templates/catalog/author_confirm_delete.html,將會用於刪除之前的使用者確認,檔案內容如下:
{% extends "base_generic.html" %}

{% block content %}

<h1>Delete Author</h1>

<p>Are you sure you want to delete the author: {{ author }}?</p>

<form action="" method="POST">
  {% csrf_token %}
  <input type="submit" action="" value="Yes, delete." />
</form>

{% endblock %}
再來於locallibrary/catalog/urls.py新增以下url mapping規則:
#modelform實做範例
#Author資料利用modelform快速建立create, update, delete功能
#modelform的快速建立功能相當類似asp.net mvc的skeleton
urlpatterns += [
    path('author/create/', views.AuthorCreate.as_view(), name='author_create'),
    path('author/<int:pk>/update/', views.AuthorUpdate.as_view(), name='author_update'),
    path('author/<int:pk>/delete/', views.AuthorDelete.as_view(), name='author_delete'),
]
在測試author的create, update, delete功能之前,得先把author list網頁做出來,總不能叫使用者自己key網址來測試這些新功能吧!?
首先先把author list網頁做出來:
1. 在locallibrary\catalog\urls.py加入author list網頁的url mapping
#加入Authors資料表的list清單網頁的url mapping
urlpatterns += [
    path('authors/', views.AuthorListView.as_view(), name='authors'),
]
然後於locallibrary\catalog\views.py加入class AuthorListView程式碼:
#建立Author資料的List清單網頁
from django.views import generic

#這是class-based views的限制網頁必須登入的作法
from django.contrib.auth.mixins import LoginRequiredMixin
class AuthorListView(LoginRequiredMixin, generic.ListView):

# class AuthorListView(generic.ListView):
    model = Author
    #透過定義get_queryset()就可以自己定義想要的資料
    #沒有要自定義的話就註解掉get_queryset()
    def get_queryset(self):
        # return Author.objects.filter(title__icontains='bike')[:5] #取前五筆資料,title包含關鍵字'bike'的
        return Author.objects.filter()[:100] #取前100筆資料
    #等等要去哪個路徑找.html檔案
    #不定義這個template_name的話,Django就會去預設的路徑尋找.html
    #預設的路徑是:/locallibrary/catalog/templates/catalog/author_list.html
    #不過目前暫時程式碼設定路徑的方式跟預設一樣就好
    template_name = '/locallibrary/catalog/templates/catalog/author_list.html'

    #get_context_data()是用來建立自訂的Server side variable的
    #跟.Net MVC也挺像的
    def get_context_data(self, **kwargs):
        # Call the base implementation first to get the context
        context = super(AuthorListView, self).get_context_data(**kwargs)
        # Create any data and add it to the context
        context['some_data'] = 'This is just some data'
        return context

    #這是分頁機制, 以下設定每頁最多10筆資料
    paginate_by = 10
然後加入此template檔/locallibrary/catalog/templates/catalog/author_list.html,檔案內容為:
{% extends "base_generic.html" %}

{% block content %}
    <h1>Author List</h1>

    <!-- 這是新建Author的網頁 -->
    <a href="{% url 'author_create' %}">Create New Author</a>

    <!-- 在views.py的class AuthorListView定義的get_queryset()
    會自動傳送一個預設的變數名稱author_list過來,當作list清單網頁的資料 -->

    {% if author_list %}
    <ul>

      {% for author in author_list %}
      <li>
        <!-- 這是author的detail-view網頁 -->
        <a href="{{ author.get_absolute_url }}">
            {{ author.first_name }} {{ author.last_name }}
        </a>
        - <a href="{% url 'author_update' author.id %}">Update</a>
        - <a href="{% url 'author_delete' author.id %}">Delete</a>
      </li>
      {% endfor %}

    </ul>
    {% else %}
      <p>There are no authors in the database.</p>
    {% endif %}
{% endblock %}
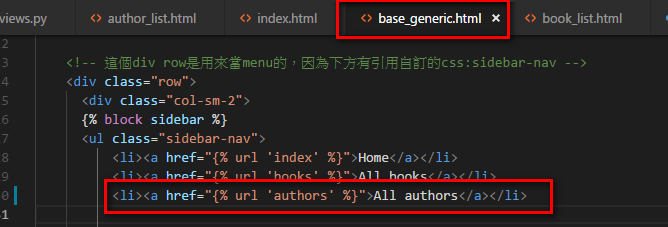
再來於locallibrary\catalog\templates\base_generic.html的menu bar加入All authors的超連結,方便使用者快速使用此功能:
<li><a href="{% url 'authors' %}">All authors</a></li>
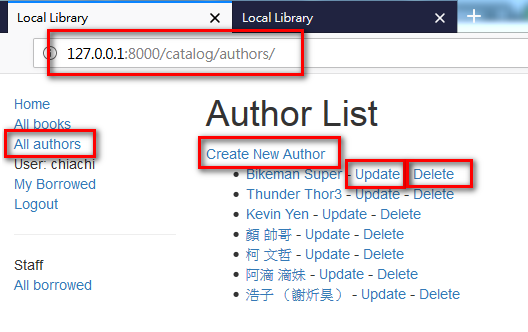
如此一來便可以快速透過左方的"All Authors"選單,進入Author list網頁:
並且快速使用Create, Update, Delete功能
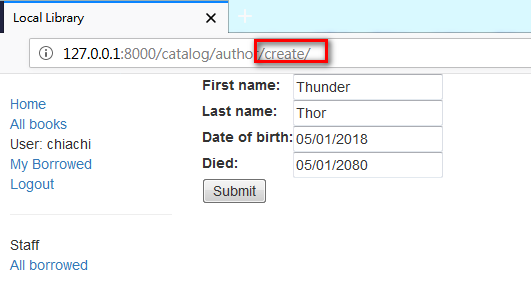
這是create author功能
這是update author功能:

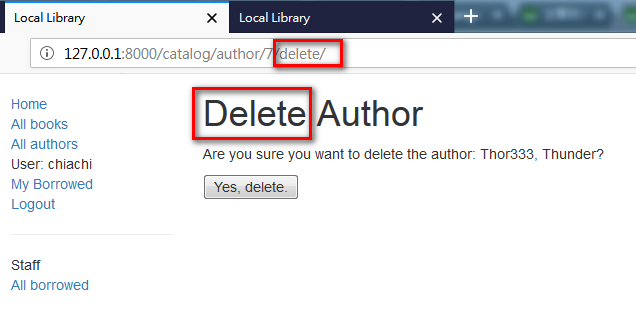
這是Delete Author功能:
以上,就是利用Django提供的modelform快速建立create, update, delete的示範囉
這篇先這樣……
參考資料:
[Python+Django]初心者筆記12(form表單介紹 part2:model form基本作法)
https://dotblogs.com.tw/kevinya/2018/07/23/204005
Django Tutorial Part 9: Working with forms
https://developer.mozilla.org/en-US/docs/Learn/Server-side/Django/Forms