介紹為何要改使用jest,而不是使用官方cli預設提供的karma and mocha
前言
之前有寫過一系列的單元測試的文章,而其實筆者一直在等待官方提到的test utils,因為之前的測試除了是使用element的方法,還有很多則是筆者自己思考研究來的,而在這段時間裡面,jest也是越來越火紅了,追技術是很辛苦的,尤其在業務需求繁重的情境下,不過即然想嘗試著用官方提供的測試工具,順理成章的當然也得來研究一下jest了,接下來就看一下筆者的分析說明和如何使用吧,如果對jest有興趣的可以訪問(https://github.com/facebook/jest),對vue test utils有興趣請至(https://github.com/vuejs/vue-test-utils),而有一系列的文章筆者覺得有心想研究的可以去觀摩一下(https://alexjoverm.github.io/2017/08/21/Write-the-first-Vue-js-Component-Unit-Test-in-Jest/)
導覽
- jest和cli預設的karma和mocha差異
- 起手vue專案和情境模擬
- 安裝jest來做測試
- 使用vue test utils
- 使用jest來隔離vuex,以順利的單元測試
- 自動跑測試和開啟測試狀況提示
- 結論
大家如果有用cli去裝上單元測試的工具,會發現裝了非常多的東西,比如說sinon and chai and karama etc....但是其實如果你只要裝jest的話,其餘東西就都不用裝了,而且自己來的手續也挺簡單的,jest也提供了類似sinon的stub and mock....的功能,而筆者個人覺得測試的說明還有反應速度,還有配置方面都比原本cli裝的那一堆工具好多了,所以筆者就很堅決的把手上的專案的單元測試改成jest的版本。
而官方提供的utils,個人倒是沒有感覺比element的測試腳本方便到哪去,但是愛用官方提供的一直是筆者的堅持,再加上utils把你處理掉了nextick的問題,不用再自己手動去處理這件事情,也是蠻讓筆者心動的,所以雖然翻過來花了比較多的精神,但是望向未來的態勢,還是跟著官方的腳步走比較保險。
因為單元測試的部份我們要自己來,所以當我在建立cli的時候,單元測試和end to end我都選擇不安裝了,這樣完成一個空白專案,就不會有test的資料夾和一些測試package的安裝,應該會如下樣子
在之前的測試情境中,我有一個key分數的表單,而且依賴於ajax提供的數據,在此我也想延用這個範例來說明,只是把工具改成jest and vue test utils,先來看看這個元件的程式碼長什麼樣子吧。
<template>
  <div>
    <table>
      <tr>
        <td>1st</td>
        <td>
          <input type="number" v-model.number="scores.firstSection">
        </td>
      </tr>
      <tr>
        <td>2st</td>
        <td>
          <input type="number" v-model.number="scores.twoSection">
        </td>
      </tr>
      <tr>
        <td>3st</td>
        <td>
          <input type="number" v-model.number="scores.threeSection">
        </td>
      </tr>
      <tr>
        <td>4st</td>
        <td>
          <input type="number" v-model.number="scores.fourSection">
        </td>
      </tr>
      </tr>
      <tr>
        <td>extend</td>
        <td>
          <input type="number" v-model.number="scores.extendSection">
        </td>
      </tr>
      <tr>
        <td>total</td>
        <td>
          <input type="number" v-model.number="total">
        </td>
      </tr>
    </table>
    <input type="button" value="submit" @click="submit">
  </div>
</template>

<script>
import _ from 'lodash'

function mathDistance (num1, num2) {
  return num2 > num1 ? num2 - num1 : num1 - num2
}

export default {
  name: 'hello',
  data () {
    return {
      scores: {
        firstSection: 0,
        twoSection: 0,
        threeSection: 0,
        fourSection: 0,
        extendSection: 0
      },
      cloneScores: {}
    }
  },
  computed: {
    total () {
      return this.scores.firstSection + this.scores.twoSection + this.scores.threeSection +
        this.scores.fourSection + this.scores.extendSection
    }
  },
  methods: {
    submit () {
      let scores = this.scores
      let modifedObject = _.reduce(this.cloneScores, function (result, value, key) {
        return _.isEqual(value, scores[key]) ? result : result.concat(key)
      }, [])
      let isDistanceScore = false
      modifedObject.forEach(property => {
        if (mathDistance(this.cloneScores[property], scores[property]) > 1) {
          isDistanceScore = true
        }
      })

      if (isDistanceScore) alert('只能增加或減少一分')
      if (modifedObject.length > 1) alert('只能更新一節的分數')
    }
  },
  created () {
    this.cloneScores = { ...this.scores }
  }
}
</script>

<!-- Add "scoped" attribute to limit CSS to this component only -->
<style scoped>

</style>
當我們新增超過1分的話會alert警告,一次key兩個分數的話也會顯示alert,看一下畫面示意的效果如下
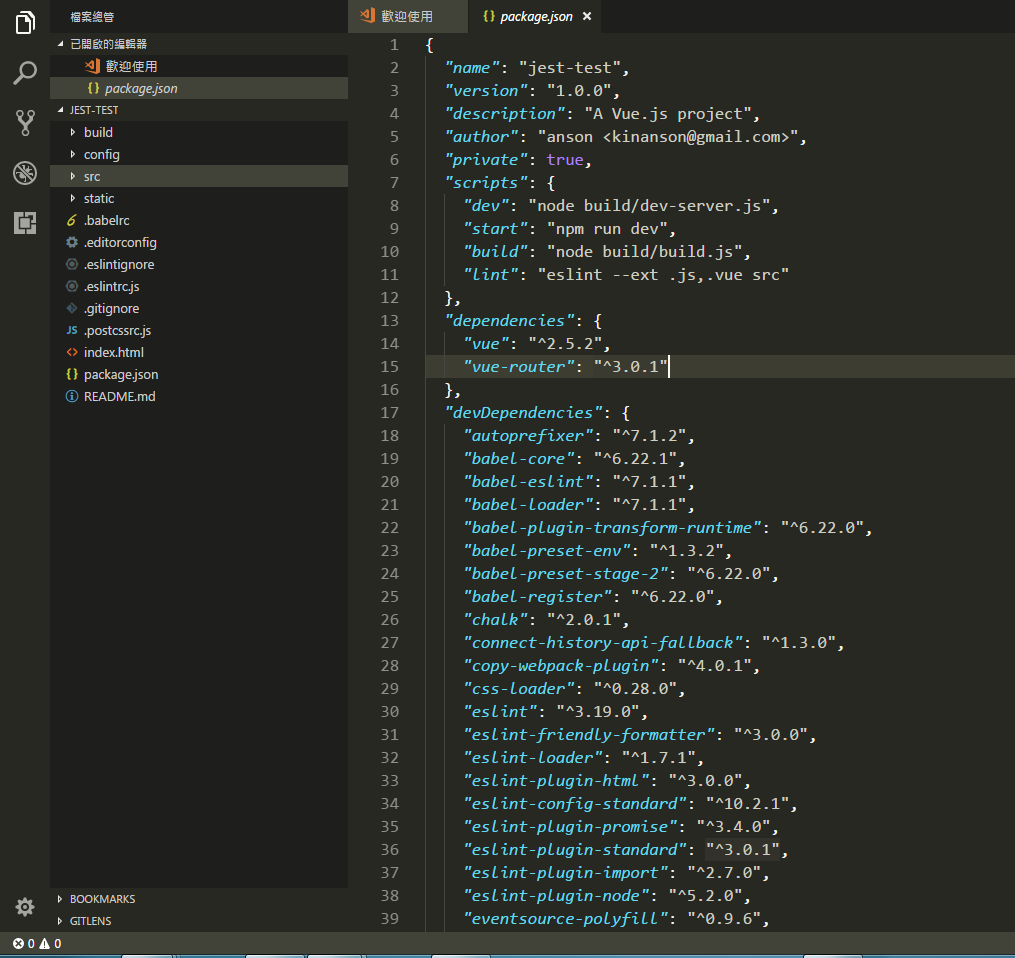
我們使用npm來安裝jest相關package
npm i jest babel-jest jest-vue --D
接著需要在package.json加入jest的一些設定。
 "jest": {
    "moduleFileExtensions": [
      "js",
      "vue"
    ],
    "transform": {
      "^.+\\.js$": "<rootDir>/node_modules/babel-jest",
      ".*\\.(vue)$": "<rootDir>/node_modules/jest-vue"
    },
    "moduleNameMapper": {
      "@/(.*)$": "<rootDir>/src/$1"
    }
  }
moduleFileExtensions是指要jest去尋找的測試檔案,而transform則是去做轉換的,moduleNameMapper則是會map到webpack的alias的區塊,接著直接在package.json的scripts區塊jest來啟動測試
"test": "jest"
這樣子就行了,接著我們就可以直接下npm run test來執行測試,執行完後沒有任何事情發生,但jest確實有執行了
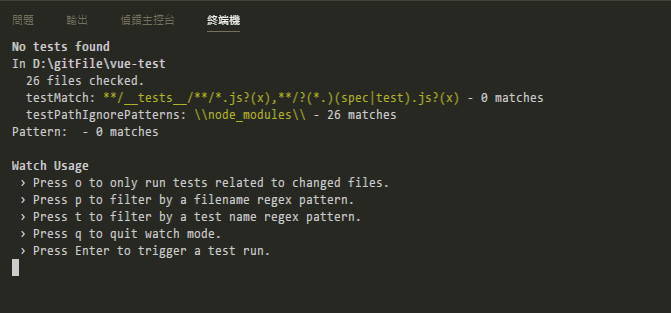
因為jest預設會去認檔名有test的,因為我個人喜歡把測試的檔案和被測試的程式放在一起,用了jest要怎麼配置就隨便你了,所以我就新增一支同名的test.js,如下示例
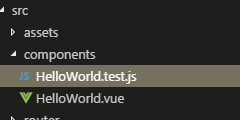
HelloWorld..test.js
import Component from './HelloWorld.vue'

describe('Component', () => {
  test('總分為所有節數加起來的分數', () => {
    console.log('test')
  })
})
再執行一下測試,可以看到如下結果
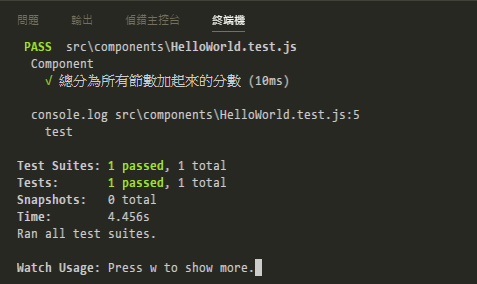
之前的動作都只是為了要確認jest已經成功安裝和跑起來了,但我們的測試當然不會只是為了印一個hello world就結束,緊接著我們來安裝一下官方建議的vue test utils吧
npm i vue-test-utils --D
緊接著我們就把測試的程式碼改成如下
import { shallow } from 'vue-test-utils' // 使用shallow可以只foucs在要測試的元件,保証隔離了子元件,如果要一併測試子元件的話,需要使用mount
import Component from './HelloWorld.vue'

describe('Component', () => {
  let wrapper, vm, alert

  beforeEach(() => {
    wrapper = shallow(Component)
    vm = wrapper.vm // 這個可以取到元件裡面的東西,比如說data裡的變數或直接調用方法
    alert = jest.spyOn(window, 'alert') // 這邊則是使用jest來spy alert這個物件,有了jest我們就不需要sinon來spy了
  })

  afterEach(() => {
    alert.mockRestore() // 每次測試完都得restore
  })

  test('總分為所有節數加起來的分數', () => {
    // vm.scores = {
    //   firstSection: 1,
    //   twoSection: 2,
    //   threeSection: 3,
    //   fourSection: 5,
    //   extendSection: 0
    // }
    // 你也可以用上面的方式來改變,但官方建議是用如下的方式,wrapper有很多方法可以使用,詳請可以參考(https://vue-test-utils.vuejs.org/en/)

    wrapper.setData({
      scores: {
        firstSection: 1,
        twoSection: 2,
        threeSection: 3,
        fourSection: 5,
        extendSection: 0
      }
    })
    expect(vm.total).toEqual(11) // 這邊的expect是使用jest的,對我來說很夠用了
  })

  test('不可以加或減超過一分', () => {
    vm.scores.firstSection = 2
    vm.submit()
    expect(alert.mock.calls[0][0]).toEqual('只能增加或減少一分')
  })

  test('只能更新一節的分數', () => {
    vm.scores.firstSection = 1
    vm.scores.twoSection = 1
    vm.submit()
    expect(alert.mock.calls[0][0]).toEqual('只能更新一節的分數')
  })

  test('不可以加或減超過一分且只能更新一節的數分', () => {
    vm.scores.firstSection = 2
    vm.scores.twoSection = 1
    vm.submit()
    expect(alert.mock.calls[0][0]).toEqual('只能增加或減少一分')
    expect(alert.mock.calls[1][0]).toEqual('只能更新一節的分數')
  })
})
以上都是簡單的測試情境,但有時候我們會有依賴於真實環境的狀況,就會導致我們的測試會受到很大的阻礙,現在我把component的程式碼改成如下,也就是呼叫完ajax之後會return一個promise的做法
<template>
  <div>
    <table>
      <tr>
        <td>1st</td>
        <td>
          <input type="number" v-model.number="scores.firstSection">
        </td>
      </tr>
      <tr>
        <td>2st</td>
        <td>
          <input type="number" v-model.number="scores.twoSection">
        </td>
      </tr>
      <tr>
        <td>3st</td>
        <td>
          <input type="number" v-model.number="scores.threeSection">
        </td>
      </tr>
      <tr>
        <td>4st</td>
        <td>
          <input type="number" v-model.number="scores.fourSection">
        </td>
      </tr>
      </tr>
      <tr>
        <td>extend</td>
        <td>
          <input type="number" v-model.number="scores.extendSection">
        </td>
      </tr>
      <tr>
        <td>total</td>
        <td>
          <input type="number" v-model.number="total">
        </td>
      </tr>
    </table>
    <input type="button" value="submit" @click="submit">
  </div>
</template>

<script>
import service from 'services/helloService'
import _ from 'lodash'

function mathDistance (num1, num2) {
  return num2 > num1 ? num2 - num1 : num1 - num2
}

export default {
  name: 'hello',
  data () {
    return {
      scores: {},
      cloneScores: {}
    }
  },
  computed: {
    total () {
      return this.scores.firstSection + this.scores.twoSection +
        this.scores.threeSection + this.scores.fourSection + this.scores.extendSection
    }
  },
  methods: {
    submit () {
      let scores = this.scores
      let modifedObject = _.reduce(this.cloneScores, function (result, value, key) {
        return _.isEqual(value, scores[key]) ? result : result.concat(key)
      }, [])
      let isDistanceScore = false
      modifedObject.forEach(property => {
        if (mathDistance(this.cloneScores[property], scores[property]) > 1) {
          isDistanceScore = true
        }
      })

      if (isDistanceScore) alert('只能增加或減少一分')
      if (modifedObject.length > 1) alert('只能更新一節的分數')
      if (!isDistanceScore && modifedObject.length <= 1) {
        // 相依於axios的部份,抽到service裡面去
        service.post().then(x => {
          alert('修改成功')
        })
      }
    },
    async get () {
      // 相依於axios的部份,抽到service裡面去
      this.scores = await service.get()
    }
  },
  async created () {
    await this.get()
    this.cloneScores = { ...this.scores }
  }
}
</script>

<!-- Add "scoped" attribute to limit CSS to this component only -->
<style scoped>

</style>
service的部份我只是隨便寫,主要目的只是為了模擬ajax的部份
import axios from 'axios'
export default {
  get () {
    return axios.get('ddd').then(x => x.data)
  },
  post () {
    return axios.post('ddd')
  }
}
特別注意一下,因為我在import service的部份,使用的是alias的方式,所以在jest的部份也得設定,這樣子jest才會認得這個路徑
 "moduleNameMapper": {
   "@/(.*)$": "<rootDir>/src/$1",
   "services/(.*)$": "<rootDir>/src/services/$1"
 }
接著我們要隔離其實非常的簡單,只要import同樣的路徑,並且直接覆寫就可以了
import { shallow } from 'vue-test-utils'
import Component from './HelloWorld.vue'
import service from 'services/helloService' // 與元件一樣import檔案進來

describe('Component', () => {
  let wrapper = shallow(Component)
  let vm = wrapper.vm
  let alret = null

  service.get = () => Promise.resolve({ // 直接stub掉我們在元件引用到的方法
    firstSection: 0,
    twoSection: 0,
    threeSection: 0,
    fourSection: 0,
    extendSection: 1
  })

  service.post = () => Promise.resolve() // 直接stub掉我們在元件引用到的方法

  beforeEach(() => {
    wrapper = shallow(Component)
    vm = wrapper.vm
    alert = jest.spyOn(window, 'alert')
  })

  afterEach(() => {
    alert.mockRestore()
  })

  test('總分為所有節數加起來的分數', () => {
    vm.scores = {
      firstSection: 1,
      twoSection: 2,
      threeSection: 3,
      fourSection: 5,
      extendSection: 0
    }
    expect(vm.total).toEqual(11)
  })

  test('不可以加或減超過一分', () => {
    vm.scores.firstSection = 2
    vm.submit()
    expect(alert.mock.calls[0][0]).toEqual('只能增加或減少一分')
  })

  test('只能更新一節的分數', () => {
    vm.scores.firstSection = 1
    vm.scores.twoSection = 1
    vm.submit()
    expect(alert.mock.calls[0][0]).toEqual('只能更新一節的分數')
  })

  test('不可以加或減超過一分且只能更新一節的數分', () => {
    vm.scores.firstSection = 2
    vm.scores.twoSection = 1
    vm.submit()
    expect(alert.mock.calls[0][0]).toEqual('只能增加或減少一分')
    expect(alert.mock.calls[1][0]).toEqual('只能更新一節的分數')
  })
})
這方面官方有講到,官方使用的是sinon來stub actions,其實我們只要使用jest.fn就可以了,舉個例子如果我們要假造我們元件使用的action和getter的話,可以如下方式去寫,注意一下註解的部份是我新加的程式碼
import Vue from 'vue'
import Vuex from 'vuex'
import { shallow } from 'vue-test-utils'
import Component from './HelloWorld.vue'
import service from 'services/helloService'

Vue.use(Vuex) //自行註冊一個vuex

describe('Component', () => {
  let wrapper = shallow(Component)
  let vm = wrapper.vm
  let alret = null

  service.get = () => Promise.resolve({
    firstSection: 0,
    twoSection: 0,
    threeSection: 0,
    fourSection: 0,
    extendSection: 1
  })

  service.post = () => Promise.resolve()

  beforeEach(() => {
    // 下面模擬一個假的store,只需要模擬我們元件內部有用到的就行了
    const store = new Vuex.Store({
      state: {},
      actions: {
        updateModelStateError: jest.fn(), // 這邊使用的是jest.fn,所以我在專案裡面就不安裝sinon了
        reset: jest.fn(),
        setViewName: jest.fn()
      },
      getters: {
        'getSave': () => 'save'
      }
    })

    wrapper = shallow(Component, {
      store // 注入我們模擬的store
    })
    vm = wrapper.vm
    alert = jest.spyOn(window, 'alert')
  })

  afterEach(() => {
    alert.mockRestore()
  })

  test('總分為所有節數加起來的分數', () => {
    vm.scores = {
      firstSection: 1,
      twoSection: 2,
      threeSection: 3,
      fourSection: 5,
      extendSection: 0
    }
    expect(vm.total).toEqual(11)
  })

  test('不可以加或減超過一分', () => {
    vm.scores.firstSection = 2
    vm.submit()
    expect(alert.mock.calls[0][0]).toEqual('只能增加或減少一分')
  })

  test('只能更新一節的分數', () => {
    vm.scores.firstSection = 1
    vm.scores.twoSection = 1
    vm.submit()
    expect(alert.mock.calls[0][0]).toEqual('只能更新一節的分數')
  })

  test('不可以加或減超過一分且只能更新一節的數分', () => {
    vm.scores.firstSection = 2
    vm.scores.twoSection = 1
    vm.submit()
    expect(alert.mock.calls[0][0]).toEqual('只能增加或減少一分')
    expect(alert.mock.calls[1][0]).toEqual('只能更新一節的分數')
  })
})
如果我們每次執行都要手動去做,那就失去自動測試的好處了,而jest提供了很多command line的指令讓我們使用,我想要監控程式碼的變化,並且在右下角跳出一個提示,我們只要把package.json的指令改成如下,就可以有自動監控等的功能,非常簡單
"test": "jest --watchAll --notify"
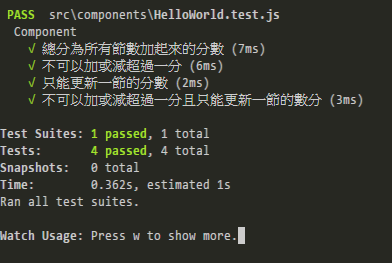
接著來看一下這樣子的話是怎麼樣的效果吧。
基本上jest還有vue test utils的功能非常的多,所以有興趣可以再自行去官網看一下,以上如果有什麼誤論或更好做法,再提醒和告知筆者。
