依照「適用於 Xamarin 應用程式的 iOS 推播通知和通知中樞」,實做了一個推播通知功能。趁記憶還夠新的時候,把步驟記錄下來。
要做到這些,前提是必須有Apple Developer帳號以建立憑證,以及Azure帳號以設定Azure Notification Hubs。
一、建立Apple Push Notification service SSL 憑證
簡單來說,就是建立一個憑證,以用來做為我們的Notification Server(也就是Azure) 與 Apple Push Notification Service 之間建立SSL之用。
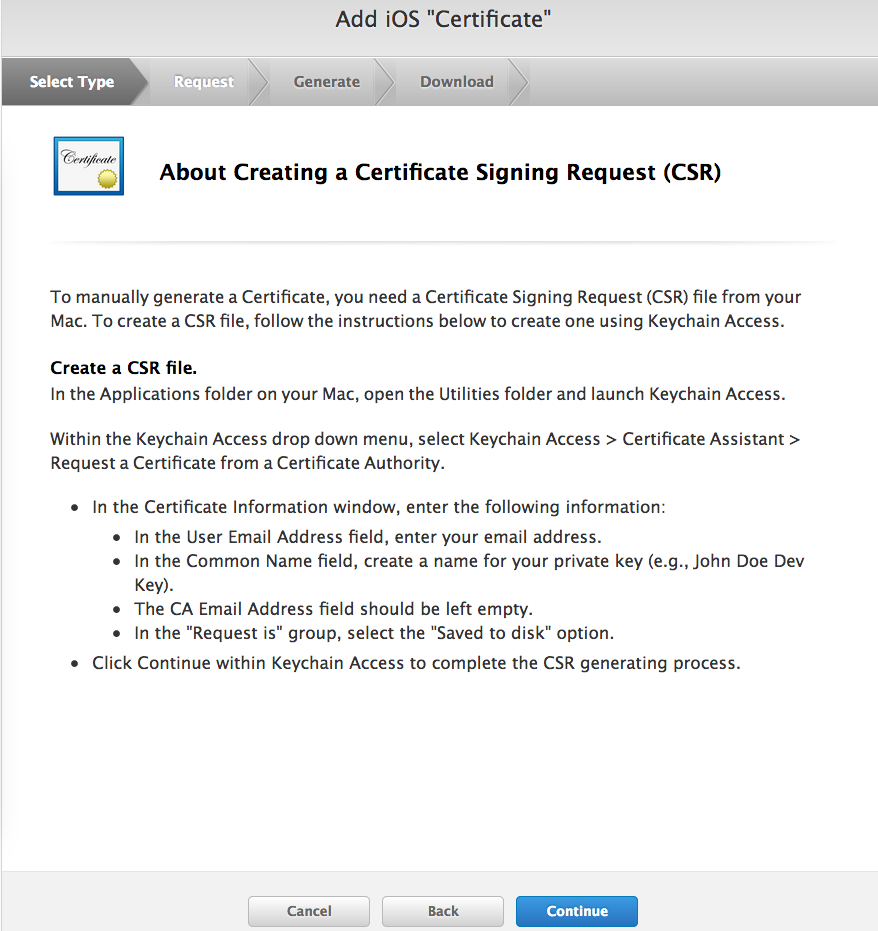
1. 建立CSR
所有憑證的建立,第一步都是建立CSR檔案。這是後續步驟中,用來上傳到憑證發行商(在這裡就是Apple Developer站台)進行憑證的申請之用的。
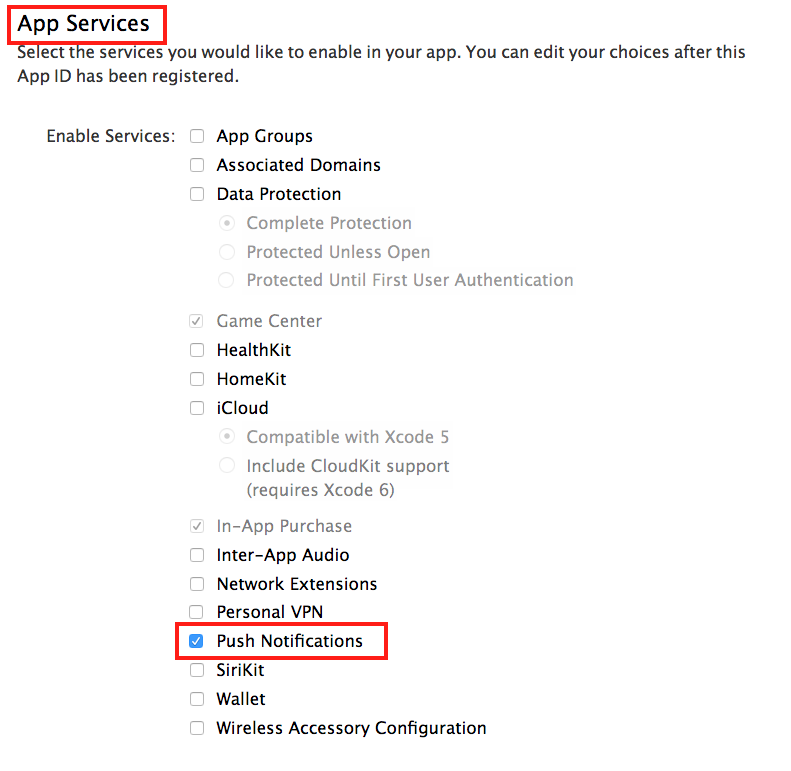
2. 建立APP ID,並設定Push Notifications
到Apple Developer站台上建立APP ID,並且勾選App Services中的Push Notifications。
3. 設定APNs憑證
APP ID建立完成後,可以在Apple Developer站台的APP ID列表中,點選以查看剛才所建立的APP ID的設定。
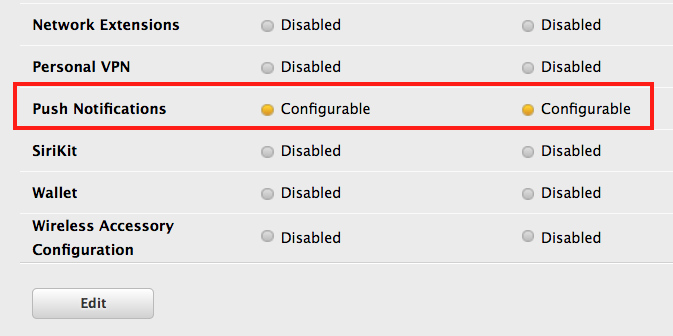
可以看到Push Notifications是Configurable的狀態,在這裡點擊Edit按鈕繼續編輯。進入編輯畫面後,可以看到以下畫面:
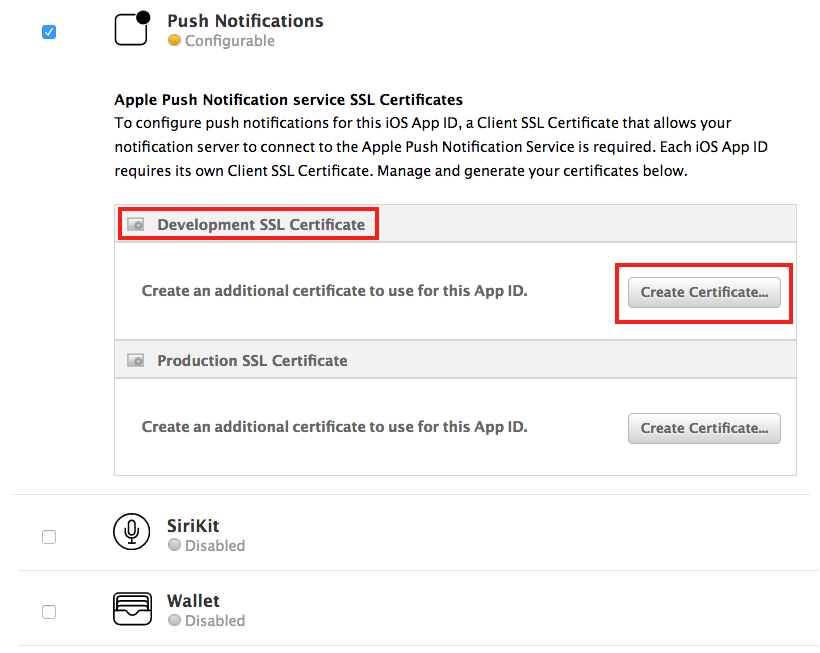
這裡的目的,就是使用之前所建立的CSR檔,以用來建立SSL憑證。所以下一步就是,點選Create Certificate按鈕,就會出現以下畫面要求建立及上傳CSR。
注意,目前實做的是Development的版本,所以要選擇
Development SSL Cerfificate區域的Create Certificate按鈕
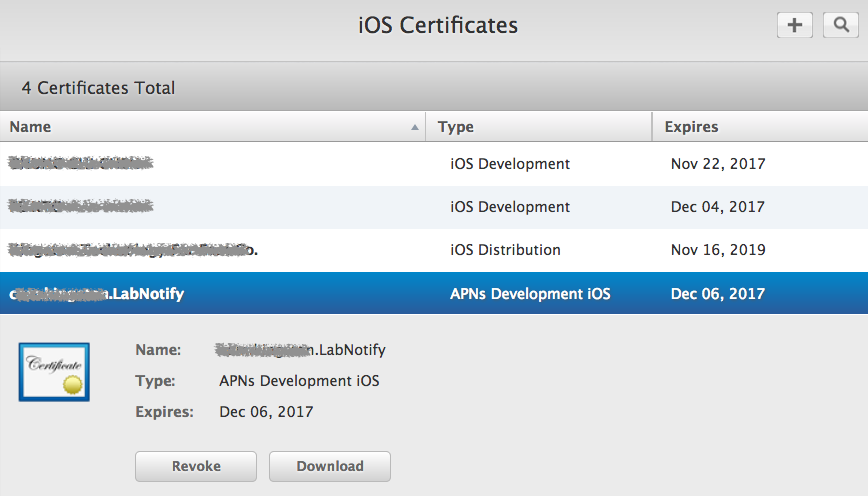
上傳步驟一所建立的CSR之後,後面就是憑證的申請及建立流程。
記得最後需要下載剛才所建立好的憑證並Double Click該憑證檔以安裝到Mac上。
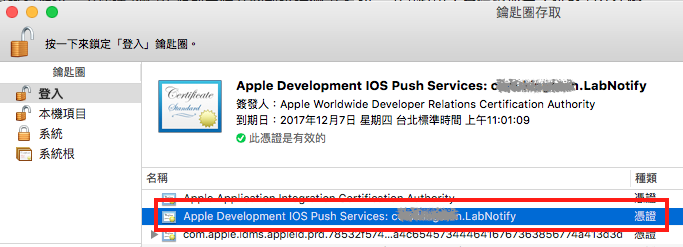
之後,在Mac的鑰匙圈存取(Keychain Access)中,選到剛才所建立的憑證,並匯出為p12憑證檔。這個p12憑證檔會在設定Azure Notification Hubs推播通知時用到。
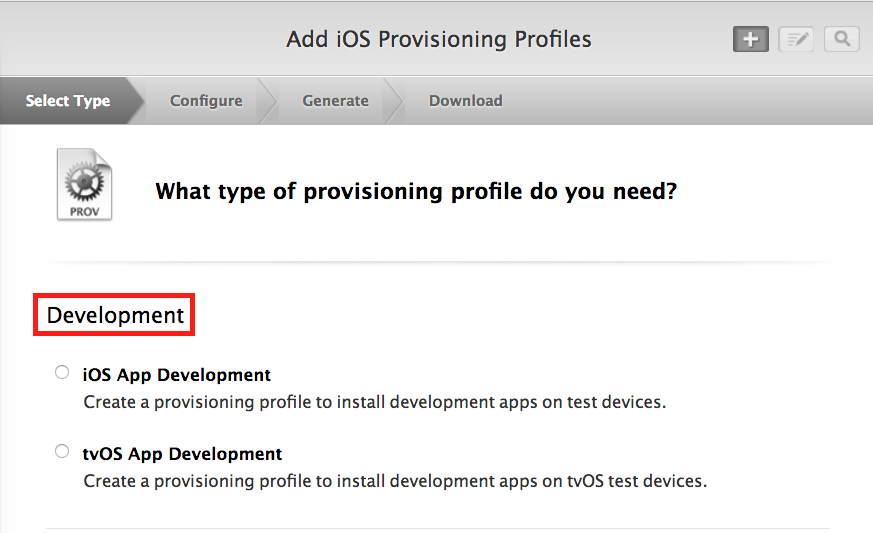
4. 建立Provisioning Profile
當以上步驟都設定完之後,再到Apple Developer站台上建立連結該APP ID的Provisioning Profile。
要注意的是,目前的實做是Development的,所以也要選擇建立Development的Provisioning Profile。
二、設定Azure Notification Hubs
建立步驟參考「設定您的通知中樞」
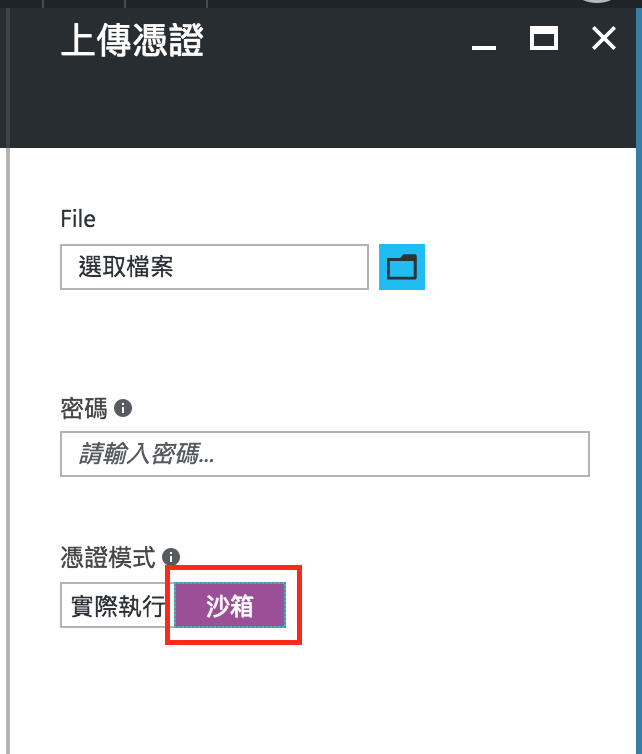
需要注意的地方是,當Azure Notification Hubs建立完成之後,需要去設定Notification Services的Apple(APNS)所需用到的SSL憑證。這裡的憑證檔,就是上面步驟所匯出的p12憑證檔。
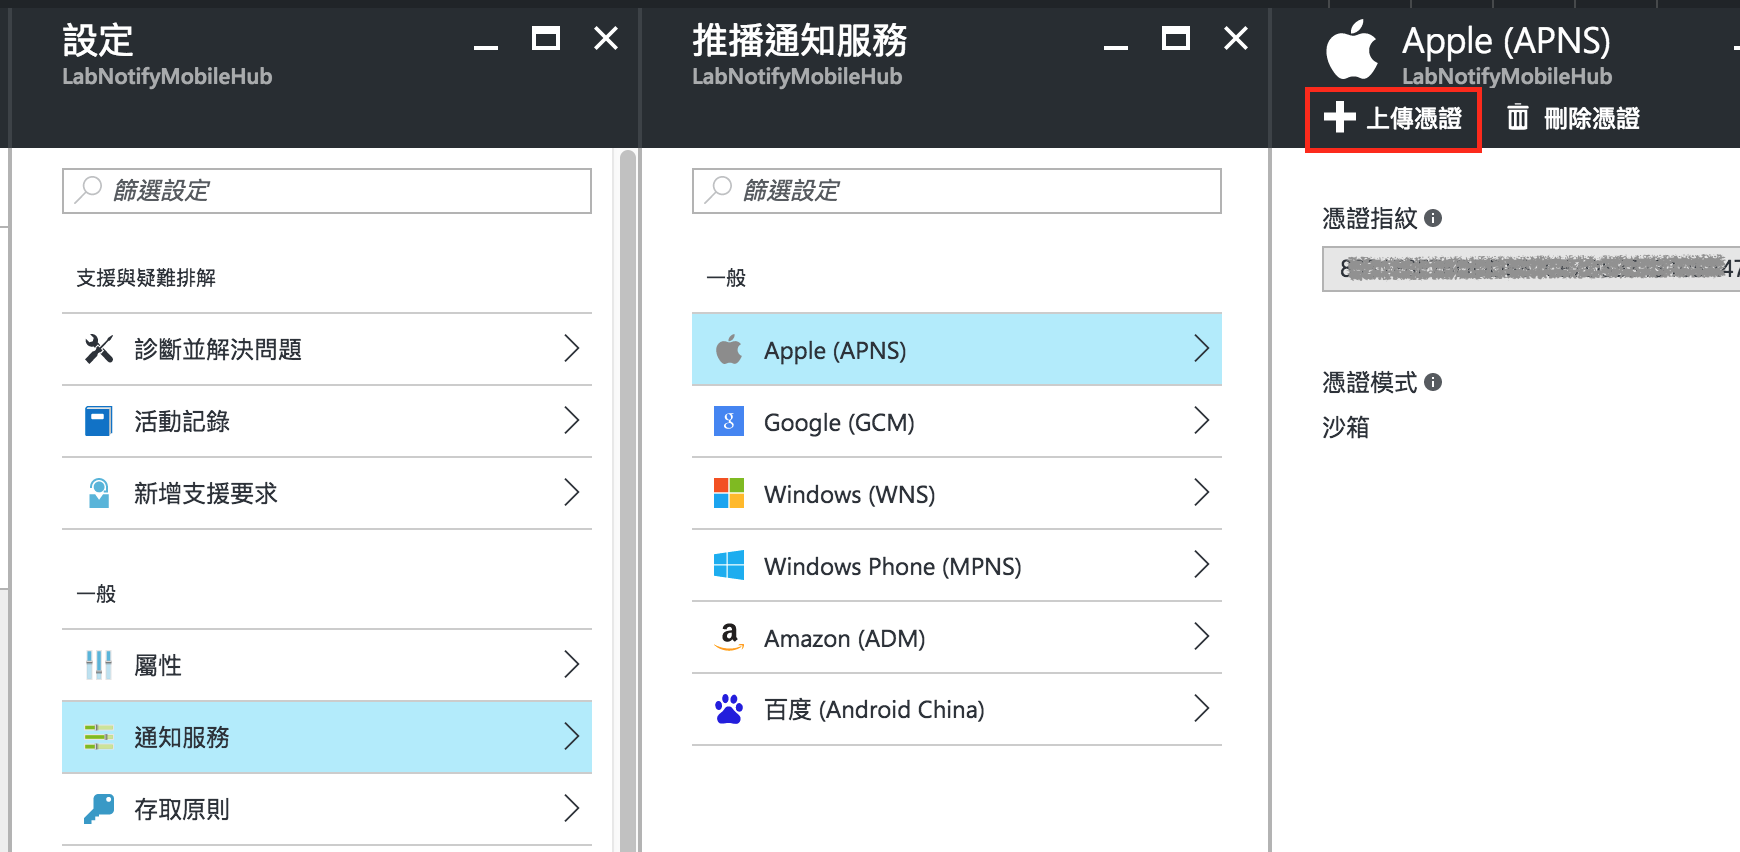
在Apple所選取的是Development相關的憑證及Provisioning Profile,在Azure則要選擇沙箱(SandBox)的憑證模式。
三、Xamarin中接收Notification
設定完Apple及Azure Site之後,接下來需要在Xamarin中寫Code以讓APP可以接收Push Notification。
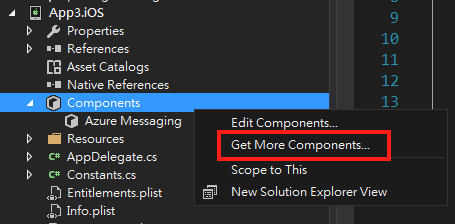
1. 安裝Xamarin Components
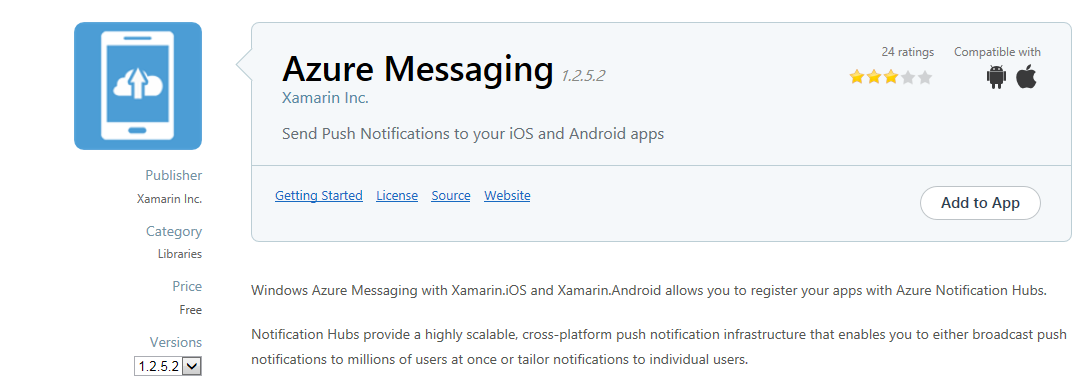
這裡直接使用Xamarin這家公司所寫的Component,以連接到我們所建立的Azure 。
在Xamarin.iOS專案的Components節點中,按右鍵開啟選單後,點選Get More Components。
這會開啟Xamarin Component Store,在裡面搜尋Azure Messaging,可以查出一個由Xamarin公司所寫的連接Azure Notification Hub的元件。
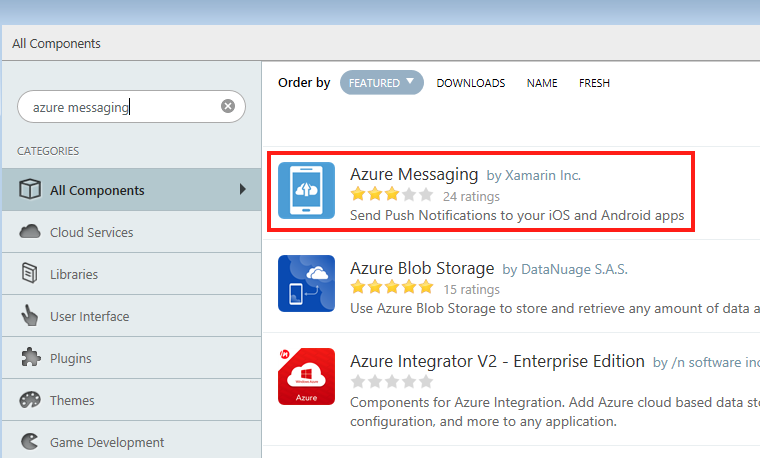
點選進該Component後,就可以看到該Component的介紹,以及一個Add to App的按鈕。點擊該按鈕,就可以將該Component加入我們的Xamarin專案中。
2. 寫Code以接收Notification
在AppDelegate.cs加上以下using 宣告。
using Foundation;
using UIKit;
using WindowsAzure.Messaging;
使用以下的Code以取代原先AppDelegate.cs中的AppDelegate class。
public partial class AppDelegate : global::Xamarin.Forms.Platform.iOS.FormsApplicationDelegate
{
    public override bool FinishedLaunching(UIApplication application, NSDictionary launchOptions)
    {
        if (UIDevice.CurrentDevice.CheckSystemVersion(8, 0))
        {
            var pushSettings = UIUserNotificationSettings.GetSettingsForTypes(
                   UIUserNotificationType.Alert | UIUserNotificationType.Badge | UIUserNotificationType.Sound,
                   new NSSet());

            UIApplication.SharedApplication.RegisterUserNotificationSettings(pushSettings);
            UIApplication.SharedApplication.RegisterForRemoteNotifications();
        }
        else
        {
            UIRemoteNotificationType notificationTypes = UIRemoteNotificationType.Alert | UIRemoteNotificationType.Badge | UIRemoteNotificationType.Sound;
            UIApplication.SharedApplication.RegisterForRemoteNotificationTypes(notificationTypes);
        }

        return true;
    }

    public override void RegisteredForRemoteNotifications(UIApplication application, NSData deviceToken)
    {
        SBNotificationHub Hub = new SBNotificationHub("your-connection-string", "your-hub-name");
        Hub.UnregisterAllAsync(deviceToken, (error) => {
            if (error != null)
            {
                Console.WriteLine("Error calling Unregister: {0}", error.ToString());
                return;
            }

            NSSet tags = null; // create tags if you want
            Hub.RegisterNativeAsync(deviceToken, tags, (errorCallback) => {
                if (errorCallback != null)
                    Console.WriteLine("RegisterNativeAsync error: " + errorCallback.ToString());
            });
        });


    }

    public override void ReceivedRemoteNotification(UIApplication application, NSDictionary userInfo)
    {
        ProcessNotification(userInfo, false);
    }

    void ProcessNotification(NSDictionary options, bool fromFinishedLaunching)
    {
        // Check to see if the dictionary has the aps key.  This is the notification payload you would have sent
        if (null != options && options.ContainsKey(new NSString("aps")))
        {
            //Get the aps dictionary
            NSDictionary aps = options.ObjectForKey(new NSString("aps")) as NSDictionary;

            string alert = string.Empty;

            //Extract the alert text
            if (aps.ContainsKey(new NSString("alert")))
                alert = (aps[new NSString("alert")] as NSString).ToString();

            //If this came from the ReceivedRemoteNotification while the app was running,
            // we of course need to manually process things like the sound, badge, and alert.
            if (!fromFinishedLaunching)
            {
                //Manually show an alert
                if (!string.IsNullOrEmpty(alert))
                {
                    UIAlertView avAlert = new UIAlertView("Notification", alert, null, "OK", null);
                    avAlert.Show();
                }
            }
        }
    }
}
其中RegisteredForRemoteNotifications function中在建立SBNotificationHub物件時,需要設定兩個參數。 一個是connection stirng,可以由Azure Notification Hub上的存取原則取得
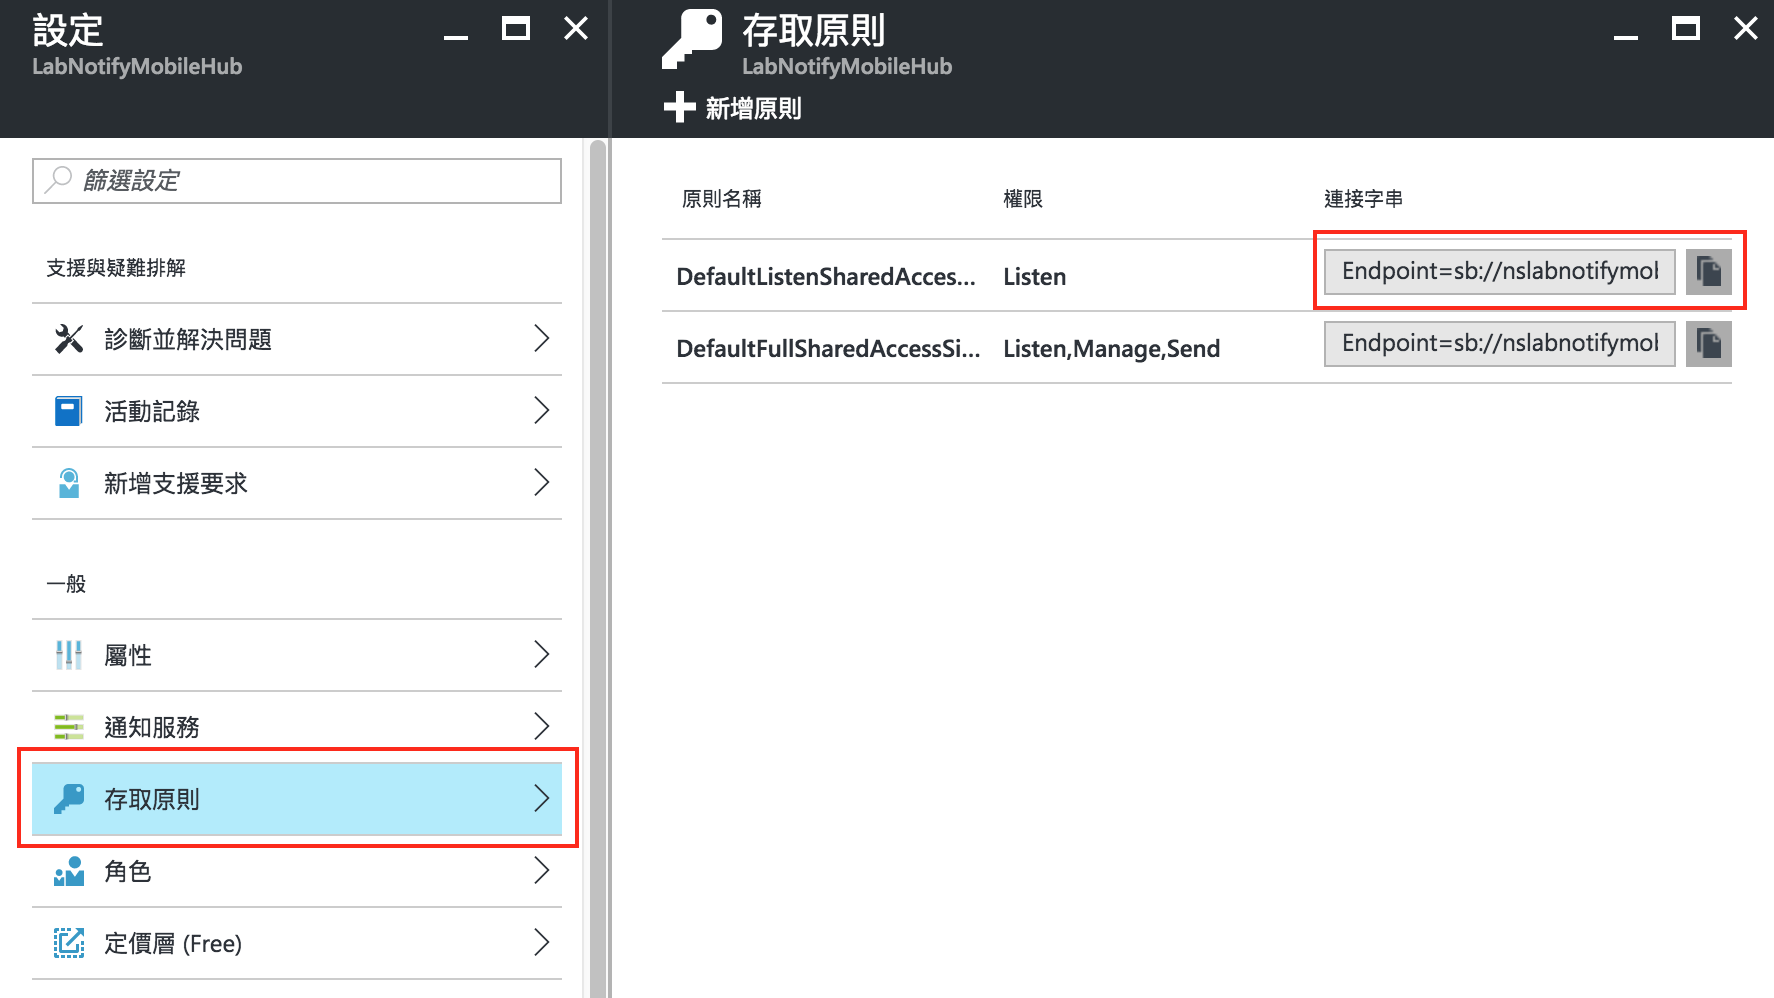
另一個參數則是Azure Notification Hub的名稱。
將專案成功Build完後,部署到實體的iPhone手機上,就可以開始進行測試。因為這個APP有設定Push Notification的功能,所以安裝完該APP後,會出現對話視窗問你要不要允許接收通知。
Push Notification無法在模擬器上測試
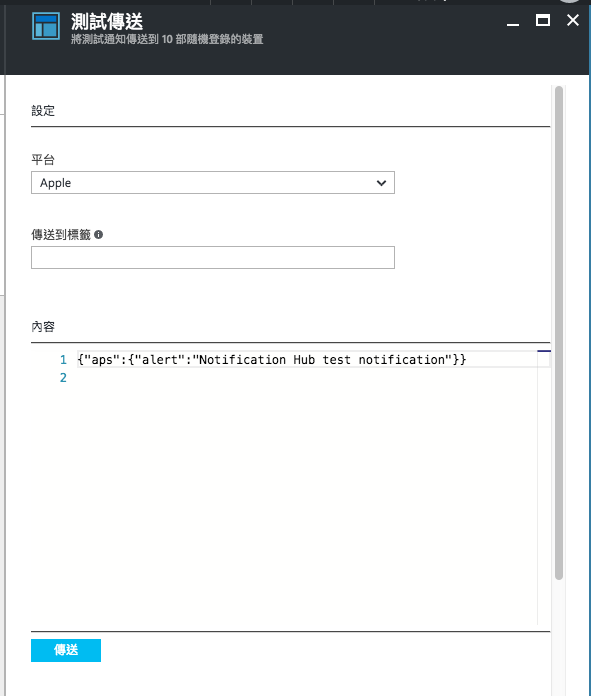
四、傳送Notification以進行測試
可以自己寫Code,透過Azure Notification Hub以傳送Notification。但最簡單的方式就是-開啟Azure Notification Hub的測試傳送,平台選擇Apple,內容使用Default的Json字串。按下傳送,順利的話,手機上就可以收到推播訊息了。