Microsoft Azure上的服務Application Insights可以有效的收集伺服器資訊,也包含了可用性的偵測
Slack是目前許多開發團隊愛用的一個線上溝通訊息的平台
這篇文章會說明如何將Application Insights上發生異常訊息時,將訊息內容送至Slack讓團隊成員可以知道發生事件了
要將Application Insights的訊息送進至Slack的步驟有點複雜,雖然說現在透過Logic App已經可以省去很多工了,可是還是有很多地方要注意。
照著文章的步驟作,要將訊息打進Slack就不是難事
1.首先先在Azure上建立一個Application Insights的服務,其他的設定先不去動他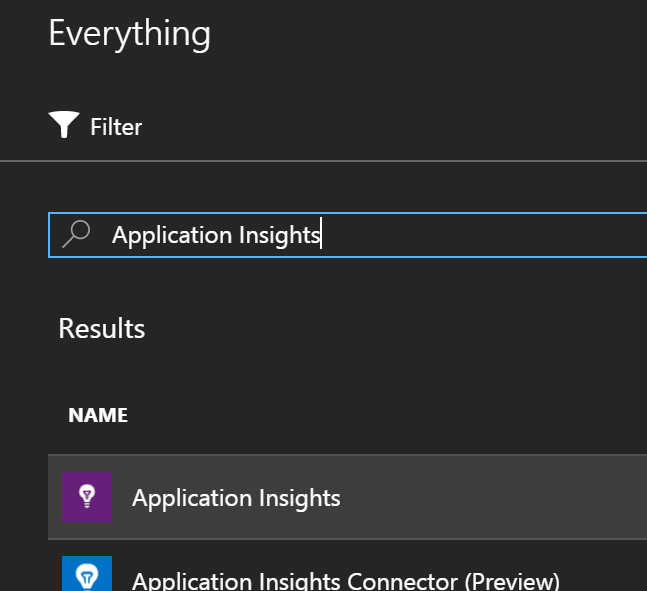
2.在Azure上建立另一個服務[Logic App],這一個Logic App會將Application Insights送進來的訊息作一個轉換,變成可以直接送進Slack的內容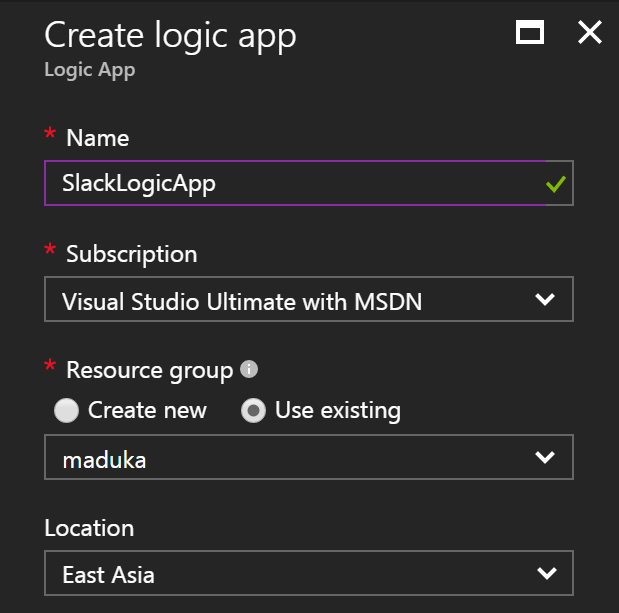
3.Logic App建好之後,點開這個Logic App,並點選[邏輯應用程式設計工具],接著在右方展開的視窗中,點選[收到HTTP要求時]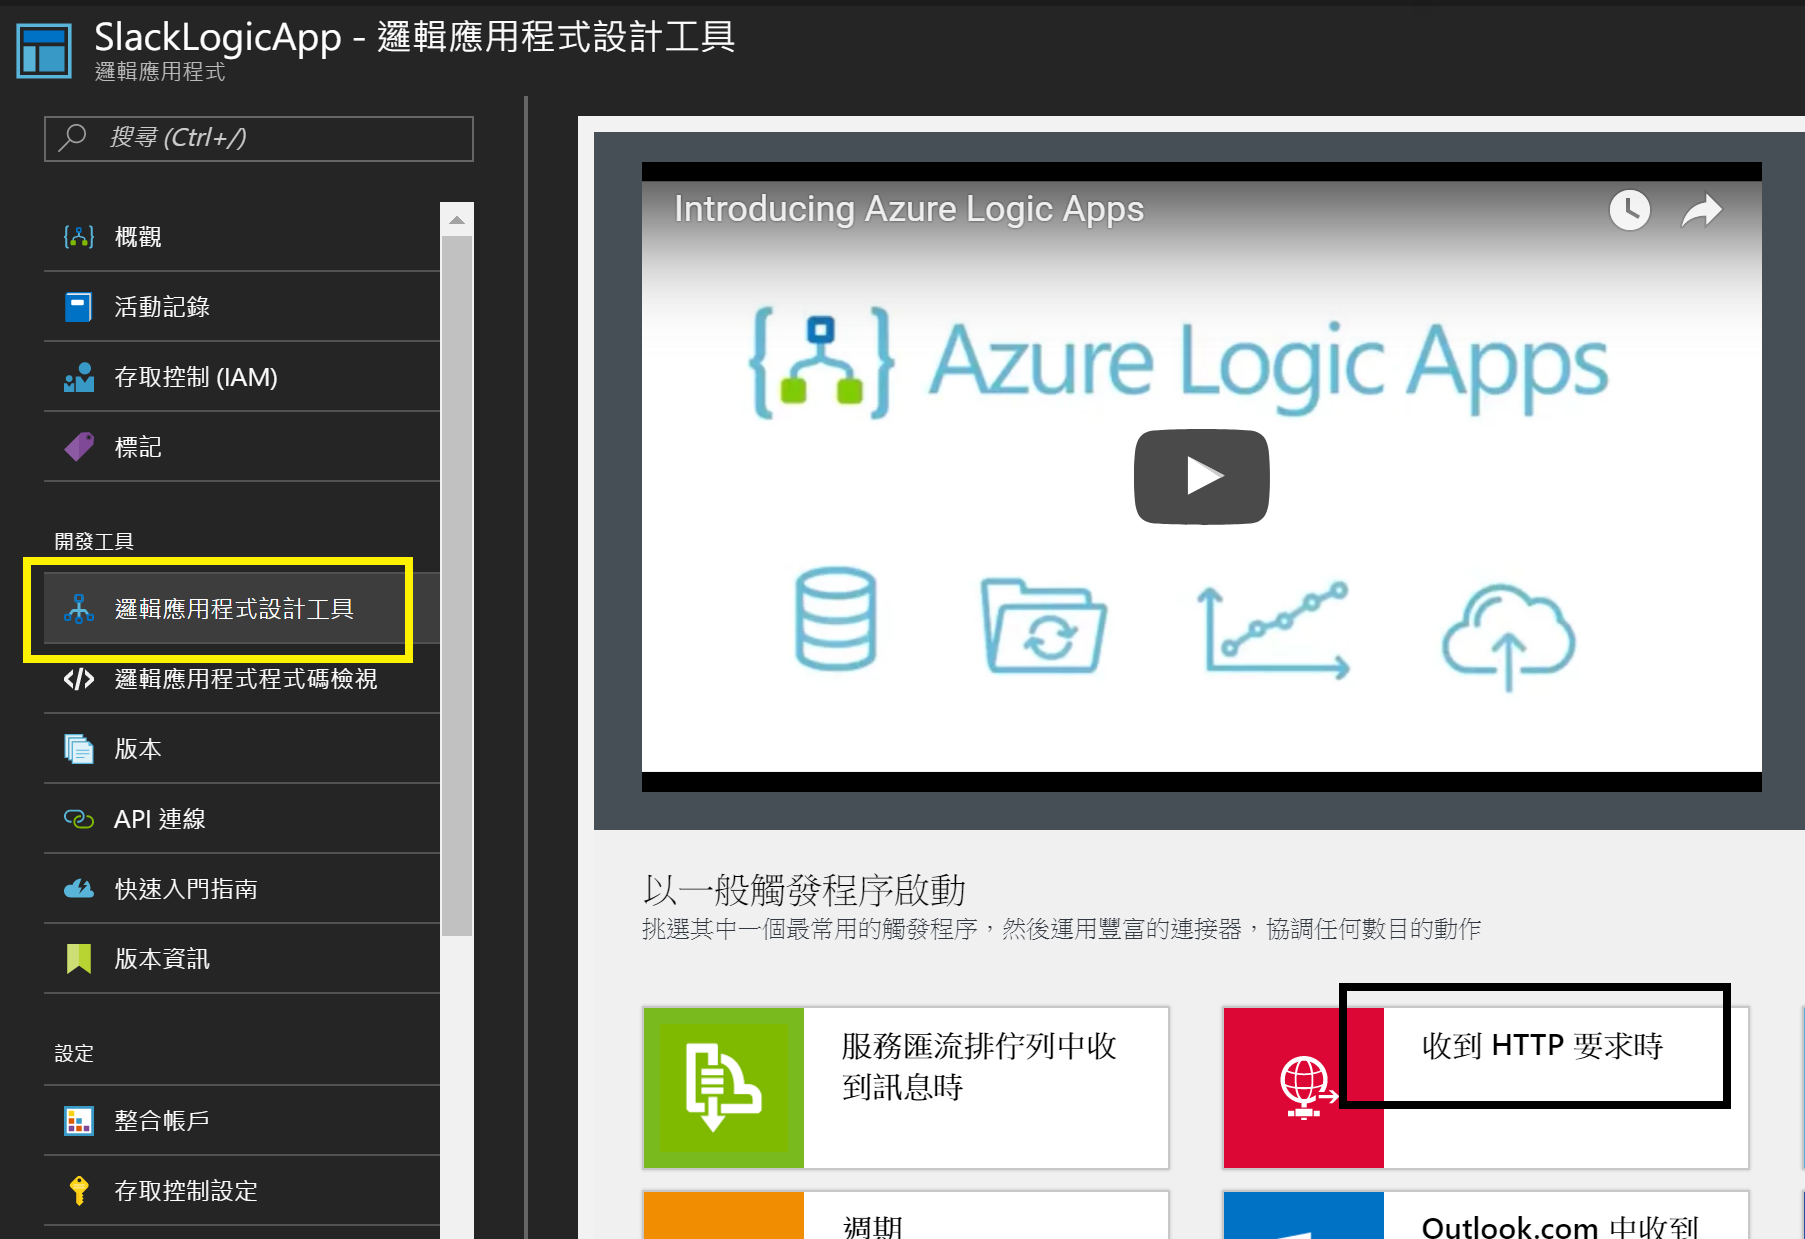
4.點開後,在第一個步驟[要求]中,將下面的JSON描述格式內容貼進文字方塊中
{
  "$schema": "http://json-schema.org/draft-04/schema#",
  "properties": {
    "context": {
      "properties": {
        "name": {
          "type": "string"
        },
        "resourceName": {
          "type": "string"
        },
        "timestamp": {
          "type": "string"
        }
      },
      "required": [
        "timestamp",
        "name",
        "resourceName"
      ],
      "type": "object"
    },
    "status": {
      "type": "string"
    }
  },
  "required": [
    "status",
    "context"
  ],
  "type": "object"
}
這段JSON內容主要是為了讓從Application Insights傳入的訊息,讓後面Logic App可以方便取用作一個對應,稍後會加以說明對應的方式,在這裡先將這個JSON結構貼上
5.在設計工具的下方,點選[+新步驟],目前新的步驟動作已經可以選擇到Slack的項目了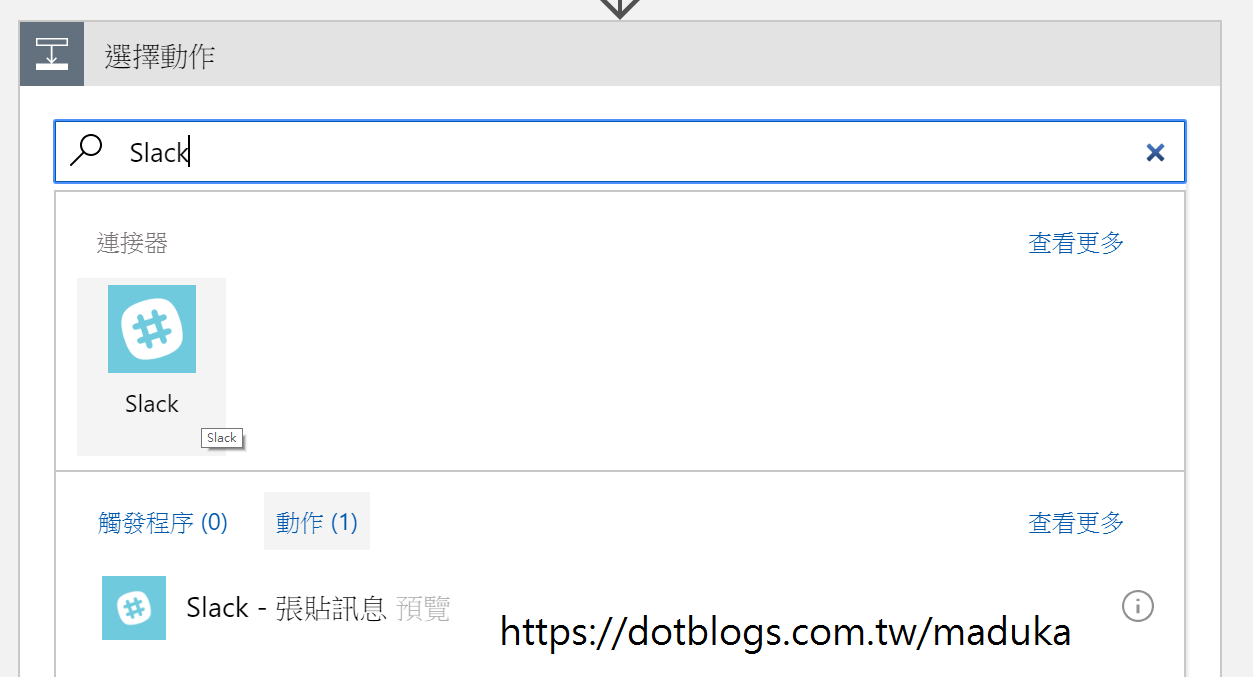
6.接著點選[Slack - 張貼訊息]這個功能,Logic App會請你登入Slack的帳號以及要登入的Slack domain,這個動作會在你的Slack上安裝一個[Microsoft Azure Logic Apps]的外掛App套件,當然點選[Install]就可以了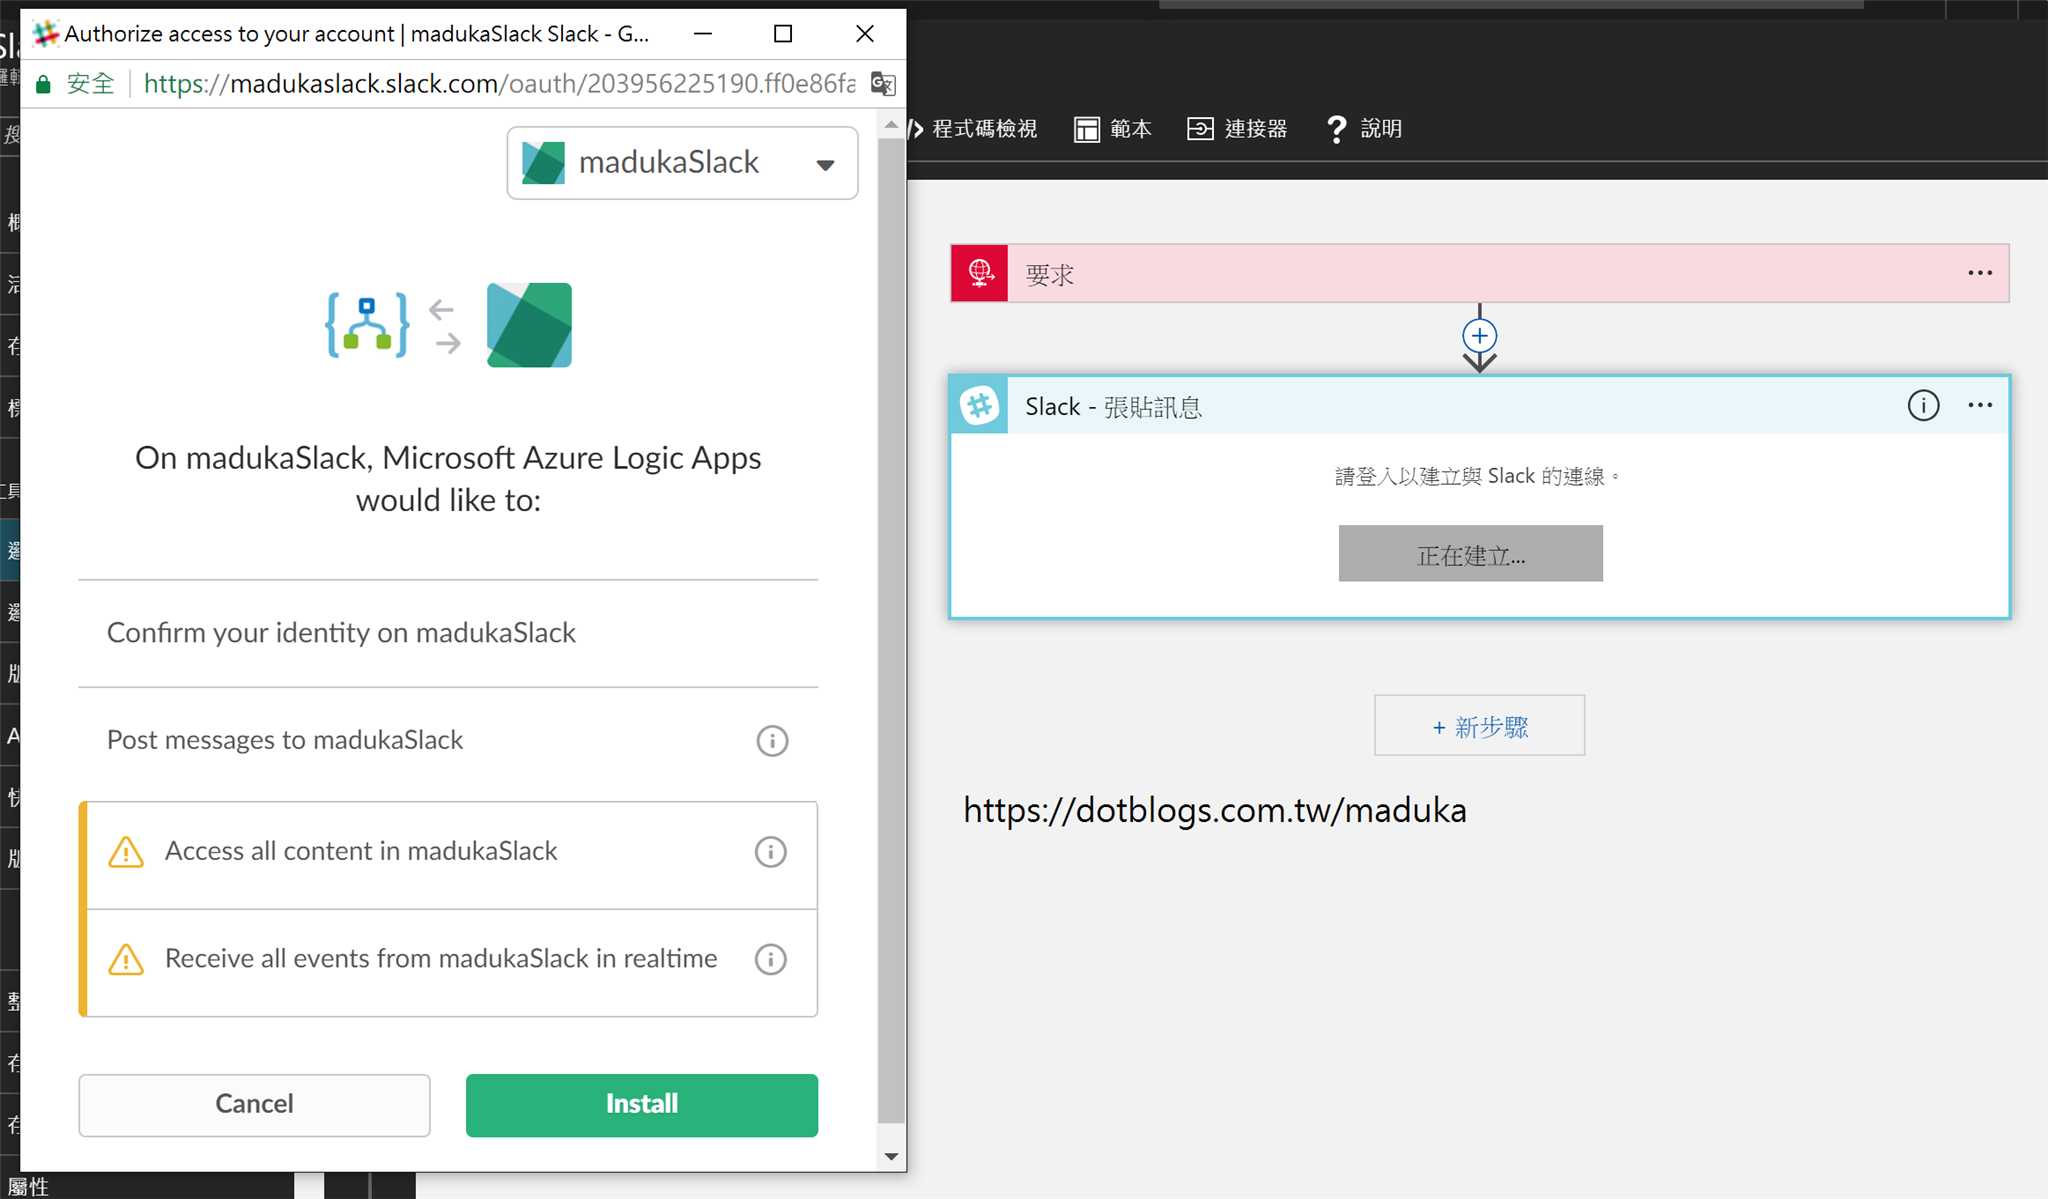
7.授權完成後,在[Slack-張貼訊息]的步驟上,須要設定[通道名稱],這個欄位是希望你的訊息送到Slack中的那一個訊息頻道,我在Slack上希望能把所有的警示訊息都收進#alerts這個頻道,所以在Logic App的設定上也必須填入#alerts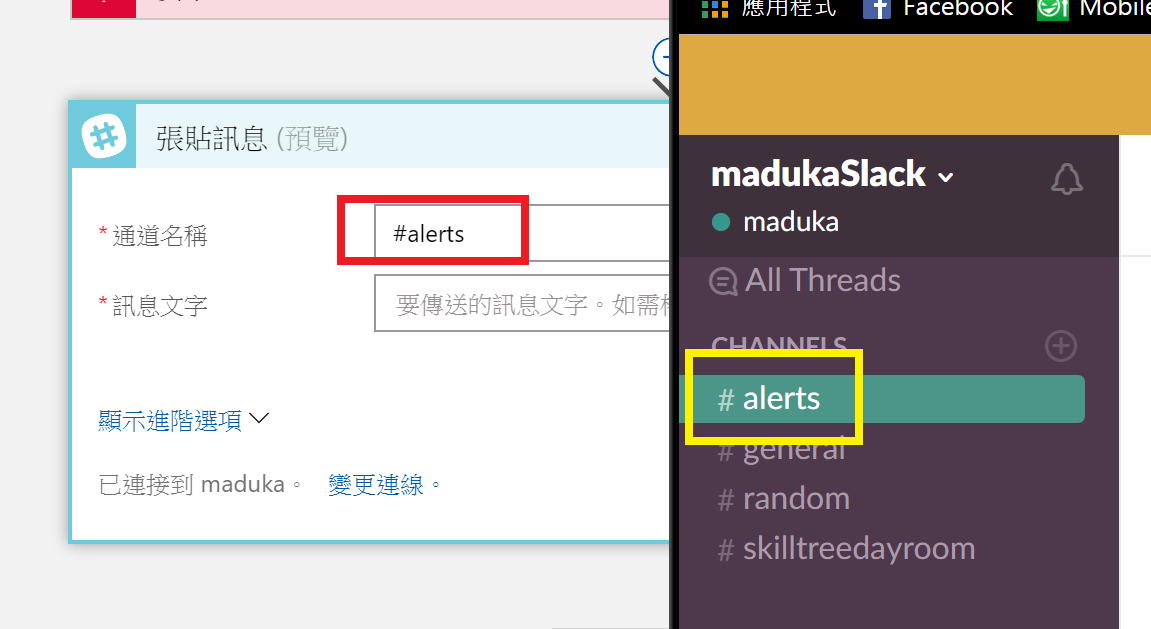
8.設定完通道名稱,在下方的[訊息文字],則是可以透過點選欄位的方式將要傳送至Slack的內容放進來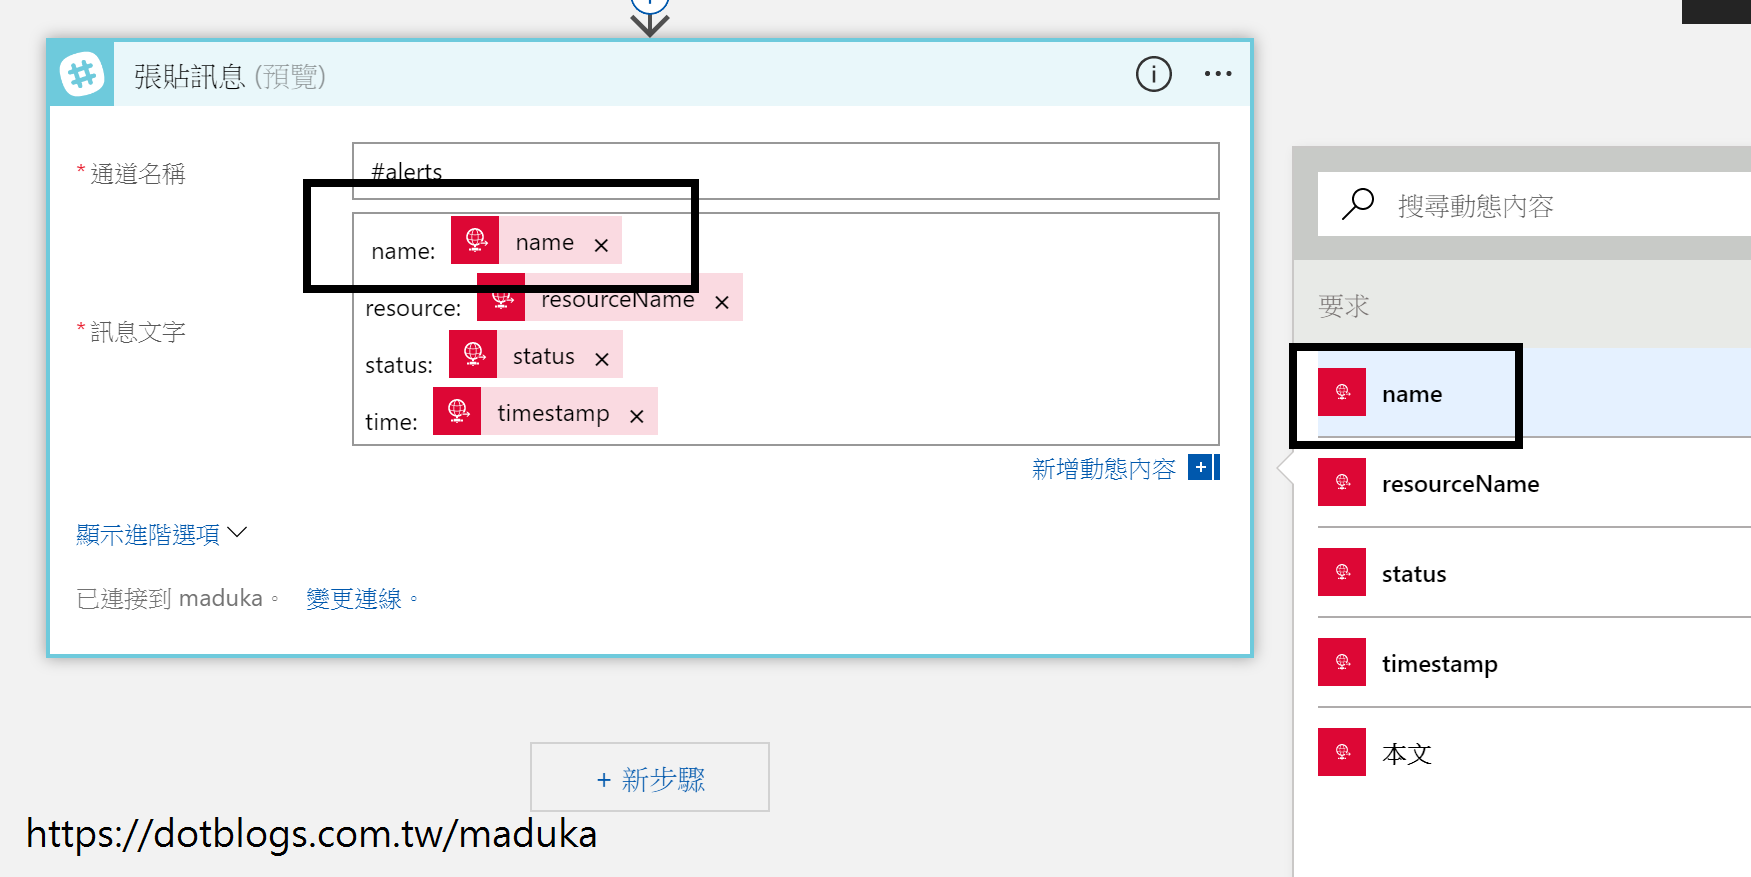 右方可以點選的欄位,其實就是早在第4個步驟中放入的JSON定義內容,所以如果想讓後面在編輯Slack訊息較為方便的情況下,就可以先在[要求]項目中的JSON先進行定義,不然就必須自行編輯原始碼來對應了
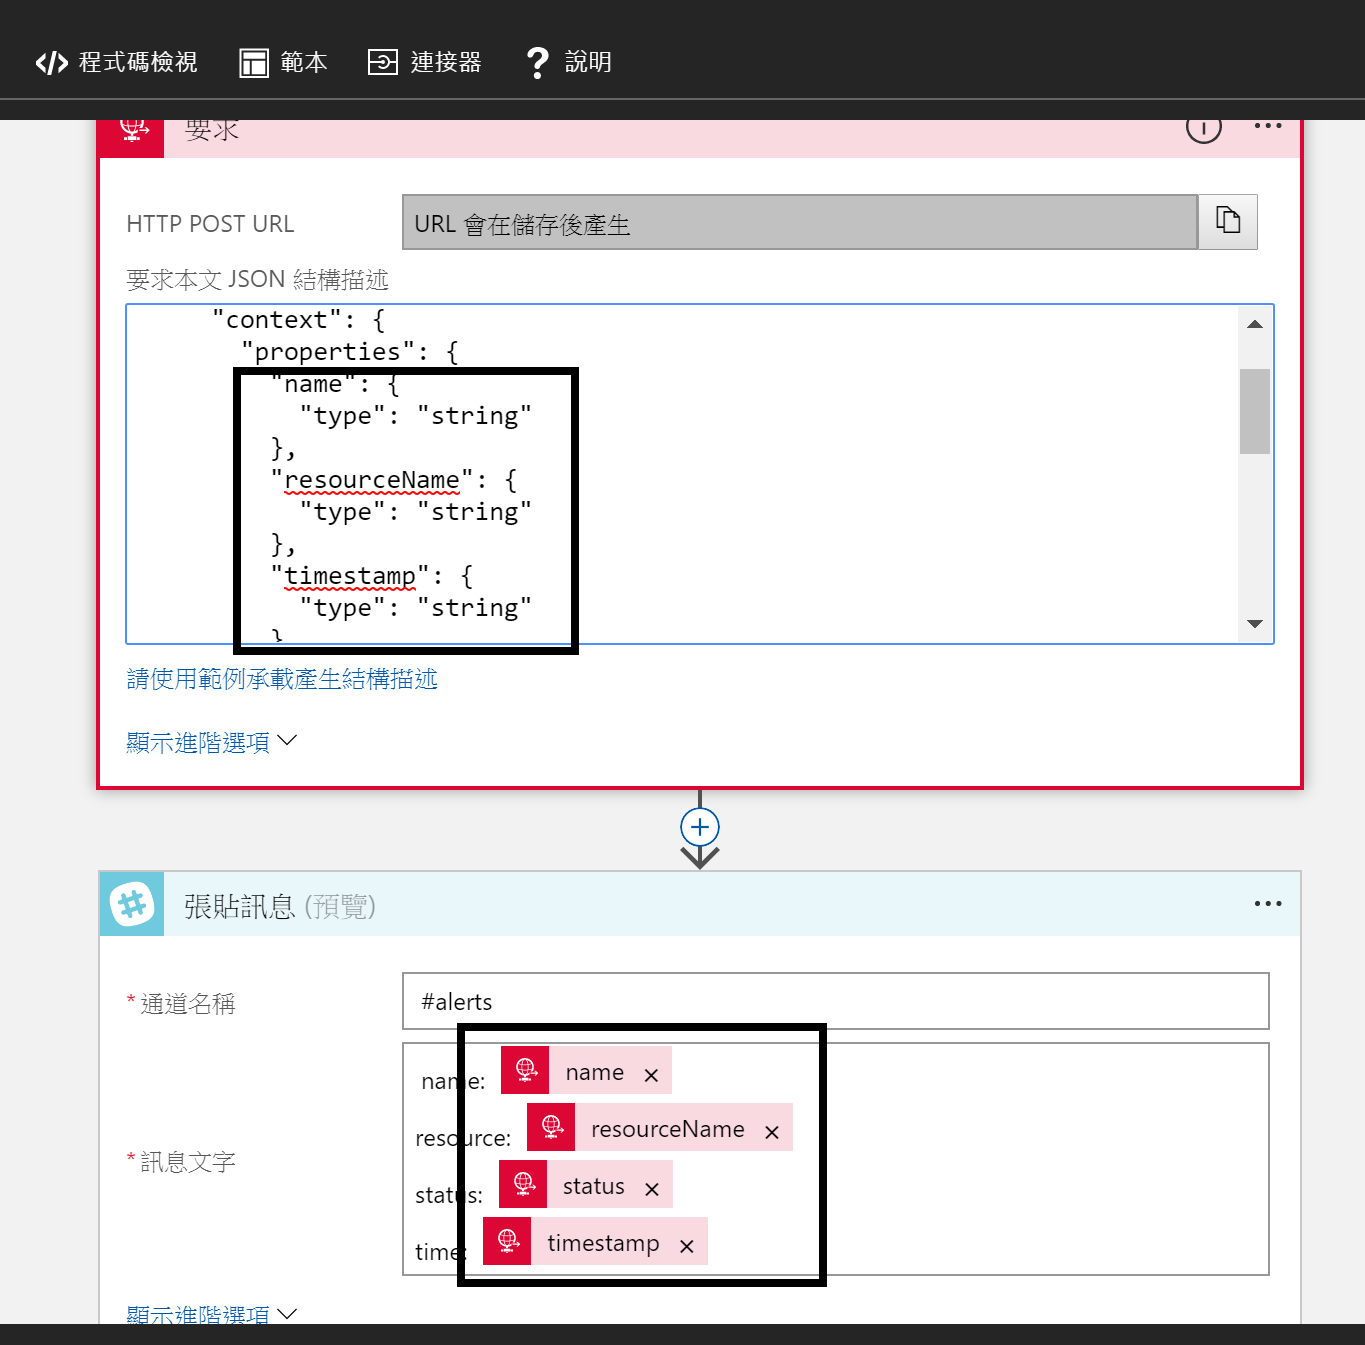
9.完成編輯,按下儲存後,請將[要求]步驟中的[HTTP POST URL]複製下來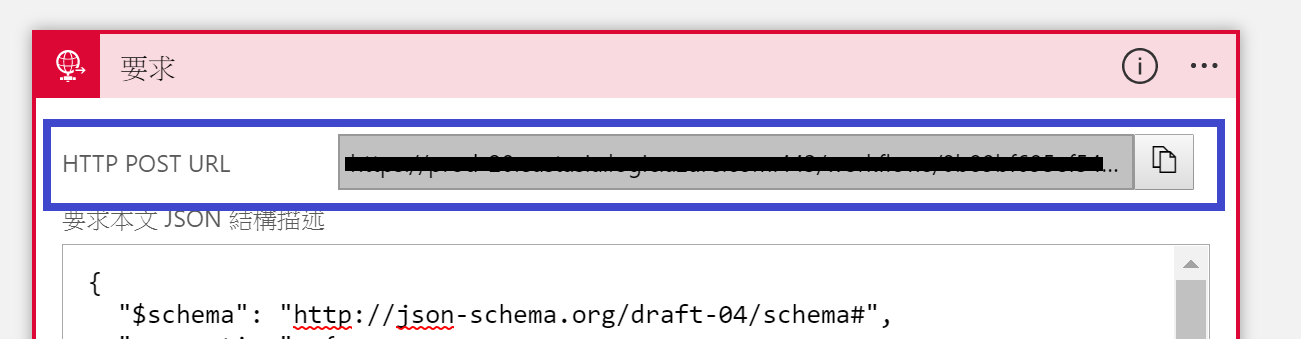
10.將前一個步驟複製下來的URL,貼至Application Insights中可用性測試,或是其他健康度監測的[WebHook]欄位中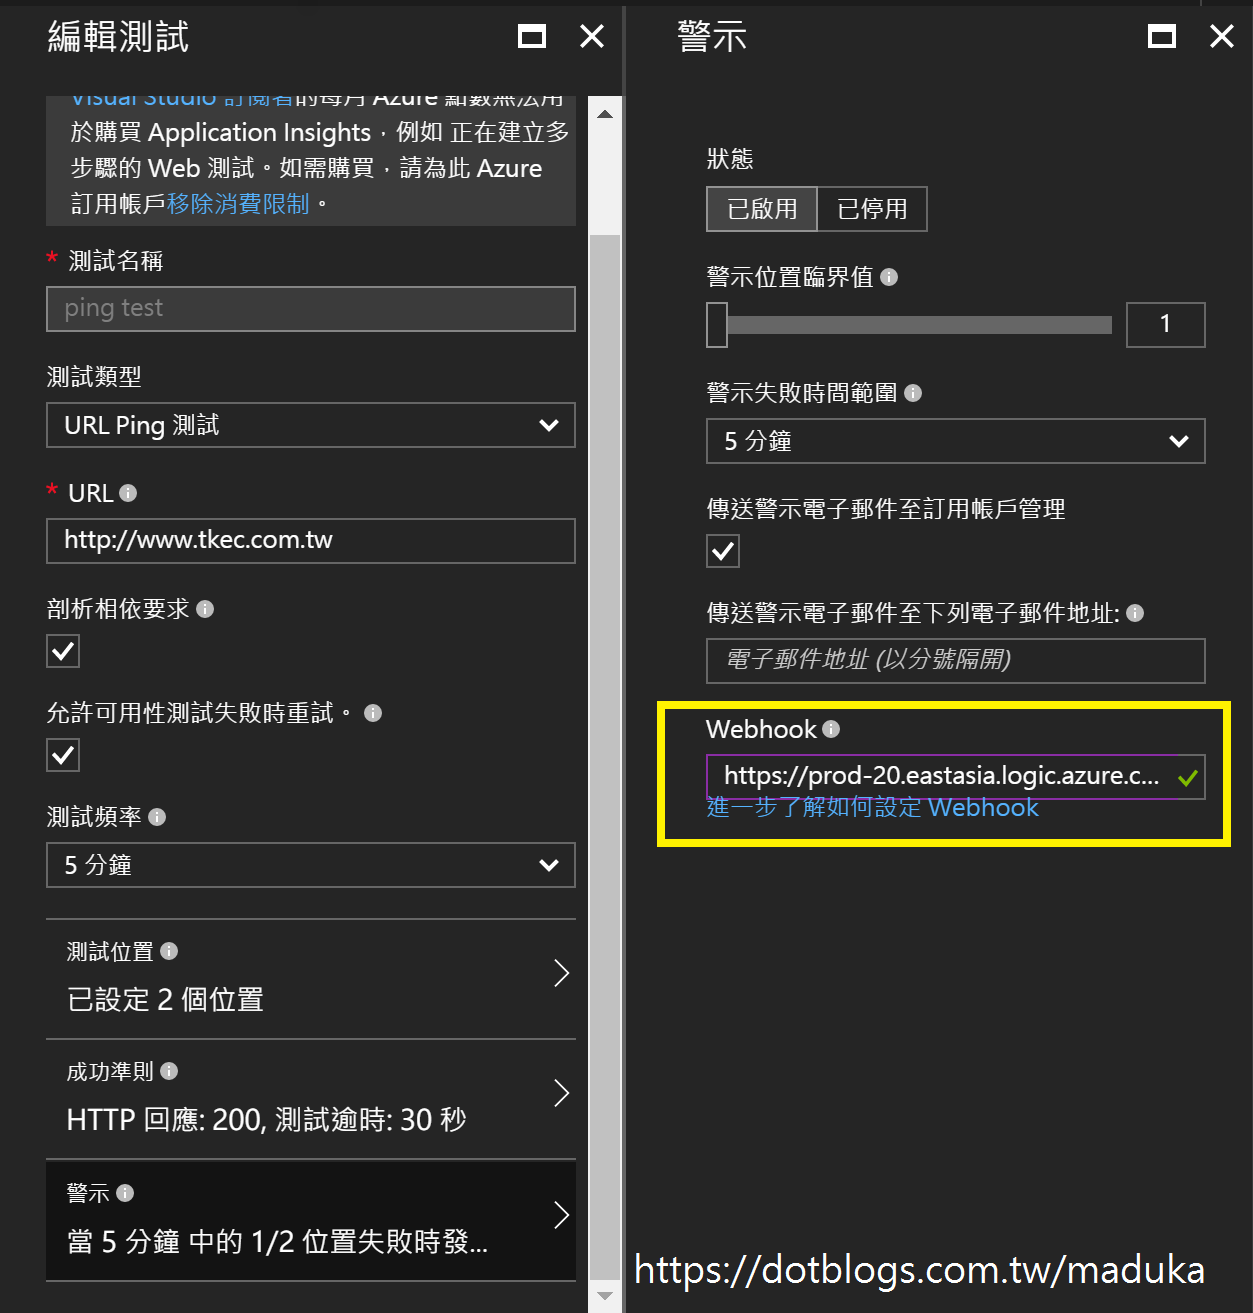
10.接著,當Application Insights發生異常時,就可以在Slack中看到推送的訊息了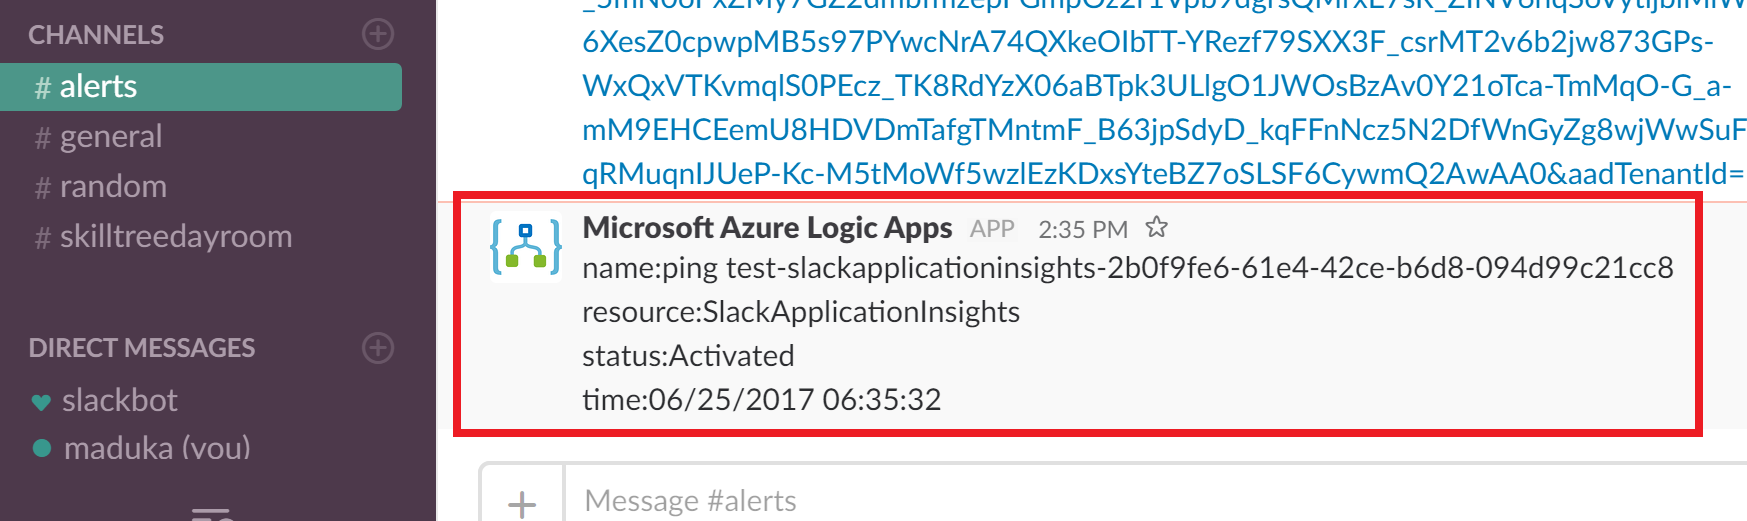
前面有提到,關於JSON對應欄位的部份,由於我在最一開始的JSON只有對應到四個可用欄位,所以在編輯[Slack-張貼訊息]的步驟時,只有這四個欄位可以使用
但是除了這四個欄位外,也可以自己找出對應的JSON欄位內容。在[Slack-張貼訊息]可以取用的項目中,還有一個欄位叫作[本文]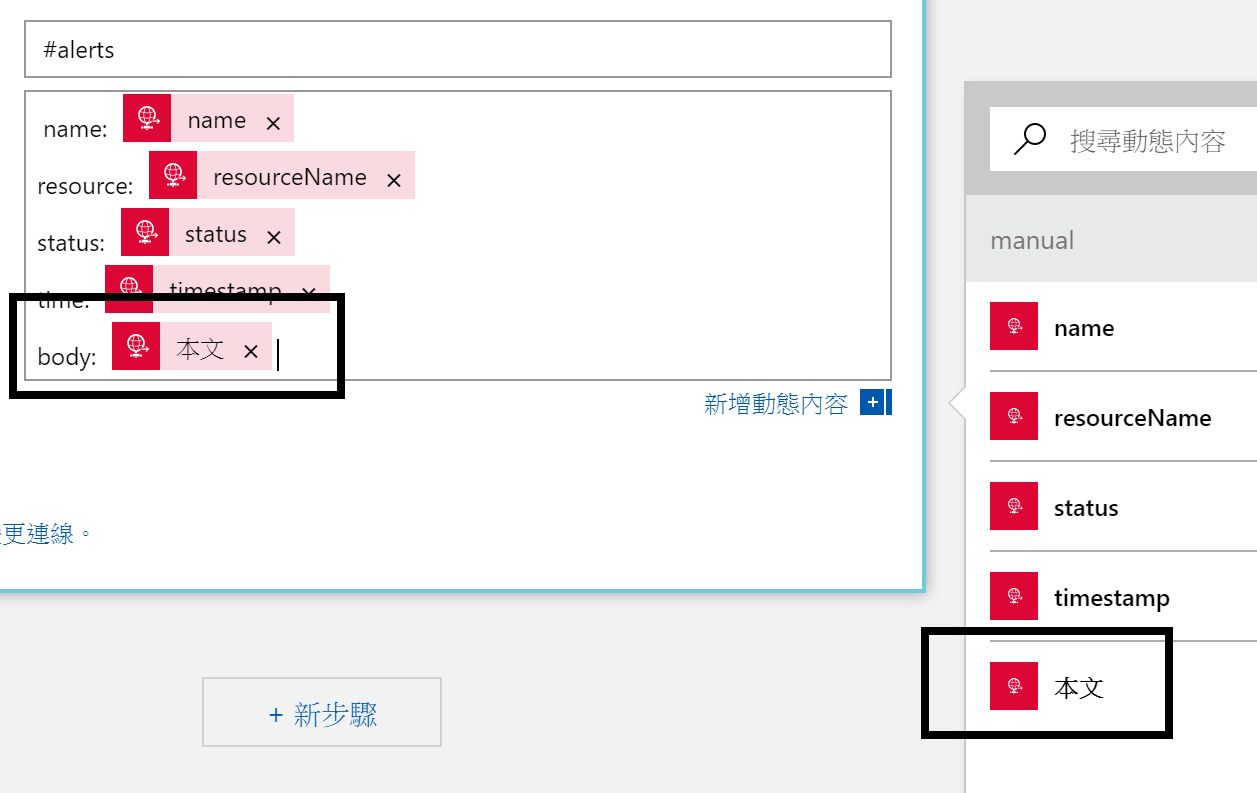 透過這個本文的內容,可以把從Application Insights要求送入的訊息全部送進Slack,不過我想應該不會有人這麼作,不過我們可以透過送進的本文內容,得到完整的JSON資料
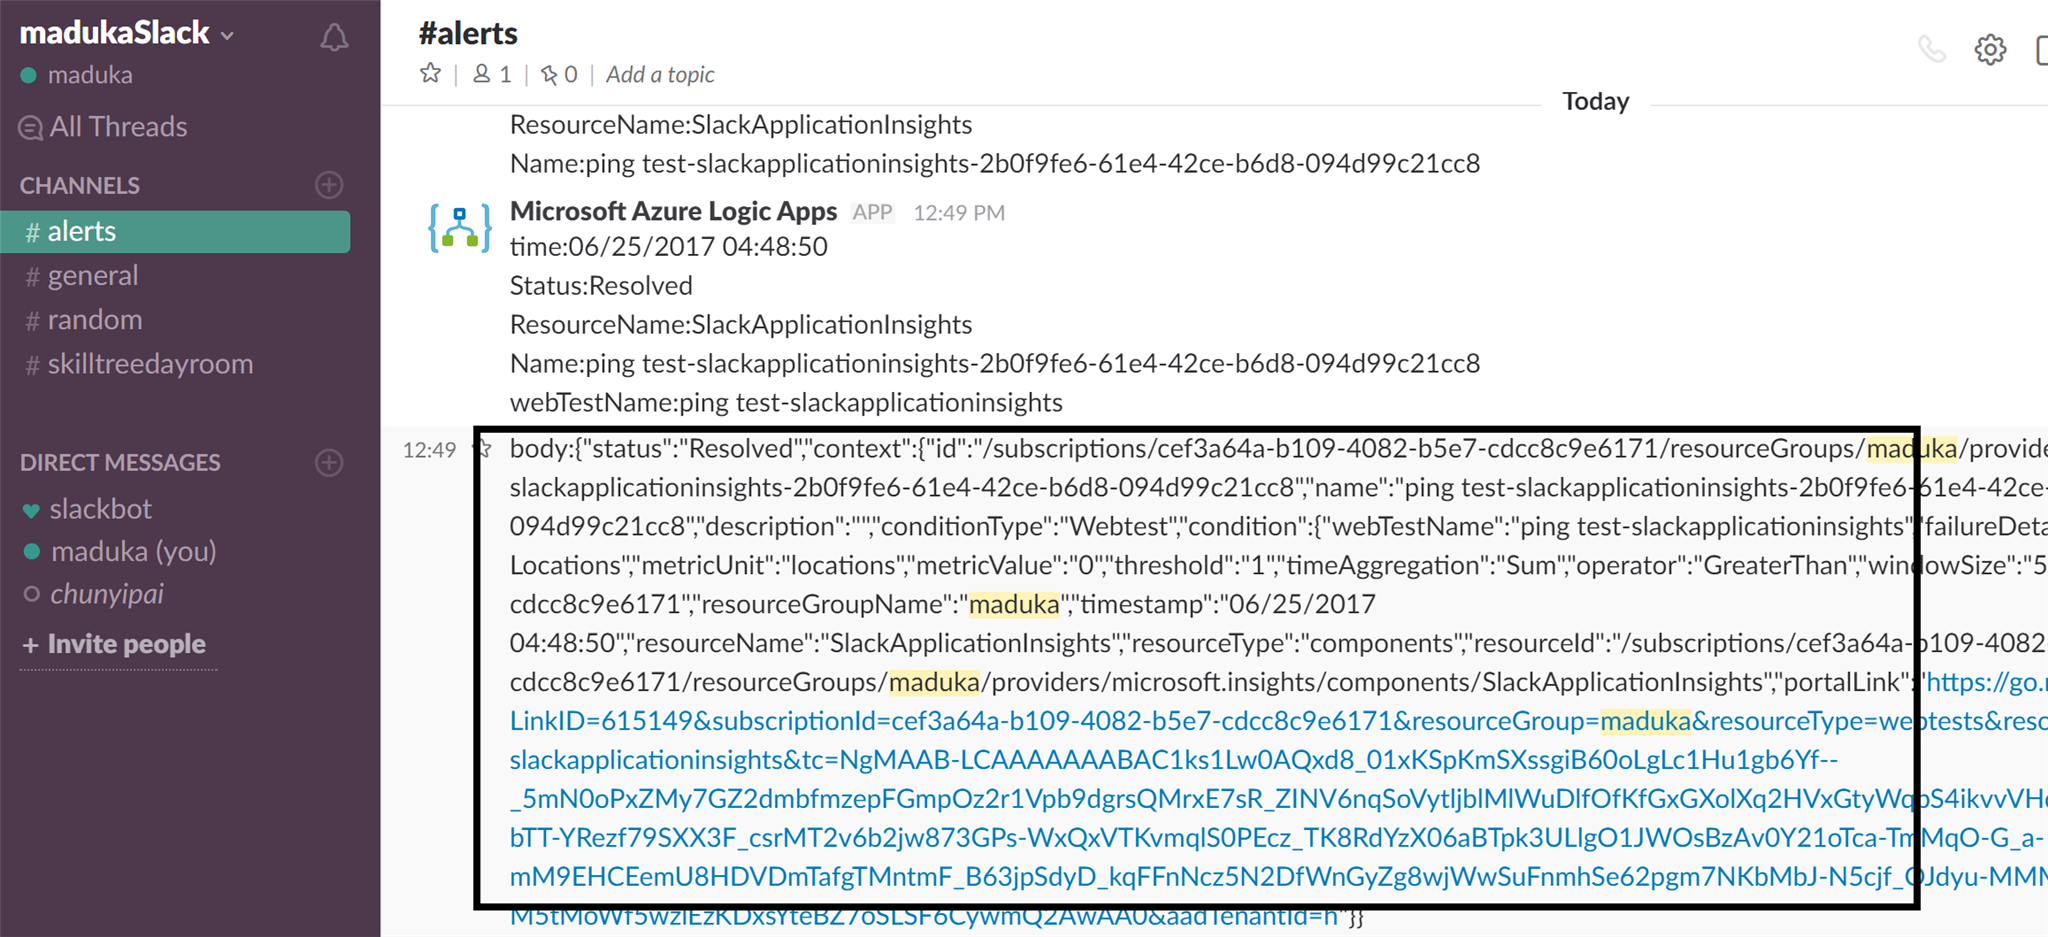 最後可以取得的JSON格式如下
public class Rootobject
{
    public string status { get; set; }
    public Context context { get; set; }
}

public class Context
{
    public string id { get; set; }
    public string name { get; set; }
    public string description { get; set; }
    public string conditionType { get; set; }
    public Condition condition { get; set; }
    public string subscriptionId { get; set; }
    public string resourceGroupName { get; set; }
    public string timestamp { get; set; }
    public string resourceName { get; set; }
    public string resourceType { get; set; }
    public string resourceId { get; set; }
    public string portalLink { get; set; }
}

public class Condition
{
    public string webTestName { get; set; }
    public string failureDetails { get; set; }
    public string metricName { get; set; }
    public string metricUnit { get; set; }
    public string metricValue { get; set; }
    public string threshold { get; set; }
    public string timeAggregation { get; set; }
    public string _operator { get; set; }
    public string windowSize { get; set; }
}
舉一個例子來說,如果我希望能夠把Condition下的webTestName也送進到Slack的訊息中,有兩個方法可以完成
第一種是直接在Logic App中去編輯原始檔,在text的欄位值中,手動輸入['context']['condition']['webtestName']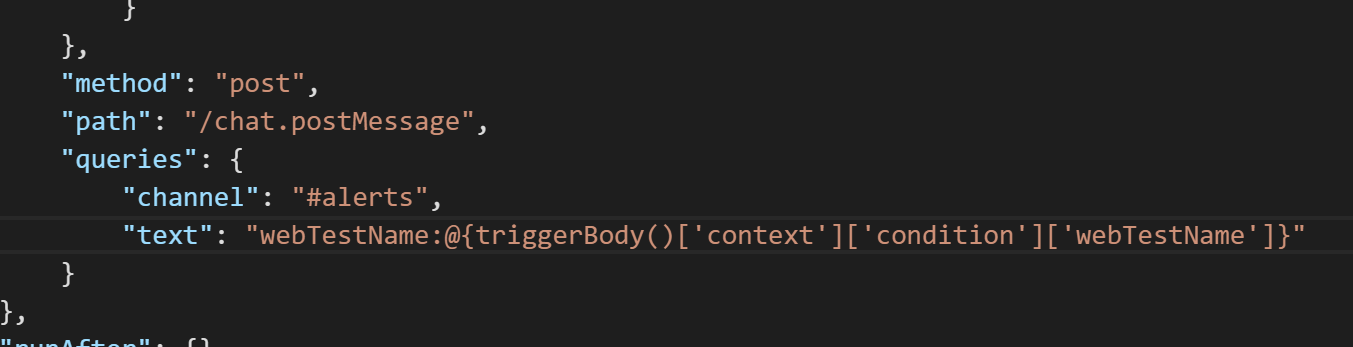 如此一來,回到GUI畫面時就會呈現這樣的結果
第二種方式,就是在[要求]的步驟中,加入對應欄位的屬性,加入至[要求]的JSON Schema可以參考下面的內容
{
    "$schema": "http://json-schema.org/draft-04/schema#",
    "definitions": {},
    "id": "http://example.com/example.json",
    "properties": {
        "context": {
            "id": "/properties/context",
            "properties": {
                "condition": {
                    "id": "/properties/context/properties/condition",
                    "properties": {
                        "failureDetails": {
                            "id": "/properties/context/properties/condition/properties/failureDetails",
                            "type": "string"
                        },
                        "metricName": {
                            "id": "/properties/context/properties/condition/properties/metricName",
                            "type": "string"
                        },
                        "metricUnit": {
                            "id": "/properties/context/properties/condition/properties/metricUnit",
                            "type": "string"
                        },
                        "metricValue": {
                            "id": "/properties/context/properties/condition/properties/metricValue",
                            "type": "string"
                        },
                        "operator": {
                            "id": "/properties/context/properties/condition/properties/operator",
                            "type": "string"
                        },
                        "threshold": {
                            "id": "/properties/context/properties/condition/properties/threshold",
                            "type": "string"
                        },
                        "timeAggregation": {
                            "id": "/properties/context/properties/condition/properties/timeAggregation",
                            "type": "string"
                        },
                        "webTestName": {
                            "id": "/properties/context/properties/condition/properties/webTestName",
                            "type": "string"
                        },
                        "windowSize": {
                            "id": "/properties/context/properties/condition/properties/windowSize",
                            "type": "string"
                        }
                    },
                    "type": "object"
                },
                "conditionType": {
                    "id": "/properties/context/properties/conditionType",
                    "type": "string"
                },
                "description": {
                    "id": "/properties/context/properties/description",
                    "type": "string"
                },
                "id": {
                    "id": "/properties/context/properties/id",
                    "type": "string"
                },
                "name": {
                    "id": "/properties/context/properties/name",
                    "type": "string"
                },
                "portalLink": {
                    "id": "/properties/context/properties/portalLink",
                    "type": "string"
                },
                "resourceGroupName": {
                    "id": "/properties/context/properties/resourceGroupName",
                    "type": "string"
                },
                "resourceId": {
                    "id": "/properties/context/properties/resourceId",
                    "type": "string"
                },
                "resourceName": {
                    "id": "/properties/context/properties/resourceName",
                    "type": "string"
                },
                "resourceType": {
                    "id": "/properties/context/properties/resourceType",
                    "type": "string"
                },
                "subscriptionId": {
                    "id": "/properties/context/properties/subscriptionId",
                    "type": "string"
                },
                "timestamp": {
                    "id": "/properties/context/properties/timestamp",
                    "type": "string"
                }
            },
            "type": "object"
        },
        "status": {
            "id": "/properties/status",
            "type": "string"
        }
    },
    "type": "object"
}
貼入至[要求]步驟中的[要求本文 JSON 結構描述]之後,就可以在[Slack-張貼]的步驟中,找到所有的欄位可以選擇,並加入至內文欄位中 編輯完成後再切換到原始碼查看,其實內容也是跟手動編輯的結果是一樣的,差別只是在於剛剛那份JSON Schema並未宣告required的欄位,所以會出現?穿插在中間
現在有越來越多的開發團隊大量的使用外部溝通軟體平台,如Slack、Line等等的工具,透過這種模式,也可以很容易的將要監控環境的訊息直接透過WebHook發送至溝通平台上了