透過 Virtual Printer 的方式,在 Mac OS X 上頭設定一台支援 AirPrint 的 PDF 印表機。
老婆買了一個 iOS App 學習日文,裡面有好多文章,但是用 iPhone 看,螢幕太小,不是很舒服。這個 App 支援 AirPrint,老婆就問我可不可以印成 PDF 檔案在電腦上面看?我找了一下,發現了 VipRiser 這個免費又支援 AirPrint 的 Virtual PDF Printer:
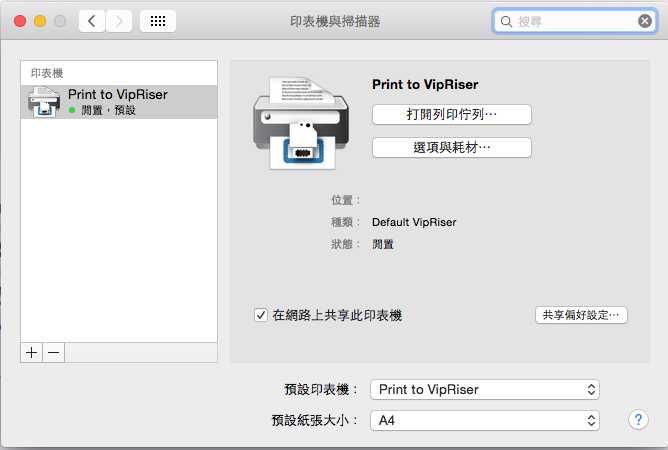
下載安裝完畢之後,執行 VipRiser 程式,然後到系統偏好設定的印表機與掃描器新增一台印表機,記得勾選在網路上共享此印表機:
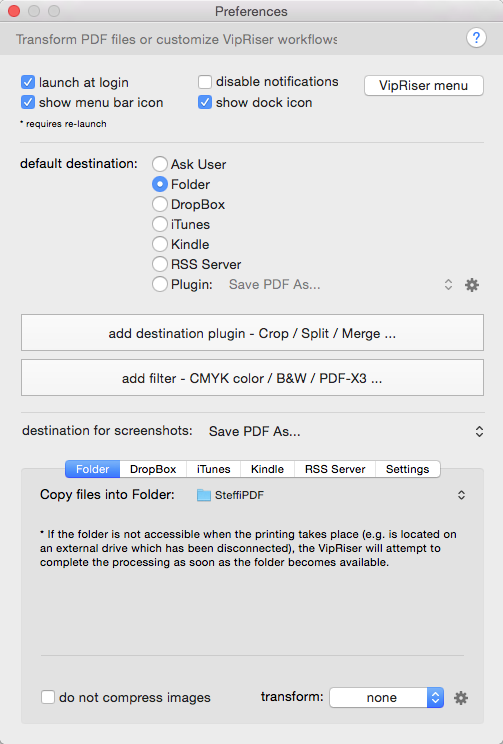
打開 VipRiser 的 Preferences 設定頁,default destination 我選擇設定 Folder,底下的 Copy files into Folder 選定一個目錄:
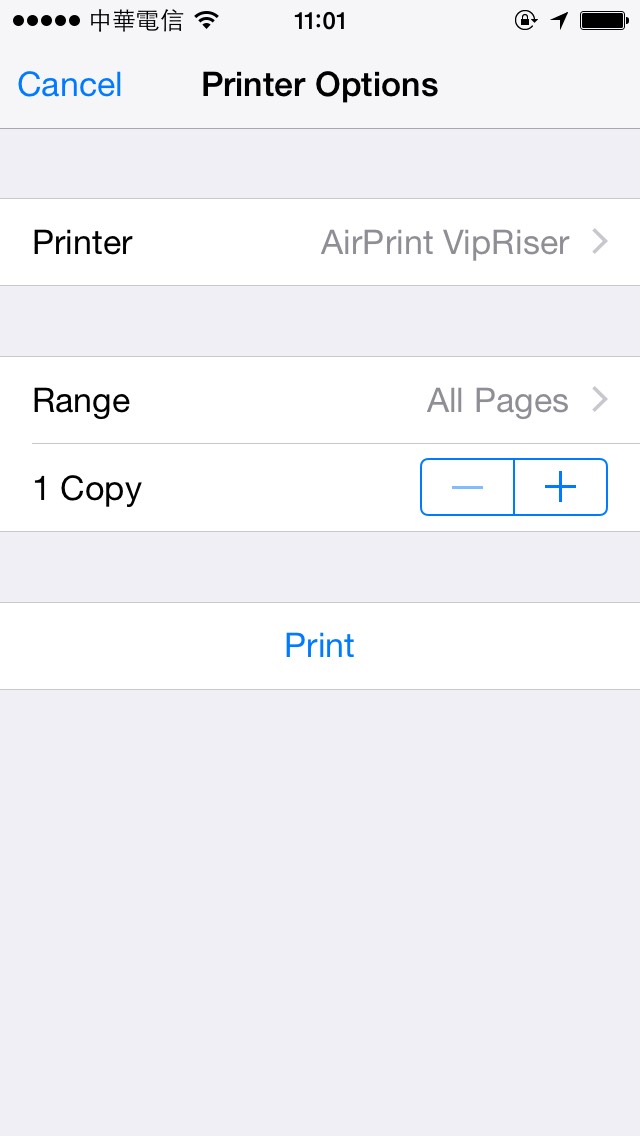
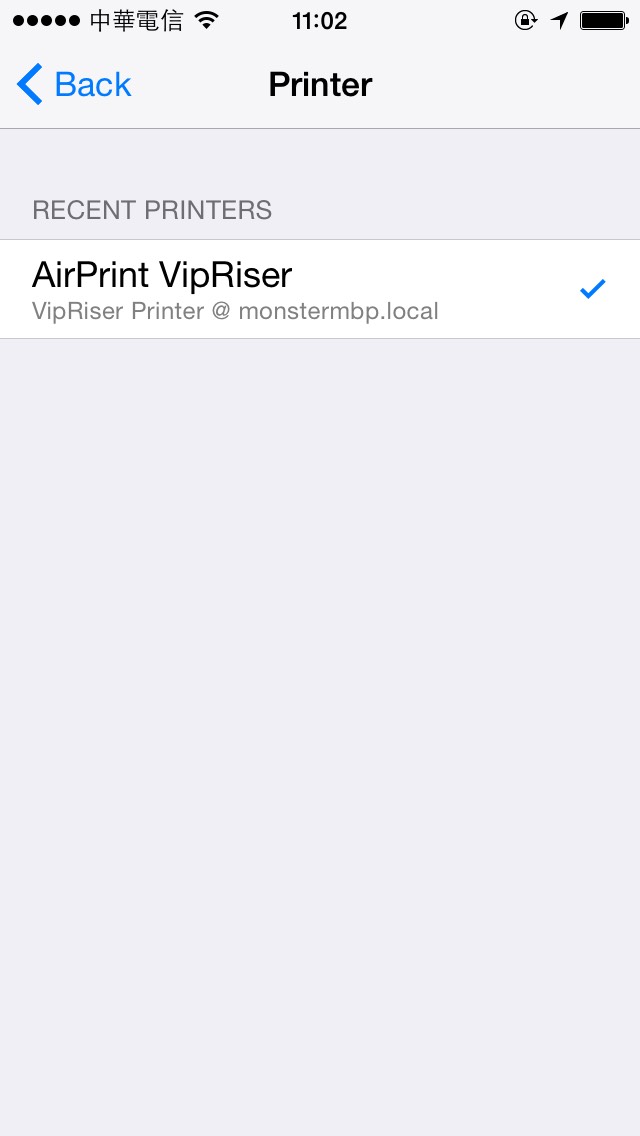
這時候支援 AirPrint 的 App 就可以透過 WiFi 搜尋到剛剛分享出來的 AirPrint VipRiser 印表機:
按下 Print 按鈕之後,剛剛設定的資料夾就會多出一個 PDF 檔案囉!