GitLab 上如何註冊Runner
在軟體的世界裡,有著不少的前人分享並提供經驗,造成後人的方便,例如CI/CD(持續整合部屬)
秉著練習的精神,以及嘗鮮的心態,採用GitLab 上的Runner 達成CI的功能
本次的目標是,如何在GitLab環境底下註冊一個Runner
環境
- Windows Server
- GitLab
- Runner
步驟
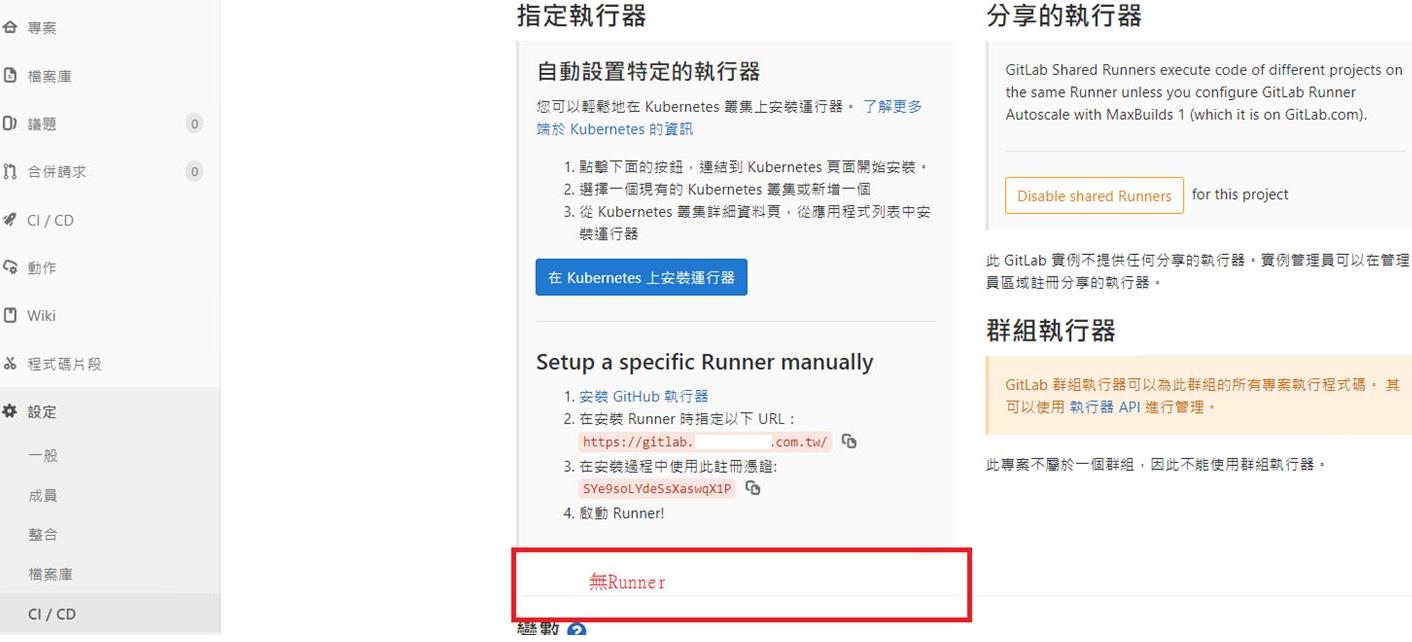
指定的專案中從設定裡找尋CI/CD並檢查是否有Runner,要記得抄下註冊憑證後面會用到
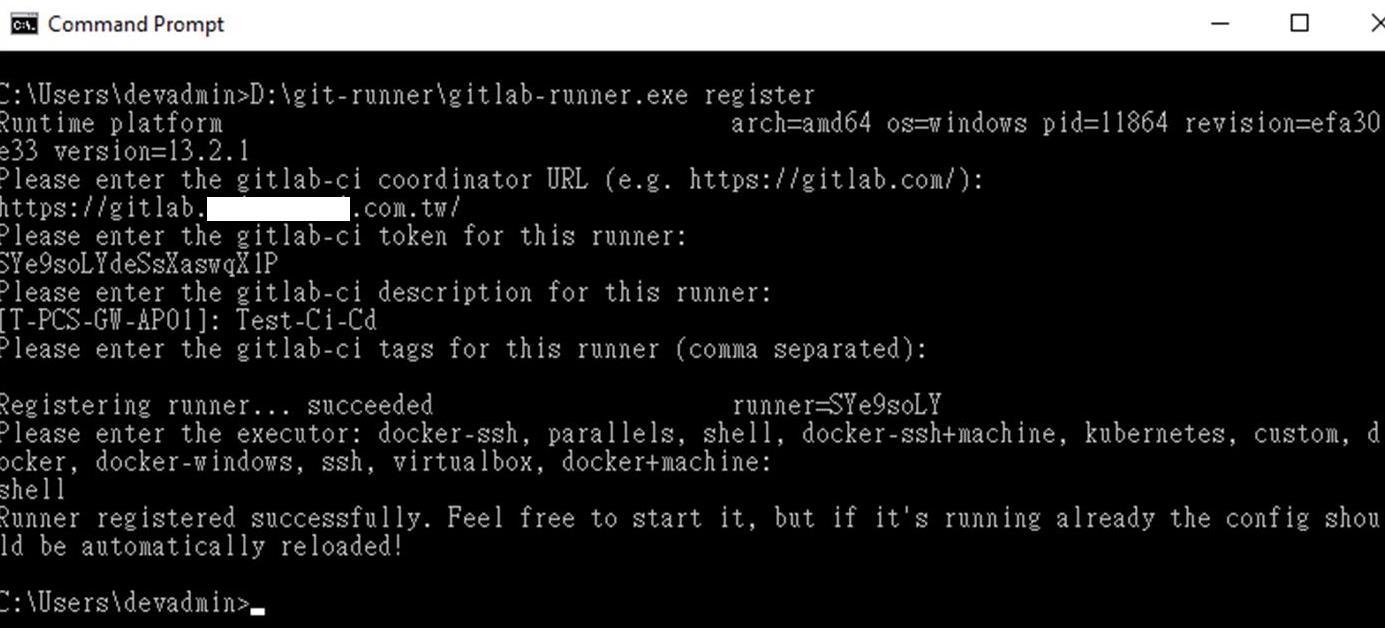
執行下列指令
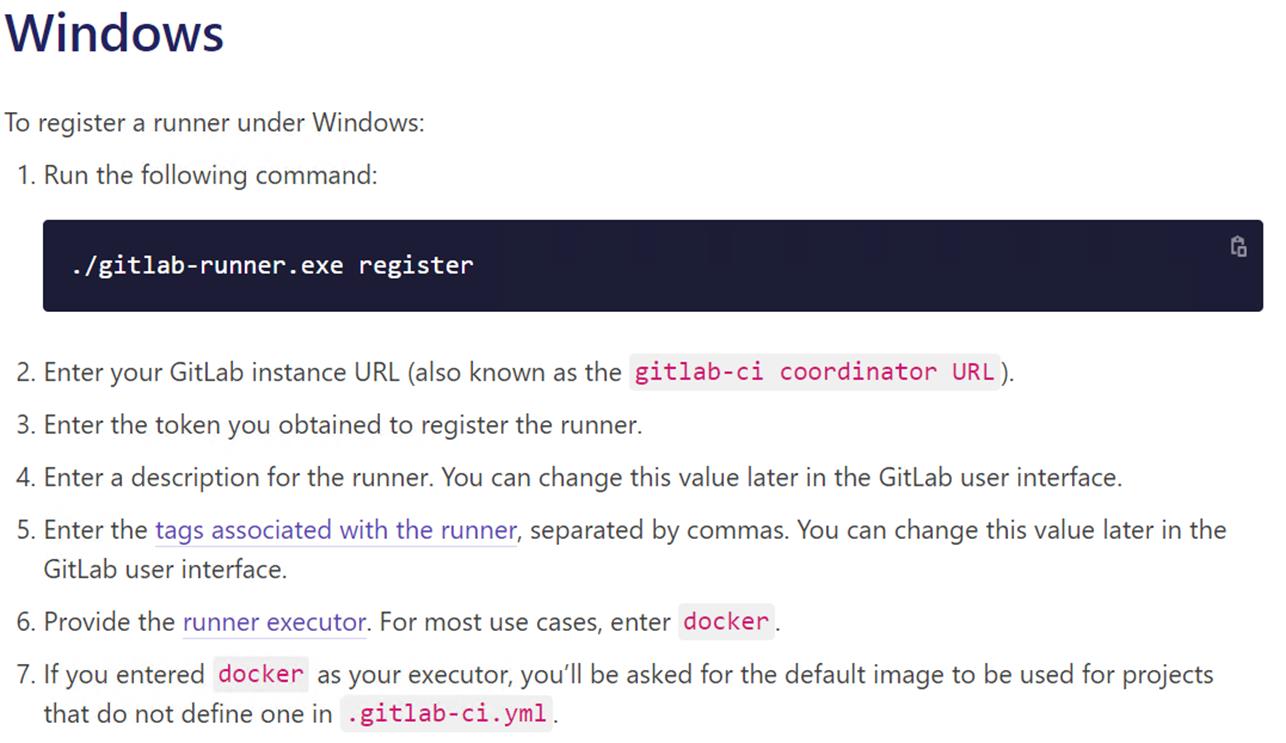
Please enter the gitlab-ci coordinator URL (e.g. https://gitlab.com )
在安裝 Runner 時指定 URL: https://gitlab.example.com.tw/

Please enter the gitlab-ci token for this runner
在安裝過程中使用此註冊憑證: SYe9soLYdeSsXaswqX1P

Token Please enter the gitlab-ci description for this runner
專案名稱

Please enter the gitlab-ci tags for this runner (comma separated):
可設定tag,用來區隔不同runner,例如:build-tag

runner Please enter the executor: ssh, docker+machine, docker-ssh+machine, kubernetes, docker, parallels, virtualbox, docker-ssh, shell:
windows的環境請輸入:shell
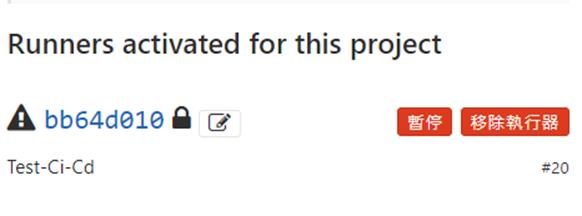
註冊完成後再回到GitLab 設定檢查CI/CD(這裡看到驚嘆號,表示需要重啟一下Runner,否則無法使用)
進入Runnerr環境底下檢查config,並檢查是否有剛註冊成功的Token,並將shell 改成powershell方便使用
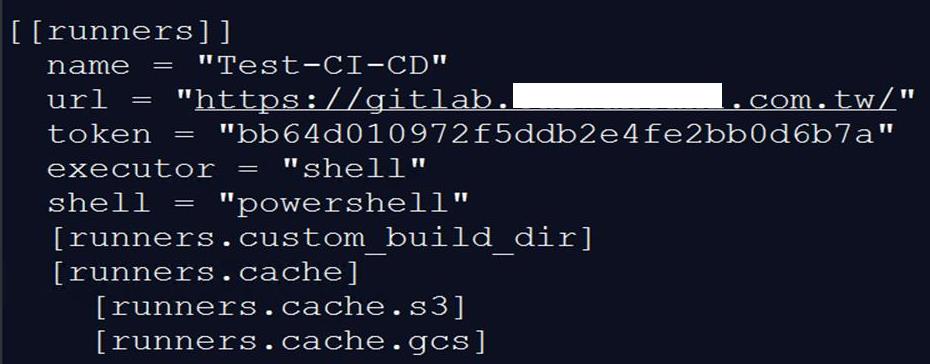
提醒: Runner環境底下檢查config是否有新增剛建立的Token,如果沒有其實可以從config中新增上去
資料參考來源