環境:Windows 10, Windows 10 Iot Core, Raspberry Pi, Visual Studio 2015
本文介紹 使用 Raspberry Pi 2 /Windows IOT Core 讀取 DHT22 的溫、濕度資訊
之前讀取 DHT11/22 時,是透過 Arduino 來讀取。
但這樣還蠻不方便的,所以有人寫了 C++ 的函式庫可以讓我們拿來使用,
請從「porrey/dht (github)」下載程式碼,而 Windows IoT Core 程式是放在 dht/source/Windows 10 IoT Core/DHT Solution/ 目錄。
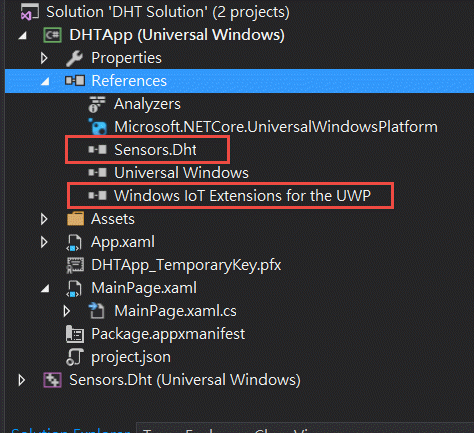
Sensors.Dht 就是 C++ 的函式庫,所以我們新增一個 UWP 程式,
加入 Windows IoT Extensions for the UWP 及 Sensors.Dht 專案參考,如下,
然後放 4 個 TextBlock,分別放 溫度、濕度及錯誤及成功次數資訊,如下,
<Page
    x:Class="DHTApp.MainPage"
    xmlns="http://schemas.microsoft.com/winfx/2006/xaml/presentation"
    xmlns:x="http://schemas.microsoft.com/winfx/2006/xaml"
    xmlns:local="using:DHTApp"
    xmlns:d="http://schemas.microsoft.com/expression/blend/2008"
    xmlns:mc="http://schemas.openxmlformats.org/markup-compatibility/2006"
    mc:Ignorable="d" Width="Auto">

    <StackPanel Background="{ThemeResource ApplicationPageBackgroundThemeBrush}">
        <TextBlock x:Name="lblTemperature" Text="Temperature" HorizontalAlignment="Center" FontSize="24" ></TextBlock>
        <TextBlock x:Name="lblHumidity" Text="Humidity" HorizontalAlignment="Center" FontSize="24"></TextBlock>
        <TextBlock x:Name="lblLog" Text="Loginfo..."></TextBlock>
        <TextBlock x:Name="lblReadingInfo" Text="" Foreground="#FFFD0303"></TextBlock>
    </StackPanel>
</Page>
而程式一開始就先設定 GPIO 及 每 1.5 秒讀取 DHT 的資料,然後更新到畫面上,如下,
public sealed partial class MainPage : Page
{
	private GpioPin _pin = null;
	private Dht22 _dht = null;
	private DhtReading reading = new DhtReading();
	private DispatcherTimer timer;
	const int DATA_PIN = 4; //GPIO 4
	private int _SuccessCount = 0;
	private int _FailCount = 0;
	public MainPage()
	{
		this.InitializeComponent();

		timer = new DispatcherTimer();
		timer.Interval = TimeSpan.FromMilliseconds(1500);
		timer.Tick += Timer_Tick;

		_pin = GpioController.GetDefault().OpenPin(DATA_PIN, GpioSharingMode.Exclusive);
		if(_pin != null)
		{
			_dht = new Dht22(_pin, GpioPinDriveMode.Input);
			timer.Start();
		}
	}

	private async void Timer_Tick(object sender, object e)
	{
		timer.Stop();
		try
		{
			reading = await _dht.GetReadingAsync().AsTask();
			if (reading.IsValid)
			{
				var temperature = Convert.ToSingle(reading.Temperature);
				var humidity = Convert.ToSingle(reading.Humidity);
				lblTemperature.Text = string.Format("{0:0.0} °C", temperature);
				lblHumidity.Text = string.Format("{0:0.0} %", humidity);
				_SuccessCount++;
			}
			else
			{
				lblLog.Text = "reading fail";
				_FailCount++;
			}
		}
		catch (Exception ex)
		{
			lblLog.Text = ex.ToString();
			_FailCount++;
		}
		finally
		{
			timer.Start();
		}
		lblReadingInfo.Text = $"Success Count:{_SuccessCount}, Fail Count:{_FailCount}";
	}
}
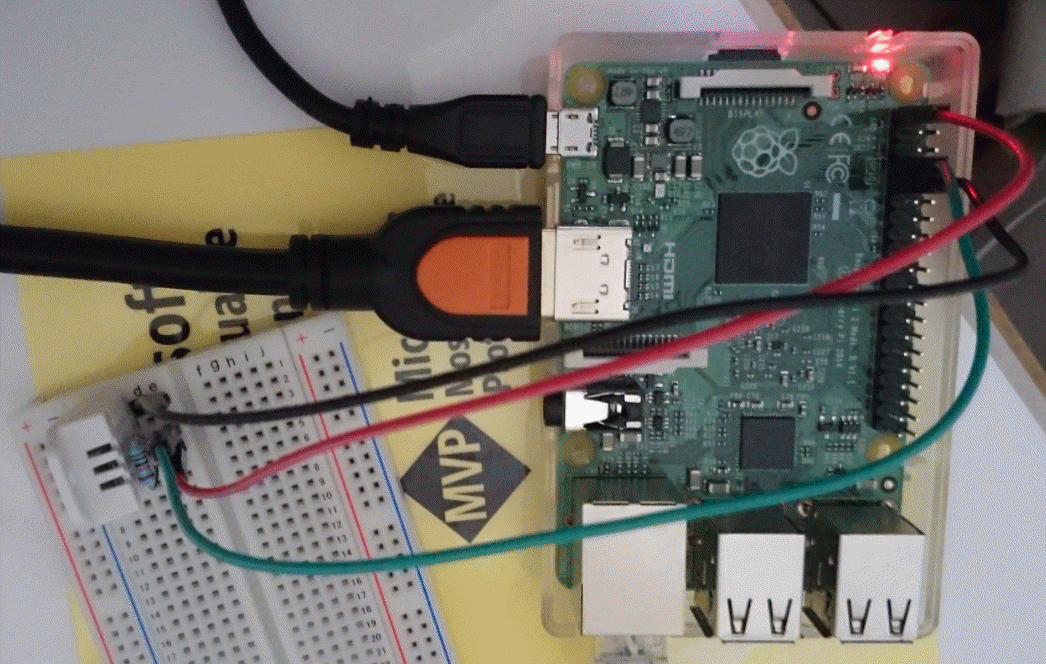
而 DHT22 的接法,可以參考「DHT11 /DHT22 Temperature Sensor」,如下,
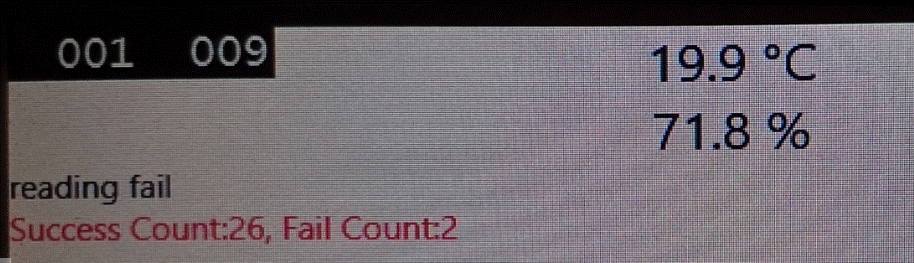
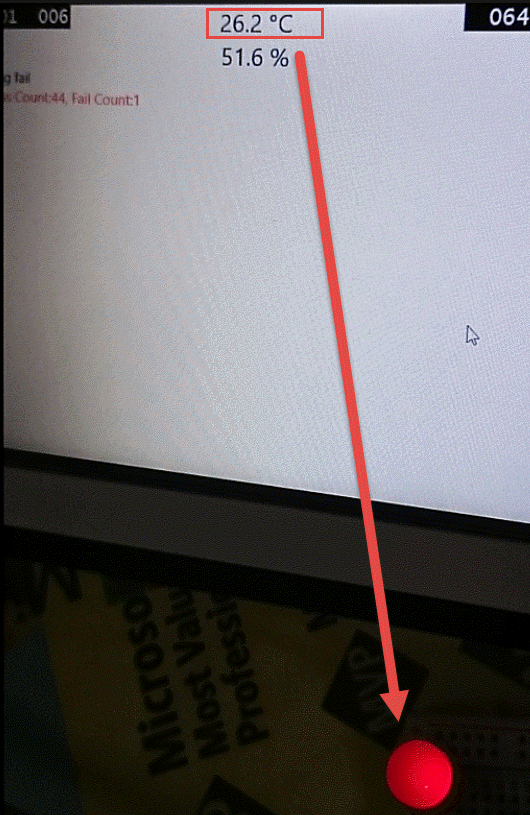
所以執行起來的畫面如下,
當然,我們可以再加入 LED (GPIO 27) 並在程式中判斷溫度大於某個值,LED就亮起來,如下,
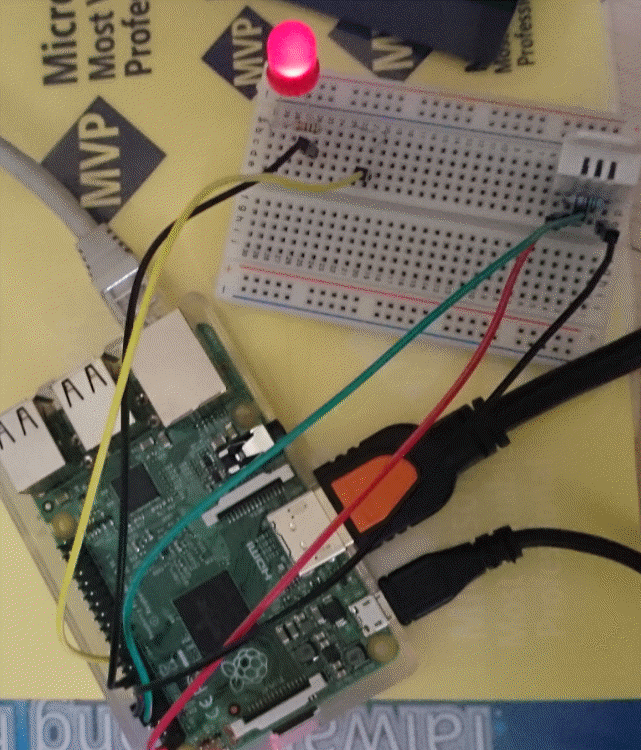
筆者在測試 DHT 22 是使用吹風機來測試,並不像 DS18B20 那麼方便測試。
所以程式俢改如下,
public sealed partial class MainPage : Page
{
	private GpioPin _pin = null;
	private Dht22 _dht = null;
	private DhtReading reading = new DhtReading();
	private DispatcherTimer timer;
	const int DATA_PIN = 4; //GPIO 4
	private int _SuccessCount = 0;
	private int _FailCount = 0;

	//for led
	private GpioPin _pinLED = null;
	private int LED_PIN = 27; //GPIO 27

	public MainPage()
	{
		this.InitializeComponent();

		timer = new DispatcherTimer();
		timer.Interval = TimeSpan.FromMilliseconds(1500);
		timer.Tick += Timer_Tick;
		InitGPIO();
		if (_pin != null)
		{
			_dht = new Dht22(_pin, GpioPinDriveMode.Input);
			timer.Start();
		}
	}

	private void InitGPIO()
	{
		GpioController gpio = GpioController.GetDefault();
		if (gpio == null)
		{
			_pin = null;
			lblLog.Text = "There is no GPIO controller on this device.";
			return;
		}
		_pin = gpio.OpenPin(DATA_PIN, GpioSharingMode.Exclusive);

		_pinLED = gpio.OpenPin(LED_PIN);
		_pinLED.Write(GpioPinValue.High);
		_pinLED.SetDriveMode(GpioPinDriveMode.Output);
	}

	private async void Timer_Tick(object sender, object e)
	{
		timer.Stop();
		try
		{
			reading = await _dht.GetReadingAsync().AsTask();
			if (reading.IsValid)
			{
				var temperature = Convert.ToSingle(reading.Temperature);
				var humidity = Convert.ToSingle(reading.Humidity);
				lblTemperature.Text = string.Format("{0:0.0} °C", temperature);
				lblHumidity.Text = string.Format("{0:0.0} %", humidity);
				_SuccessCount++;
				//溫度大於 23 就亮燈(Low),否則就熄燈(High)
				_pinLED.Write(temperature > 23 ? GpioPinValue.Low : GpioPinValue.High);

			}
			else
			{
				lblLog.Text = "reading fail";
				_FailCount++;
			}
		}
		catch (Exception ex)
		{
			lblLog.Text = ex.ToString();
			_FailCount++;
		}
		finally
		{
			timer.Start();
		}
		lblReadingInfo.Text = $"Success Count:{_SuccessCount}, Fail Count:{_FailCount}";
	}
}
參考資料
DHT11 /DHT22 Temperature Sensor
Hi,
亂馬客Blog已移到了 「亂馬客 : Re:從零開始的軟體開發生活」
請大家繼續支持 ^_^
