企業之中有一堆的系統,而每個系統之間難免需要相互溝通。
例如在人事系統之中新增一名員工之後,可能需要呼叫企業的權限控管系統也去新增該名員工,並設定相關的作業,AD, Mail 等等工作。
本文將介紹使用 Microsoft ASP.NET WebHook Preview 來達到這樣子的功能 ...
像這種 A系統 有個事件要去呼叫其他系統的行為,就是一種 Publisher/Subscriber pattern,
我們可以使用 Microsoft ASP.NET WebHook 來幫我們處理掉復雜部份,讓我們著重在發佈及接收。
以下我們以產品增、刪、改的行為來示範,將訂閱資料存在 SQL Server之中,參考(Sending WebHooks with ASP.NET WebHooks Preview)。
1.建立 Receiver WebAPI 專案,Framework 請選擇 4.6 or 以上(取名為 WebHookDemo.Receiver)
1.1.新增一個簡單的 Web API 專案,驗證選取 Individual User Accounts。
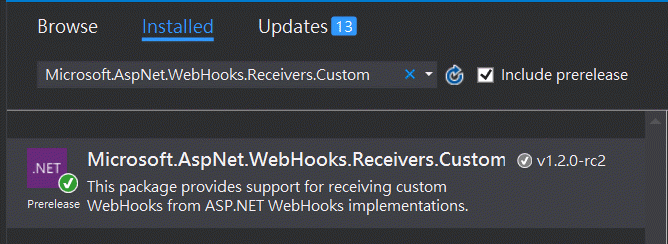
1.2.加入 Microsoft.AspNet.WebHooks.Receivers.Custom 這個 Nuget 套件
1.3.設定 Custom Receivers Web Hooks
在 WebApiConfig.cs 中的 Register 中,加入以下1行,
config.InitializeReceiveCustomWebHooks();
1.4.在 web.config 中設定 receiver 需要資訊,Secret的長度要在 32 ~ 128 之間。
<appSettings>
<add key="MS_WebHookReceiverSecret_Custom" value="12345678901234567890123456789012" />
</appSettings>
1.5.建立預設的 WebHookHandler
public class DefaultHookHandler : WebHookHandler
{
	public override Task ExecuteAsync(string receiver, WebHookHandlerContext context)
	{
		// Get data from WebHook
		CustomNotifications data = context.GetDataOrDefault<CustomNotifications>();

		// 如果這裡會處理太久的話,建議將資料放到 Queue 之中慢慢處理,先回傳 true
		//https://docs.asp.net/projects/webhooks/en/latest/receiving/handlers.html
		// Get data from each notification in this WebHook
		foreach (IDictionary<string, object> notification in data.Notifications)
		{
			var action = notification["Action"];
			JObject product = (JObject)notification["Product"];
		}
		return Task.FromResult(true);
	}
}
1.6.測試 Receiver 是否正常?
開啟 Browser 連到 http://localhost:[你專案使用的port]/api/webhooks/incoming/custom ,看看是否會出現以下的訊息,

2.建立 Sender 專案 (取名為 WebHookDemo.Sender)
2.1.新增一個簡單的 Web API 專案,Framework 請選擇 4.6 or 以上,驗證選取 Individual User Accounts。
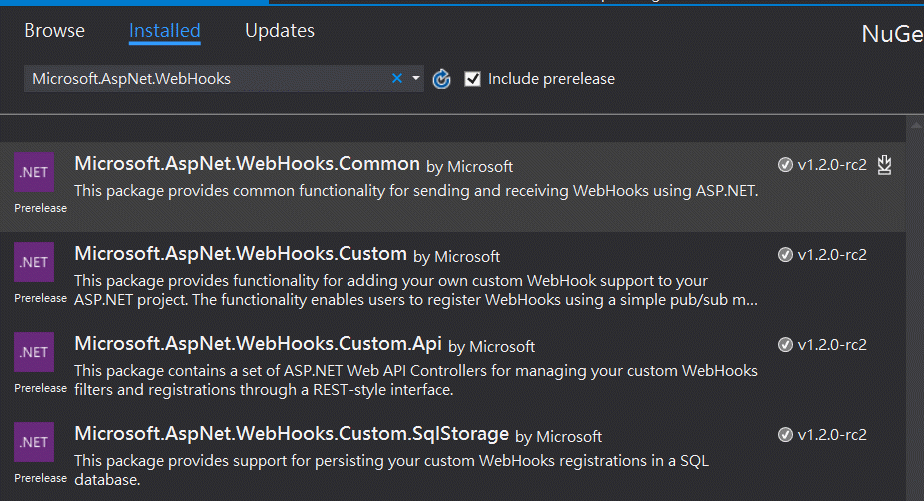
2.2.加入以下 3 個 Nuget 套件
Microsoft.AspNet.WebHooks.Custom
Microsoft.AspNet.WebHooks.Custom.SqlStorage
Microsoft.AspNet.WebHooks.Custom.Api
2.3.設定 Custom Web Hooks
在 WebApiConfig.cs 中的 Register 中,加入以下3行,
config.InitializeCustomWebHooks();
config.InitializeCustomWebHooksSqlStorage();
config.InitializeCustomWebHooksApis();
2.4.定義可以發佈的 Event,這裡我們使用 Add、Update及Delete,如下,
public class ProductHookProvider : IWebHookFilterProvider
{
	private readonly Collection<WebHookFilter> filters = new Collection<WebHookFilter>
	{
		new WebHookFilter { Name = "Add", Description = "Add Product happened."},
		new WebHookFilter { Name = "Update", Description = "Update Product happened."},
		new WebHookFilter { Name = "Delete", Description = "Delete Product happened."}
	};

	public Task<Collection<WebHookFilter>> GetFiltersAsync()
	{
		return Task.FromResult(this.filters);
	}
}
2.5.新增 Product 類別
public class Product
{
	public int Id { get; set; }

	public string Name { get; set; }

	public decimal Price { get; set; }

	public string Description { get; set; }
}
2.6.新增 ProductController ,並在對應的 Action 之中發佈 Event
[Authorize]
public class ProductsController : ApiController
{
	static List<Product> _Products = new List<Product>()
	{
		new Product {Id=1, Name="RADAR", Price=1000M , Description="人事系統"},
		new Product {Id=2, Name="RMTECH", Price=2010M , Description="RM系統"}
	};

	// GET api/Products
	public IEnumerable<Product> Get()
	{
		return _Products;
	}

	// GET api/Products/1
	public IHttpActionResult Get(int id)
	{
		var product = _Products
						.Where(p => p.Id == id)
						.FirstOrDefault();
		if (product == null)
			return NotFound();
		return Ok(product);
	}

	// POST api/Products
	public async Task Post([FromBody]Product product)
	{
		if (product != null)
		{
			var newProductId = _Products.Max(p => p.Id) + 1;
			product.Id = newProductId;
			product.Description += DateTime.Now.ToString("hh:mm:ss");
			_Products.Add(product);
			await this.NotifyAsync("Add", new { Product = product });
		}

	}

	// PUT api/Products/1
	public async Task Put(int id, [FromBody]Product product)
	{
		_Products.RemoveAll(p => p.Id == id);
		product.Description += DateTime.Now.ToString("hh:mm:ss");
		_Products.Add(product);
		await this.NotifyAsync("Update", new { Product = product });
	}

	// DELETE api/values/5
	public async Task<IHttpActionResult> Delete(int id)
	{
		var product = _Products
						.Where(p => p.Id == id)
						.FirstOrDefault();
		if (product == null)
			return NotFound();
		product.Description += DateTime.Now.ToString("hh:mm:ss");
		await this.NotifyAsync("Delete", new { Product = product });
		return Ok();
	}
}
2.7.設定 WebHooks 儲存 (詳細可參考:Updates to Microsoft ASP.NET WebHooks Preview)
2.7.1.先在 web.config 的 connectionStrings 中新增 name 為 MS_SqlStoreConnectionString 的連線字串,如下,
<connectionStrings>
<!-- 請依您要存放的DB設定正確的連線字串 -->
<add name="MS_SqlStoreConnectionString" connectionString="Data Source=localhost;Initial Catalog=WebHooks;Integrated Security=True" providerName="System.Data.SqlClient" />
</connectionStrings>
2.7.2.透過 EF Code First Migrations 來建立資料庫,如下,
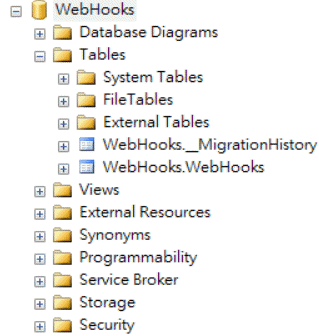
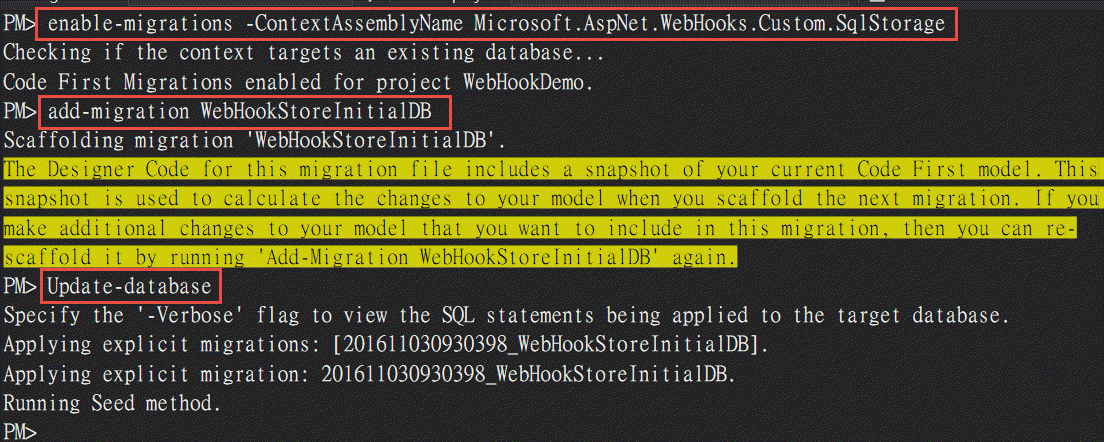 會建立名為 WebHooks 的 Database,如下,
2.8.設定簡單的 Form 驗證(只為了測試方便,請使用您系統預設的驗證方式)
因為訂閱之前需要有User登入,為了測試,所以使用 Form 驗證 (詳細可參考:如何在 ASP.NET Web API 2 專案中啟用表單驗證 (Forms Authentication)),
2.8.1.HomeController中新增About Action直接登入,如下,
public ActionResult About()
{
	FormsAuthentication.SetAuthCookie("rainmaker", false);
	ViewBag.Message = "Your application description page.";
	return RedirectToActionPermanent("Index");
}
2.8.2.設定允許使用 Form 驗證
在 WebApiConfig.cs 中的 Register Method 中,Mark以下2行
//config.SuppressDefaultHostAuthentication();
//config.Filters.Add(new HostAuthenticationFilter(OAuthDefaults.AuthenticationType));
2.8.3.Web.config 中啟用 Form 驗證,並註解 <remove name="FormsAuthentication" /> ,如下,
<authentication mode="Forms">
<forms name=".ASPXAUTH" loginUrl="/Home/About" />
</authentication>
<modules>
<!--<remove name="FormsAuthentication" />-->
</modules>
2.9.設定訂閱/取消訂閱及 Trigger Event(subscribe中的 url ,請填入 Receiver 的 url ) ,如下,
在 Views/Home/Index.cshtml 中 jumbotron div 下面,加入以下的設定
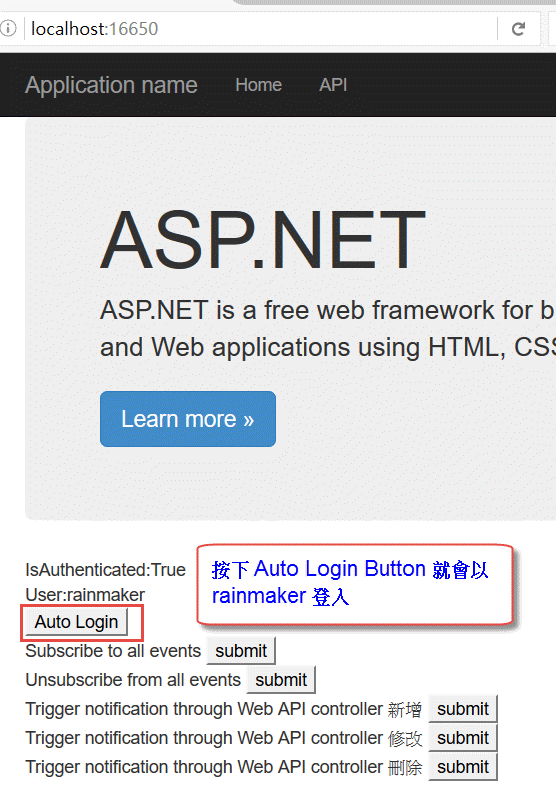
IsAuthenticated:@User.Identity.IsAuthenticated
<br />
User:@User.Identity.Name
<br />
@using (Html.BeginForm("About", "Home"))
{
    <input name="login" type="submit" value="Auto Login" />
}

<form onsubmit="return subscribe()">
    Subscribe to all events <input type="submit" value="submit">
</form>
<form onsubmit="return unsubscribe()">
    Unsubscribe from all events <input type="submit" value="submit">
</form>

<form onsubmit="return notifyAdd()">
    Trigger notification through Web API controller 新增 <input type="submit" value="submit">
</form>

<form onsubmit="return notifyUpdate()">
    Trigger notification through Web API controller 修改 <input type="submit" value="submit">
</form>

<form onsubmit="return notifyDelete()">
    Trigger notification through Web API controller 刪除 <input type="submit" value="submit">
</form>


<script>
function subscribe() {
    $.ajax({
        type: "POST",
        url: "/api/webhooks/registrations",
        data: JSON.stringify({
            WebHookUri: "http://localhost:1161/api/webhooks/incoming/custom",
            Secret: "12345678901234567890123456789012",
            Description: "My first WebHook!"
        }),
        contentType: "application/json; charset=utf-8",
        dataType: "json",
        success: function(data, status) { alert(status); },
        failure: function(errMsg) { alert(errMsg); }
    });
    return false;
}

function unsubscribe() {
    $.ajax({
        url: "/api/webhooks/registrations",
        type: 'DELETE',
        success: function (data, status) { alert(status); },
        failure: function(errMsg) { alert(errMsg); }
    });
    return false;
}

function notifyAdd() {
    $.post("/api/products",
    {
        "Name": "新產品",
        "Price": 303.3,
        "Description": "新產品 測試"
    },
    function (data, status) { alert("Data: " + data + "\nStatus: " + status); });
    return false;
}

function notifyUpdate() {
    $.ajax({
        url: "/api/products/4",
        type: 'PUT',
        data: {
            "Id": 4,
            "Name": "新產品-修改",
            "Price": 303.3,
            "Description": "新產品 測試 * 修改"
        },
        success: function (data, status) { alert(status); },
        failure: function (errMsg) { alert(errMsg); }
    });
    return false;
}

function notifyDelete() {
    $.ajax({
        url: "/api/products/4",
        type: 'DELETE',
        success: function (data, status) { alert(status); },
        failure: function (errMsg) { alert(errMsg); }
    });
    return false;
}
</script>
3.開始測試看是不是接得到,
同時啟動2個專案(Receiver請使用Debug進入以方便驗證),來測試訂閱/取消訂閱及發佈Event
3.1. Sender 先用 Form 驗證登入,如下,
如果沒有先登入的話,得到 Authorization has been denied for this request. 的訊息。
3.2.按下訂閱,可以檢查 DB 中有一筆的訂閱資料,如下,

3.3. 測試新增/修改/刪除,是否會正常跑到 Receiver 專案中的 DefaultHookHandler 之中。

參考資料
Sending WebHooks with ASP.NET WebHooks Preview
Updates to Microsoft ASP.NET WebHooks Preview
Getting Started with Microsoft ASP.NET WebHook Preview
如何在 ASP.NET Web API 2 專案中啟用表單驗證 (Forms Authentication)
Hi,
亂馬客Blog已移到了 「亂馬客 : Re:從零開始的軟體開發生活」
請大家繼續支持 ^_^
