摘要:Kinect SDK 初探(下)-a
- Face Tracking Basics-WPF
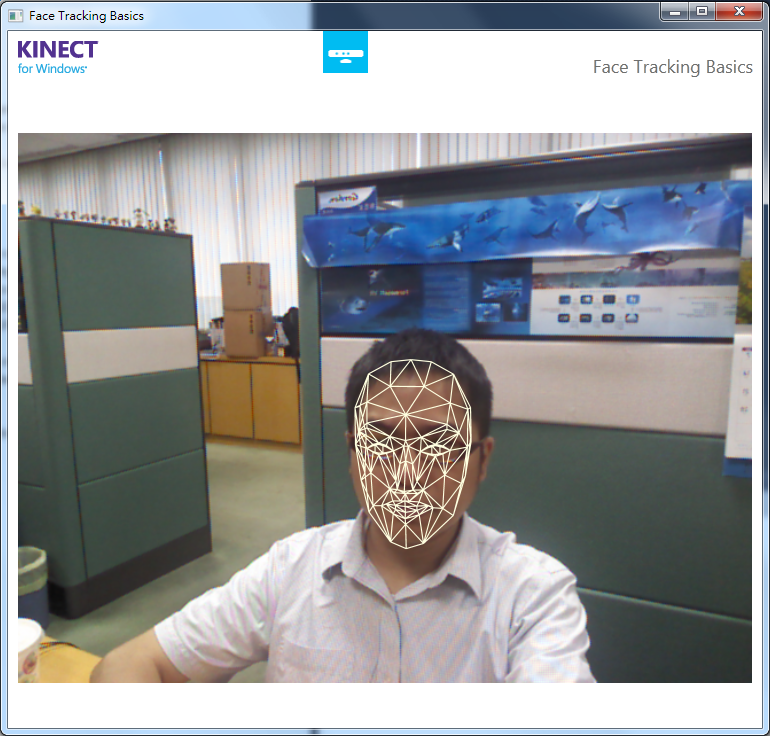 這邊我只看到一個OnRender的程式
但是我不知道為什麼它不是依照Event的方式處理
        protected override void OnRender(DrawingContext drawingContext)
        {
            base.OnRender(drawingContext);
            foreach (SkeletonFaceTracker faceInformation in this.trackedSkeletons.Values)
            {
                faceInformation.DrawFaceModel(drawingContext);
            }
        }
反正會有人Call就是了
- Face Tracking Visualization
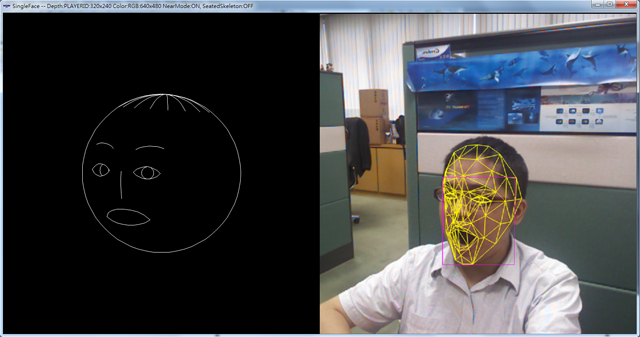
這個看起來很有趣
首先先找找FaceTrackLib.h在那裏 C:\Program Files\Microsoft SDKs\Kinect\Developer Toolkit v1.5.1\inc
它幫我們Link到FaceTrackLib.lib 這部份已經變成binary, 裏面做了什麼不得而知
左邊的蛋頭大約用了199個特徵點, 轉換成極座標畫在球體上
再來, 研究一下它用什麼樣的繪圖引擎...它畫出蛋頭和人臉上的網格
pColorImg->DrawLine(p3DMdl[eht.pEdges[i] >> 16], p3DMdl[eht.pEdges[i] & 0xFFFF], color, 1);
因為它的DrawLine Function都是在IFTImage這個物件中, 這個物件又已經變成binary了, 所以也沒辦法追查(不重要)
- Green Screen D2D
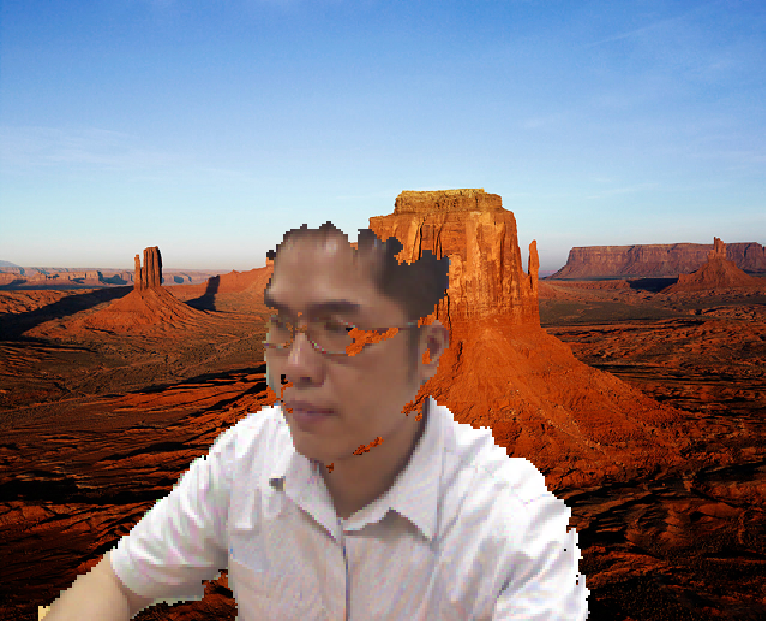
這個程式看起來很遜.... 理論上應該可以以長時間學習不動的背景 把人切出來
結果它只是去看DepthBuffer, 把判斷成Player的Pixel切出來
        int outputIndex = 0;
        LONG* pDest;
        LONG* pSrc;

        // loop over each row and column of the color
        for (LONG y = 0; y < m_colorHeight; ++y)
        {
            for (LONG x = 0; x < m_colorWidth; ++x)
            {
                // calculate index into depth array
                int depthIndex = x/m_colorToDepthDivisor + y/m_colorToDepthDivisor * m_depthWidth;

                USHORT depth  = m_depthD16[depthIndex];
                USHORT player = NuiDepthPixelToPlayerIndex(depth);

                // default setting source to copy from the background pixel
                pSrc  = (LONG *)m_backgroundRGBX + outputIndex;

                // if we're tracking a player for the current pixel, draw from the color camera
                if ( player > 0 )
                {
                    // retrieve the depth to color mapping for the current depth pixel
                    LONG colorInDepthX = m_colorCoordinates[depthIndex * 2];
                    LONG colorInDepthY = m_colorCoordinates[depthIndex * 2 + 1];

                    // make sure the depth pixel maps to a valid point in color space
                    if ( colorInDepthX >= 0 && colorInDepthX < m_colorWidth && colorInDepthY >= 0 && colorInDepthY < m_colorHeight )
                    {
                        // calculate index into color array
                        LONG colorIndex = colorInDepthX + colorInDepthY * m_colorWidth;

                        // set source for copy to the color pixel
                        pSrc  = (LONG *)m_colorRGBX + colorIndex;
                    }
                }

                // calculate output pixel location
                pDest = (LONG *)m_outputRGBX + outputIndex++;

                // write output
                *pDest = *pSrc;
            }
        }

        // Draw the data with Direct2D
        m_pDrawGreenScreen->Draw(m_outputRGBX, m_colorWidth * m_colorHeight * cBytesPerPixel);
Player = NuiDepthPixelToPlayerIndex(depth); 就是去讀該Pixel屬於那一個Player的函式
- Skeleton Basics-WPF
this.sensor.SkeletonStream.TrackingMode = SkeletonTrackingMode.Seated; 將骨架設定成只偵測上半身, 對在辦公桌前測試的工程師是一件好事
繪圖程式在
            this.imageSource = new DrawingImage(this.drawingGroup);

            // Display the drawing using our image control
            Image.Source = this.imageSource;
用一個DrawingImage和一個DrawingGroup合作, 再從DrawingGroup拿出一個DrawingContext
using (DrawingContext dc = this.drawingGroup.Open())
drawingContext就可以 DrawLine(drawPen, this.SkeletonPointToScreen(joint0.Position), this.SkeletonPointToScreen(joint1.Position));
但是感覺偵測的結果有點糟....(是週遭環境不好嗎?)
 |
|
