使用者介面測試
1 前言
在測試計劃與手動測試的強化討論到如何產生測試計劃並依其執行手動測試, 在Visual Stdio 2010之測試方面還有另外一項令人驚豔的強化,即重新打造的使用者介面測試(Coded UI Test),原有的Web Test已被取代,在VSTS2008我們僅能測試Web介面,而且不包含Java Script部份,新的Coded UI Test不僅支援原有的Web介面,還能測試WPF與Win Form等介面,Silverlight部份會正式版之後才會納入。
2 流程
錄製Coded UI Test的流程有兩種,第一種跟過去的Web Test沒兩樣,即先新建一個Test,執行錄製動作,開始操作您欲錄製的應用程式介面,結束後停止錄製,筆者先略過這個流程;第二種流程比較特別,流程如下:
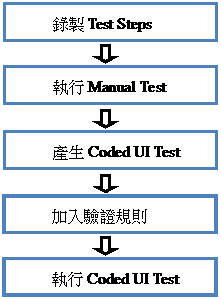 |
圖1 Manual Test轉換成Coded UI Test流程
其中第一、二個步驟在上一篇已經介紹過了,即Test Plan的Test Steps,以及依Test Steps執行的Manual Test,筆者要介紹的是運用Manual Test的測試結果轉換成自動化測試的Coded UI Test。
3 執行Manual Test
上一期的範例是一個簡單的計算器Web版,筆者將它改成WFP版,功能維持相同,以測試它是否真能錄製WPF介面,首先請先啓動您欲測試的應用程式,如下圖:
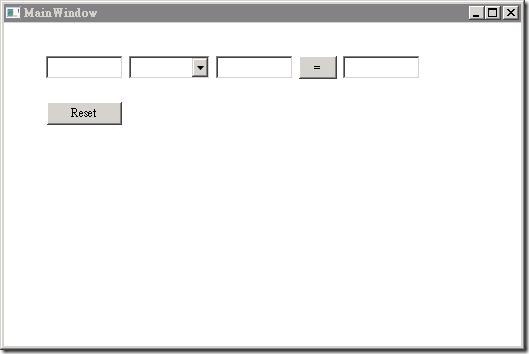
圖2 計算器WPF版
接著啓動MTM(Microsoft Test Manager 2010),切換至”Test”頁面,點選上一期所錄製的Test Case,按[Run]鈕以執行Manual Test,會出現Start Test畫面,跟上一期展示不同的是,請將”Create action recording”選項勾起,再按[Start Test]鈕。接下來即依Test Steps執行測試動作,唯一差異是畫面上方多了一個”Currently Recording”小視窗:
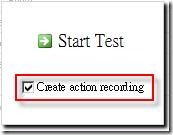
圖3 Start Test畫面
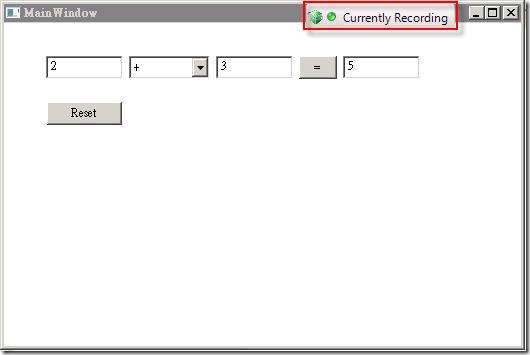
圖4 執行測試畫面
錄製完成後,您可以按Test Runner工具列之[Play All]鈕重新播放剛才的測試步驟,以驗證是否正確錄製,若沒問題請按[Save & Close]鈕結束。
4 產生Coded UI Test
下一步請開啓VS2010 Ultimate,新建一Test Project,然後新增一Coded UI Test,請選擇”Use an existing action recording”項目,如下圖:
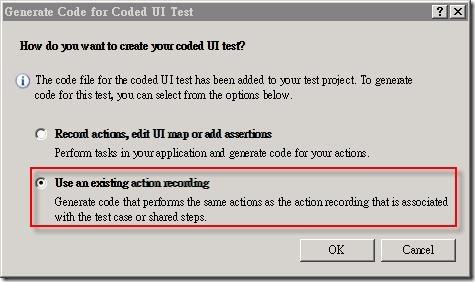
圖5 選擇”Use an existing action recording”項目
接著找出之前錄製成功的測試結果對應的Test Case ID,如下圖:
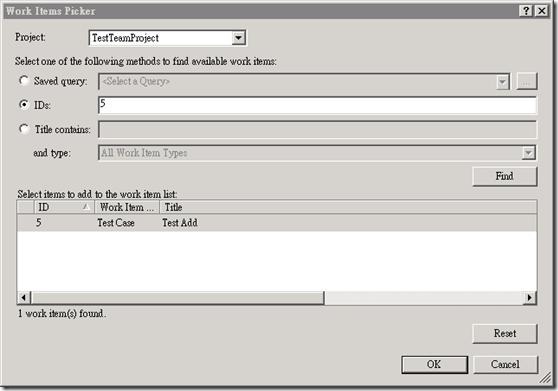
圖6 找出對應的Test Case ID
Visual Studio會依Test Case裡所包含的Action Recording內容自動產生Coded UI Test程式碼:
[DataSource("Microsoft.VisualStudio.TestTools.
DataSource.TestCase", "http://win2008test:8080/tfs/
defaultcollection;TestTeamProject", "5",
DataAccessMethod.Sequential), TestMethod]
public void CodedUITestMethod1()
{
// To generate code for this test, select "Generate
Code for Coded UI Test" from the shortcut menu and
select one of the menu items.
this.UIMap.PushbuttonReset();
this.UIMap.InputnumberTextBox1Params.
TextBox1EditText = TestContext.DataRow
["TextBox1"].ToString();
this.UIMap.InputnumberTextBox1();
this.UIMap.SelectoperatorDropDownList1Params.
ComboBox1ComboBoxSelectedItem = TestContext.
DataRow["DropDownList1"].ToString();
this.UIMap.SelectoperatorDropDownList1();
this.UIMap.InputnumberTextBox2Params.
TextBox2EditText = TestContext.DataRow
["TextBox2"].ToString();
this.UIMap.InputnumberTextBox2();
this.UIMap.Pushbutton();
}
從上述程式碼可以看出整個操作動作都是針對UIMap這個類別,它也是由Visual Studio所產生出來的,您可以在UI.Designer.cs看到相關的屬性。
5 加入驗證規則
接下來要加上驗證(Assertion)才算完整,在您的測試Method之最下方,按右鍵選擇”Generate Code for Coded UI Test” -> “Use Coded UI Test Builder”,請拖曳如下圖的標靶鈕至您想要驗證的欄位,如[=]鈕右方的TextBox,請注意,拖曳至目標位置時,它會將此控制項用藍色框框標註起來。

圖7 Coded UI Test Builder畫面
接著會出現”Add Assertions”視窗,請選擇欲驗證的屬性,如Text,再按[Add an assertion]鈕,最後輸入Comparator與Comparison Value,如下圖:
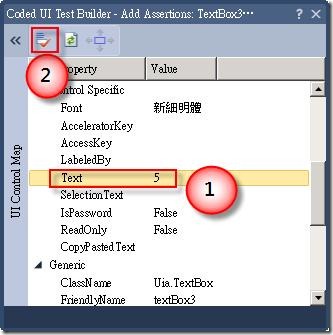
圖8 Add Assertions視窗
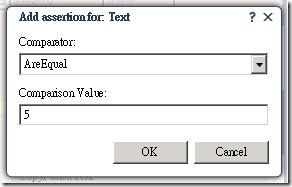
圖9 輸入Comparator與Comparison Value
最後按[Generate Code]鈕,會要求輸入欲產生的驗證Method名稱,完成後會在您的Test Method多呼叫一個驗證Method。
您可以如同VSTS2008透過Test View執行您的Coded UI Test。

圖10 Coded UI Test執行結果
6 結語
新版的使用者介面測試(Coded UI Test)相信是許多測試人員眾所期待的功能,微軟終於做到了!能夠廣泛支援各式使用者介面,希望Sliverlight部份能儘早支援,因為它是目前很受歡迎的技術。
7 參考資料
- MSDN Testing the Application:http://msdn.microsoft.com/en-us/library/ms182409(VS.100).aspx
- Creating Automated Tests:http://msdn.microsoft.com/en-us/library/dd380755(VS.100).aspx
.jpg)