[ASP.net MVC 4] 多張上傳圖片預覽,不使用Session和js套件的方式
前言
先看完成後的效果
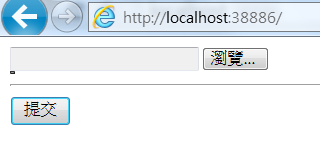
Step 1. 一開始的畫面

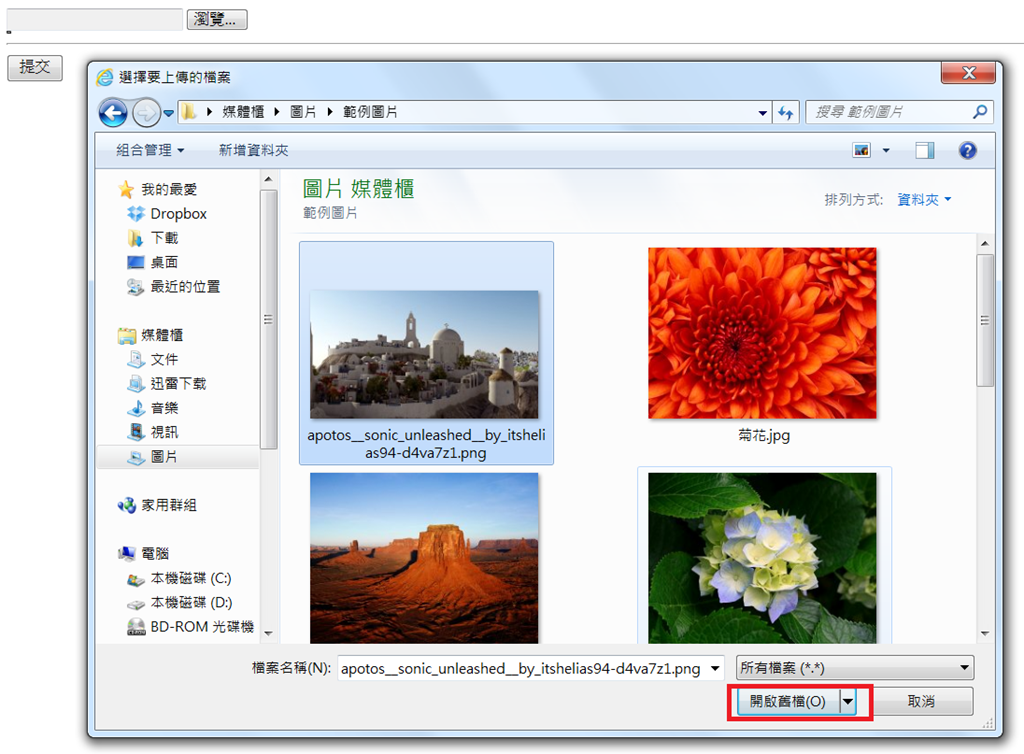
Step 2. 選擇一張圖片

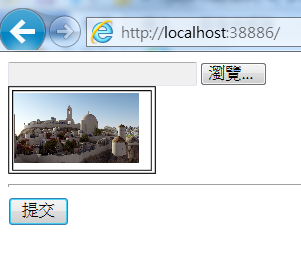
Step 3. 網頁自動上傳

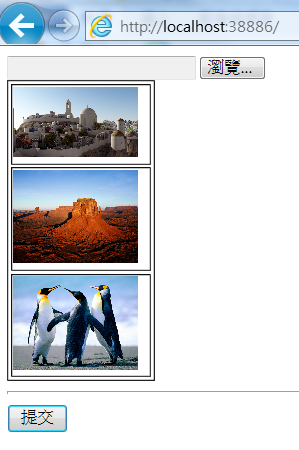
Step 4. 一直重覆Step 2,圖片有累加效果,這可不是用啥jQuery上傳套件做的~

只要會點簡單jQuery或javascript語法即可完成
不用把資訊先存放在Session(之前的醜文:[ASP.net MVC] 上傳檔案時不要連同表單都提交)
也不必用到「圖片轉base64字串,<img>的src指向base64字串」這招(此法有些瀏覽器不支援)
用到的觀念只有之前介紹的文章:[ASP.net MVC 4] Controller如何取得Html Table裡各個Cell格子的值
實作
Models資料夾加入
MemberViewModel.cs
using System;
using System.Collections.Generic;
using System.Linq;
using System.Web;

namespace MvcApplicationHtmlTableBind.Models
{
    public class MemberViewModel
    {
        /// <summary>
        /// 加這個,當MemberViewModel new出來時,存取PhotoFileNames才不會發生NULL例外
        /// </summary>
        private List<string> _PhotoFileNames = new List<string>();
        /// <summary>
        /// 多張大頭照的檔案名稱
        /// </summary>
        public List<string> PhotoFileNames { get { return this._PhotoFileNames; } set { this._PhotoFileNames = value; } }

    }
}
Controllers資料夾加入HomeController
using System;
using System.Collections.Generic;
using System.IO;
using System.Linq;
using System.Web;
using System.Web.Mvc;
using MvcApplicationHtmlTableBind.Models;

namespace MvcApplicationHtmlTableBind.Controllers
{
    public class HomeController : Controller
    {

        /// <summary>
        /// 一開始進入表單
        /// </summary>
        /// <returns></returns>
        [HttpGet]
        public ActionResult Index()
        {
            MemberViewModel vm = new MemberViewModel();
            return View(vm);
        }

        /// <summary>
        /// 表單提交
        /// </summary>
        /// <param name="act"></param>
        /// <param name="vm"></param>
        /// <param name="myFile"></param>
        /// <returns></returns>
        [HttpPost]
        public ActionResult Index(string act, MemberViewModel vm, HttpPostedFileBase myFile)
        {
            switch (act)
            {
                case "upload"://上傳照片
                    this.UploadPhoto(vm, myFile);
                    break;
                case "post"://存檔,寫DB
                    //照片已在剛剛就上傳到Server
                    this.LogWrite(vm);
                    break;
            }


            return View(vm);
        }
        /// <summary>
        /// 寫Log查看表單post的結果
        /// </summary>
        /// <param name="vm"></param>
        private void LogWrite(MemberViewModel vm)
        {
            //寫Log - 檔案名稱(知道上傳的檔案名稱,就可以寫DB了)
            using (FileStream fs = new FileStream(@"D:\myLog.txt", FileMode.Append, FileAccess.Write, FileShare.ReadWrite))
            {
                StreamWriter sw = new StreamWriter(fs);

                foreach (string strPhotoFileName in vm.PhotoFileNames)
                {
                    sw.WriteLine(strPhotoFileName);
                }
                sw.Close();
            }

        }
        /// <summary>
        /// 上傳單一照片
        /// </summary>
        /// <param name="vm"></param>
        /// <param name="myFile"></param>
        private void UploadPhoto(MemberViewModel vm, HttpPostedFileBase myFile)
        {
            if (myFile != null && myFile.ContentLength > 0)//使用者有選擇照片檔案
            {
                //新的檔案名稱
                string strFileName = Guid.NewGuid().ToString() + Path.GetExtension(myFile.FileName);
                //存放檔案路徑
                string strFilePath = Server.MapPath("~/UploadFiles/" + strFileName);
                //檔案存放在Server
                myFile.SaveAs(strFilePath);
                //ViewModel的PhotoFileNames累加一張圖片名稱
                vm.PhotoFileNames.Add(strFileName);
            }
        }

    }
}
Views資料夾加入Home資料夾並加入Index.cshtml
@model MvcApplicationHtmlTableBind.Models.MemberViewModel
@{
Layout = null;
}
<!DOCTYPE html>
<html>
<head>
<meta name="viewport" content="width=device-width" />
<title>Index</title>
<script type="text/javascript" src="@Url.Content("~/Scripts/jquery-2.0.0.min.js")"></script>
<!--加入一些自己手寫的簡單jQuery語法-->
<script type="text/javascript">
//上傳照片
function uploadPhoto() {
$("input[name='act']").attr("value", "upload");
//表單提交
$("form[name='myForm']").submit();
}
//提交表單
function postForm() {
//更改flag
$("input[name='act']").attr("value", "post");
}
</script>
</head>
<body>
@using (Html.BeginForm("Index", "Home", FormMethod.Post, new { enctype = "multipart/form-data", name = "myForm" }))
{
<!--紀錄是要上傳照片還是資料存檔-->
<input type="hidden" value="" name="act" />
<!--選擇檔案後,表單自動提交-->
<input type="file" value="選擇大頭照" name="myFile" onchange="uploadPhoto();" />
<table border="1" >
@for (int i = 0; i < Model.PhotoFileNames.Count; i++)
{
<tr>
<td>
<!--預覽圖-->
<img src="@(Url.Content("~/UploadFiles/")+Model.PhotoFileNames[i])" width="100" />
@Html.HiddenFor(m => m.PhotoFileNames[i])
</td>
</tr>
}
</table>
<hr /><!--我是分隔線-->
<input type="submit" value="提交" onclick="postForm();" />
}
</body>
</html>
這樣就好了,很簡潔~
結語
雖說是多張預覽圖,但表單提交時,圖片早已丟到Server上
提交post只是把剛剛上傳圖片的檔名做最後確認寫入DB動作
如果使用者放棄,未提交的話,注意剛剛上傳的圖片就會變成垃圾圖片
不過有個好處,比起使用Session方式沒有Session逾期風險
本文範例檔下載,MSDN期滿為止
