access data through Entity Framework Core Database First in separate classlibrary project
嚴格來說,標題應該取名Code First from Database
.Net framework時期就有類似的玩意兒↓
前言
趁著.net Core 2剛推出,把最近從恆逸資訊上課的記憶抄寫下來,畢竟發現.net Core好多事情要自己手動處理
以前.Net Framework要透過Entity Framework存取資料,大概步驟如下:
1.專案先透過NuGet加入Entity Framework套件參考
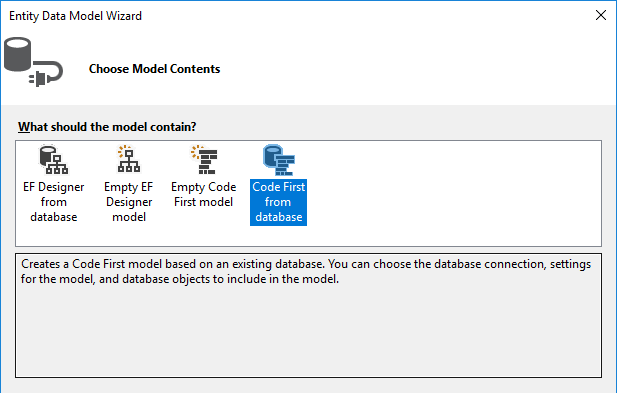
2.專案加入*.edmx (EF Designer from Database First開發方式)
3.把自己的XXXContext物件(有繼承DbContext類別的那個) new出來即可存取資料。
以上對話框點一點選一選就完成了XD
然而在.net Core變成....
1.專案先透過NuGet加入Microsoft.EntityFrameworkCore.SqlServer套件參考(此為專門存取SqlServer用的Provider)
還有Microsoft.EntityFrameworkCore.Tools(此為從資料庫建立模型Class的用途)
如果是ASP.net Core 2的專案,上述兩個預設都已經加好在Microsoft.AspNetCore.All套件底下
如果是一般ClassLibrary專案則要自己手動加入那兩個套件。
2. .Net Core沒有 *.edmx檔,取而代之必須下指令產生一堆 *.cs模型
3.各種地方相依性注入(連線字串、XXXDbContext....等等)
4.由於已透過相依性注入取得物件,所以不必每次存取資料前都把XXXContext new出來,這一點倒是在Controller減少了些程式碼
實作
本文環境:Win10、Visual Studio 2017 15.5.5、SQL Server 2014 Developer Edition
以下Step by Step,照著做應該就可以建立出ASP.net Core 2網站透過另一個類別庫專案的Entity Framework Core 2來存取資料。
※ASP.net Core 3、.Net 5之後的專案大同小異,只差別在Startup.cs基本程式碼不一樣,未來就不累述了
1. 建立一個ASP.net Core 2乾淨的空白Web專案

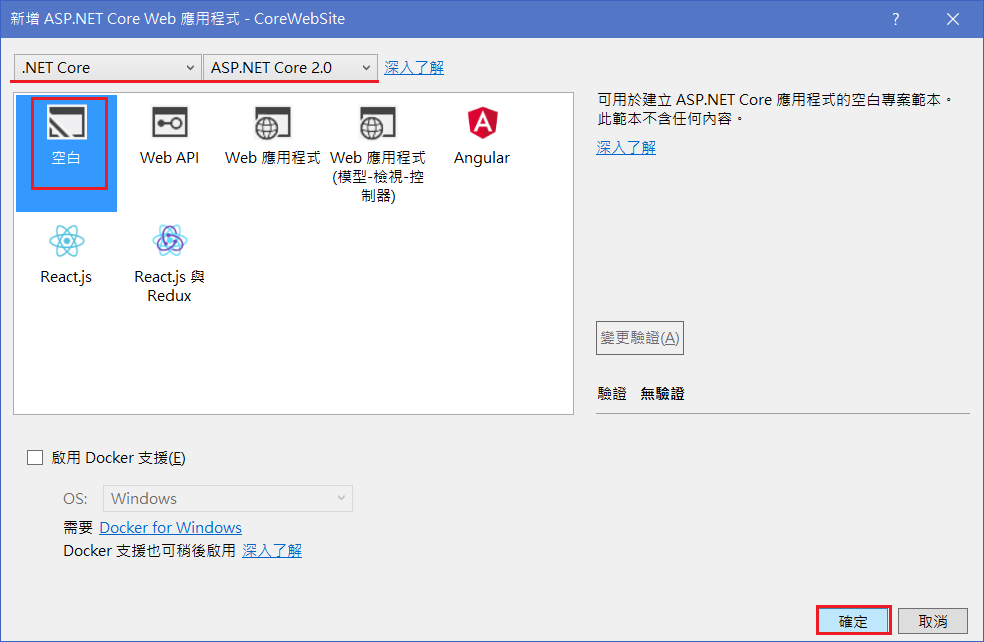
上述的Web應用程式範本為.net Core 2新推出的Razor Page架構,很像以前的asp,只是多了PageModel可以資料繫結
而它右邊的Web應用程式(模型-檢視-控制器)範本才是熟悉的MVC架構,這裡選「空白」,別讓Visual Studio多加其他有的沒的程式碼混淆視聽XD
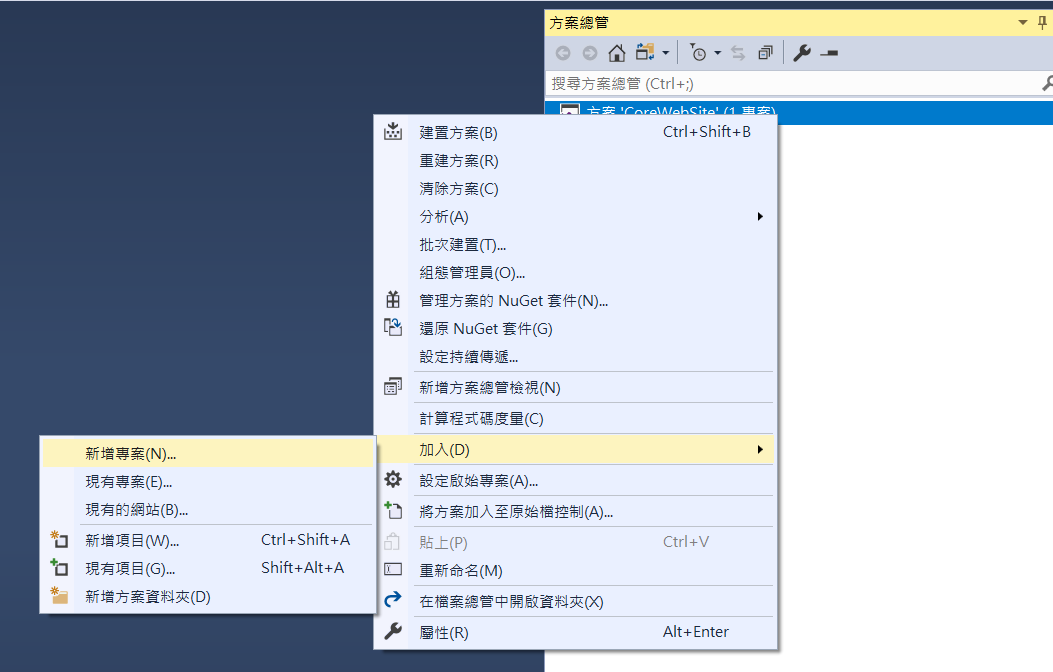
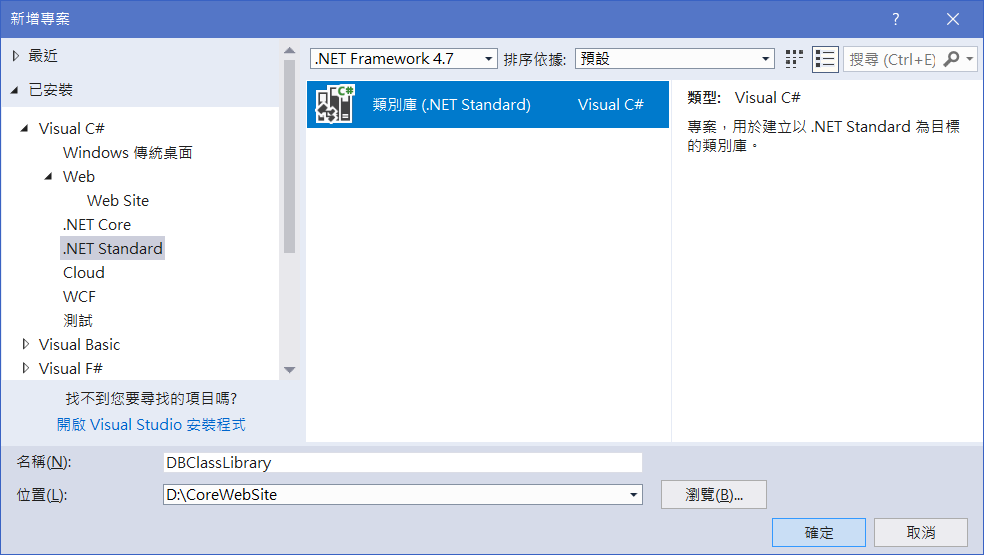
2.對著方案右鍵,加入新增.NET Standard類別庫專案(如此建置出來的類別庫才能供.net Core和.net framework兩邊使用)
※如果你很確定會用到這個DB Access的專案都是.Net Core的話,類別庫專案也是可以選擇.Net Core而非.Net Standard
此類別庫專案就是專門存放資料模型的專案
※.Net 5的話,目標Framework就一律選.Net 5吧
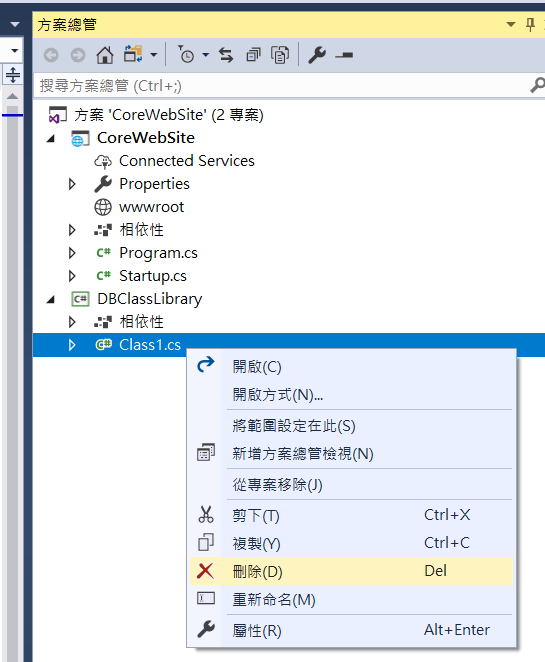
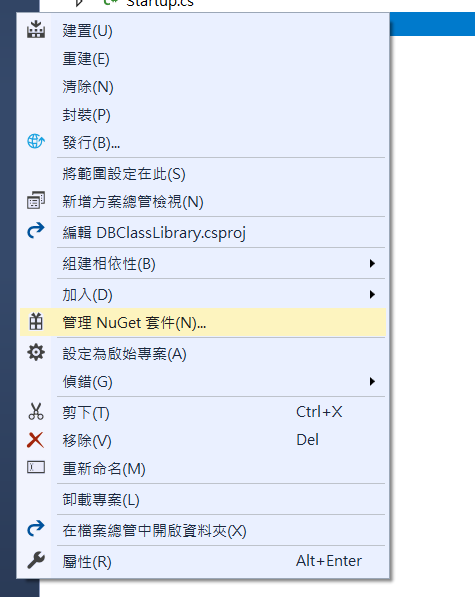
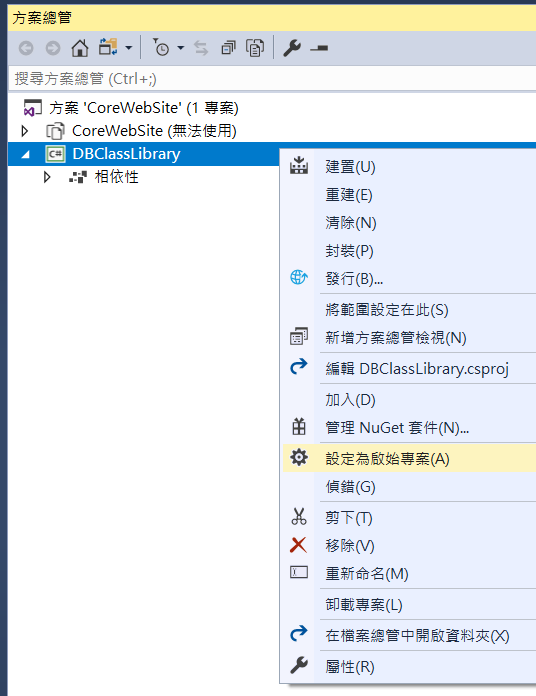
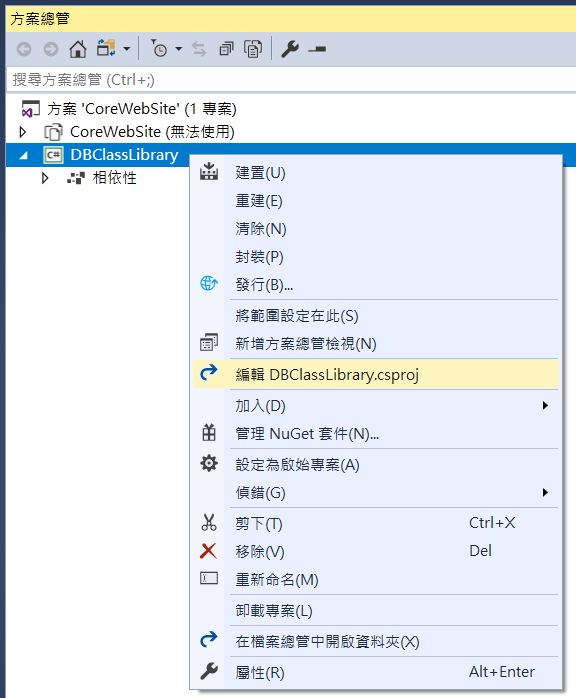
預設多出來的Class1.cs檔案可以刪除,然後對著ClassLibrary類別庫專案右鍵>管理NuGet套件
依序加入「Microsoft.EntityFrameworkCore.SqlServer」、「Microsoft.EntityFrameworkCore.Tools」這兩個套件
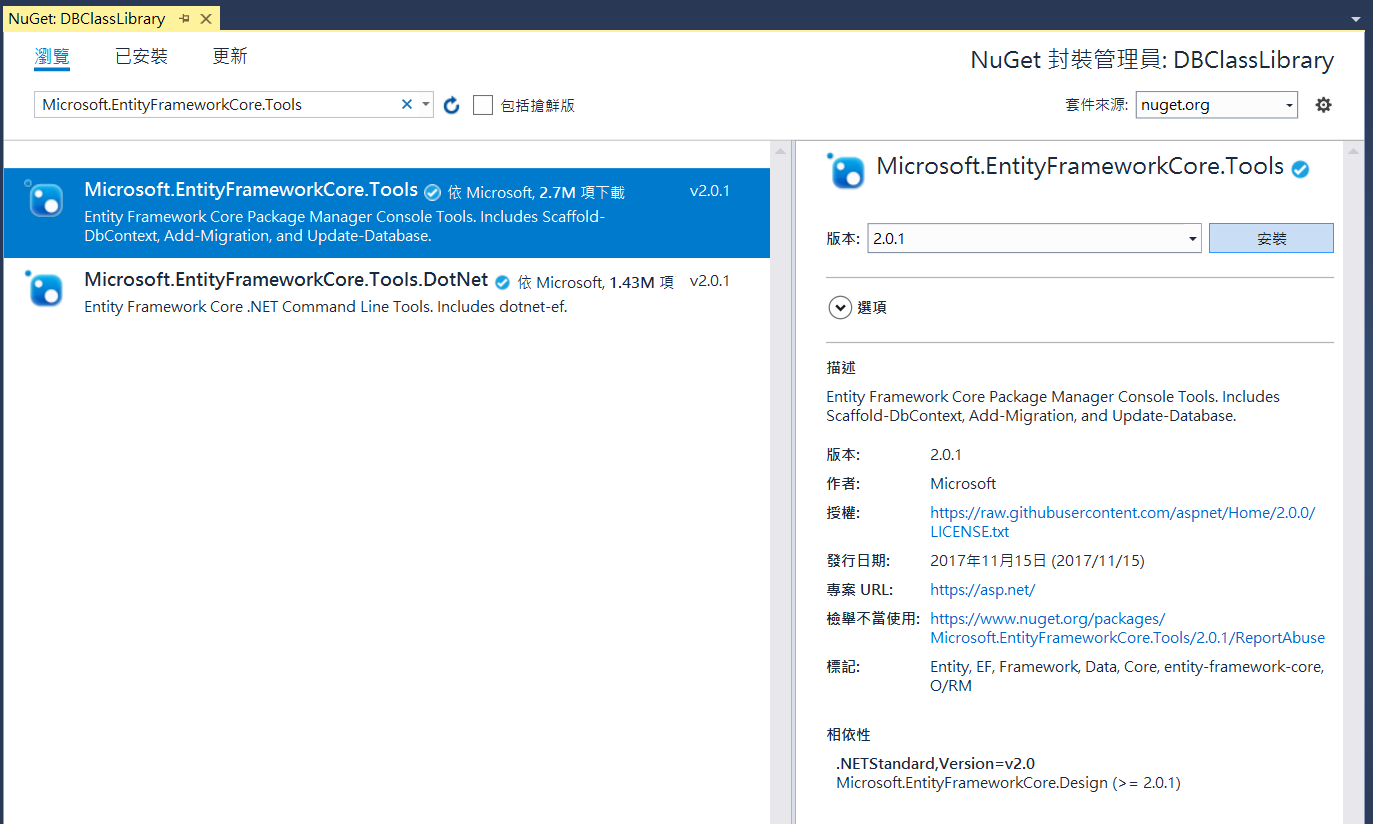
Microsoft.EntityFrameworkCore.Tools和Microsoft.EntityFrameworkCore.Tools.DotNet兩者都可以把DB轉成Class模型
只是差在後續Console指令下得不一樣
既然微軟官方寫Microsoft.EntityFrameworkCore.Tools
那就裝Microsoft.EntityFrameworkCore.Tools就好了
微軟官網:在 ASP.NET Core 上使用 EF Core 搭配現有資料庫的使用者入門
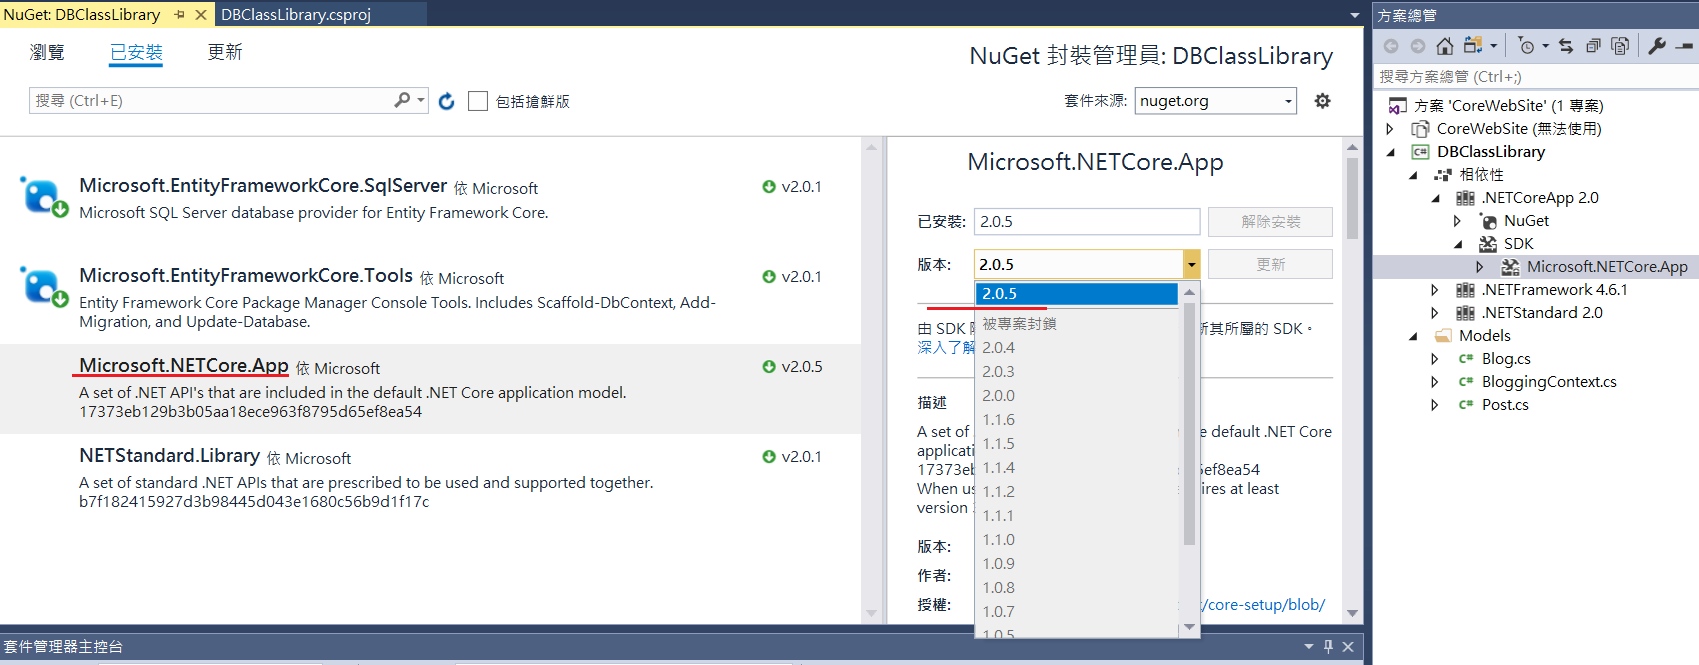
※2019-03-19 追記:透過Nuget加入兩個套件「Microsoft.EntityFrameworkCore.SqlServer」、「Microsoft.EntityFrameworkCore.Tools」記得版本都選擇相同↓
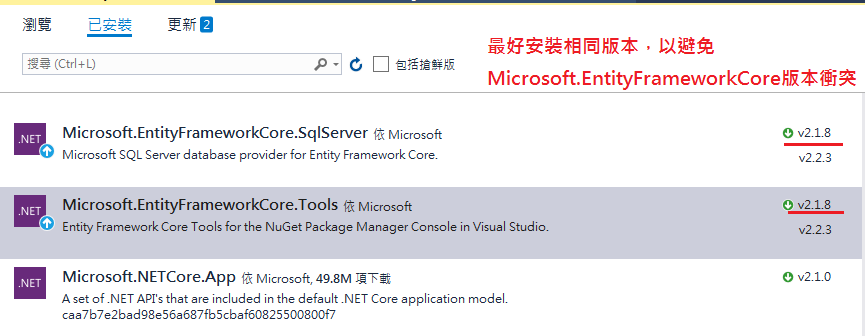
版本不同的話,應該會發生如下錯誤 ↓

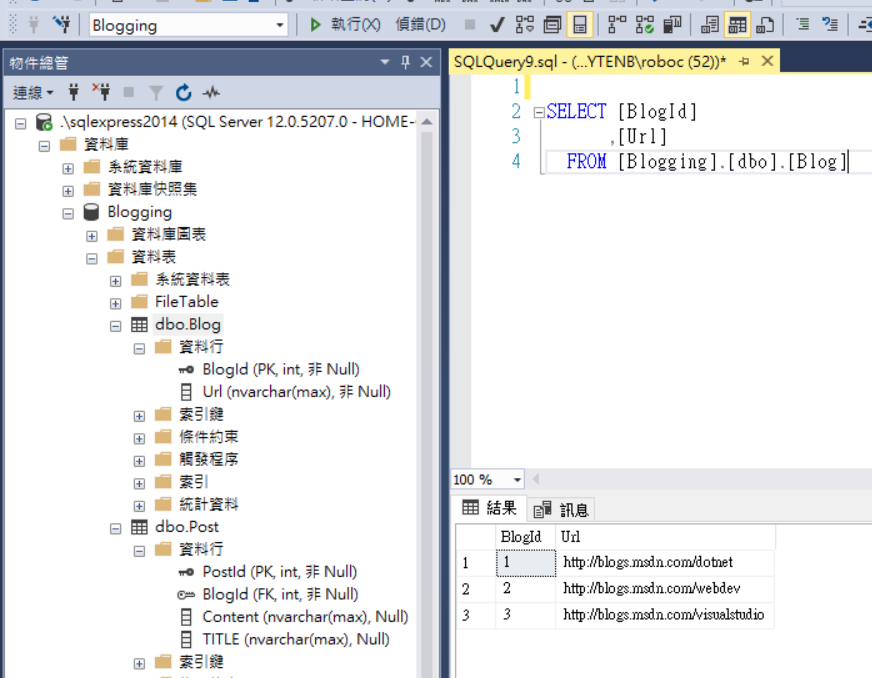
3.確認資料庫的資料準備好了
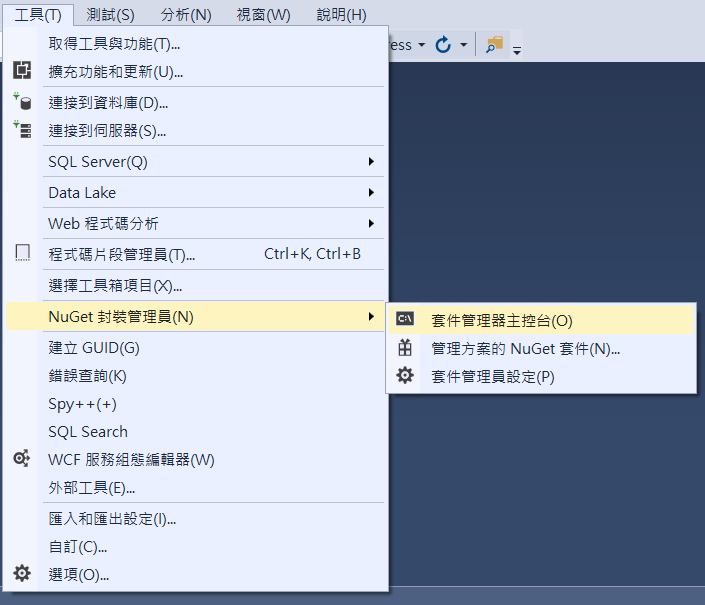
4.Visual Studo最上方的選單 工具>開啟套件管理器主控台,準備下指令
在主控台Consoel要下的指令↓
Scaffold-DbContext "Server=.\sqlexpress2014;Database=Blogging;Trusted_Connection=True;" Microsoft.EntityFrameworkCore.SqlServer -OutputDir Models -Force -UseDatabaseNames -Tables Blog,Post
Scaffold-DbContext為剛剛安裝Tools套件的指令,DB連線字串依自己情況決定
-OutputDir指定要輸出到專案根目錄下哪個資料夾,本文為Models資料夾
-Force為工具產出的.cs檔要強制覆寫現存檔案(DB欄位Schema異動後,就給這個)
-Tables參數,指定只需要載入哪些資料表(以逗號區隔),留意大小寫最好和DB裡一樣避免出現黃字警告,沒給-Tables參數的話,預設抓DB全部的Table
-UseDatabaseNames,程式碼產生出來的類別名稱要和資料庫裡的一模一樣
其它參數請見官網說明:Entity Framework Core 工具的參考-Visual Studio 中的套件管理員主控台
以下是執行完指令後的結果
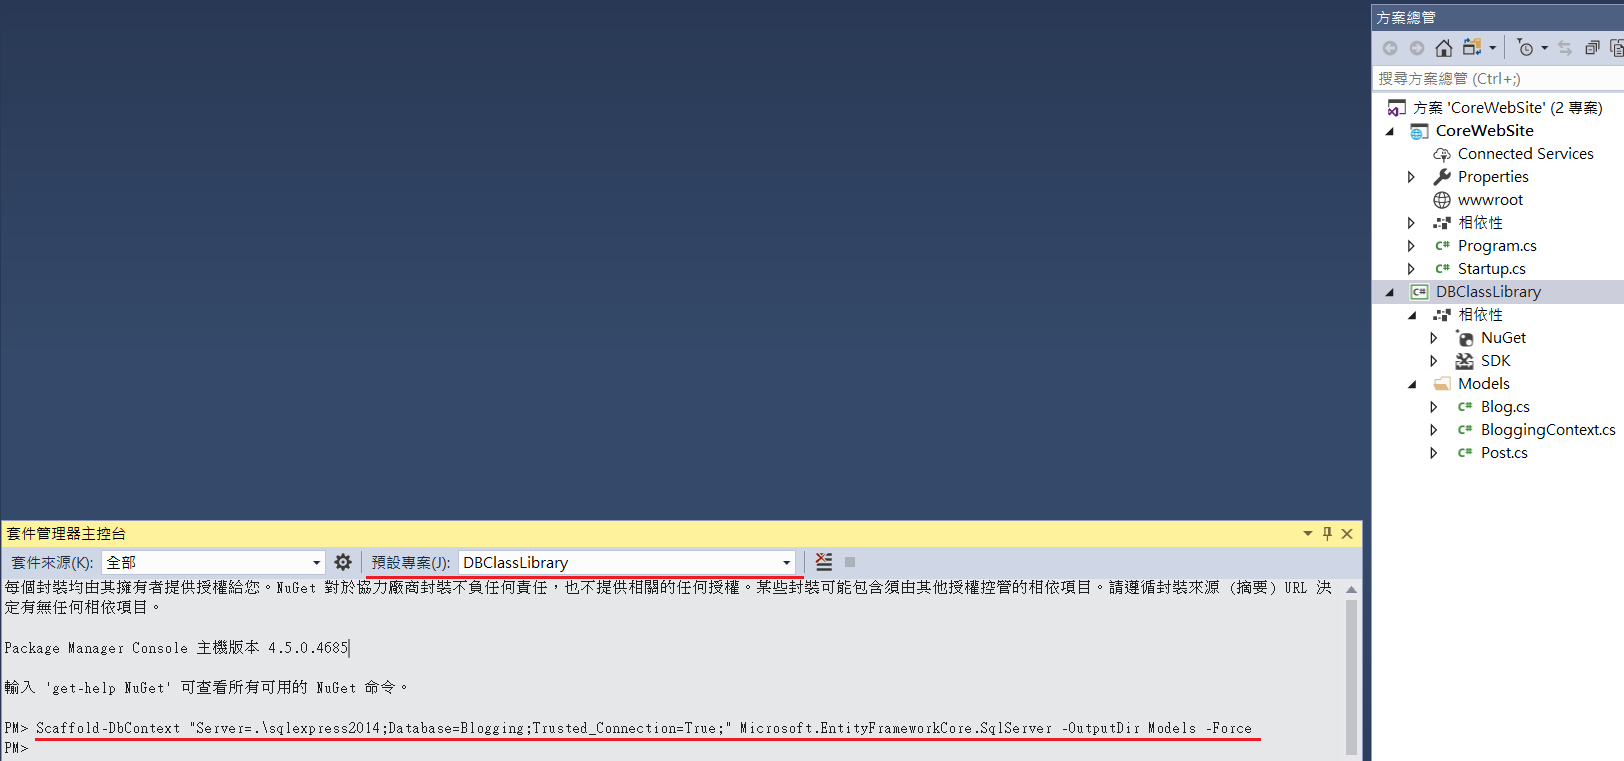
↑上面得留意主控台的預設專案要選對專案,這會影響Model(.cs檔)輸出到哪個專案
※2019-03-19 追記:整個程式碼路徑不可以有中文或特殊符號,否則會報錯
錯誤訊息可能是 「Unable to resolve startup project ''.
Using project 'DBClassLibrary' as the startup project.
The specified framework version '2.1' could not be parsed
The specified framework 'Microsoft.NETCore.App', version '2.1' was not found.
- Check application dependencies and target a framework version installed at:
C:\Program Files\dotnet\
- Installing .NET Core prerequisites might help resolve this problem:
https://go.microsoft.com/fwlink/?LinkID=798306&clcid=0x409
- The .NET Core framework and SDK can be installed from:
https://aka.ms/dotnet-download
- The following versions are installed:
2.1.9 at [C:\Program Files\dotnet\shared\Microsoft.NETCore.App]」
或「Scaffold-DbContext : 以 "1" 引數呼叫 "GetFullPath" 時發生例外狀況: "不合法的路徑格式。"位於 線路:1 字元:1
+ Scaffold-DbContext "Server=.\sqlexpress2014;Database=MyDB;Trusted_Connect ...
+ ~~~~~~~~~~~~~~~~~~~~~~~~~~~~~~~~~~~~~~~~~~~~~~~~~~~~~~~~~~~~~~~~~~~~~~~~~~~~~~~~
+ CategoryInfo : NotSpecified: (:) [Scaffold-DbContext], MethodInvocationException
+ FullyQualifiedErrorId : ArgumentException,Scaffold-DbContext」
↓ 我專案路徑含有 [ ] 就這樣報錯.....

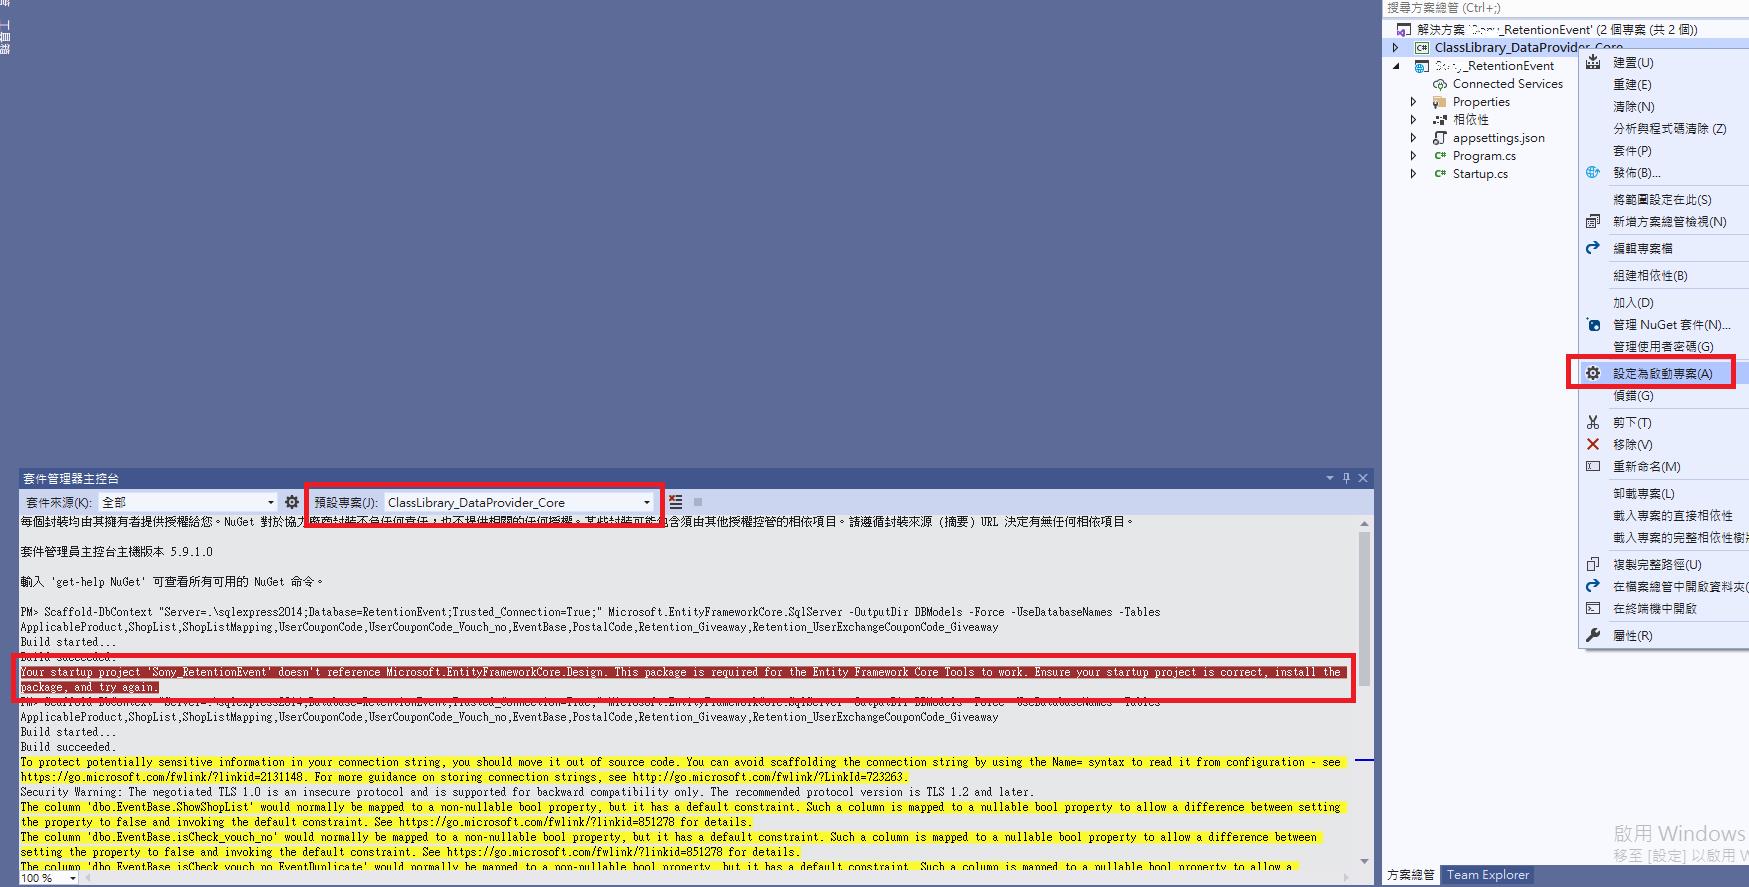
※2021-04-09追記:貌似到了.Net 5要把類別庫專案設定為啟動專案再輸入指令,Web專案才不會出現錯誤訊息無法參考「Microsoft.EntityFrameworkCore.Design」的樣子↓
如果出現黃字請忽略它,程式還是可以正常執行,只是DB中原本不允許NULL的bool欄位變成C#的bool?型別(容我日後有空再想辦法處理)
主控台指令完畢後,接著到XXXContext.cs裡,把OnConfiguring方法刪除,微軟建議改使用相依性注入方式設定DB連線字串
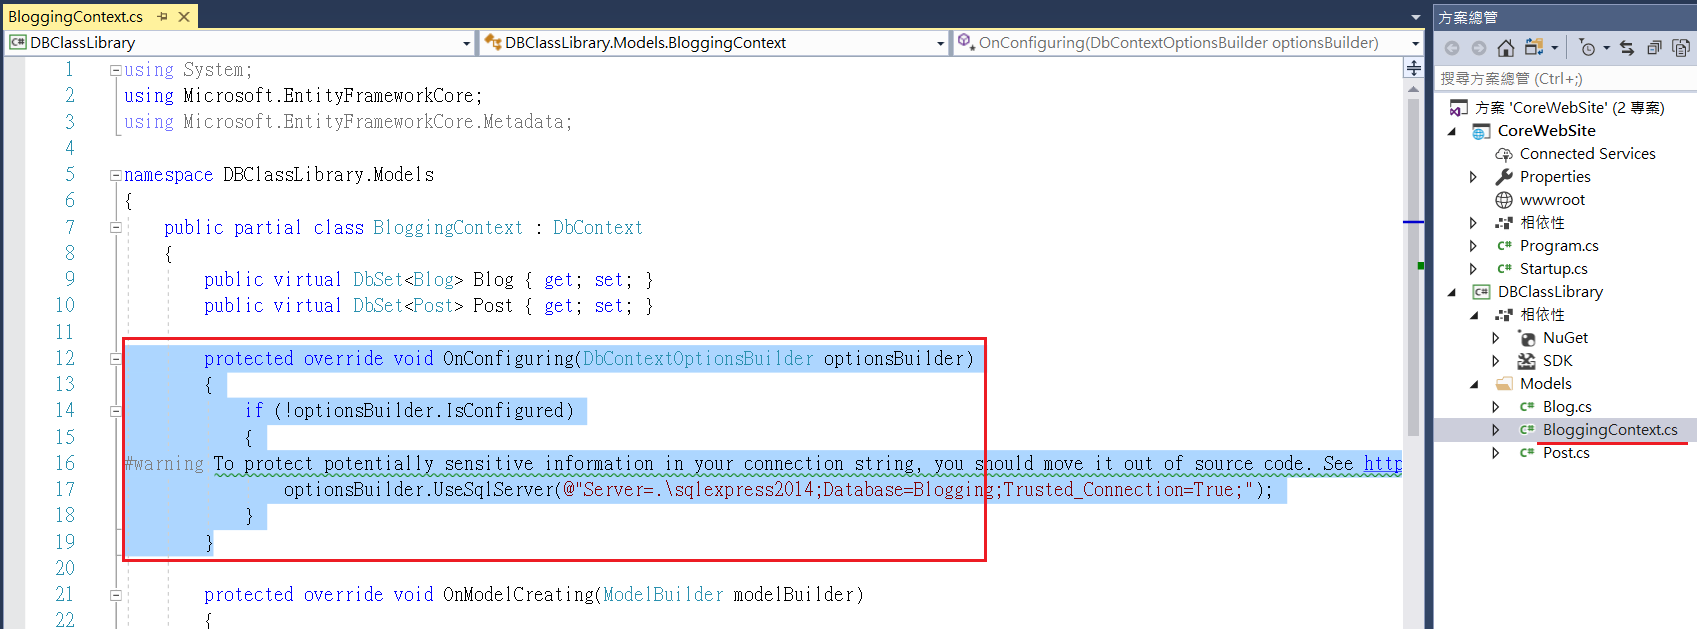
完整程式碼如下:
using System;
using Microsoft.EntityFrameworkCore;
using Microsoft.EntityFrameworkCore.Metadata;

namespace DBClassLibrary.Models
{
    public partial class BloggingContext : DbContext
    {
        public virtual DbSet<Blog> Blog { get; set; }
        public virtual DbSet<Post> Post { get; set; }


        //不知道從哪一版開始,工具就會自動加入建構子,沒加的話,自己加上吧~
        public BloggingContext(DbContextOptions<BloggingContext> options)
                                                          : base(options)
        { }

        protected override void OnModelCreating(ModelBuilder modelBuilder)
        {
            modelBuilder.Entity<Blog>(entity =>
            {
                entity.Property(e => e.Url).IsRequired();
            });

            modelBuilder.Entity<Post>(entity =>
            {
                entity.Property(e => e.Title).HasColumnName("TITLE");

                entity.HasOne(d => d.Blog)
                    .WithMany(p => p.Post)
                    .HasForeignKey(d => d.BlogId);
            });
        }
    }
}
2019.8.20追記
上述談到把OnConfiguring方法刪除,但如果專案中有寫到類似以下代碼,在執行階段就會報錯
An unhandled exception occurred while processing the request.
InvalidOperationException: No database provider has been configured for this DbContext. A provider can be configured by overriding the DbContext.OnConfiguring method or by using AddDbContext on the application service provider. If AddDbContext is used, then also ensure that your DbContext type accepts a DbContextOptions<TContext> object in its constructor and passes it to the base constructor for DbContext.
public class MyDb_Utility
{

        public static void AddRecord()
        {
            //非DI方式使用DbContext↓
            using (BloggingContext db=new BloggingContext())
            {
                //...略
                db.SaveChanges();
            }
        }

    }
有時候真的就是想在某某Utility類別或某某Service類別中存取資料庫,而且不是DI方式注入DbContext,這時XXXContext.cs的OnConfiguring方法改成以下
//每次重新Generate Code都要手動修改↓
protected override void OnConfiguring(DbContextOptionsBuilder optionsBuilder)
{
  if (!optionsBuilder.IsConfigured)
  {
    //須事先透過Nuget加入Microsoft.Extensions.Configuration.Json組件參考
    IConfiguration config = new ConfigurationBuilder()
                      .SetBasePath(Directory.GetCurrentDirectory())
                      .AddJsonFile("appsettings.json", optional: true, reloadOnChange: true)
                      .Build();
    optionsBuilder.UseSqlServer(config.GetConnectionString("DefaultConnection"));
  }
}↑解法參考:'No database provider has been configured for this DbContext' on SignInManager.PasswordSignInAsync
5.至目前為止,Model類別庫專案建置完成,中間可能會遇到一些問題,請見文章最下方解決
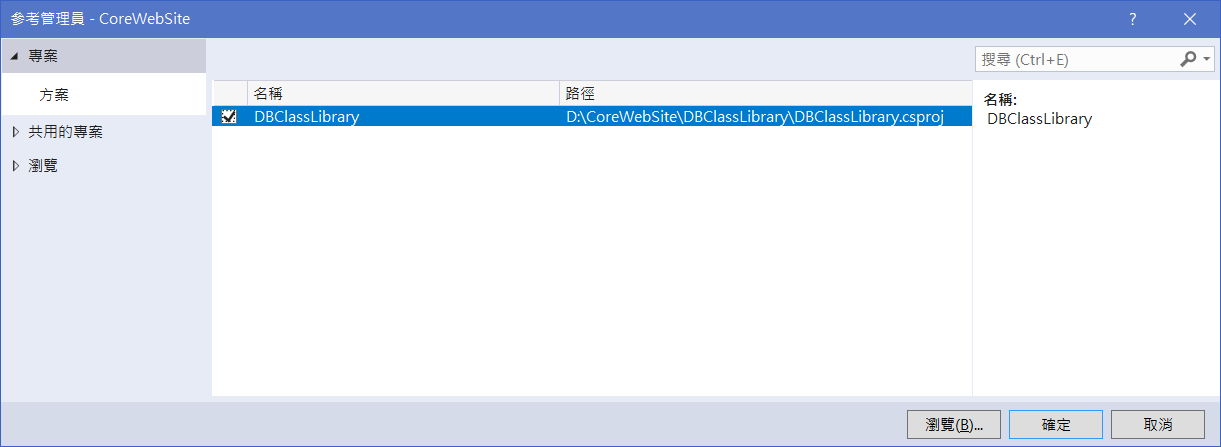
接著ASP.net Core 2 Web專案加入該類別庫專案的參考,準備在網站中存取資料。
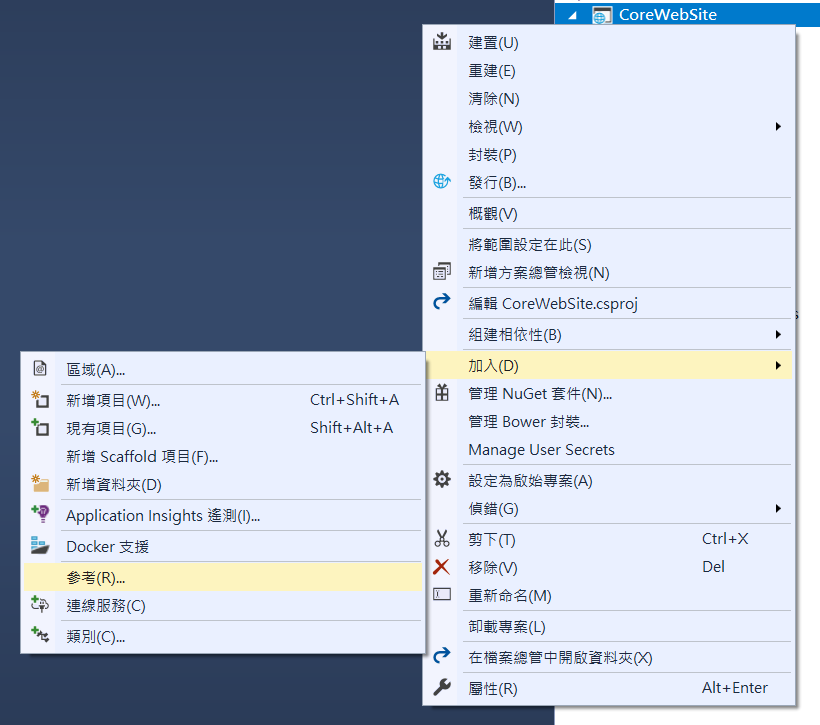
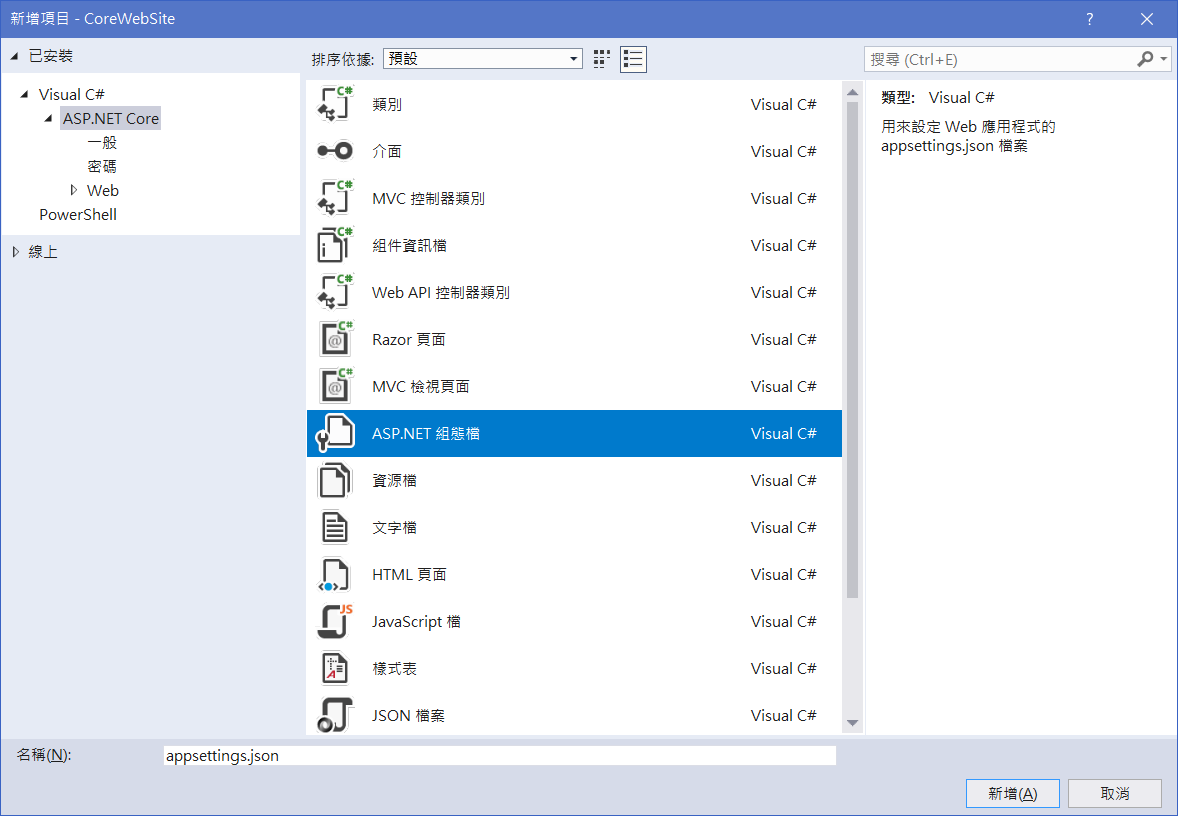
6.對著ASP.net Core專案右鍵新增>加入項目,選ASP.net 組態檔(appsettings.json)
要把本機開發時期的DB連線字串填進去,網站正式上線時,此檔案內容要記得修改

↑因為是json格式,所以反斜線兩次跳脫字元
7.DB連線字串配置好後,要在網站啟動時,讀取該連線字串,並註冊服務要使用資料庫XXXContext物件
開啟Startup.cs檔,完整程式碼和說明如下:
Asp.net Core 2 ↓
using System;
using System.Collections.Generic;
using System.Linq;
using System.Threading.Tasks;
using Microsoft.AspNetCore.Builder;
using Microsoft.AspNetCore.Hosting;
using Microsoft.AspNetCore.Http;
using Microsoft.Extensions.DependencyInjection;
/*引用*/
using Microsoft.Extensions.Configuration;
using Microsoft.EntityFrameworkCore;
namespace CoreWebSite
{
public class Startup
{
//使用相依性注入方式取得物件
private IConfiguration _config;
public Startup(IConfiguration config)
{
this._config = config;
}
//註冊服務
public void ConfigureServices(IServiceCollection services)
{
//↓待會在Controller便可使用相依性注入取得BloggingContext物件
services.AddDbContext<DBClassLibrary.Models.BloggingContext>(options =>
options.UseSqlServer(this._config.GetConnectionString("DefaultConnection")));
services.AddMvc();
}
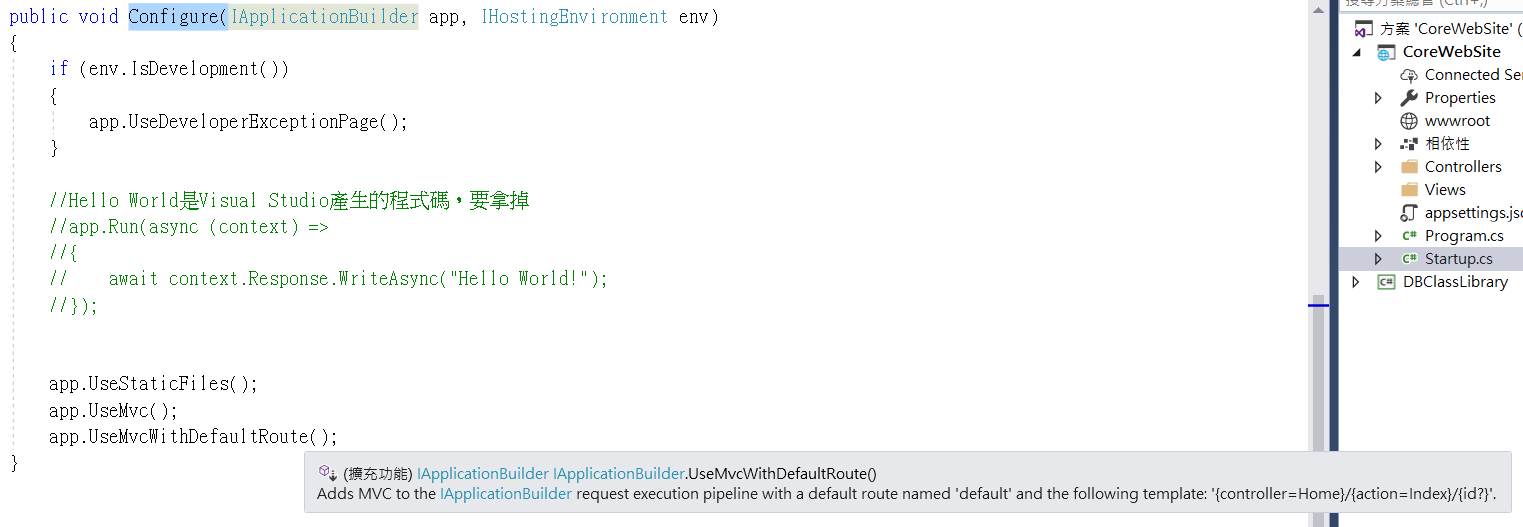
public void Configure(IApplicationBuilder app, IHostingEnvironment env)
{
if (env.IsDevelopment())
{
app.UseDeveloperExceptionPage();
}
//Hello World是Visual Studio產生的程式碼,要拿掉
//app.Run(async (context) =>
//{
// await context.Response.WriteAsync("Hello World!");
//});
app.UseStaticFiles();
app.UseMvcWithDefaultRoute();
}
}
}
Asp.net Core 3 的Startup.cs ↓
using System;
using System.Collections.Generic;
using System.Linq;
using System.Threading.Tasks;
using Microsoft.AspNetCore.Authentication.Cookies;
using Microsoft.AspNetCore.Builder;
using Microsoft.AspNetCore.Hosting;
using Microsoft.AspNetCore.Http;
using Microsoft.AspNetCore.Mvc.Infrastructure;
using Microsoft.EntityFrameworkCore;
using Microsoft.Extensions.Configuration;
using Microsoft.Extensions.DependencyInjection;
using Microsoft.Extensions.DependencyInjection.Extensions;
using Microsoft.Extensions.Hosting;

namespace Web_Event
{
    public class Startup
    {
        private readonly IConfiguration _config;
        public Startup(IConfiguration config)
        {
            this._config = config;
        }

        public void ConfigureServices(IServiceCollection services)
        {
            services.AddSession(options =>
            {
                // Set a short timeout for easy testing.
                options.IdleTimeout = TimeSpan.FromMinutes(30);
                options.Cookie.HttpOnly = true;
                // Make the session cookie essential
                options.Cookie.IsEssential = true;
            });


            //↓待會在Controller便可使用相依性注入取得BloggingContext物件
            services.AddDbContext<DBClassLibrary.Models.BloggingContext>(options =>
                  options.UseSqlServer(this._config.GetConnectionString("DefaultConnection")));


            services.AddControllersWithViews().AddNewtonsoftJson();

        }

        public void Configure(IApplicationBuilder app, IWebHostEnvironment env)
        {
            if (env.IsDevelopment())
            {
                app.UseDeveloperExceptionPage();
            }
            else
            {
                app.UseExceptionHandler("/Home/Error");
                app.UseHsts();
            }
            app.UseHttpsRedirection();//Controller、Action不必再加上[RequireHttps]屬性
            app.UseSession();
            app.UseStaticFiles();
            app.UseRouting();
            //留意先執行驗證...
            app.UseAuthentication();
            app.UseAuthorization();//Controller、Action才能加上 [Authorize] 屬性

            app.UseEndpoints(endpoints =>
            {
                endpoints.MapControllerRoute(
                  name: "default",
                  pattern: "{controller=Home}/{action=Index}/{id?}");
            });
        }
    }
}
8. 由於一開始我建立的是空白專案,所以要自己新增Controllers和Views兩個資料夾
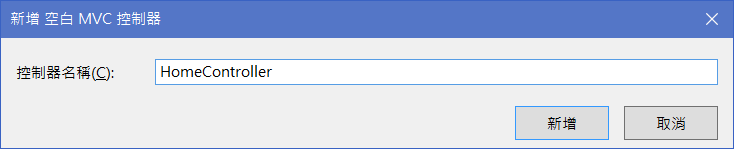
然後在Controllers資料夾按右鍵加入控制器,選第一個即可
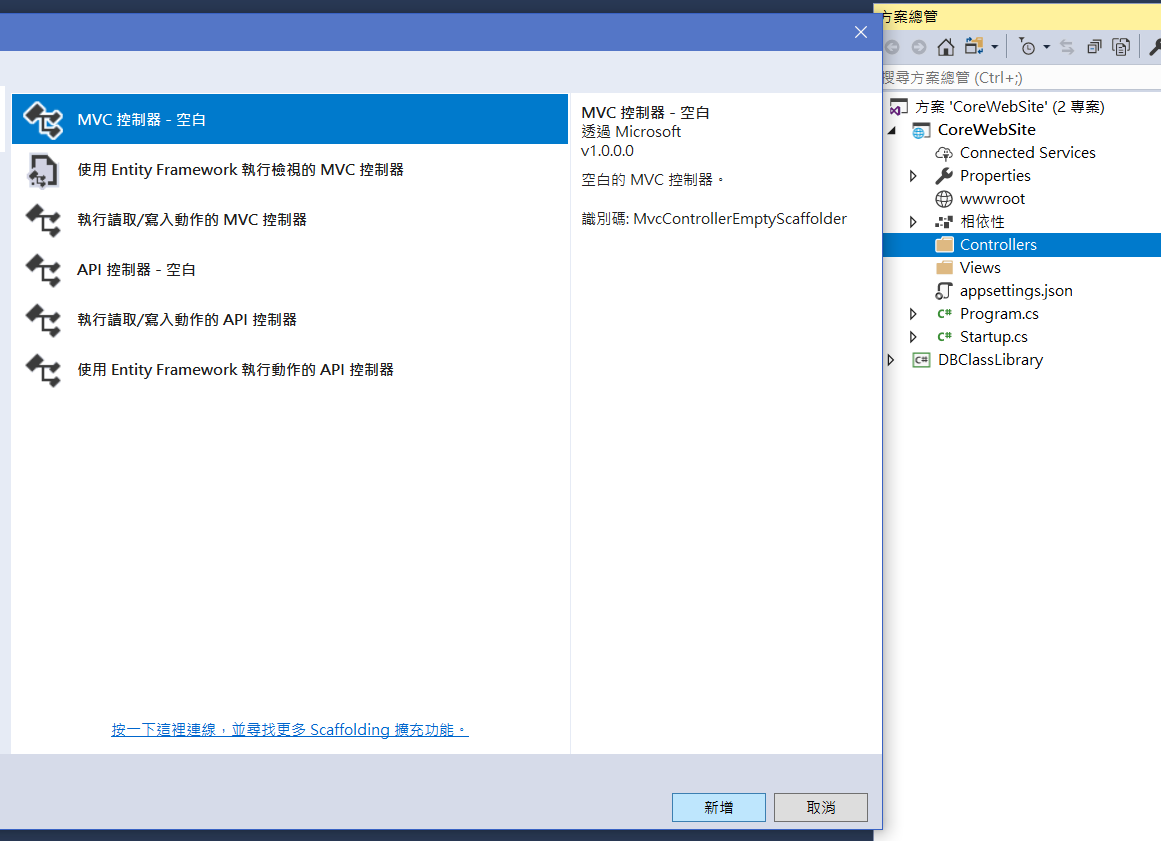
剛剛在Startup.cs裡的Configure方法,我使用的路由是app.UseMvcWithDefaultRoute();
方便起見,新增的Controller就命名為HomeController
9.HomeController裡的Action方法如下
using System;
using System.Collections.Generic;
using System.Linq;
using System.Threading.Tasks;
using Microsoft.AspNetCore.Mvc;
/*引用*/
using System.Text;
namespace CoreWebSite.Controllers
{
public class HomeController : Controller
{
//使用相依性注入來取得XXXContext物件
private readonly DBClassLibrary.Models.BloggingContext _context;
public HomeController(DBClassLibrary.Models.BloggingContext context)
{
this._context = context;
}
public IActionResult Index()
{
//查詢資料
var query = this._context.Blog.AsQueryable();
StringBuilder sb = new StringBuilder();
if (query.Any())
{//查有資料
sb.Append("<ul>");
foreach (DBClassLibrary.Models.Blog item in query)
{
sb.Append($@"<li>{item.BlogId} - {item.Url}</li>");
}
sb.Append("</ul>");
}
//懶得加View,所以用Content回傳,意思有到就好XD
return Content(sb.ToString(),"text/html",Encoding.UTF8);
}
}
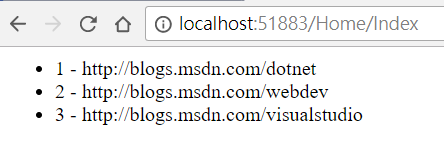
}執行結果完成↓
※2019-05-06追記,在View(*.cshtml)注入DbContext方式
@inject DBClassLibrary.Models.BloggingContext context
<!--@inject加上 類型 變數名 即可-->
※2019-05-07追記,如何在ActionFilter中存取DbContext
Use DbContext in ActionFilter Middleware
※2021-03-19追記,如果編譯無誤執行時期發生
InvalidOperationException: The entity type 'Your ClassName ' requires a primary key to be defined. If you intended to use a keyless entity type call 'HasNoKey()'.
這種錯誤,應該是你的資料庫Table裡有取名兩個以上欄位叫XXXA_ID、XXXB_ID
EntityFrameworkCore無法識別哪一個欄位是Primary Key,這種情況要到YourClass.cs把PK Property加上[Key]就可以了↓
using System;
using System.Collections.Generic;
//引用這個↓
using System.ComponentModel.DataAnnotations;

namespace Web_Event.DBModels
{
    public partial class YourClass
    {
        //↓加這個
        [Key]
        public long sysid { get; set; }
        public long UserCouponCode_SystemID { get; set; }

        public string vouch_no { get; set; }


    }
}
補充
如果想更新資料庫模型檔案(*.cs)的話,就直接在套件管理器主控台再下同樣的Scaffold-DbContext指令(記得加上-force 覆蓋原始檔案)即可。
若是手動誤刪Models資料夾把底下所有模型都刪除,而想再重新產生模型檔案,可能會出現錯誤訊息:Build failed.
解決方法如下
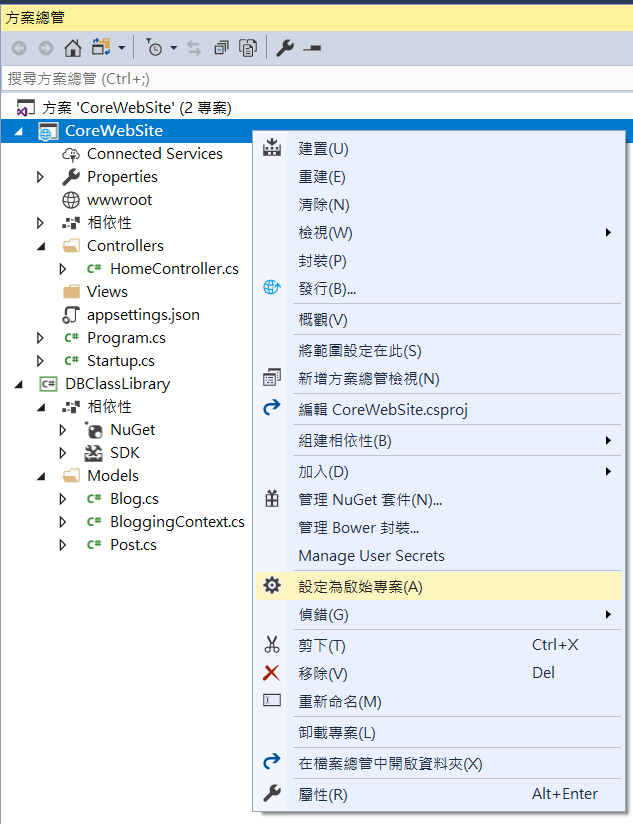
先把其它專案都卸載,然後類別庫專案設為起始專案再下指令
會發生另一錯誤
Startup project 'DBClassLibrary' targets framework '.NETStandard'. There is no runtime associated with this framework, and projects targeting it cannot be executed directly. To use the Entity Framework Core Package Manager Console Tools with this project, add an executable project targeting .NET Framework or .NET Core that references this project, and set it as the startup project; or, update this project to cross-target .NET Framework or .NET Core.
大意是說,想使用EF Core的話,要有一個可直接執行的專案(例如:ASP.net Core)參考此類別庫專案並設為起始專案才行(但我們剛剛已試過會發生Build failed,所以此法行不通)
或另一辦法,修改此專案為跨平台專案,如下:
編輯類別庫專案的.csproj檔
<Project Sdk="Microsoft.NET.Sdk">

  <PropertyGroup>
    <!--原本是這個↓-->
    <!--<TargetFramework>netstandard2.0</TargetFramework>-->
    <!--修改為這兩個↓-->
    <TargetFrameworks>netcoreapp2.0;net461;netstandard2.0</TargetFrameworks>
    <RuntimeFrameworkVersion>2.0.5</RuntimeFrameworkVersion>
  </PropertyGroup>

  <ItemGroup>
    <PackageReference Include="Microsoft.EntityFrameworkCore.SqlServer" Version="2.0.1" />
    <PackageReference Include="Microsoft.EntityFrameworkCore.Tools" Version="2.0.1" />
  </ItemGroup>

</Project>
填netcoreapp2.0是因為我另一專案為ASP.net Core 2
net 461是因為Microsoft.EntityFrameworkCore.SqlServer和Microsoft.EntityFrameworkCore.Tools這兩個2.0.1版本支援.Net framework版本從4.6.1起跳
<RuntimeFrameworkVersion>區段要填什麼則看Microsoft.NETCore.App最新版是哪個版本,我另一專案是.net Core 2,就最好填2.0.0~2.x.x之間
<TargetFramework>區段影響的是NuGet安裝套件相依版本
<RuntimeFrameworkVersion>區段影響的是.NET Core世界裡Microsoft.NETCore.App的執行階段版本
詳細見StackOverflow討論:What's the difference between <TargetFramework> and <RuntimeFrameworkVersion>?
修改完.csproj後,在套件管理器主控台再下同樣Scaffold-DbContext指令應該就可以把那一堆模型類別檔加回來,加回來後記得剛剛.csproj的設定也改回去
之後原本卸載的ASP.net Core專案再重新載入並設為起始專案,按下Ctrl+F5鍵就都可以正常執行
↑手動刪除模型類別檔案所造成的問題,我想未來改版應該會改進,畢竟之前.net framework加入*.edmx檔案的方式太便利也沒什麼差錯
2018.3.5 補充
如果同一方案下有一個.net framewok專案也想使用.net Standard專案裡的EF Core的話(我的情況是Web Service Web Application專案,因為ASP.net Core 2還沒有Web Service只有Web API.....)
請參考以下....還有.net Core、.net framework專案想共用EF的話,.net Standard專案得加入參考EF Core而不是以前的Entityframework,因為.net Standard專案不相容Entityframework
.net Standard專案的.csproj檔需要修改一下
<PropertyGroup>
    <!--修改為這兩個↓ .net Core、.net framework版本依自己需求調整-->
    <TargetFrameworks>netcoreapp2.0;net461;netstandard2.0</TargetFrameworks>
    <RuntimeFrameworkVersion>2.0.3</RuntimeFrameworkVersion>
  </PropertyGroup>
接下來.net framework專案加入.net Standard專案參考和透過NuGet加入Microsoft.EntityFrameworkCore參考
然後一執行有可能出現以下問題
System.IO.FileLoadException: Could not load file or assembly 'System.ValueTuple, Version=0.0.0.0, Culture=neutral, PublicKeyToken=cc7b13ffcd2ddd51' or one of its dependencies. The located assembly's manifest definition does not match the assembly reference. (Exception from HRESULT: 0x80131040)研究許久,.net framework專案引用.net Standard專案時,還須要解決Binding Redirect問題
當重建.net framework專案,出現黃色警告,雙擊兩下為Web.config檔加入binding redirect
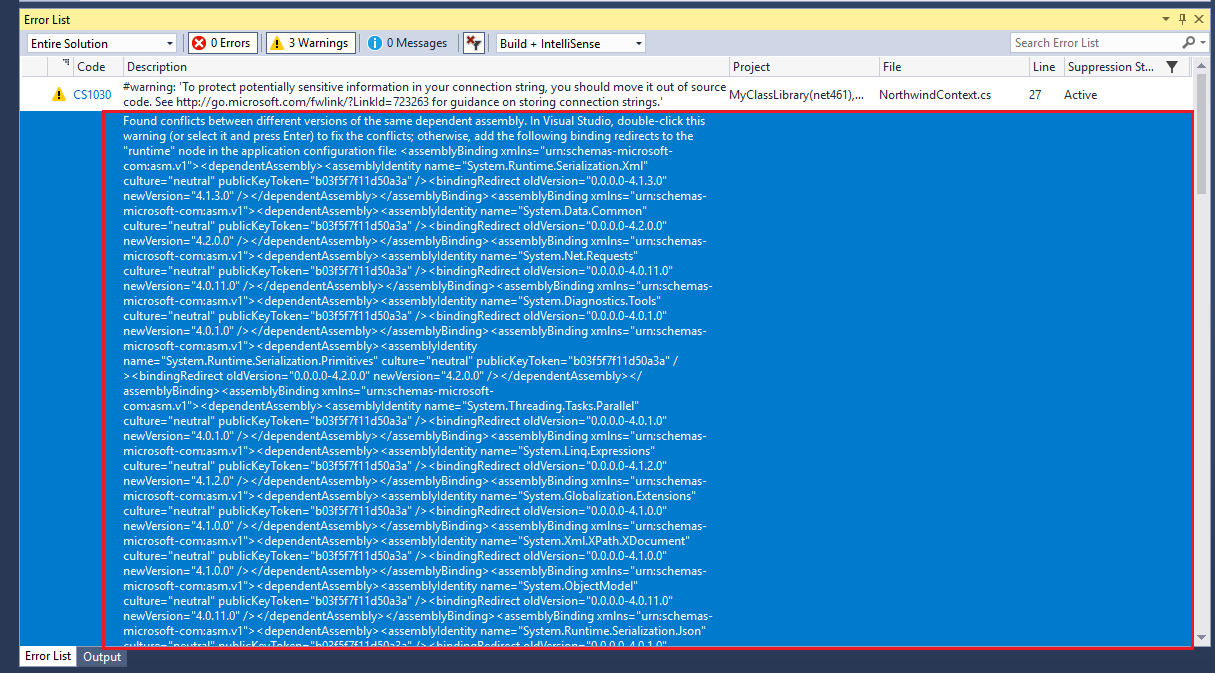
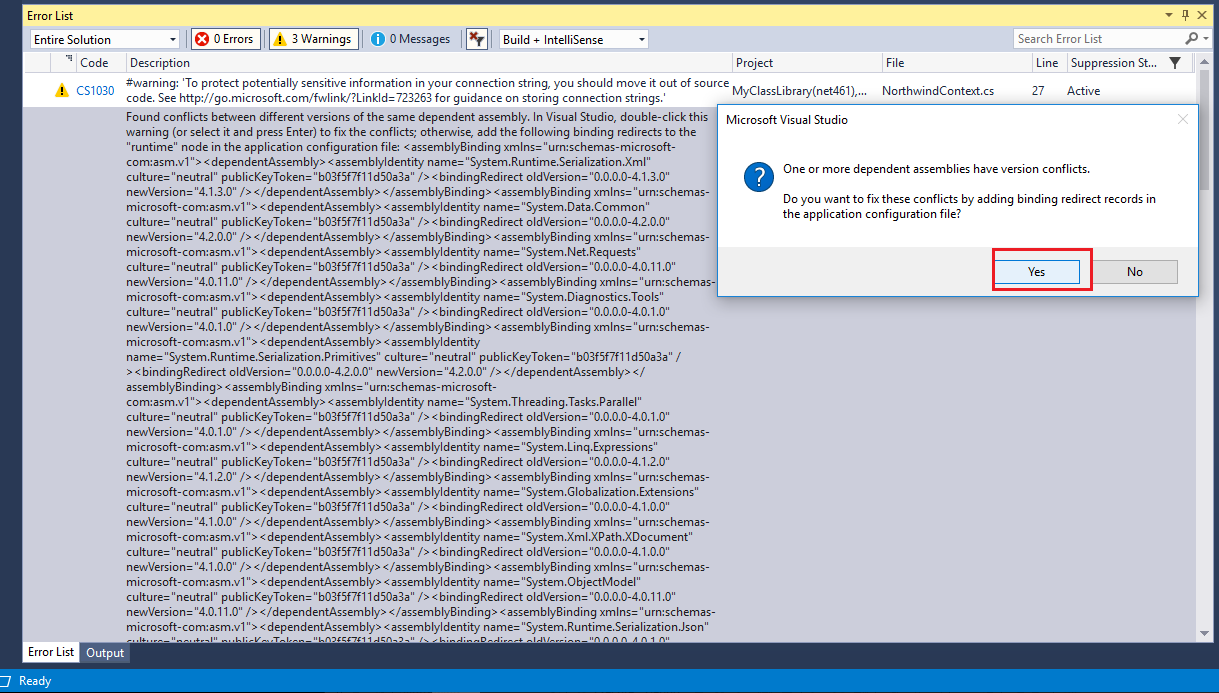
如此一來.net framework專案即可正常引用.net Standard專案並執行了~
如果剛好,好死不死,那個.net framework專案是Web Site的話,可能要把NuGet Package全部安裝(不確定,我沒親自試過XD)
看此篇討論所寫的:Issues with .NET Standard 2.0 with .NET Framework & NuGet #481
※話說有人的環境會複雜到同時存在.net framework和.net Core嗎XD
結語
目前.net Core技術跟.net framework比起來感覺缺東缺西,很多事情要手動處理,看來再等個.net Core 3版本出來說不定會更靠譜
原本最後打算寫個ASP.net Core 2網站如何部署IIS
主要把握兩點:1.安裝.NET Core Windows Server Hosting(載點在官網:Host ASP.NET Core on Windows with IIS)
讓IIS出現ASPNETCoreModule模組可以處理ASP.net Core網站,個人猜測未來Windows Server 2016之後的作業系統IIS如果有內建的話,或許此步驟可省略(?)
2.網站要先經過發行Publish動作,像以往直接複製檔案到正式機部署是行不通的
既然網路上已有人把部署ASP.net Core寫得很詳細,這邊就不多寫了