Sharepoint_2010_宣告式驗證
這篇文章源自於
由於Sharepoint之宣告式驗證一直設定不順利,參考網路或書籍多半東缺西損不能成功。
這篇文章論述完整清晰,按步驟逐步設定,大致上沒問題。
以下算是中文化修改,加上一些註解個人註解。(Project的部分略過)。
主要步驟為
1.建立一個負責存儲使用者或角色的SQL資料庫。
2.建立一個web應用程式(使用8088埠),並啟用宣告式驗證。(宣告式驗證只能執行於新建應用程式的程序中,已存在的不能變更為宣告式驗證)。
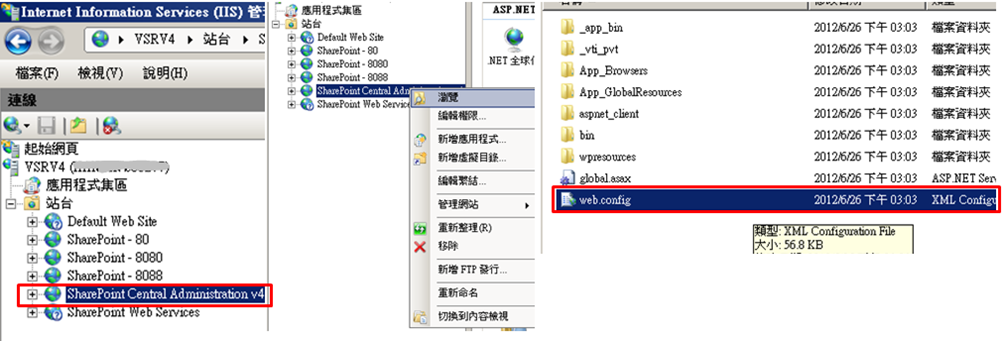
3.修改Sharepoint Central Administration應用程式的web.config檔。
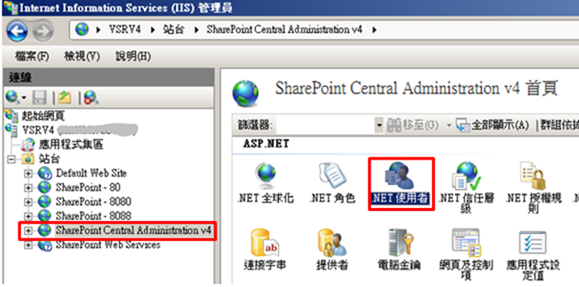
4.使用IIS管理員介面,建幾個帳號,後面新增網站集合時會用到。
5.修改Sharepoint Central Administration應用程式的web.config檔。
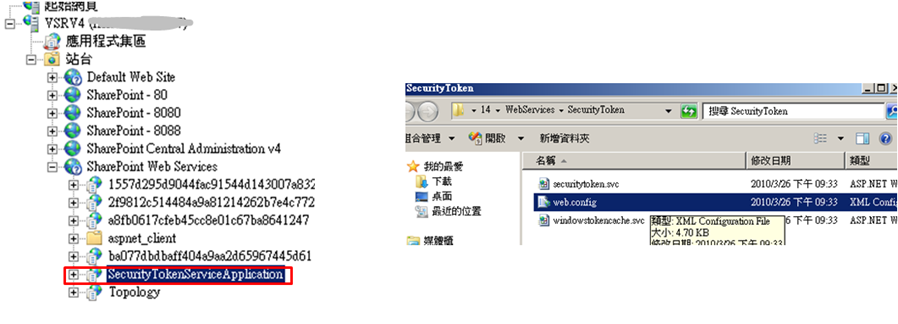
6.修改STS(SecurityTokenServiceApplication)應用程式的web.config檔。
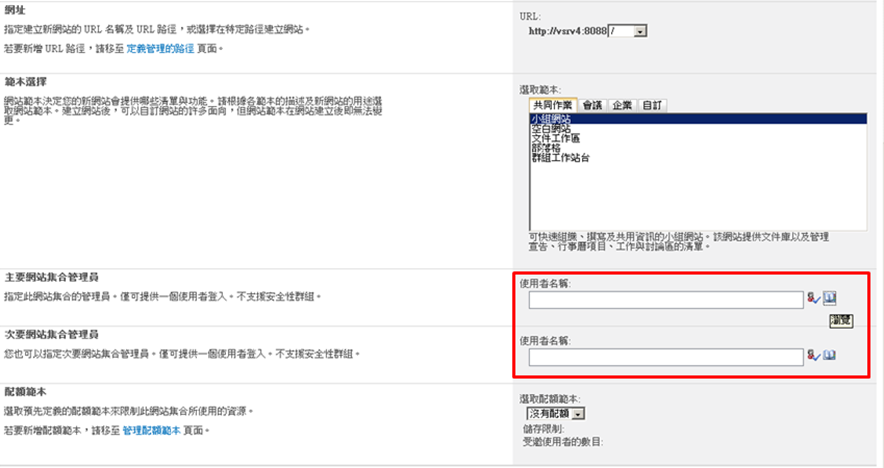
7.建網站集合,並指定主要、次要集合管理員。
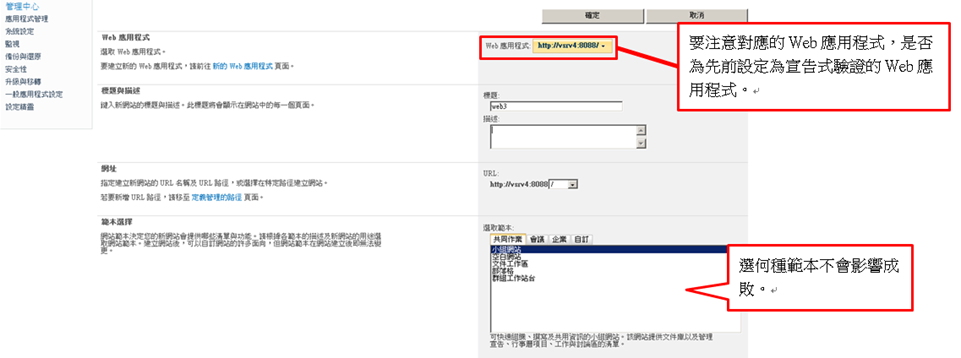
另外宣告式驗證必須在新建Web應用程式時指定,不能針對已存在的Web應用程式修改,因此在規劃上要特別注意。
一、建立 aspnetsb 帳號資料庫
執行aspnet_regsql.exe指令。這個指令是專用來建立產生aspnetdb資料庫用的。
執行之後就會跳出畫面。
填入伺服器名稱。驗證採預設Windows驗證。資料庫採預設不變動。
完成。
資料庫已建立。
注意權限。必須讓當前操作的帳號對aspnetdb有管理權限。(很重要注意)。
二、指定 Web應用程式改用宣告式驗證
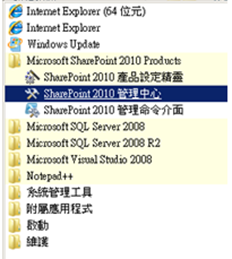
進入Sharepoint的資料管理中心。
管理Web應用程式。
新增Web應用程式。
變更為”宣告試驗證”
啟用表單為主的驗證(FBA)
成員資格提供者名稱: AspNetSqlMembers
角色管理員名稱:AspNetSqlRoles
指定Web應用程式管理帳戶。
指定資料庫及伺服器名稱。
Web應用程式建立完畢。
三、修改管理中心應用程式的 web.config
把下列文字加到</SafeControls>這個標籤的後面。
| <PeoplePickerWildcards> <clear /> <add key="AspNetSqlMembers" value="%" /> </PeoplePickerWildcards> |
找到這段標籤文字<sessionState mode="InProc" timeout="20" cookieless="UseCookies" />
將下列文字加到後面。
| <roleManager enabled="true" cacheRolesInCookie="false" cookieName=".ASPXROLES" cookieTimeout="30" cookiePath="/" cookieRequireSSL="false" cookieSlidingExpiration="true" cookieProtection="All" defaultProvider="AspNetWindowsTokenRoleProvider" createPersistentCookie="false" maxCachedResults="25"> <providers> <clear /> <add connectionStringName="SqlConn" applicationName="/" name="AspNetSqlRoles" type="System.Web.Security.SqlRoleProvider, System.Web, Version=2.0.3600.0, Culture=neutral, PublicKeyToken=b03f5f7f11d50a3a" /> <add applicationName="/" name="AspNetWindowsTokenRoleProvider" type="System.Web.Security.WindowsTokenRoleProvider, System.Web, Version=2.0.0.0, Culture=neutral, PublicKeyToken=b03f5f7f11d50a3a" /> </providers> </roleManager> <membership defaultProvider="AspNetSqlMembers" userIsOnlineTimeWindow="15" hashAlgorithmType=""> <providers> <clear /> <add connectionStringName="SqlConn" enablePasswordRetrieval="false" enablePasswordReset="true" requiresQuestionAndAnswer="true" passwordAttemptWindow="10" applicationName="/" requiresUniqueEmail="false" passwordFormat="Hashed" name="AspNetSqlMembers" type="System.Web.Security.SqlMembershipProvider, System.Web, Version=2.0.3600.0, Culture=neutral, PublicKeyToken=b03f5f7f11d50a3a" /> </providers> </membership> |
找到這段標籤文字
</appSettings>
加入下列文字
| <connectionStrings> <add name="SqlConn" connectionString="data source=vsrv4;Integrated Security=SSPI;Initial Catalog=aspnetdb" providerName="System.Data.SqlClient" /> </connectionStrings> |
四、如何新增使用者在aspnetdb內
這個錯誤訊息忽略它,繼續。
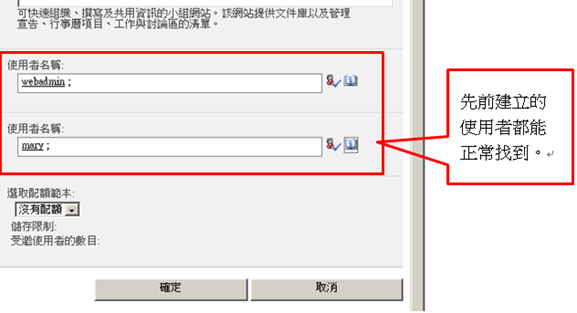
這裡我們建兩個帳號webadmin、mary。
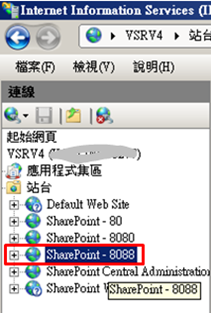
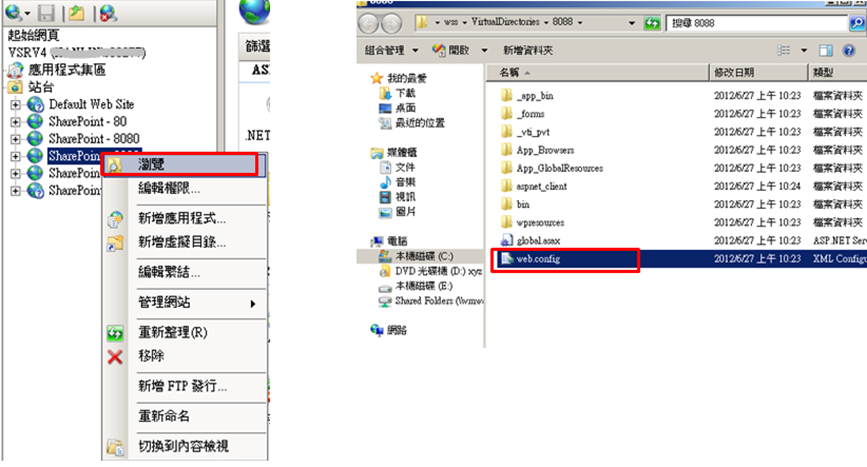
五、修改8088埠應用程式的web.config
找到下面這個標籤文字
</SafeControls>
將下列文字加到後面
| <PeoplePickerWildcards> <clear /> <add key="AspNetSqlMembers" value="%" /> <add key="AspNetSqlMembershipProvider" value="%" /> </PeoplePickerWildcards> |
搜尋到下面這段標籤文字
<machineKey validationKey
將下列文字加到後面
| <roleManager cacheRolesInCookie="false" cookieName=".ASPXROLES" cookiePath="/" cookieProtection="All" cookieRequireSSL="false" cookieSlidingExpiration="true" cookieTimeout="30" createPersistentCookie="false" defaultProvider="c" enabled="true" maxCachedResults="25"> <providers> <clear /> <add name="c" type="Microsoft.SharePoint.Administration.Claims.SPClaimsAuthRoleProvider, Microsoft.SharePoint, Version=14.0.0.0, Culture=neutral, PublicKeyToken=71e9bce111e9429c" /> <add connectionStringName="SqlConn" applicationName="/" name="AspNetSqlRoles" type="System.Web.Security.SqlRoleProvider, System.Web, Version=2.0.3600.0, Culture=neutral, PublicKeyToken=b03f5f7f11d50a3a" /> </providers> </roleManager> <membership defaultProvider="i" hashAlgorithmType="" userIsOnlineTimeWindow="15"> <providers> <clear /> <add name="i" type="Microsoft.SharePoint.Administration.Claims.SPClaimsAuthMembershipProvider, Microsoft.SharePoint, Version=14.0.0.0, Culture=neutral, PublicKeyToken=71e9bce111e9429c" /> <add connectionStringName="SqlConn" enablePasswordRetrieval="false" enablePasswordReset="true" requiresQuestionAndAnswer="true" passwordAttemptWindow="10" applicationName="/" requiresUniqueEmail="false" passwordFormat="Hashed" name="AspNetSqlMembers" type="System.Web.Security.SqlMembershipProvider, System.Web, Version=2.0.3600.0, Culture=neutral, PublicKeyToken=b03f5f7f11d50a3a" /> </providers> </membership> |
搜尋到下面這段標籤文字
</microsoft.identityModel>
將下列文字加到後面
| <connectionStrings> <add name="SqlConn" connectionString="data source=vsrv4;Integrated Security=SSPI;Initial Catalog=aspnetdb" providerName="System.Data.SqlClient" /> </connectionStrings> |
六、修改 STS應用程式的web.config
STS指的是Secure Token Service,附屬在SharePoint Web Service下。
搜尋到下面這段標籤文字
</system.serviceModel>
將下列文字加到後面
| <connectionStrings> <add name="SqlConn" connectionString="data source=vsrv4;Integrated Security=SSPI;Initial Catalog=aspnetdb" providerName="System.Data.SqlClient" /> </connectionStrings> |
在後面<system.web>標籤內,填入下列文字。如果們沒有發現<system.web>標籤,自行加入。
| <membership defaultProvider="AspNetSqlMembers"> <providers> <add connectionStringName="SqlConn" enablePasswordRetrieval="false" enablePasswordReset="true" requiresQuestionAndAnswer="true" passwordAttemptWindow="10" requiresUniqueEmail="false" passwordFormat="Hashed" applicationName="/" name="AspNetSqlMembers" type="System.Web.Security.SqlMembershipProvider, System.Web, Version=2.0.3600.0, Culture=neutral, PublicKeyToken=b03f5f7f11d50a3a" /> </providers> </membership> <roleManager defaultProvider="AspNetSqlRoles" enabled="true"> <providers> <add connectionStringName="SqlConn" applicationName="/" name="AspNetSqlRoles" type="System.Web.Security.SqlRoleProvider, System.Web, Version=2.0.3600.0, Culture=neutral, PublicKeyToken=b03f5f7f11d50a3a" /> </providers> </roleManager> |

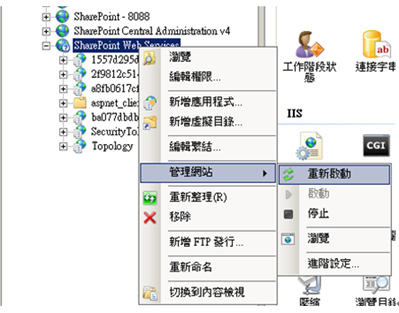
建議以上修改web.config之後,各web應用程式最好重新啟動。
七、建立8088埠 Web應用程式對應的網站集合
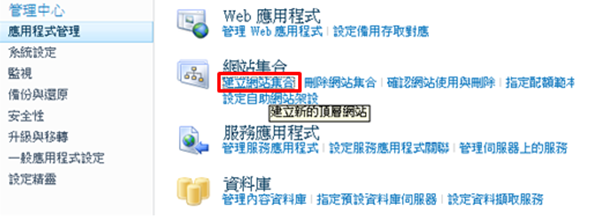
進入管理中心
建立網站集合
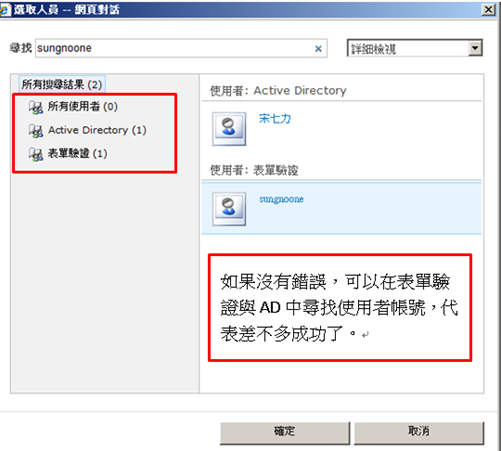
指定網站集合管理員
八、測試連線
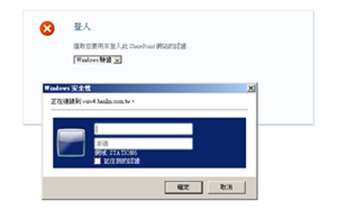
最大的不同便是一進來,便要求你選擇驗證類型。如果應用程式的[Windows驗證]和[表單驗證]都有勾選的話。
選擇表單驗證,確定我們的mary可以登入。
成功。
建議初建完成,[windows驗證]及[表單驗證],都應各自嘗試是否能正確提供驗證登入。
確定Windows的帳號也能透過[windows驗證]正常登入。才算大功告成。
九、帳號管理方案
可以透過表單驗證登入了,但是帳號新增刪除修改呢?
除了自行撰寫介面外,也有網路的善心人士撰寫的Sharepoint管理套件,免費下載。
以下提供一個。
免費的Sharepoint package
下載點
http://sharepoint2010fba.codeplex.com/releases/view/77295
安裝說明
http://sharepoint2010fba.codeplex.com/documentation
佈署前請先確認目前帳號是否具有網站管理員權限。
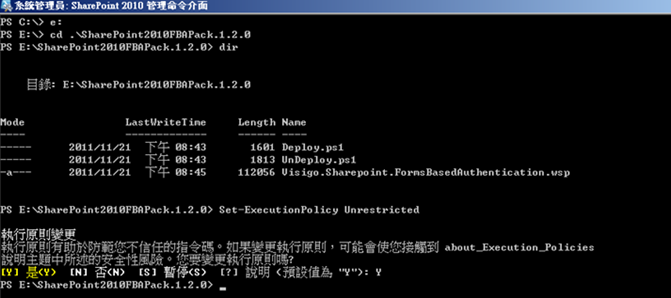
先執行
Set-ExecutionPolicy Unrestricted
佈署到網站
.\Deploy http://vsrv4:8088
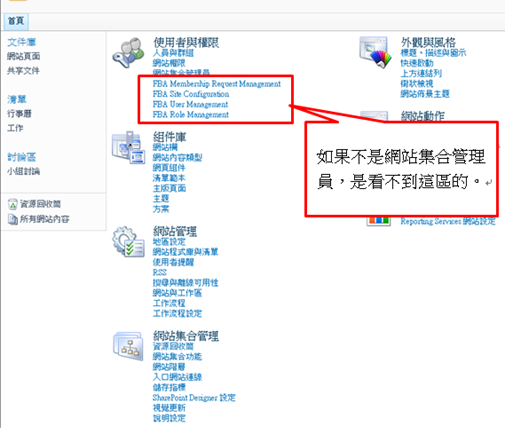
進入網站設定,便可看到新增功能
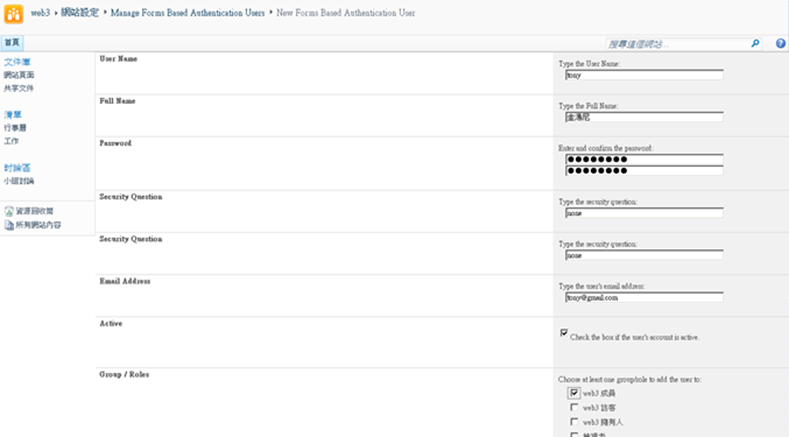
新增帳號的畫面,不過可惜都是英文的。
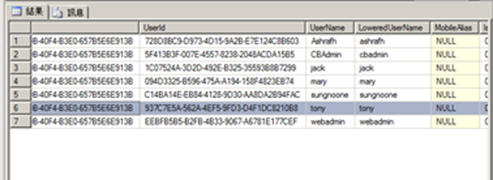
建完帳號後,可到aspnetdb資料庫看一下帳號是否存入,以確認功能正常執行。
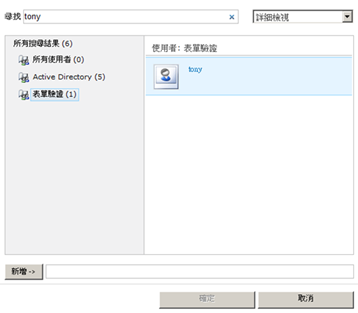
Sharepoint權限人員搜尋也能正常搜尋到我們剛剛輸入的使用者,便可以收工了。
十、其他注意事項
1.帳號密碼預設原則為必須英數+特殊字符混雜,如要取消複雜性的原則,必須加上下面這個參數。
minRequiredNonalphanumericCharacters="0"
若加上
minRequiredPasswordLength="3"
表示密碼最少須3個字。
其所加的位置,位於<membership>標籤內
以 Sharepoint Central Administration 應用程式的 web.config 為例。
其他web應用程式若有相同需求,比照辦理。
2.前面所有web.config設定中,凡 <connectionStrings> 內 connectionString參數內容應以實際環境為主,尤其是 data source 請改成你的資料庫主機名稱。


