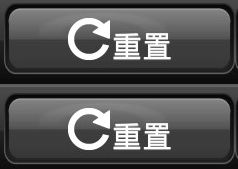
摘要:Java Android Button圖片與文字混合置中
相信很多人都有像這樣的需求
但是偏偏Button的Drawable Left,Drawable Top,Drawable Right,Drawable Top
這四個屬性放的圖片都是在最旁邊,像是這樣
整理出三種方法
1.利用版面去配置,按鈕在背後,前面在蓋圖片跟文字然後置中
<RelativeLayout
    android:layout_width="0dp"
    android:layout_height="wrap_content"
    android:layout_weight="1"
    android:background="@drawable/footer_btn4" >

    <Button
    android:id="@+id/btnReset"
    android:layout_width="match_parent"
    android:layout_height="match_parent"
    android:background="@drawable/selector_menu_footer_btn"
    android:onClick="btnConfirmSearch"
    android:textColor="@color/white"
    android:textSize="@dimen/tenant_search_condition_condition_btn_txt" />

    <LinearLayout
        android:layout_width="wrap_content"
        android:layout_height="wrap_content"
        android:layout_centerHorizontal="true"
        android:layout_centerVertical="true"
        android:gravity="center" >

        <RelativeLayout
            android:layout_width="wrap_content"
            android:layout_height="wrap_content"
            android:background="@drawable/footer_btn3" >
        </RelativeLayout>

        <TextView
            android:id="@+id/textView2"
            android:layout_width="wrap_content"
            android:layout_height="wrap_content"
            android:clickable="false"
            android:text="@string/tenant_search_condition_loc_btn_reset"
            android:textColor="@color/white"
            android:textSize="@dimen/tenant_search_condition_condition_btn_txt" />
    </LinearLayout>
</RelativeLayout>
結果是
優點是靈活性高,缺點就是layout檔會比較複雜
2.透過SpannableString,ImageSpan塞圖片到文字中
SpannableString spanText = new SpannableString("1重置");
Drawable d = getResources().getDrawable(R.drawable.footer_btn3);
int a = (int)btnConfirmSearch.getTextSize();
d.setBounds(0, 0, a, a);//設定圖片為文字的大小
//d.setBounds(0,0,d.getIntrinsicWidth(),d.getIntrinsicHeight());//原始大小
ImageSpan imageSpan = new ImageSpan(d, ImageSpan.ALIGN_BASELINE);
spanText.setSpan( imageSpan,0 , 1, Spannable.SPAN_EXCLUSIVE_EXCLUSIVE);
btnConfirmSearch.setText(spanText);
這樣會有個問題,假設圖片高度比文字高度高,文字會往下跑,以下為兩種對齊方式
ImageSpan.ALIGN_BASELINE跟ImageSpan.ALIGN_BOTTOM的結果
設定成文字高度的結果
優點layout檔乾淨,缺點圖片不能大於文字高度
3.程式動態設置
設置paddingLeft把圖片推到右邊,此時文字也會一起被推到右邊
再設置drawablePadding負的把文字拉回左邊
給定context,按鈕,圖片id,圖片與文字間距
code:
public static void set_button_Drawable_center(final Context context,final Button button,final int imageID,final int spacing)
{
	handler=new Handler();
	runnable=new Runnable() {

		@Override
		public void run() {
			// TODO Auto-generated method stub
			if(button.getMeasuredWidth() == 0)
			{
				handler.postDelayed(runnable, 0);
			}else{
				Drawable drawable=context.getResources().getDrawable(imageID);
				int width=button.getMeasuredWidth();
				int height=button.getMeasuredHeight();

				int txt_width=(int)(button.getTextSize()*button.getText().length());
				int txt_height=(int)(button.getLineCount()*button.getLineHeight());

				int img_width=drawable.getIntrinsicWidth();
				int img_height=drawable.getIntrinsicHeight();
				int content_height=txt_height+img_height+spacing;
				int content_width=txt_width+img_width+spacing;
				int padding_w=width/2-content_width/2;
				int padding_h=height/2-content_height/2;

				button.setCompoundDrawablesWithIntrinsicBounds(drawable, null, null, null);
				button.setPadding(padding_w,0,0,0);
				button.setCompoundDrawablePadding(-padding_w);
			}
		}
	};
	handler.postDelayed(runnable, 0);
}
結果
優點layout檔乾淨,缺點程式較複雜,不過是一勞永逸,靈活性高
這是我想到的三種方法,若還有其他的方法,麻煩給我個建議,謝謝


