[iOS] 在iOS裡操作SQLite筆記 - (三)
上一篇文章討論了CoreData的資料操作方式,經由CoreData產生出來的SQLite資料庫就是會很好心的幫我們多建立一些欄位與兩個Table,然而在寫資料庫的就必須要了解這些多出來的Table以及欄位他們之間的關聯,某些角度上來看,還真有點不方便。在這個情形下,泛型集合也會是個不錯的選擇,不過在討論Objective-c的泛型集合做法前。也可以在陣列中放入物件,這樣可以暫時解決掉sqlite3_stmt資料集上弱型別的issue。
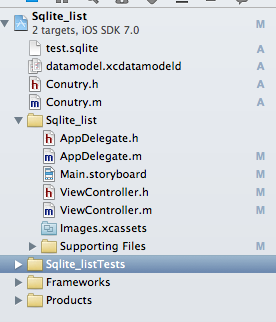
1. 新增Xcode專案,專案名稱命名為[CoreData]。
2. 加入CoreData.Framework參考
3. 新增DataModel。
4. 新增Entity
5. 新增NSManagedObjectsubclass 類別
6. 建立Entity。
Note:
到這個步驟都跟前一個章節一樣,用CoreData.Framework去建立一個Entity。其實到這個步驟我只是要這個Entity模型。並且
可以用xcdatamodeld來管理物Entity與Entity之間的關聯。當然你也可以自行建立Entity,不一定要依靠CoreData.Framework。
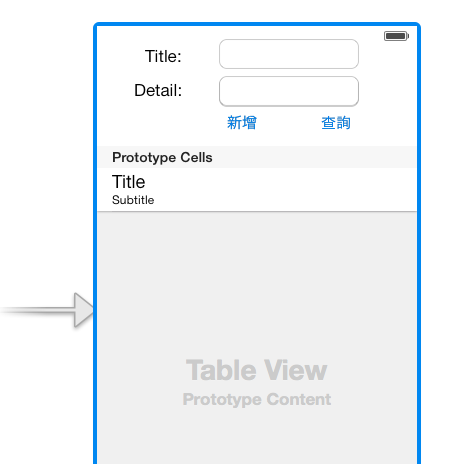
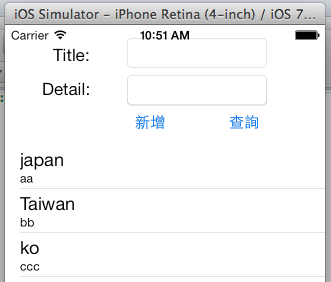
7.設計iPhoneStory Board
在iPhoneStoryBoard Layout中,新增底下的畫面。
兩個UITextbox用來讓使用者輸入值,在新增兩個按鈕,分別是是新增資料到SQLite資料庫中,以及查詢SQLite資料庫的資料,
在下方我新增了一個UITableView,是用來顯示資料庫裡面的資料格式。
8. 建立SQLite資料庫
跟上一個章節不一樣的地方在,這個資料庫結構要用我們自己建立的,而不是用CoreData幫我們建立的資料庫。
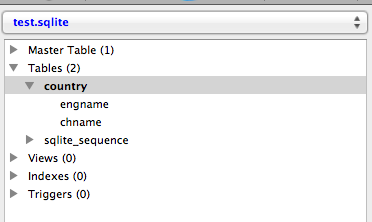
也在第一個章節有提到,SQLite可以用FireFox瀏覽器下的一個工具套件,SQLite Manager去看這個資料庫的檔案結構。
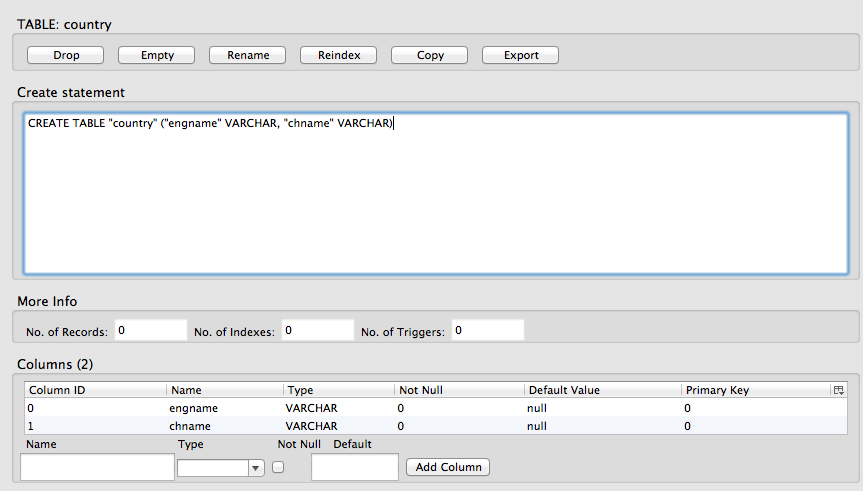
在這次的資料庫是我們自己建立的,可以在下圖中看到資料庫建立語法(DDL),這邊資料庫就變得比較單純了。
9. 在App的AppDelegate.h 的 application:didFinishLaunchingWithOptions: 事件複製資料庫到Documents路徑下
在App執行的時候,我們要將這個資料庫Copy複製到App的Document資料夾下,在AppDelegate.h 檔案裡用
application:didFinishLaunchingWithOptions:事件我們撰寫下方程式碼:
- (BOOL)application:(UIApplication *)application didFinishLaunchingWithOptions:(NSDictionary *)launchOptions

{

//將資料庫檔案複製到具有寫入權限的目錄

NSFileManager *fm = [[NSFileManager alloc]init];

NSString *src = [[NSBundle mainBundle]pathForResource:@"test" ofType:@"sqlite"];

NSString *dst = [NSString stringWithFormat:@"%@/Documents/test.sqlite",NSHomeDirectory()];

//APP啓用的時候在@/Documents 沒有資料庫

//從APP裡面把tjmb資料庫拷貝到 @/Documents/ 資料夾下

//拷貝完資料庫後,刪除掉App裡面的資料庫

//檢查目的地的檔案是否存在,如果不存在則複製資料庫

if(![fm fileExistsAtPath:dst]){

[fm copyItemAtPath:src toPath:dst error:nil];

[fm removeItemAtPath:src error:nil];

}

// Override point for customization after application launch.

return YES;

}
10. 在ViewController.h檔案裡 宣告下方的程式碼:
#import

@interface ViewController : UIViewController{

//變數db,型別是db

sqlite3* db;

//變數TabelDatas,型別是NSMutableArray

NSMutableArray *TabelDatas;

}

@property (weak, nonatomic) IBOutlet UITextField *mytitle;

@property (weak, nonatomic) IBOutlet UITextField *mydetail;

@property (weak, nonatomic) IBOutlet UITableView *mytable;

//宣告新增按鈕方法insertdata

- (IBAction)insertdata:(id)sender;

//宣告查詢按鈕方法querydata

- (IBAction)querydata:(id)sender;

//宣告executeQuery方法,帶入SQL字串,傳回一個sqlite3_stmt物件

- (sqlite3_stmt *) executeQuery:(NSString *) query;

//宣告statementtoMSarray方法,帶入sqlite3_stmt物件,傳回一個NSMutableArray物件

- (NSMutableArray *) statementtoMSarray:(sqlite3_stmt *) sqlstmt;

@end
11. 在ViewController.m檔案裡 宣告下方的程式碼:
//查詢按鈕事件:將資料庫的資料撈出來

- (IBAction)querydata:(id)sender{

//傳入資料庫查詢指令,下一個章節再來討論sql injection的問題

NSString *sql2 = [NSString stringWithFormat:@"select * from country"];

sqlite3_stmt *statement = [self executeQuery:sql2];

TabelDatas = [self statementtoMSarray:statement];

[self.mytable reloadData];

}

//宣告executeQuery方法,帶入SQL字串,傳回一個sqlite3_stmt物件

- (sqlite3_stmt *) executeQuery:(NSString *) query{

sqlite3_stmt *statement;

sqlite3_prepare_v2(db, [query UTF8String], -1, &statement, nil);

return statement;

}

//宣告statementtoMSarray方法,帶入sqlite3_stmt物件,傳回一個NSMutableArray物件

- (NSMutableArray*) statementtoMSarray:(sqlite3_stmt *) sqlstmt{

//建立 NSMutableArray TabelDatas Instance;

TabelDatas = [[NSMutableArray alloc]init];

//利用回圈把sqlstmt裡面的資料取出來

while (sqlite3_step(sqlstmt) == SQLITE_ROW) {

//建立Conutry物件

Conutry *test = [[Conutry alloc]init];

//將sqlite3_stmt裡的資料對應Conutry物件屬性

test.engname = [NSString stringWithUTF8String:(char *)sqlite3_column_text(sqlstmt,0)];

test.chname = [NSString stringWithUTF8String:(char *)sqlite3_column_text(sqlstmt,1)];

//將物件新增進動態陣列

[TabelDatas addObject:test];

}

return TabelDatas;

}

//這個方法是用來指定UITableView有多少的Section

- (NSInteger)numberOfSectionsInTableView:(UITableView *)tableView{

// Return the number of sections.

return 1;

}

//這個方法是用來指定UITableView每個Section裡面有多少Rows

- (NSInteger)tableView:(UITableView *)tableView numberOfRowsInSection:(NSInteger)section{

// return 1;

return [TabelDatas count];

}

//UITableView用來產生Cell的方法

- (UITableViewCell *)tableView:(UITableView *)tableView cellForRowAtIndexPath:(NSIndexPath *)indexPath

{

static NSString *CellIdentifier = @"Cell";

UITableViewCell *cell = [tableView dequeueReusableCellWithIdentifier:CellIdentifier];

if (cell == nil){

cell = [[UITableViewCell alloc]initWithStyle:UITableViewCellStyleDefault reuseIdentifier:CellIdentifier];

}

//Configure the cell.

// cell.textLabel.text = [[TabelDatas objectAtIndex:0]objectAtIndex:[indexPath row]];

// cell.detailTextLabel.text = [[TabelDatas objectAtIndex:1]objectAtIndex:[indexPath row]];

//將TabelDatas陣列裡面物件取出

Conutry *currentdata = [TabelDatas objectAtIndex:[indexPath row]];

//接著就可以用物件屬性的方式來操作物件

cell.textLabel.text = currentdata.engname;

cell.detailTextLabel.text = currentdata.chname;

return cell;

}
12. 編譯App
編譯執行這個App,可以看到以下的結果。這樣的寫法對使用者來看其實沒有任何的差別,
但是當我們在撰寫程式的時候,在維護上會比較方便。
在取出物件的時候,可以有對應的物件,更好操作資料。否則假如有陣列裡面有許多資料的話,
我們就必須要用這樣的方式把所有資料取出來。當一個Table有數十個欄位的時候,那要取出某個特定欄位的值,
程式碼就會變的很不好閱讀。
// cell.textLabel.text = [[TabelDatas objectAtIndex:0]objectAtIndex:[indexPath row]];
// cell.detailTextLabel.text = [[TabelDatas objectAtIndex:1]objectAtIndex:[indexPath row]];
. . . . . . . . . . . . . . . . . . . . .
// cell.detailTextLabel.text = [[TabelDatas objectAtIndex:10]objectAtIndex:[indexPath row]];
13. 結論
在這個研究又看到幾個衍生性的問題。首先當然是我們利用使用者的輸入資料來組出SQL指令,這樣的情形下,
就有可能遭遇資料庫隱碼攻擊(sql injection),再者原本使用CoreData物件,當我要新增一筆資料進資料庫,
我去呼叫了NSEntityDescription物件,在記憶體中新增一筆資料,最後經由呼叫
[managedObjectContext save]的方式回寫資料到儲存媒體,這類型的離線資料操作與更新就不需要我
在去處理,不過目前我們用這樣的方式來操作資料,那就要自己來處理這一個部分了,
人參啊……就是會給你許許多多的挑戰…..下一篇再來繼續聊下去…..
範例程式下載:https://github.com/twbenlu/iOSSQLiteDTO
參考資料
Objective C Generics Implemented Entirely At Compile Time