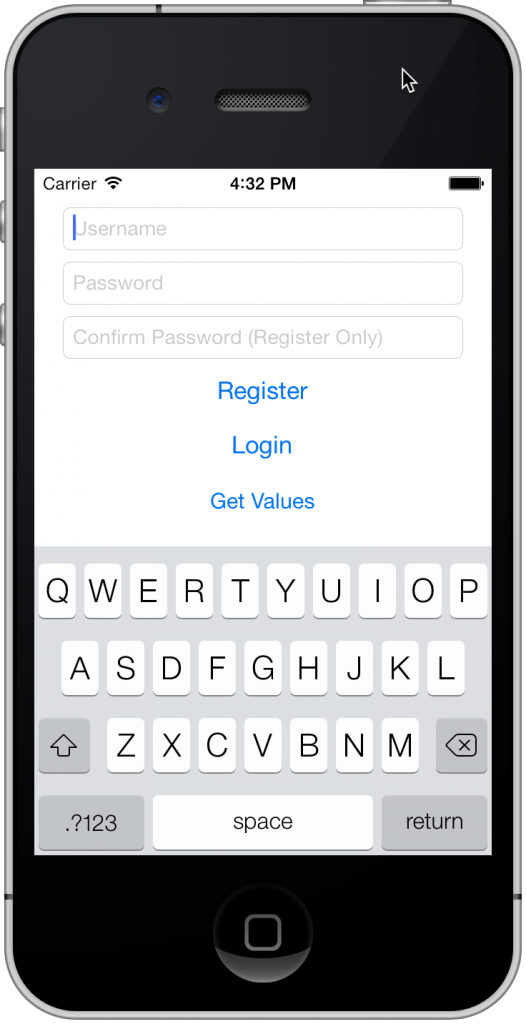
摘要: [Asp.Net Identity] Xamarin.iOS 呼叫需要驗證的ASP.Net WebApi
在設計不管是iOS App或者是Android App的時候,跟你的Backend Server有互動應該是很常碰到的應用。越來越多的企業提供WebApi的服務來取代Web Service。,通常你的WebApi會提供介面讓前端跟後端的資料庫有資料存取的互動。這關係到CRUD的動作,當前端Mobile Device要接收資料的時候可能還好,因為就是對資料庫去做Select的動作。但是當你有資料回寫的時候,那就關係到insert,Update,delete的動作。所以這一篇先來討論最基本的部分,如何整合Asp.Net Identity機制來要求前端使用者必須通過驗證才可以呼叫你的WebApi。這一篇文章就來討論iOS的App要如何去呼叫帶有[Authorize]屬性的WebApi。
這篇文章是參考與翻譯外國作者James的文章,原文出處
http://www.azurefromthetrenches.com/?p=471
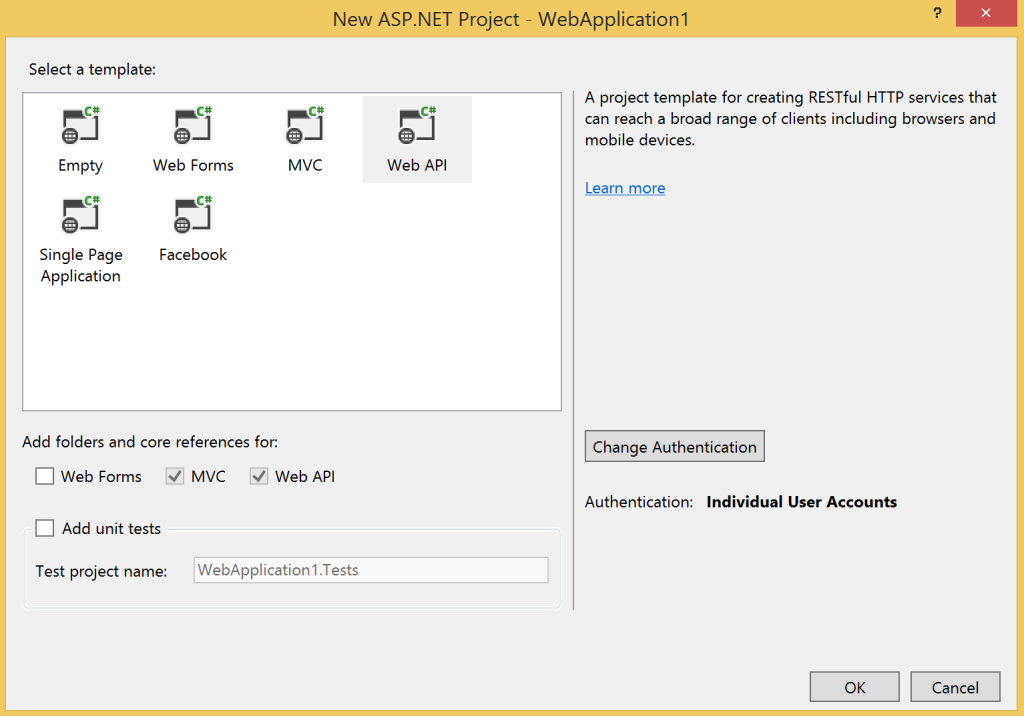
1. 首先要在Visual Studio裡面建立一個WebApi的專案。在驗證方式的地方選擇[個別使用者帳戶]
在這個專案裡面,在Controllers資料夾下找到一個名為ValuesController的API Controller。這是WebApi專案範本所提供的WebApi。在這個類別最上方可以看到有一個Authorize attribute屬性。這是用來保護這個WebApi不可匿名存取。編譯執行這個專案後,去存取這個Api,會得到以下的錯誤訊息。(http://localhost:5287/api/Values)
<Error>
<Message>Authorization has been denied for this request.</Message>
</Error>
到目前為止,我們就是希望這個WebApi無法被網路上的匿名使用者存取。
2.接下來要存取這個WebApi之前,第一步就是要去註冊一個使用者帳號。
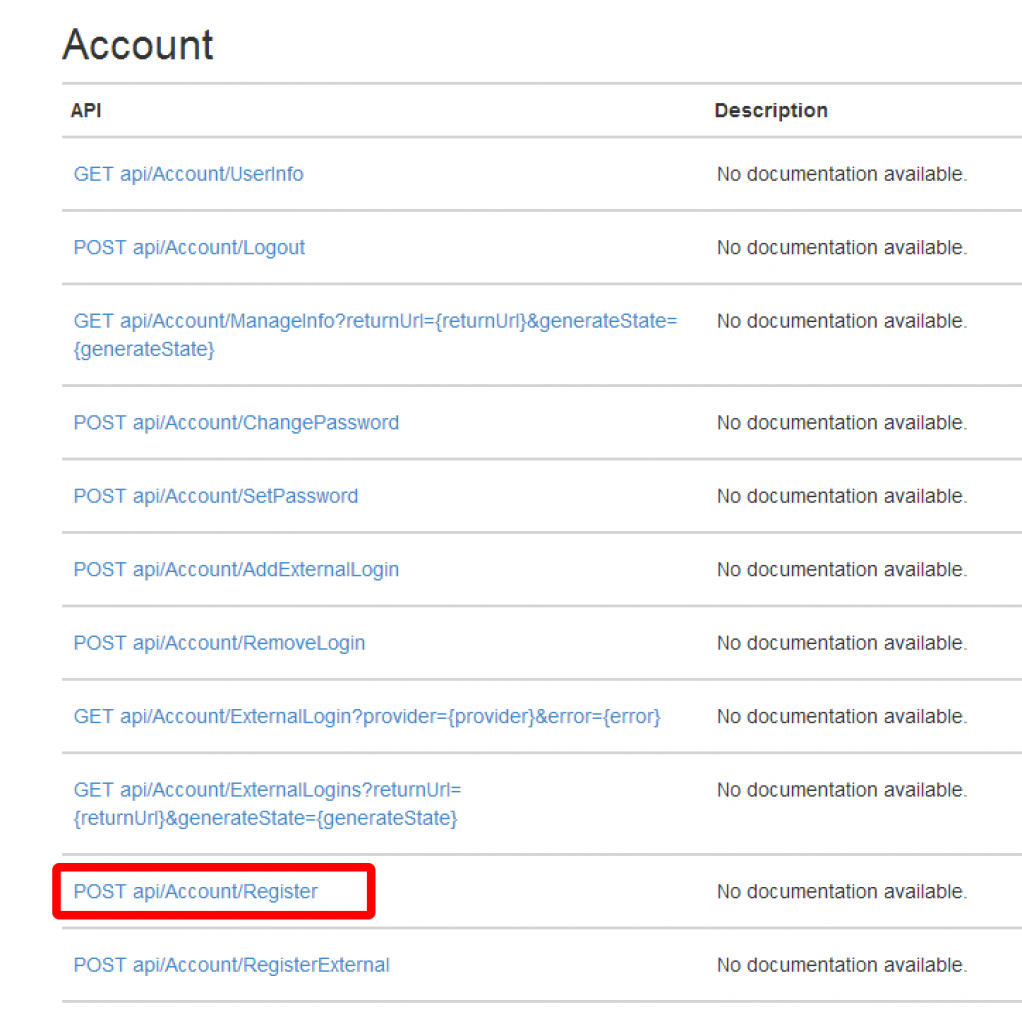
連結到這個專案中的help頁面,可以看到底下的WebApi列表 (for example http://localhost:5287/Help)
,列表中看到一個Api叫做Register,這個Api可以允許匿名存取,他是用來協助前端使用者註冊一個帳號到資料庫裡面。
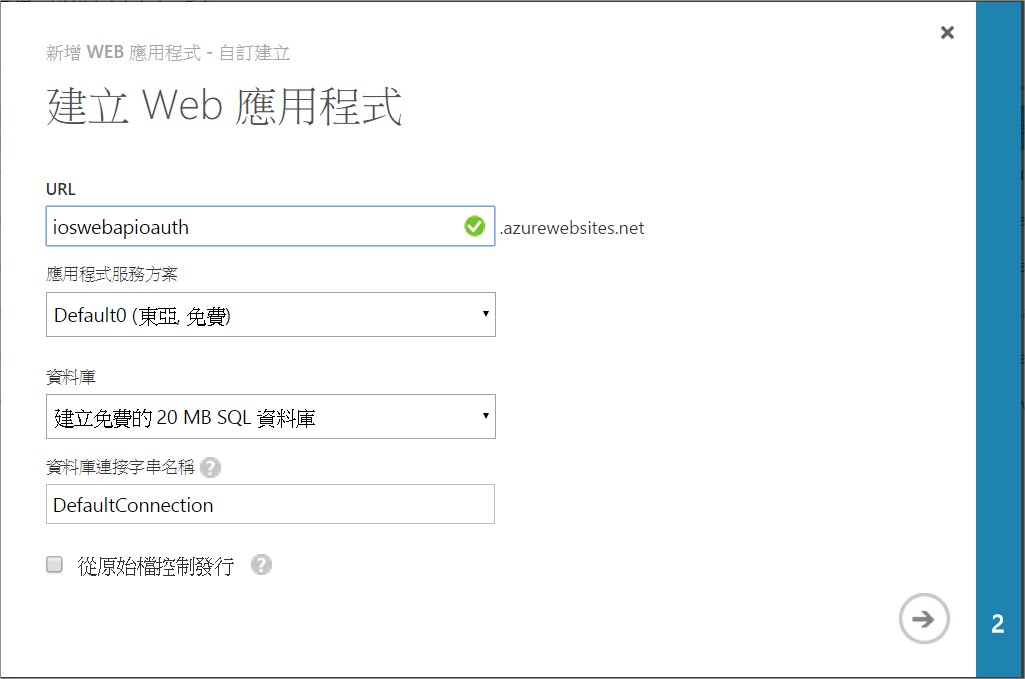
把這個專案發佈到Windows Azure上,並且在Windows Azure上面建立一個SQL 資料庫。
3. 接下來建立註冊資料的Model。
在MVC WebApi專案中,有一個RegisterBindingModel類別,這個類別主要寫入資料到資料庫的DTO類別。另 外在Xamarin.iOS專案中作者也建立了一個RegisterModel類別,這兩個型別結構是一樣的。一個是iOS Device要送出資料的結構,另一個是Webapi Server site要接收資料的結構。原作者是用Xamarin.iOS來執行這個範例,所以他建議把這類型的Model放到Portable Class Library裡面,這樣就可以在Xamarin.iOS或者是Xamarin.Android以及MVC專案中去共用這個類別。
class RegisterModel{
    public string UserName { get; set; }
    public string Password { get; set; }
    public string ConfirmPassword { get; set; }
}
在Xamain.ios的專案中,有一個RegisterService Class,這是在iOS程式中用HttpWebRequest來傳送一個註冊資訊給Server site Controller。
class RegisterService
{
    public async Task Register(string username, string password, string confirmPassword)
    {
        RegisterModel model = new RegisterModel
        {
            ConfirmPassword = confirmPassword,
            Password = password,
            UserName = username
        };

        HttpWebRequest request = new HttpWebRequest(new Uri(String.Format("{0}api/Account/Register", Constants.BaseAddress)));
        request.Method = "POST";
        request.ContentType = "application/json";
        request.Accept = "application/json";
        string json = JsonConvert.SerializeObject(model);
        byte[] bytes = Encoding.UTF8.GetBytes(json);
        using(Stream stream = await request.GetRequestStreamAsync())
        {
            stream.Write(bytes, 0, bytes.Length);
        }

        try
        {
            await request.GetResponseAsync();
            return true;
        }
        catch (Exception ex)
        {
            return false;
        }
    }
}
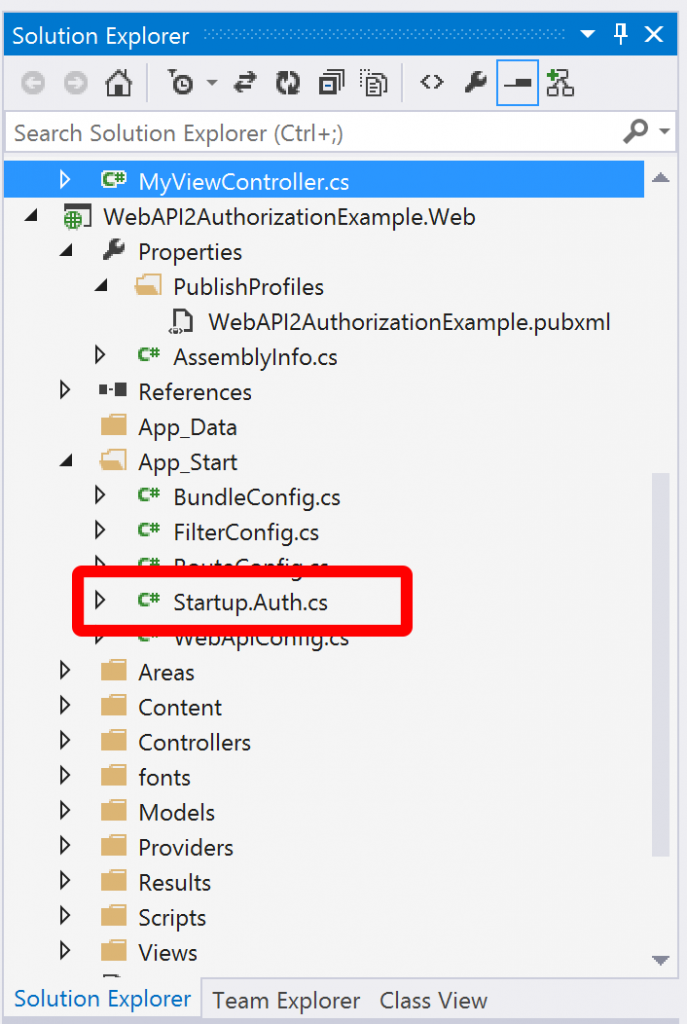
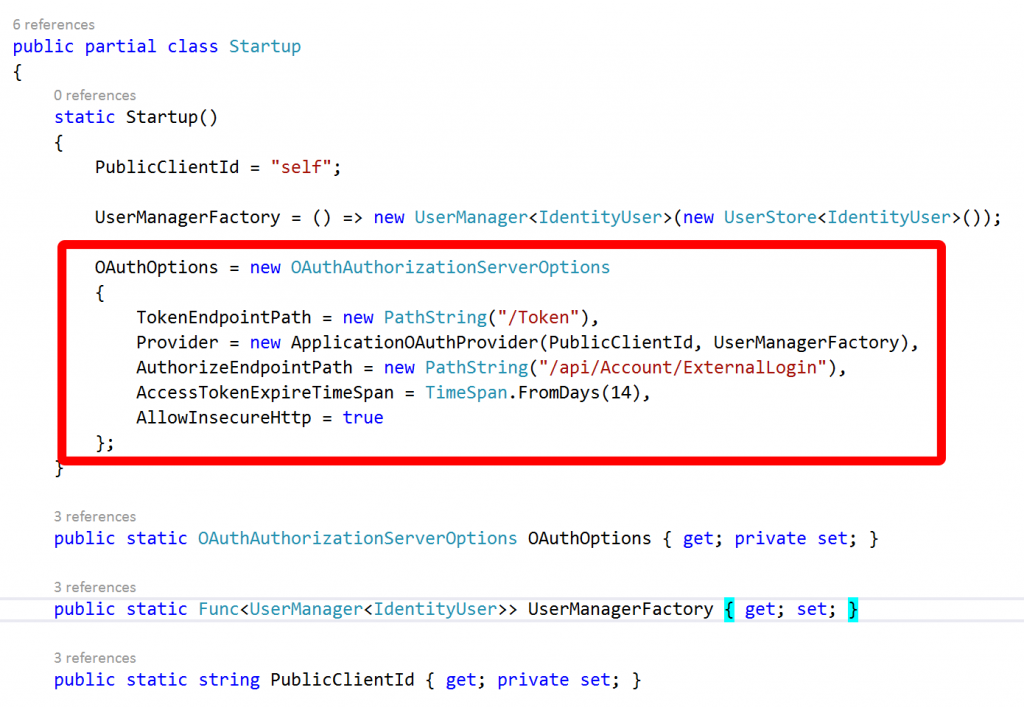
剛剛的程式協助使用者註冊一個帳號,但是要如何實作登入?我們再回頭看到WebApi的Help區塊,裡面並沒有一個Login的方法。接下來就是Owin登場的地方了。開啟在專案範例中App_Start資料夾裡面的Startup.Auth.cs檔案。
看到Startup.cs檔案的OAuthOptions區塊。
實際上,Owin是一個跑在我們網站中的的OAuth驗證伺服器 ( OAuth authentication server),並且他會針對驗證使用者來設定一個OAuth endpoints。
而Server site的驗證會需要使用者提供一個Token,它用使用者的username與password去驗證辨別使用者本身。後續若有其他的Service需要驗證身份時,這個token會在Http header裡面做傳送的動作。上圖 /Token的區塊是Web Server上的Token end point。除了傳送帳號與密碼外,還需要設定grant_type 為 password。接著在Xamarin.iOS裡面建立LoginService Class,負責送出Endpoint所需要的Form Data。
class LoginService
{
    public async Task Login(string username, string password)
    {
        HttpWebRequest request = new HttpWebRequest(new Uri(String.Format("{0}Token", Constants.BaseAddress)));
        request.Method = "POST";

        string postString = String.Format("username={0}&password={1}&grant_type=password",    HttpUtility.HtmlEncode(username), HttpUtility.HtmlEncode(password));
        byte[] bytes = Encoding.UTF8.GetBytes(postString);
        using (Stream requestStream = await request.GetRequestStreamAsync())
        {
            requestStream.Write(bytes, 0, bytes.Length);
        }

        try
        {
            HttpWebResponse httpResponse =  (HttpWebResponse)(await request.GetResponseAsync());
            string json;
            using (Stream responseStream = httpResponse.GetResponseStream())
            {
                json = new StreamReader(responseStream).ReadToEnd();
            }
            TokenResponseModel tokenResponse = JsonConvert.DeserializeObject(json);
            return tokenResponse.AccessToken;
        }
        catch (Exception ex)
        {
            throw new SecurityException("Bad credentials", ex);
        }
    }
}
登入成功後,OAuth Server會回覆一個Json資料,裡面包含著一個access token以及一些資訊。這邊把這個資訊序列化回TokenResponseModel物件。
class TokenResponseModel
{
    [JsonProperty("access_token")]
    public string AccessToken { get; set; }

    [JsonProperty("token_type")]
    public string TokenType { get; set; }

    [JsonProperty("expires_in")]
    public int ExpiresIn { get; set; }

    [JsonProperty("userName")]
    public string Username { get; set; }

    [JsonProperty(".issued")]
    public string IssuedAt { get; set; }

    [JsonProperty(".expires")]
    public string ExpiresAt { get; set; }
}
現在我們有了伺服器建立與回傳的Token後,後續要連接到任何需要驗證或授權的WebApi,都可以使用這個Token。現在就用這個attempt來連接ValuesController。
在呼叫WebApi的時候,Client端必須在Http Header提供access token。名稱必須被宣告為Authorization,並且Header必須要有“Bearer {token}”的format宣告。
class ValuesService
{
    public async Task GetValues(string accessToken)
    {
        HttpWebRequest request = new HttpWebRequest(new Uri(String.Format("{0}api/Values", Constants.BaseAddress)));
        request.Method = "GET";
        request.Accept = "application/json";
        request.Headers.Add("Authorization", String.Format("Bearer {0}", accessToken));

        try
        {
            HttpWebResponse httpResponse = (HttpWebResponse)(await request.GetResponseAsync());
            string json;
            using (Stream responseStream = httpResponse.GetResponseStream())
            {
                json = new StreamReader(responseStream).ReadToEnd();
            }
            List values = JsonConvert.DeserializeObject(json);
            return values;
        }
        catch (Exception ex)
        {
            throw new SecurityException("Bad credentials", ex);
        }
    }
}
接著就可以去測試你的這個Xamarin.iOS專案了。
原作者範例檔案GitHub下載位置: https://github.com/JamesRandall/WebAPI2AuthenticationExample
參考文獻:
How To: Register and Authenticate with Web API 2, OAuth and OWIN
http://www.azurefromthetrenches.com/?p=471
OAuth 2.0 筆記 (1) 世界觀
http://blog.yorkxin.org/posts/2013/09/30/oauth2-1-introduction/
