之前有分享過 Templates Explorer 的設定,是在 Visual Studio 2017上,
但最近使用的開發工具從 Visual Studio 轉戰至 Rider 上,剛好要設定新的 code template,在這邊小小分享一下也做個紀錄
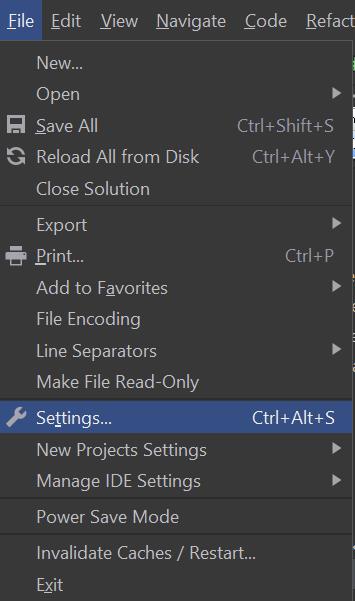
1. 打開 Rider,從 File/Settings 打開設定
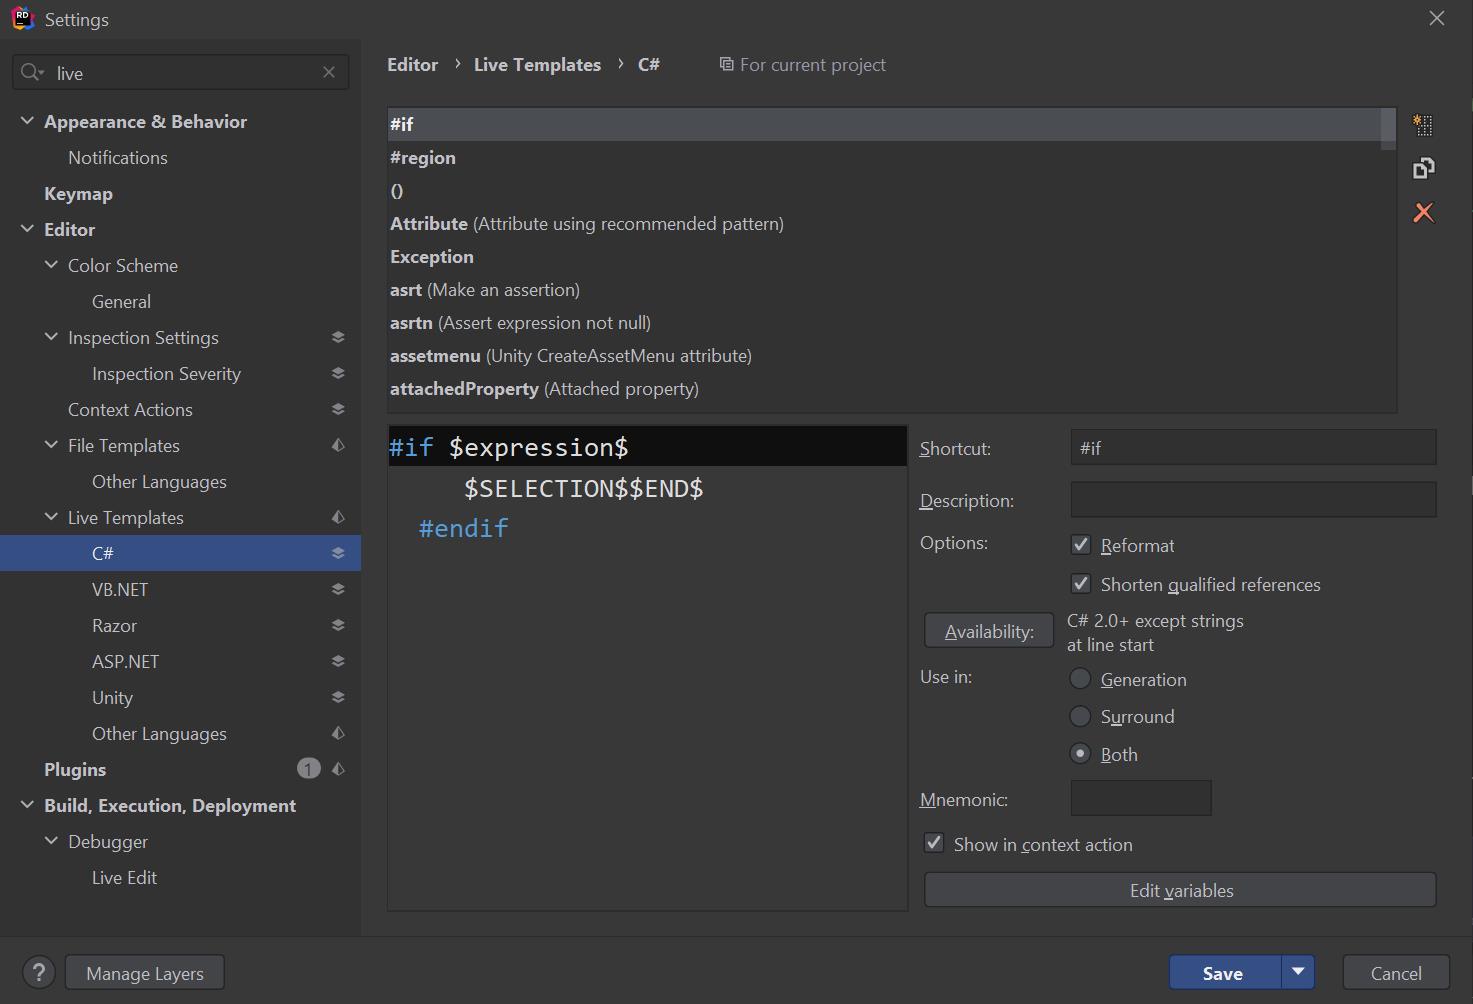
2. 在 search bar 搜尋 Live Templates
3. 右邊有個新增的按鈕
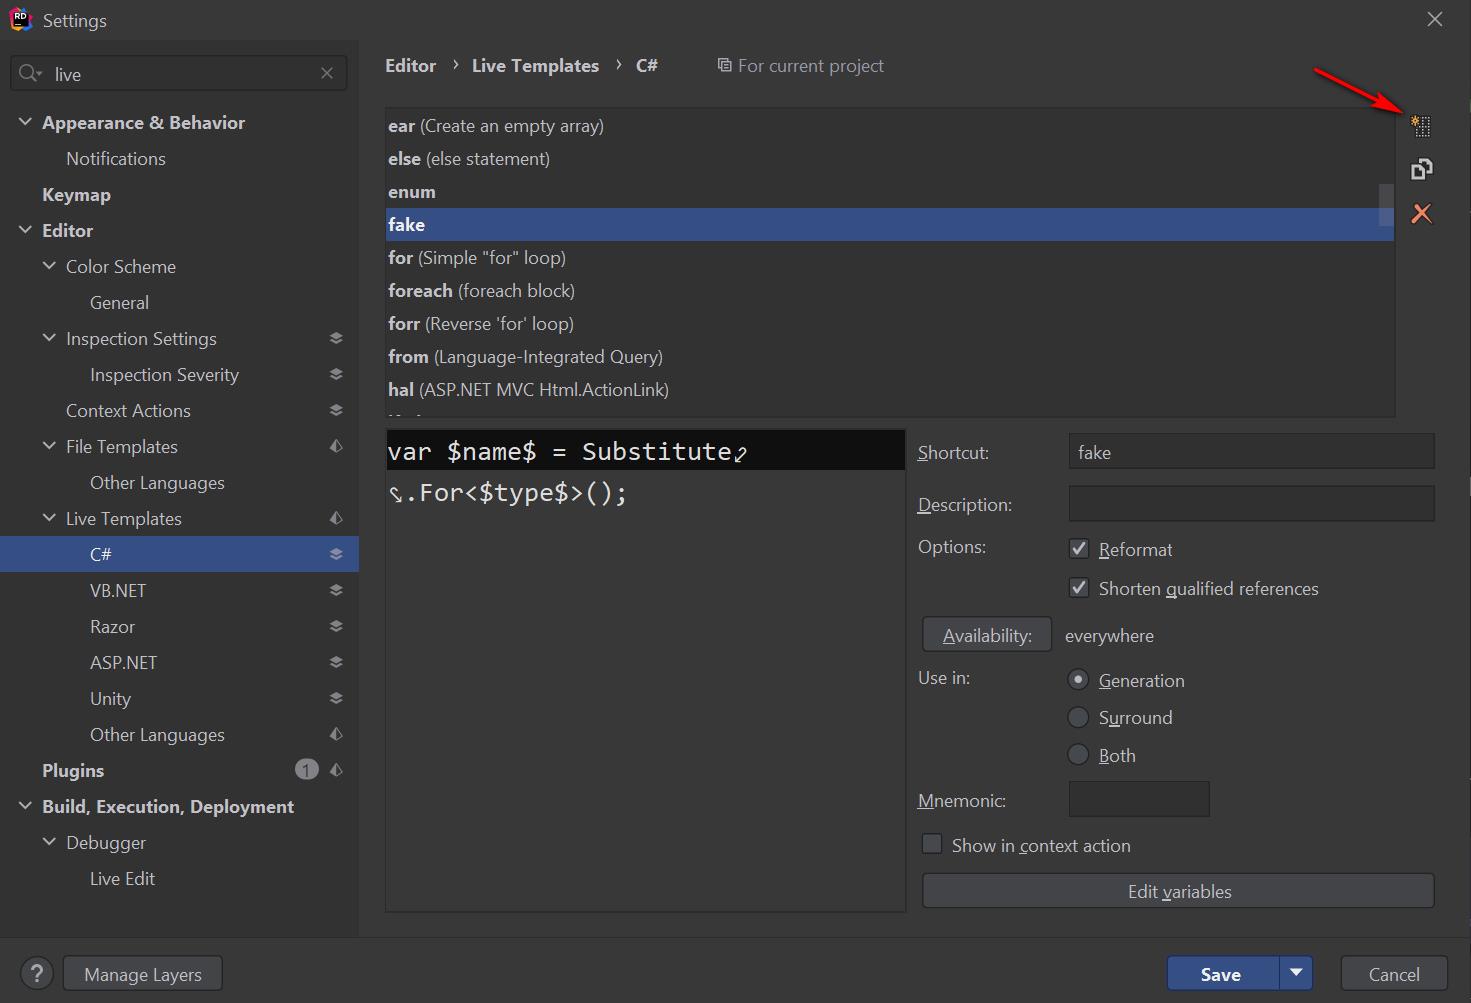
4. 輸入想要設定的 template,並且按下 Save 按鈕就完成啦!
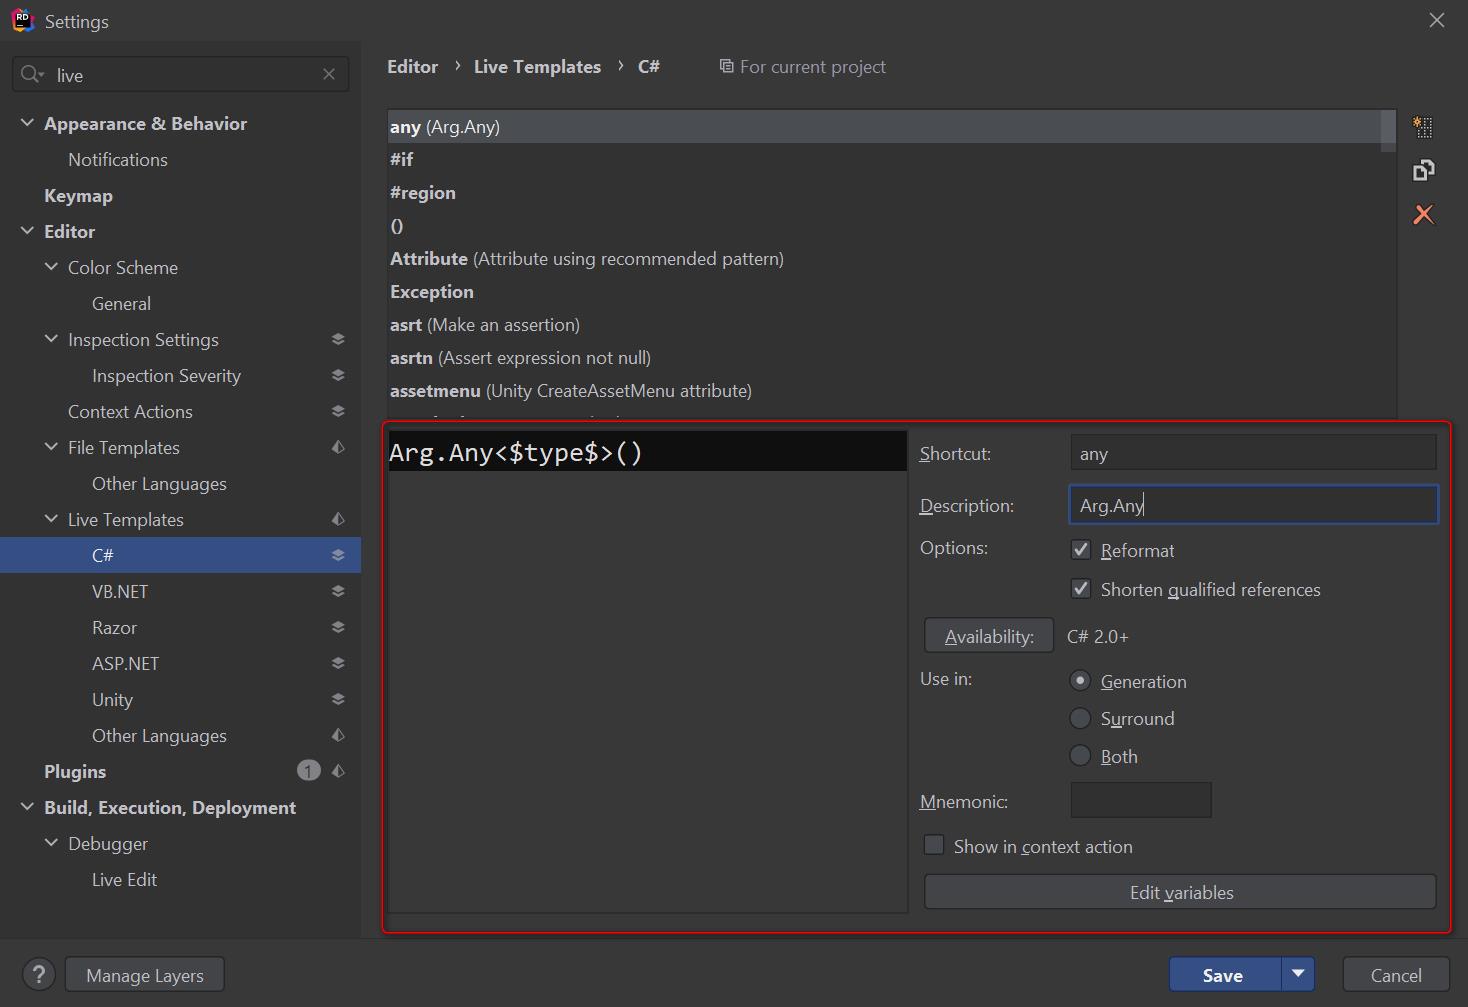
這次新增的 template 是 Arg.Any<$type$>(),使用的 shortcut 為 any
5. 使用範例
只要打出 any,就能看到剛剛設定的 live template
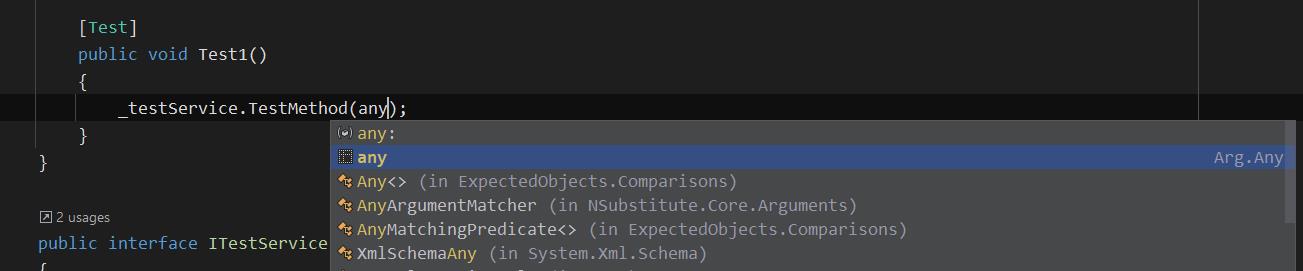
接著按下 enter,就會把游標鎖定在你需要指定型別的地方
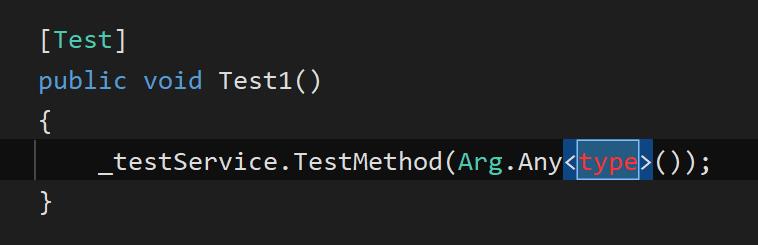
在使用 NSubstitute 寫測試時,搭配之前設定的 fake 是不是方便了許多~