.Net Core終於在美國時間6月27號 Release 1.0.0版,從第一次發表跨平台的 Framework到 Release的6月27號也歷經的一年多的時間,而在這一次的 Release中 Web的部分包含了 MVC和 WebAPI兩個部分,接下來的文章將會說明如何使用 .Net Core來開發 WebAPI。
而如何安裝 .Net Core與 Visulal Studio Tool的部分,在這邊將不多做說明,如果您還不知道如何安裝,可以參考阿砮的學習手寫板 - Hello ASP.NET Core 1.0有詳細的說明。
新增 .Net Core WebAPI專案
如果已經安裝了 .Net Core 1.0.0和 Visual Studio Tool的話,可以在新增專案的視窗中看到相關的專案範本
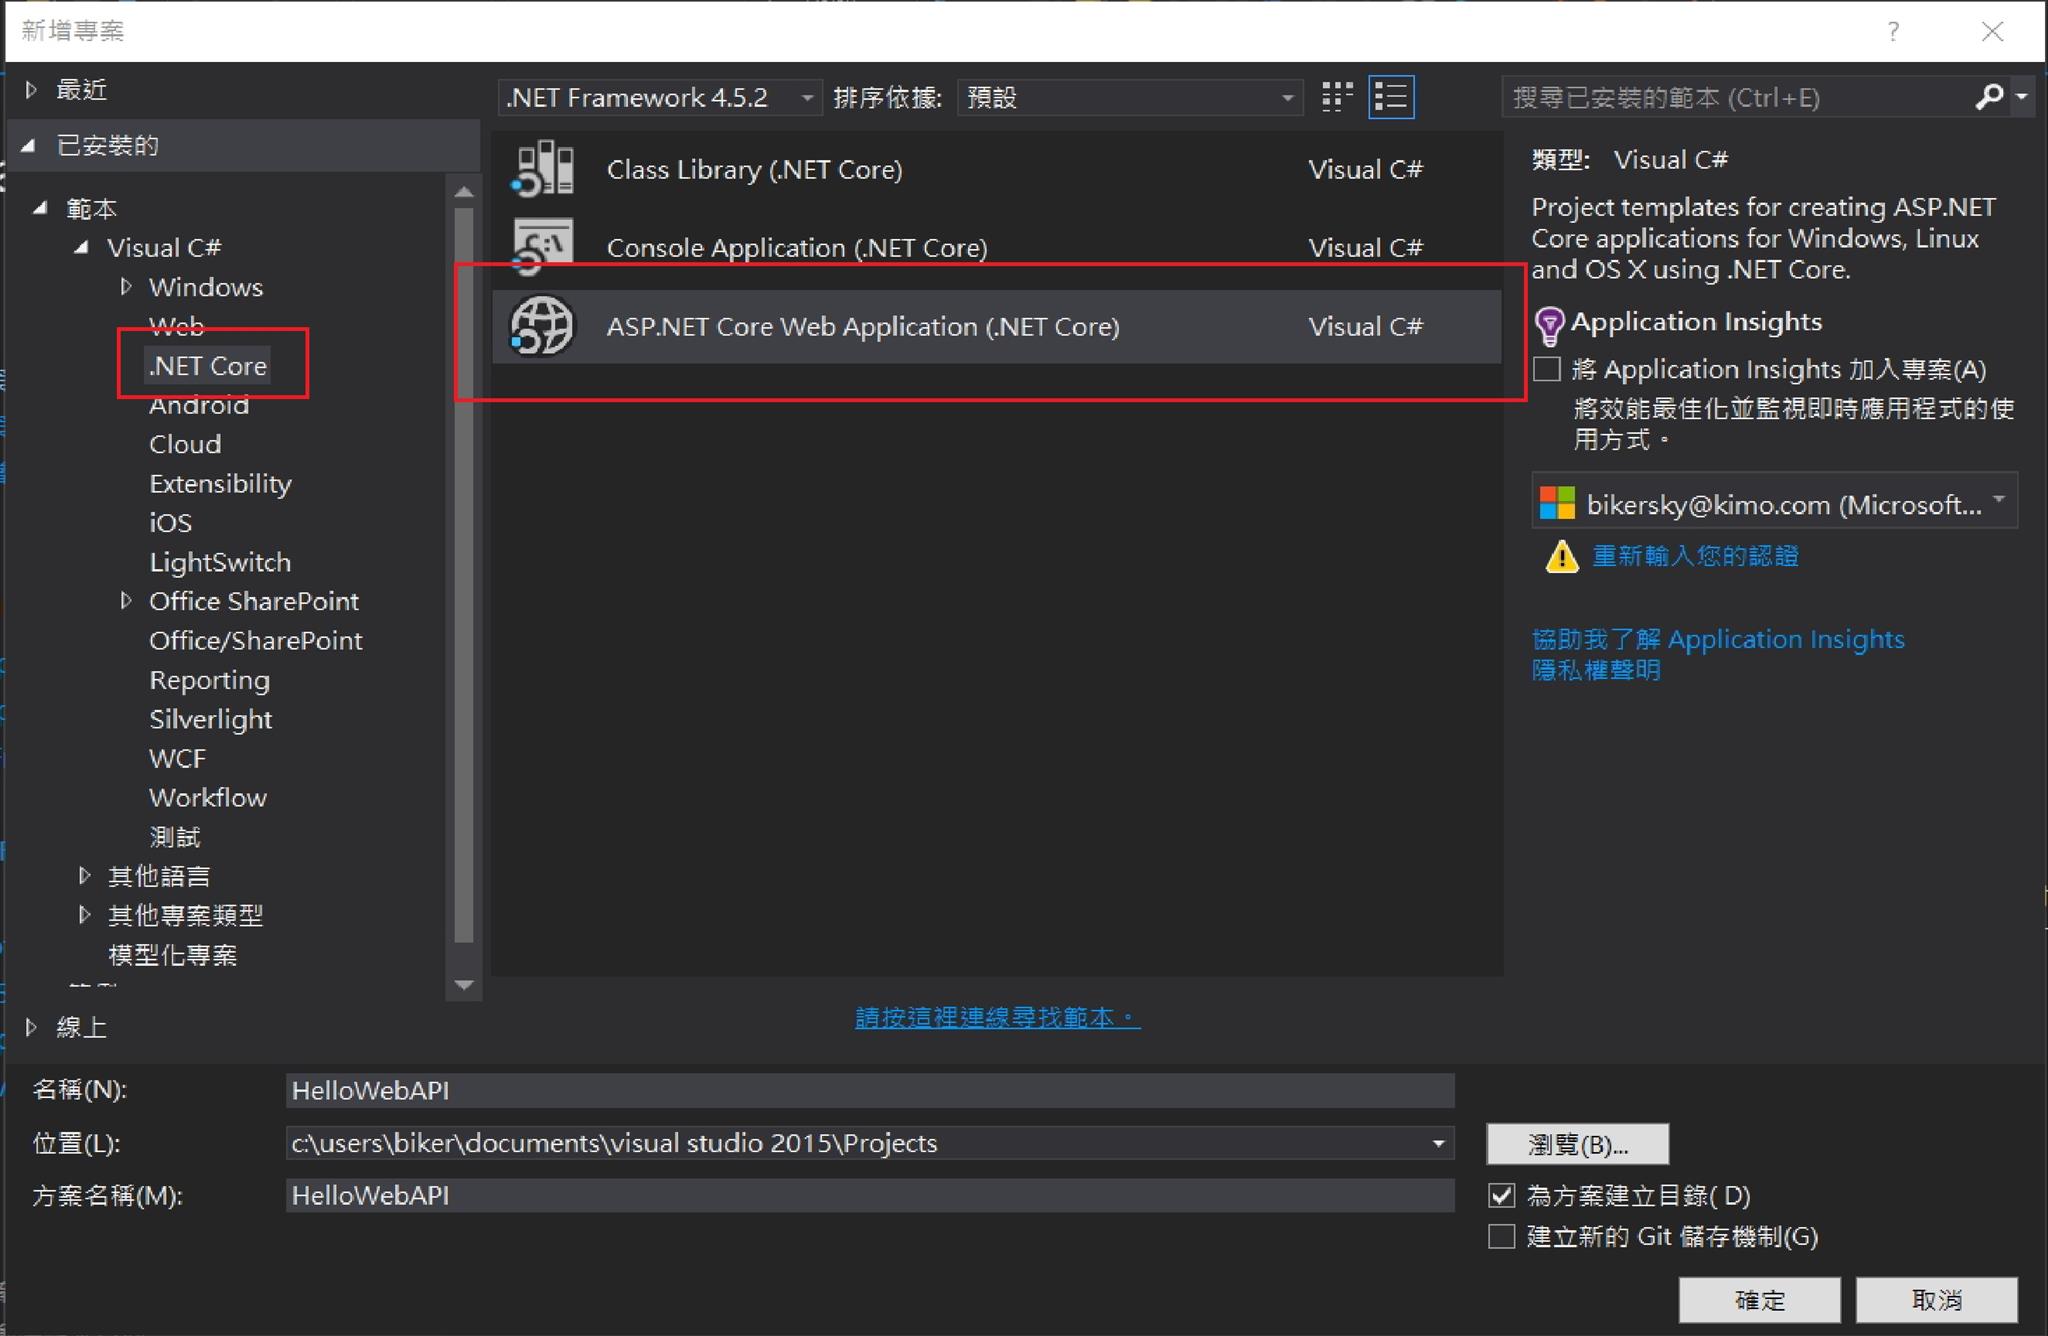
選取 Asp.Net Core Web Application的專案範本
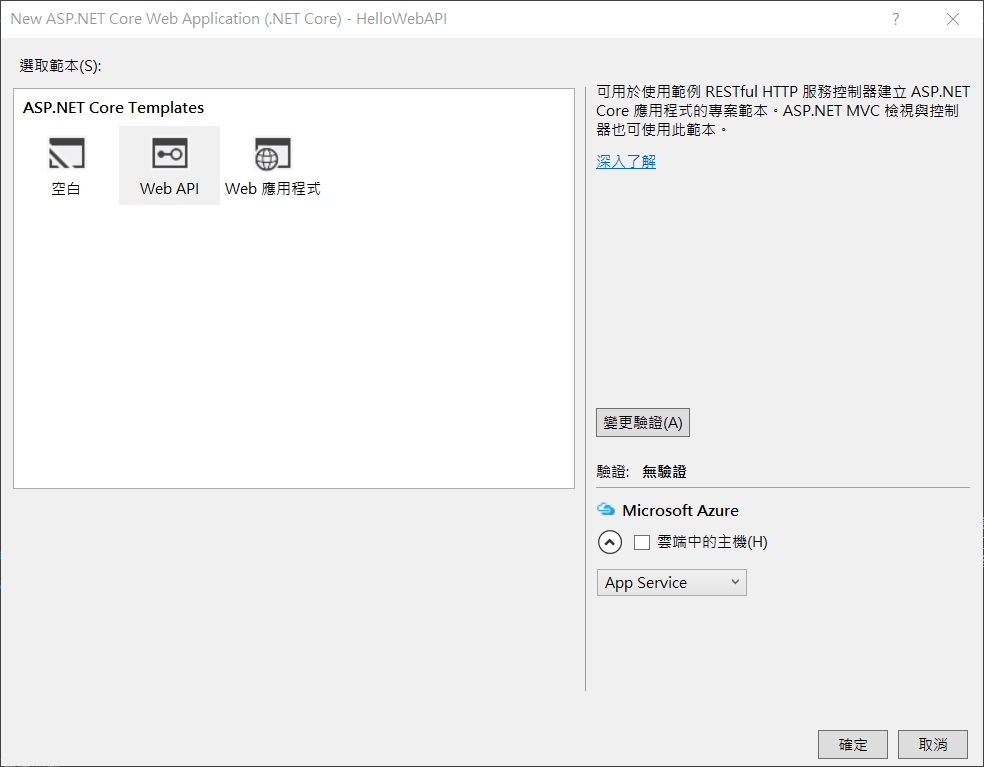
接著選擇 Web API的 Template,按下確定後,Visual Studio就會幫我們將整個專案結構建立好。
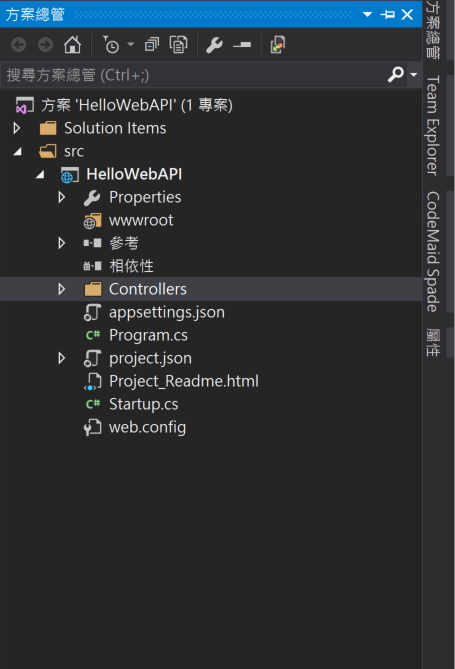
可以看到建立出來的專案結構與傳統的 Asp.Net WebAPI相比簡潔許多 (請容許筆者在這邊就不貼上傳統 Asp.Net WebAPI的專案結構了)
Project.json
.Net Core將專案使用到的套件設定通通寫在這一份檔案中,不管是直接編輯寫到 Project.json中,或是透過 Nuget安裝的套件一律都會寫在這一份檔案中,來看一下 Project.json的內容
{
  "dependencies": {
    "Microsoft.NETCore.App": {
      "version": "1.0.0",
      "type": "platform"
    },
    "Microsoft.AspNetCore.Mvc": "1.0.0",
    "Microsoft.AspNetCore.Server.IISIntegration": "1.0.0",
    "Microsoft.AspNetCore.Server.Kestrel": "1.0.0",
    "Microsoft.Extensions.Configuration.EnvironmentVariables": "1.0.0",
    "Microsoft.Extensions.Configuration.FileExtensions": "1.0.0",
    "Microsoft.Extensions.Configuration.Json": "1.0.0",
    "Microsoft.Extensions.Logging": "1.0.0",
    "Microsoft.Extensions.Logging.Console": "1.0.0",
    "Microsoft.Extensions.Logging.Debug": "1.0.0",
    "Microsoft.Extensions.Options.ConfigurationExtensions": "1.0.0"
  },

  "tools": {
    "Microsoft.AspNetCore.Server.IISIntegration.Tools": "1.0.0-preview2-final"
  },

  "frameworks": {
    "netcoreapp1.0": {
      "imports": [
        "dotnet5.6",
        "portable-net45+win8"
      ]
    }
  },

  "buildOptions": {
    "emitEntryPoint": true,
    "preserveCompilationContext": true
  },

  "runtimeOptions": {
    "configProperties": {
      "System.GC.Server": true
    }
  },

  "publishOptions": {
    "include": [
      "wwwroot",
      "Views",
      "Areas/**/Views",
      "appsettings.json",
      "web.config"
    ]
  },

  "scripts": {
    "postpublish": [ "dotnet publish-iis --publish-folder %publish:OutputPath% --framework %publish:FullTargetFramework%" ]
  }
}
在 "dependencies"的部分就是專案所使用到的套件,但是有一些套件相依的檔案並不會顯示在這邊。除此之外,還包含了使用的 Framework,可以看到專案使用的是 "netcoreapp1.0",剩下的部分這裡就不多做說明了,有興趣的人可以從官方的文件,或是從 Nuget的網站上查看說明。
補充說明一點,在傳統的 Asp.Net WebAPI的專案中如果是使用 Web API專案範本, Visual Studio預設會載入許多的套件與 Dll,所以一般會習慣使用空的專案範本來建立專案。但是,在 .Net Core下,如果是使用 WebAPI的專案範本,Visual Studio終於不在給大家滿滿的 垃圾 套件預載,所以這邊可以安心的使用 Web API的專案範本。
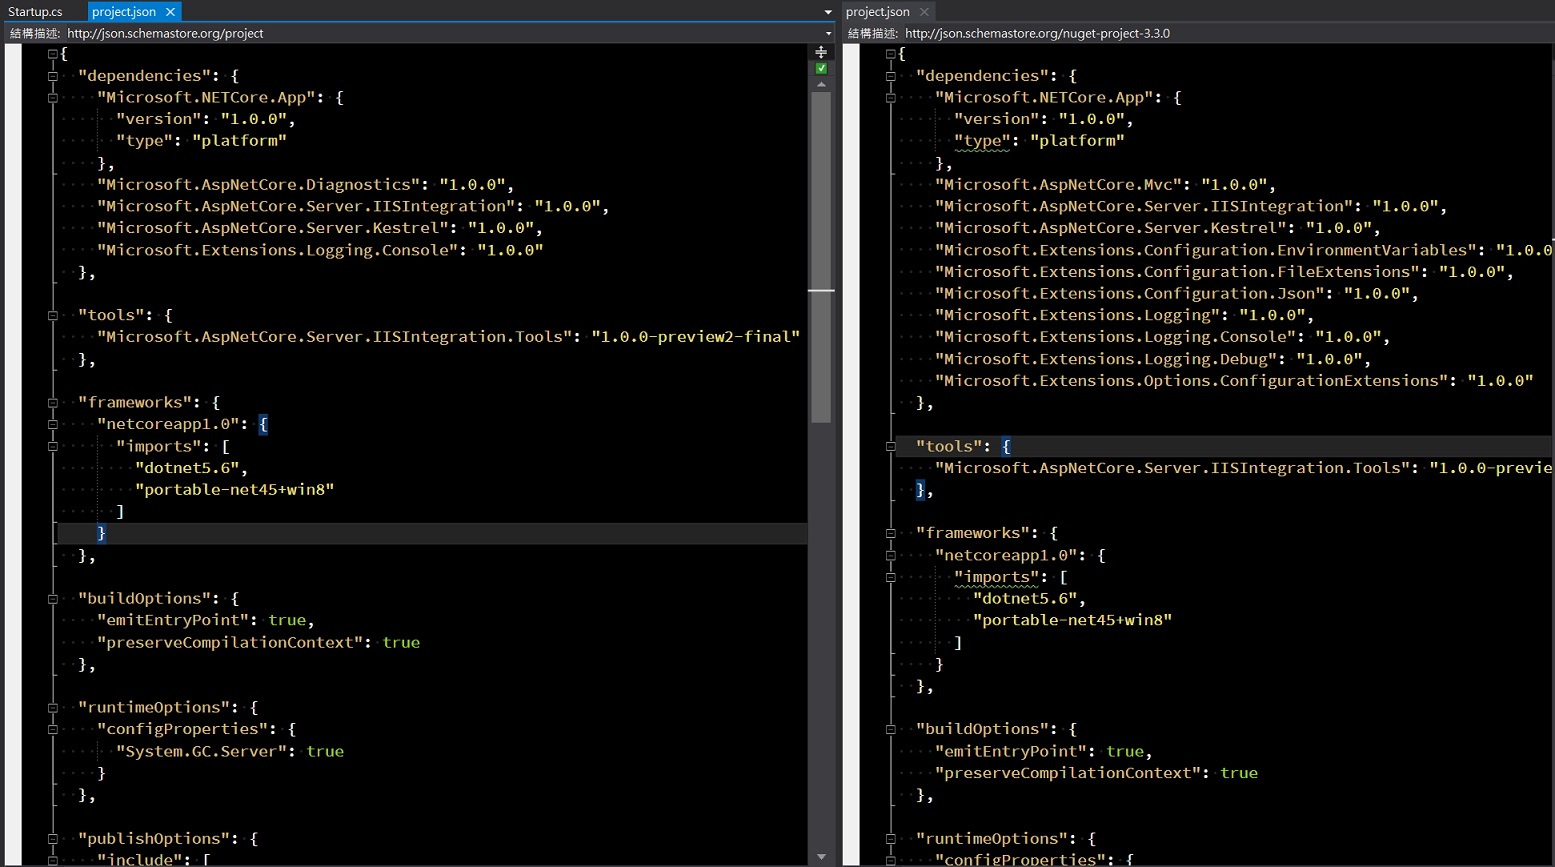
在 "dependencies",多出來的部分基本上都是用得到的。
新增HelloController
接著新增 HelloController,在新增的視窗中選擇 "Web API控制器類別"
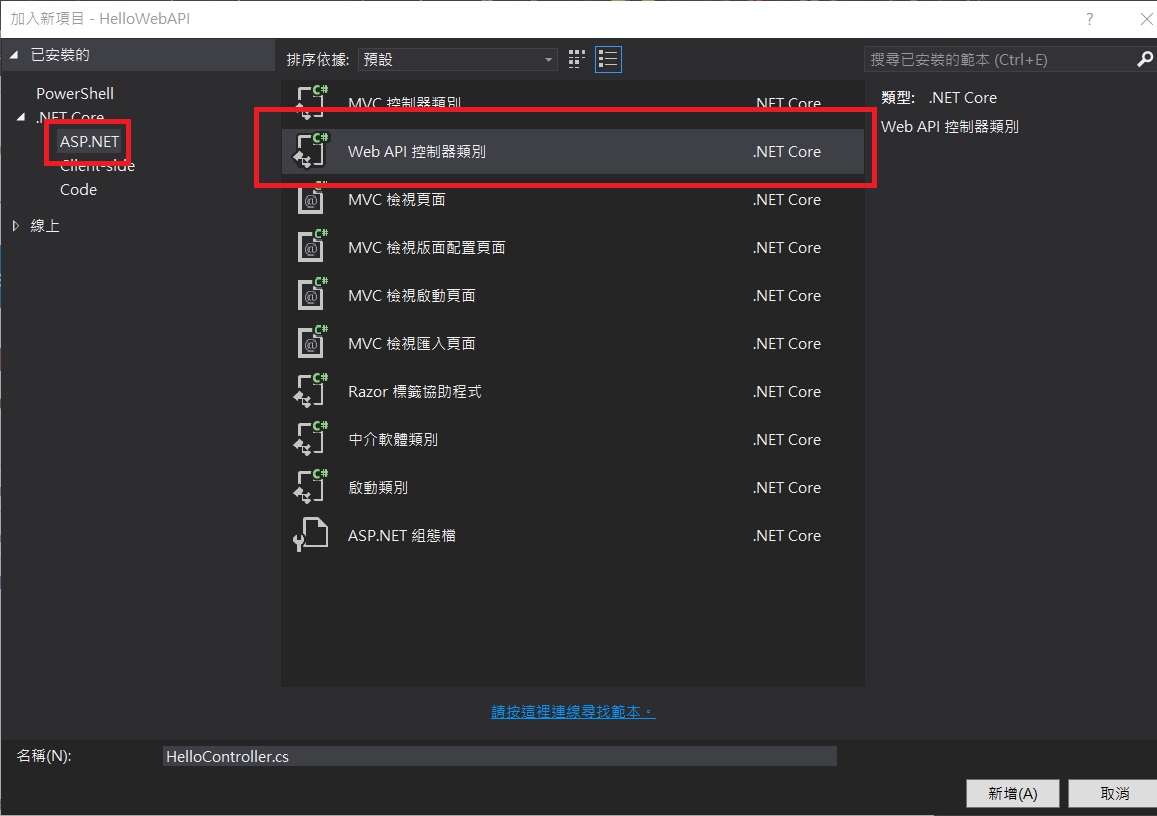
新增完畢後,可以看到 HelloController裡面 Visual Studio已經幫我們寫好了基本 Http存取行為的 Action
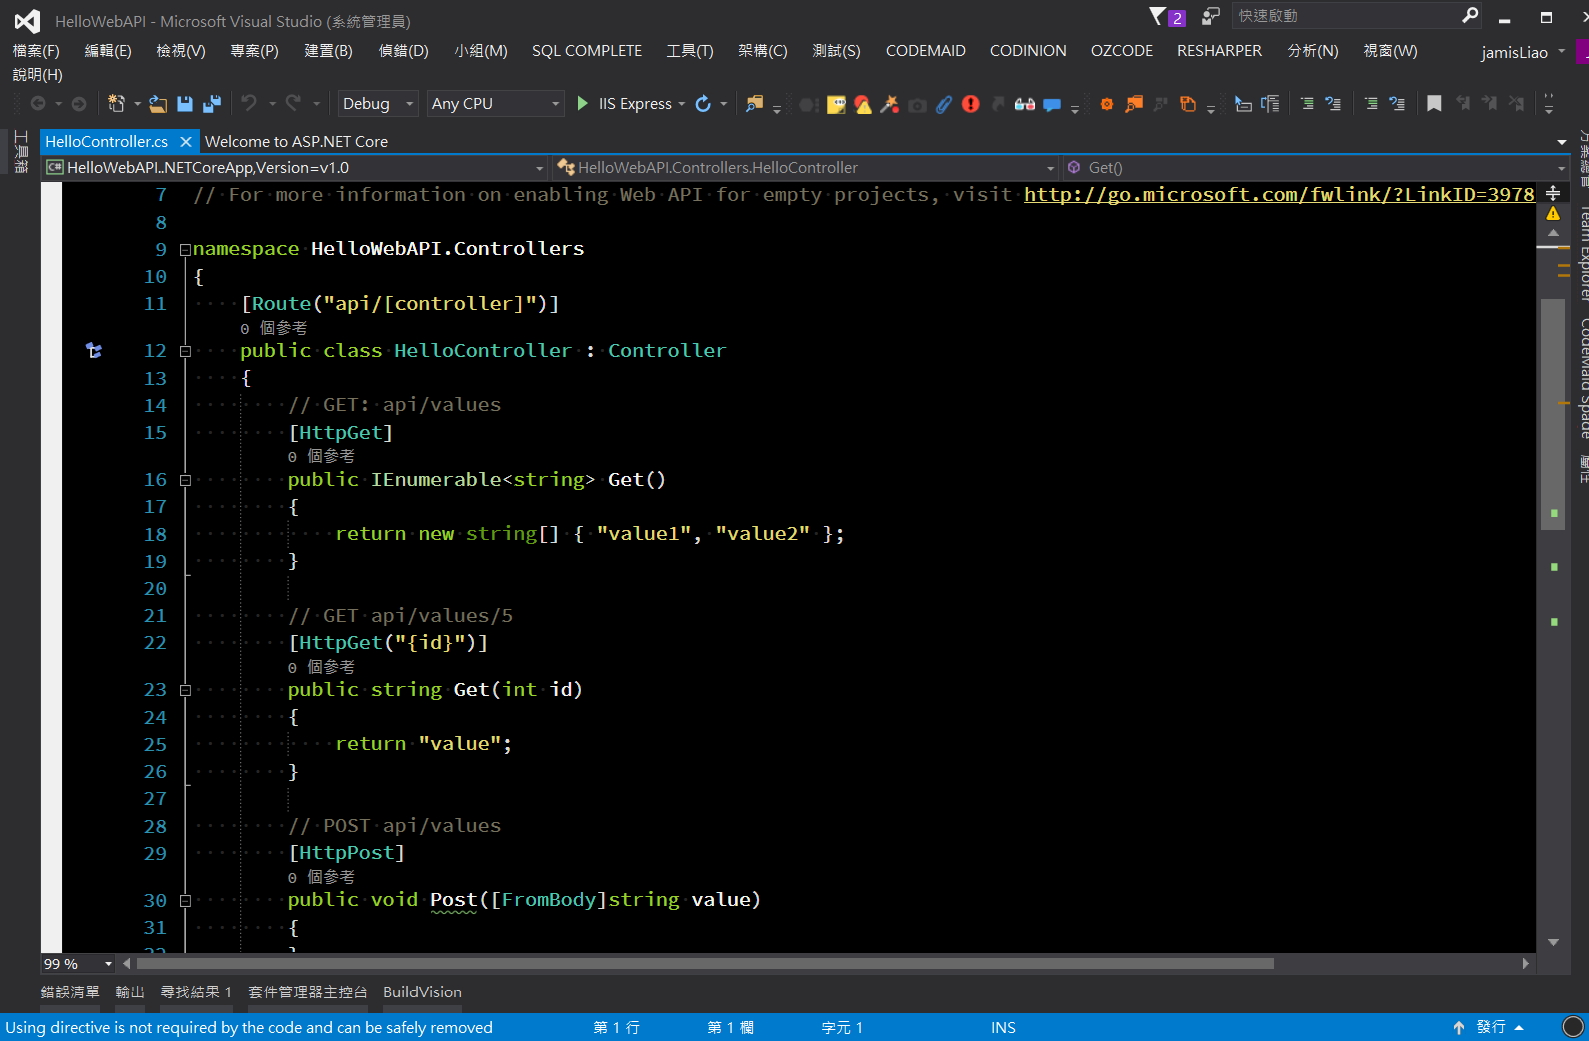
這邊將 Get這一個 Action稍作修改一下,將回傳的型別改成 String,並且修改一下回傳的資料
[HttpGet]
public string Get()
{
    return "Hello WebAPI";
}
Start WebAPI
接著將 HelloWebAPI運行起來,這邊有一個需要注意的地方,Visual Studio預設建立起來的專案是可以選擇使用 IIS Express或是 Self-Host in your own process,這邊選擇 Self-Host in your own process。
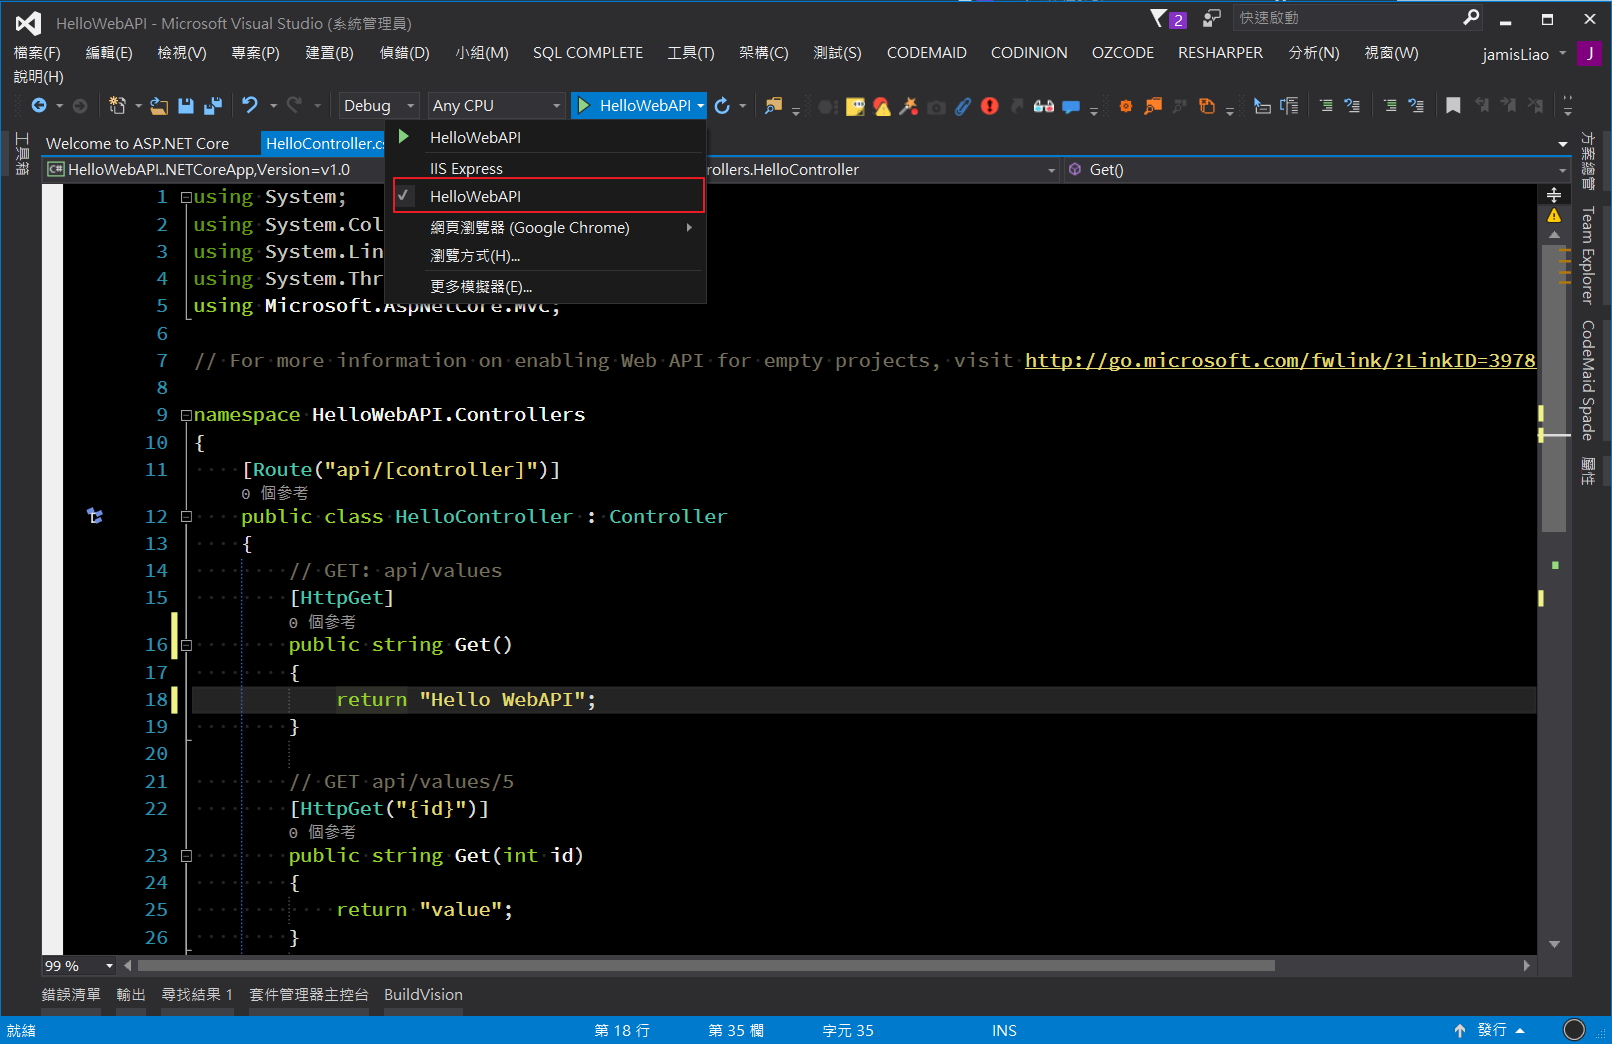
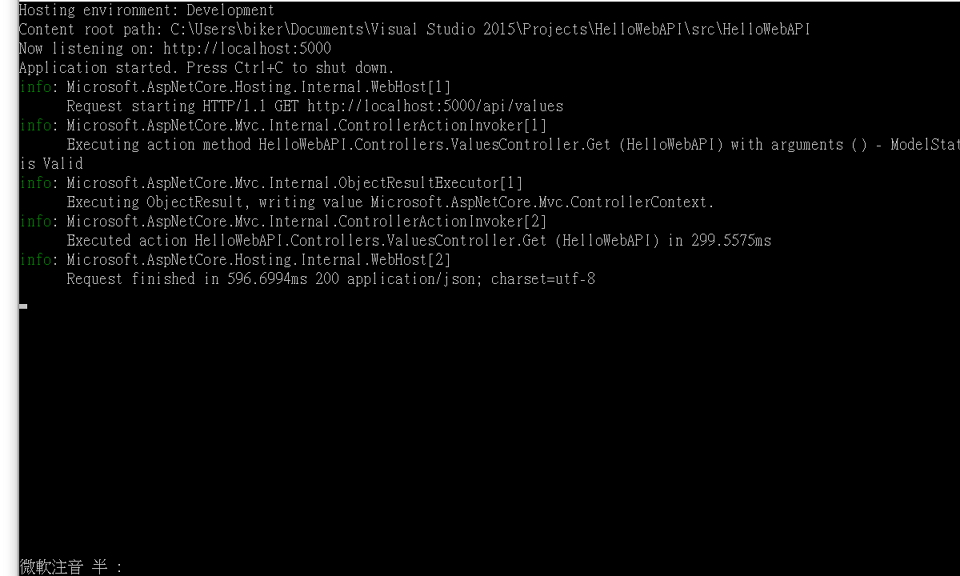
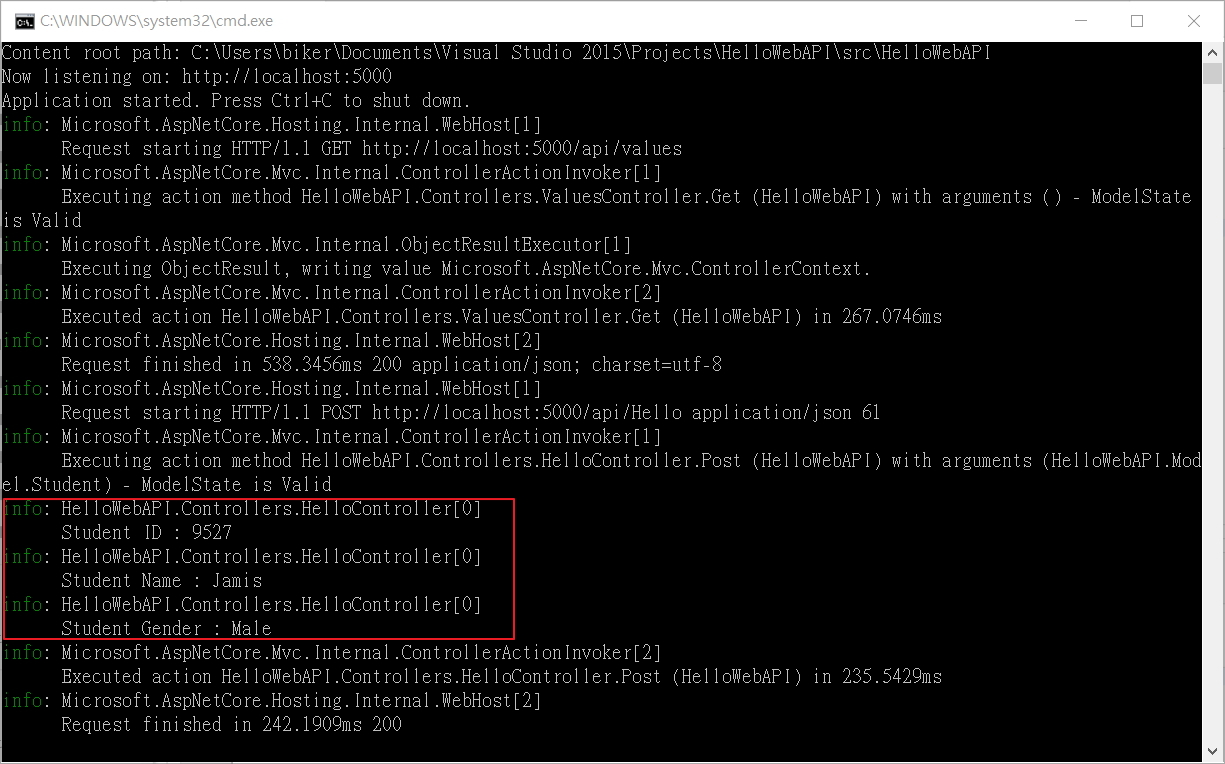
運行來後會產生一個命令模式視窗,上面會顯示 WebAPI的 Log
實際使用 Postman來測試一下剛剛撰寫回傳 "Hello WebAPI"的功能
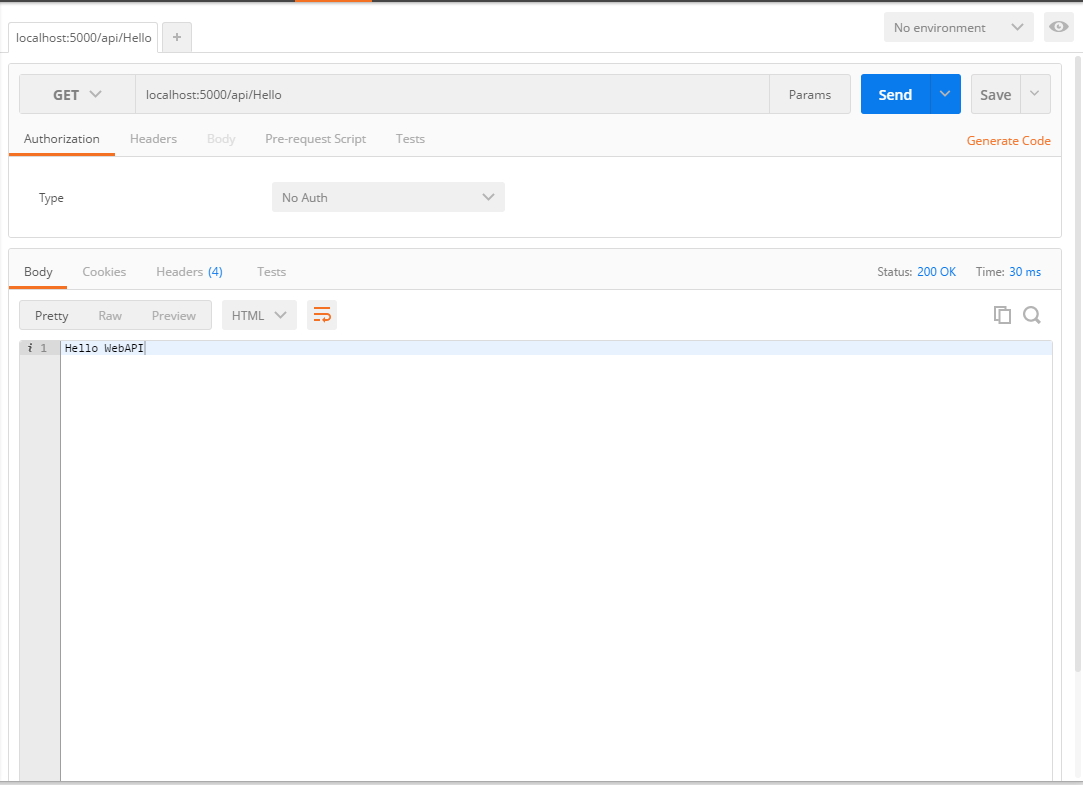
系統確實回傳 "Hello WebAPI",功能正確。
新增 Post Action
在實際的系統,不免俗的一定會有 Post傳送資料的功能,在剛剛 HelloController中將 Post Action稍微修改一下
    // POST api/values
    [HttpPost]
    public void Post([FromBody]Student student)
    {
        this._logger.LogInformation($"Student ID : {student.Id}");
        this._logger.LogInformation($"Student Name : {student.Name}");
        this._logger.LogInformation($"Student Gender : {student.Gender}");
    }
Student的結構
public class Student
{
    /// <summary>
    /// 學號
    /// </summary>
    public string Id { get; set; }

    /// <summary>
    /// 姓名
    /// </summary>
    public string Name { get; set; }

    /// <summary>
    /// 性別
    /// </summary>
    public string Gender { get; set; }
}
接著一樣利用 Postman實際的呼叫 WebAPI,並且傳送 Student的資料
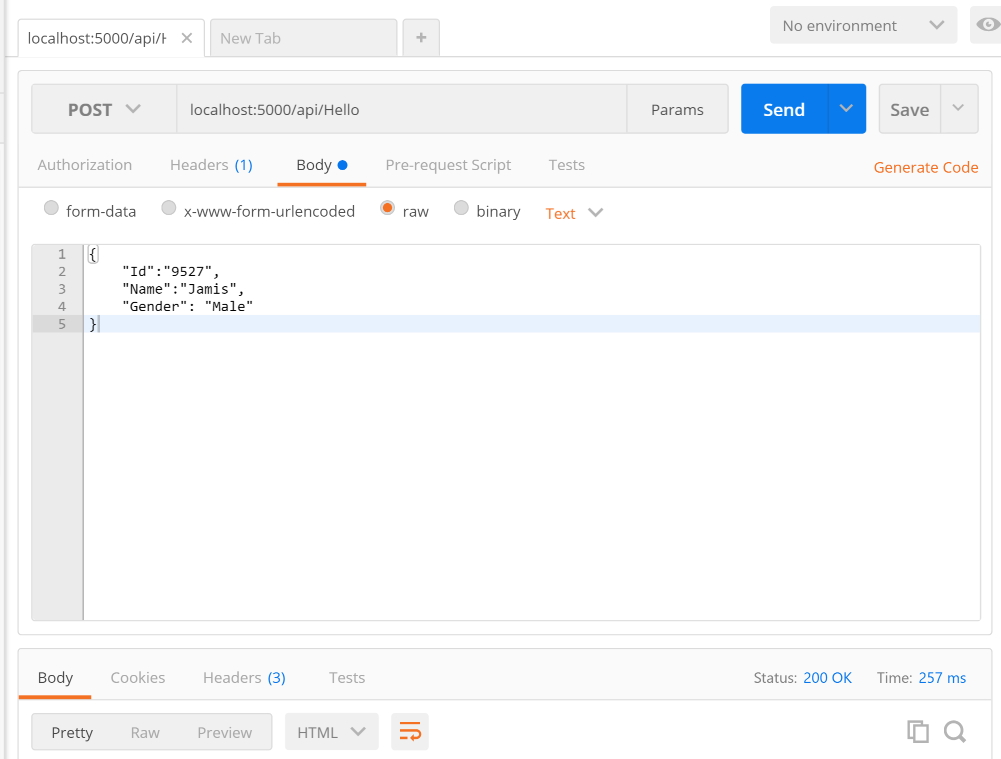
可以 Log視窗中看到接收到的資料輸出的資訊
小結
透過 Visual Studio可以快速地建立一個 .Net Core的 WebAPI專案,也實際的展示如何新增 WebAPI Controller,並且撰寫一小段簡單的程式來展示 Get與 Post的方式。在下一篇的文章中,將說明如何運用 EntityFramework.Core與資料庫互動。
參考連結
原始碼下載
免責聲明:
"文章一定有好壞,文章內容有對有錯,使用前應詳閱公開說明書"


